


Create Cheap ND Filters For Your DJI Phantom 3
Jun 15, 2015
Allen Mowery
Allen Mowery is a Nationally-published Commercial & Editorial Photographer with over 20 years of experience. He has shot for major brands as well small clients. When not shooting client work or chasing overgrown wildlife from his yard, he loves to capture the stories of the people and culture around him.
Share:

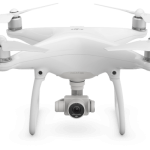
Photo hacker and drone pilot Rui M. Leal was a little disappointed “Jell-O effect” and dark corners on his new DJI Phantom 3. After reading about how a neutral density filter can help reduce or eliminate this, he set about finding one. However, as he soon discovered, there aren’t currently a whole lot of accessories for the stock camera, so he set about creating some himself.

What You’ll Need
- Scissors
- A Pen (or similar marking device)
- A Coin (or other circular object measuring a similar diameter to the lens protector ring for tracing a pattern)
- A Rosco Cinegel Sample Pack (or similar selection of plastic gels)
- Small plastic bag or storage container (optional…to keep your finished ND filters from going AWOL)

How It’s Done
- Carefully remove the lens protector ring and set it aside.
- Remove the rubber seal inside the ring taking special care to not damage it. Set it aside, you’ll need it for later.
- Measure the diameter of the protector ring and create your pattern.
- Trace your pattern onto the desired gels, and cut them out.
- Simply place the new ND filter inside the lens protector ring, making sure there are no bends or twists or bubbles.
- Place the small rubber seal/gasket and re-attach the ring to the camera.

The Results

While not an earth-shattering hack, it is a simple way to add a neutral density filter to the Phantom’s camera for next to no cost (about $6 for the sample pack, including shipping, should you decide to go that route). And, from what I’ve seen from much of the low-contrast, washed-out drone footage and images out there, this one works pretty well!
Head out to Rui M. Leal’s blog for the full tutorial.
[DIY: DJI Phantom 3 Vision ND Filters for Lens | Lighting Mods]

Allen Mowery
Allen Mowery is a Nationally-published Commercial & Editorial Photographer with over 20 years of experience. He has shot for major brands as well small clients. When not shooting client work or chasing overgrown wildlife from his yard, he loves to capture the stories of the people and culture around him.


Join the Discussion
DIYP Comment Policy
Be nice, be on-topic, no personal information or flames.