


How to convert a floor dolly into a DIY tripod track dolly
Jan 30, 2017
John Aldred
John Aldred is a photographer with over 25 years of experience in the portrait and commercial worlds. He is based in Scotland and has been an early adopter – and occasional beta tester – of almost every digital imaging technology in that time. As well as his creative visual work, John uses 3D printing, electronics and programming to create his own photography and filmmaking tools and consults for a number of brands across the industry.
Share:

Floor dollies are fantastic tools for giving your camera some motion when shooting video. The problem with them, though, is that you need a perfectly flat stable surface on which to use them. The slightest imperfection or bump becomes obvious and easily noticeable in your footage. This is why so many photographers and filmmakers user sliders instead. But, what if you could get that same smooth motion with a tripod?
Well, with this fairly straightforward conversion, you can. In this video from ImaginetMedia, our host BobB204 (we’ll call him Bob) talks us through converting a regular cheap floor dolly. It’s a pretty straightforward process, but there are some tricks to help make life easier.
The process, as mentioned, is pretty simple. It all starts with a basic cheap folding floor tripod dolly. Such dollies really can be quite good to quickly move your camera from one spot to another around a studio, but they’re rarely going to give smooth fluid motion.
The first step is to remove the wheels that come with the dolly, which are simply held on by a bolt. Next, we replace these with Glide Gear Dolly Track Swivel Wheel Assemblies. You’ll need three of these assemblies, one for each leg holder. They’re a little more expensive now than they show in the video, but they’re still quite cheap compared to an actual track dolly.
Bob discovered that the bolt which comes with the Glide Gear wheel assemblies is a little too long for the folding dolly. So, he picked up 1.5″ x 3/8″ stainless steel bolts to replace them.

With the bearing and assembly fitted onto the new bolts, they attach to the dolly frame. Designed to swivel about the bolt, they adjust to the shape of the track. This means you can use them with both straight or curved track.
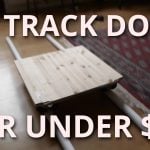
For the track itself, Bob used 1 1/4″ black ABS pipe, which you can pick up at pretty much any hardware store. And this is where you’ll need to break out the power tools. The two longer pieces of pipe along which the dolly will travel rest on several shorter cross pieces. These short lengths keep the track an appropriate distance apart.
The hole in the cross pieces to accept the track is cut offset. It provides a slight C shape into which the track “snaps”, rather than just laying in a groove. This holds the track firmly in place.

Bob measured the outside diameter of the pipe, to determine a 1 5/8″ hole saw produces the perfect hole. This allows the pipe to fit snug, without being too tight. To determine the width, place the dolly on top of the tracks. Then, the distance between the centre points can be measured and transferred to the cross pieces. Allowing some extra space for overhang, 30″ is enough for Bob’s cross pieces.
This is the tricky bit. Each cross piece requires two C shaped holes. Each accepts a separate length of track. These need to align perfectly. Joe wraps the black pipe in masking tape to make it easy to see the markings. He then marks a centre line by holding the pipe against the edge of his workbench. A piece of wood with a 1 5/8″ semi-circle cut into it acts as a vice to clamp the pipe to the surface for drilling.

With the cross pieces cut, everything just snaps together. Bob cut two further small pieces for end caps. These prevent the dolly from simply sliding off the end of the track. One big advantage to this type of design is that you can easily extend it. If you want to increase the length, simply use short lengths of 1 1/4″ dowel, and slide on more pipes. This is great if you need a long track, but are short on space for transport.

As everything snaps together, once assembled, you can move the whole rig with ease. Just pick it up, take it to the next location, and lay it down.

The track makes silky smooth motion easy. For video, you’re all set. For things like timelapse, it shouldn’t be too hard to strap a motor to one end, and a belt to slide your tripod across at whatever rate you choose.
Do you use a tripod dolly? Is it free moving? Or on a track? Or do you prefer to just mount a slider between two tripods?

John Aldred
John Aldred is a photographer with over 25 years of experience in the portrait and commercial worlds. He is based in Scotland and has been an early adopter – and occasional beta tester – of almost every digital imaging technology in that time. As well as his creative visual work, John uses 3D printing, electronics and programming to create his own photography and filmmaking tools and consults for a number of brands across the industry.


Join the Discussion
DIYP Comment Policy
Be nice, be on-topic, no personal information or flames.