


Combine regular, fast, and slow motion footage for mind bending video effects
Mar 14, 2017
John Aldred
John Aldred is a photographer with over 25 years of experience in the portrait and commercial worlds. He is based in Scotland and has been an early adopter – and occasional beta tester – of almost every digital imaging technology in that time. As well as his creative visual work, John uses 3D printing, electronics and programming to create his own photography and filmmaking tools and consults for a number of brands across the industry.
Share:

Fundamentally, for me, photography’s about playing with time. Either you’re freezing a moment of it, or you’re capturing a lot of it into a single image. There’s a lot we can do with those two principles, but ultimately you’re creating a still image. This image only shows one of those two things. A moment frozen, or lots of moments mashed together.
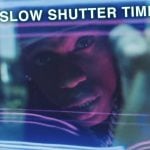
With video, we get other options. Obviously, we can shoot in realtime. But, we can also speed it up with timelapse, or grind our scene to a near halt with slow motion. Video also has the advantage of not being just a single image, but many images played back in sequence. In this video, Justin Odisho explores mixing different speeds of footage together to create some rather interesting effects. He even reverses one clip for a very odd result.
Simply adjusting the recording or playback framerate of video footage isn’t a new idea. Both timelapse and slow motion have existed for years. They’ve appeared in movies and TV shows, even music videos. Within the last decade, though. both techniques have become widely available to the masses, and gained in popularity. Especially timelapse. In fact, it’s getting to the point where it’s virtually impossible to find a vlog on YouTube now that doesn’t contain some timelapse.
But mixing timelapse, slow motion, and realtime footage together in the same final clip presents a whole bunch of new creative options. I’ve seen this attempted a couple of times in movies in the past. Usually it’s some kind of sinister 90s sci-fi show on an alien planet. The actors shown in realtime, while a sky zooms across behind them. The effects shown by Justin, though, are a little more subtle.

Creating illusions like this, and mixing footage is extremely simple with today’s software. Premiere Pro, After Effects, DaVinci Resolve, and many other applications will allow you to do it. While the specific commands and terminology may be different, the principle is the same regardless of the software you use.
Essentially, you just need to find the two clips you wish to use – which is a lot easier if the two are the same scene locked off on a tripod. Then draw a mask around one to reveal parts of the other.

Then it’s just a case of lining them up in the timeline to give you the action you want. Depending on the movement in the scene, you may wish to animate your masks as the sequence progresses. You’ll probably also want to make sure you’ve got some feathering on your mask to help blend the edges. Even with the same scene, you will often see slightly lighting inconsistencies and reflections.
The example I mentioned earlier of the bad 90s sci-fi show on the alien planet is also described in Justin’s video. This time, though, we’re on earth, looking through a bedroom window. Again, it’s a simple case of masking out the window, or using chroma keying to reveal the sky timelapse through it.


This isn’t a perfect final result, but it demonstrates the principle. For cutting out something as difficult as this window scene, without affecting anything inside the room, you’ll probably want to go with After Effects. It does a much better job of keying and rotoscoping than Premiere Pro could ever do.
Watching this bit, I finally realised what it was about those sci-fi sequences that made them always look so obvious and bad. In the real world, as clouds move across the sky and the background changes behind our subject, there’s subtle differences in the light wrapping around our subject. So, you’ll want to create a good light wrap for your foreground footage, to help sell the illusion.
All in all though, it’s a very interesting looking technique that opens up a lot of potential options. I’ve started using slow motion a lot more in my personal video projects lately. This technique gives me a few ideas that I’m going to have to play with.

John Aldred
John Aldred is a photographer with over 25 years of experience in the portrait and commercial worlds. He is based in Scotland and has been an early adopter – and occasional beta tester – of almost every digital imaging technology in that time. As well as his creative visual work, John uses 3D printing, electronics and programming to create his own photography and filmmaking tools and consults for a number of brands across the industry.
Related Posts
 Mind Bending Clip Shot With 75 Camera Bullet Time Array Showcases Equally Mind Bending BMX Tricks
 Slow Mo Guys team up with Steve Giralt to film super fast robots in super slow motion
 How to shoot and edit time bending slow shutter video with Premiere Pro
 A Slow Mo Guy talks about the challenges of shooting high speed slow motion video
Join the Discussion
DIYP Comment Policy
Be nice, be on-topic, no personal information or flames.