


3 Easy Lighting Setups That Make Your B&W Editorial Portraits Stand Out
Aug 20, 2025
Anzalna Siddiqui
A psychology major in her third year of Bachelor’s, Anzalna Siddiqui has endless curiosity for the human mind and a deep love for storytelling – both through words and visuals. Though she hasn’t taken up photography as a profession, her Instagram is where her passion finds its home. In addition to this, she’s a travel enthusiast who never travels without her camera because every place has a story waiting to be captured.
Share:
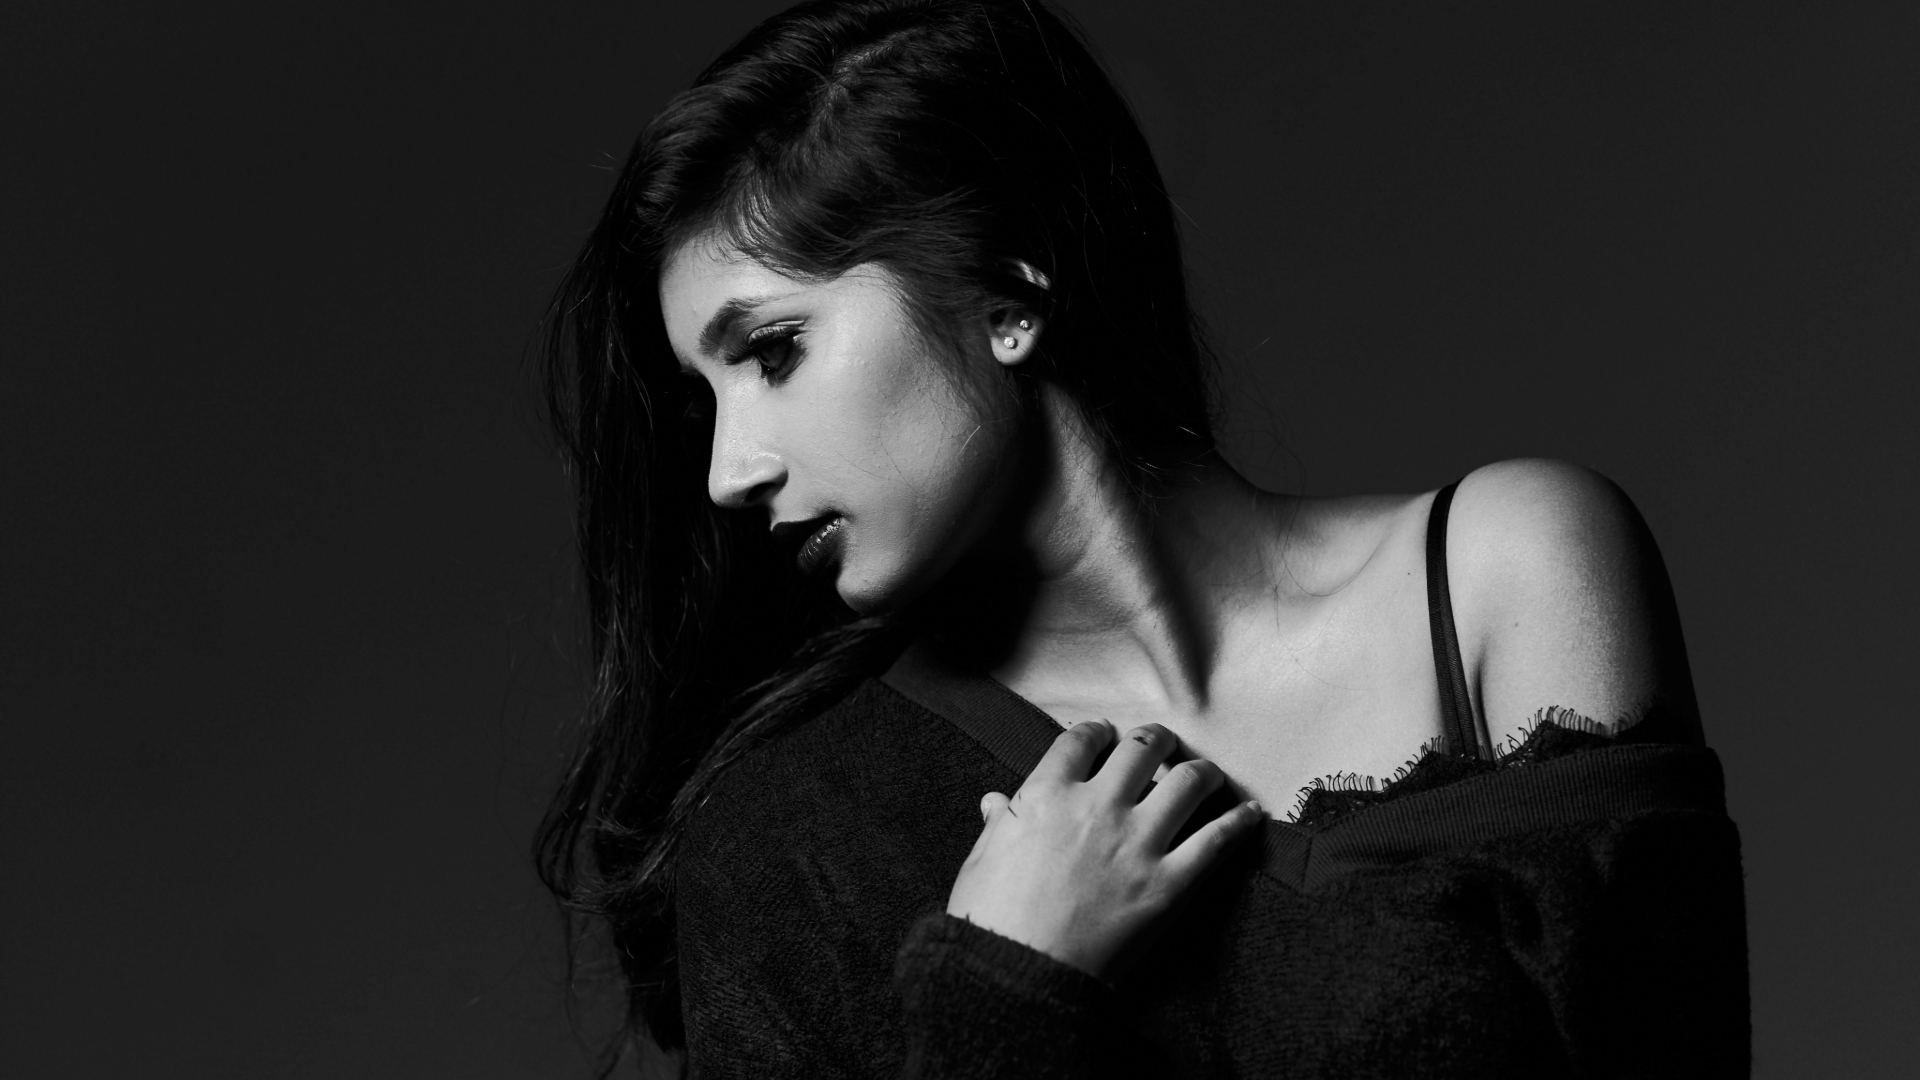
Have you ever seen a beautiful black and white portrait and wondered, “How did they achieve that?” It’s not only about the subject in the image. It’s also about the emotions, atmosphere, and drama that light and shadows create. Capturing that essence might feel challenging, but what if you could make a professional-looking B&W portrait using just a few lights? In a recent video, skilled photographer Nathan Elson explains 3 easy lighting setups that can transform editorial portraits from ordinary to exceptional. The great news is that you don’t need a large studio or expensive equipment. What you need is to learn how to shape light.
1. The One-Light Wonder: Simple, Classic, and Super Effective
Every adventure begins with a first step, and for Nathan, that step into lighting techniques starts with a one-light setup. This approach is an excellent way to ease into portrait photography while achieving a stunning, classic look. Nathan uses a Godox AD600 Pro II paired with a large octabox, positioned in front of a plain white wall.
He emphasizes the importance of feathering the light. Rather than directing the strobe straight at your subject, angle the octabox slightly away from them so that the soft edge of the light gently illuminates their face. This technique creates a smooth transition between bright highlights and dark shadows. Though it may seem minor, it adds remarkable depth and dimension to your images. Additionally, the white wall behind your subject will transform into a lovely gray, providing separation effortlessly. For this setup, Nathan used camera settings of f/8, 1/200th of a second, and ISO 200, which could also serve as a great starting point for you. Overall, this setup is an excellent way to grasp the fundamentals of light shaping before diving into more complex techniques. It’s all about building a strong foundation.
[Related Reading: The Simplest, Fastest and Most Effective One Light Setup I’ve Ever Used]
2. The Two-Light Dynamic Duo: Adding a Softening Touch
You’ve mastered using one light for your photography, and now it’s time to elevate your skills. This is where a second light can help, focusing on control. You can use this additional light to fill in shadows and highlight more details of your subject. In Nathan’s video, he mentions that his model was dressed in a black trench coat, and a single light couldn’t capture all the intricate fabric details.
To fix this, he introduced a second light: an AD600 Pro with a large umbrella, placed opposite the leading light. This new light complements the key light without overpowering it. Instead, it gently brightens the shadows and creates a more even, less harsh contrast in the image. Additionally, this fill light helps slightly lighten the background, enhancing the separation between the subject and the backdrop. You maintain the nice shape created by your leading light while adding extra detail and softness that enhances the portrait. Personally, I enjoy using a fill light; it acts like a safety net, softening harsh shadows and ensuring every part of your subject is visible, especially with complex outfits.
[Related Reading: Use this simple two-light setup for gorgeous and consistent portrait lighting]
3. The Three-Light Look: Creating a Scene with Depth
If you’re in the mood to try something new and be a bit more creative, Nathan recommends using a three-light setup to “dirty up the frame.” He believes that adding props like light stands and old housing can make your scene more visually appealing. For this effect, he uses two lights and adds a third one, which is where the fun begins.
The third light is an optical snoot. While you might know about regular snoots, an optical snoot is a unique tool that allows you to project specific shapes or patterns of hard light. Nathan explains that he used it to create a beam of hard light coming from the same direction as the soft key light. This technique adds a nice contrast between different light qualities in one image. He says it resulted in sharper shadows on the model’s face, highlighting her features, and added interesting light and shadow on the background wall for extra depth. Although it’s a more advanced method, it can really transform a portrait from just a simple headshot into a more intricate and artistic piece.
[Related Reading: How to make 3 point portrait lighting setup on a budget]
The Wildcard: Mixed Lighting and Motion Blur
Just when you think you have everything under control, Nathan introduces an extra setup that focuses on experimentation and fun. This technique uses both flash and continuous lighting to create an interesting motion effect. While it’s different from the usual editorial style, it’s a fun method worth trying out.
To do this, he suggests starting by turning off all the lights in the room. Then, use a flash as your main light source. After that, add a constant light source, like two panel lights, to achieve the motion effect. He sets his camera to bulb mode, which allows the shutter to stay open for as long as you want. Nathan explains that you can move the camera in various directions for about 2 to 3 seconds while the shutter is open. The flash will freeze your subject, while the constant light adds a cool motion blur. You can slide your chair, twist your body, or gently move the camera to get different effects. It’s a great way to step outside your comfort zone and create something truly unique.
So go ahead, pick up your camera and lights, and start experimenting with these 3 easy lighting setups!
[3 LIGHTING SETUPS for B&W Editorial Portraits I Nathan Elson; Image credits: Pexels]

Anzalna Siddiqui
A psychology major in her third year of Bachelor’s, Anzalna Siddiqui has endless curiosity for the human mind and a deep love for storytelling – both through words and visuals. Though she hasn’t taken up photography as a profession, her Instagram is where her passion finds its home. In addition to this, she’s a travel enthusiast who never travels without her camera because every place has a story waiting to be captured.


Join the Discussion
DIYP Comment Policy
Be nice, be on-topic, no personal information or flames.