


How I created these images: Favourites of 2024 (Part III)
Jan 27, 2025
Soumyadeep Mukherjee
Soumyadeep Mukherjee is an award-winning astrophotographer from India. He has a doctorate degree in Linguistics. His work extends to the sub-genres of nightscape, deep sky, solar, lunar and optical phenomenon photography. He is also a photography educator and has conducted numerous workshops. His works have appeared in over 40 books & magazines including Astronomy, BBC Sky at Night, Sky & Telescope among others, and in various websites including National Geographic, NASA, Forbes. He was the first Indian to win “Astronomy Photographer of the Year” award in a major category.
Share:
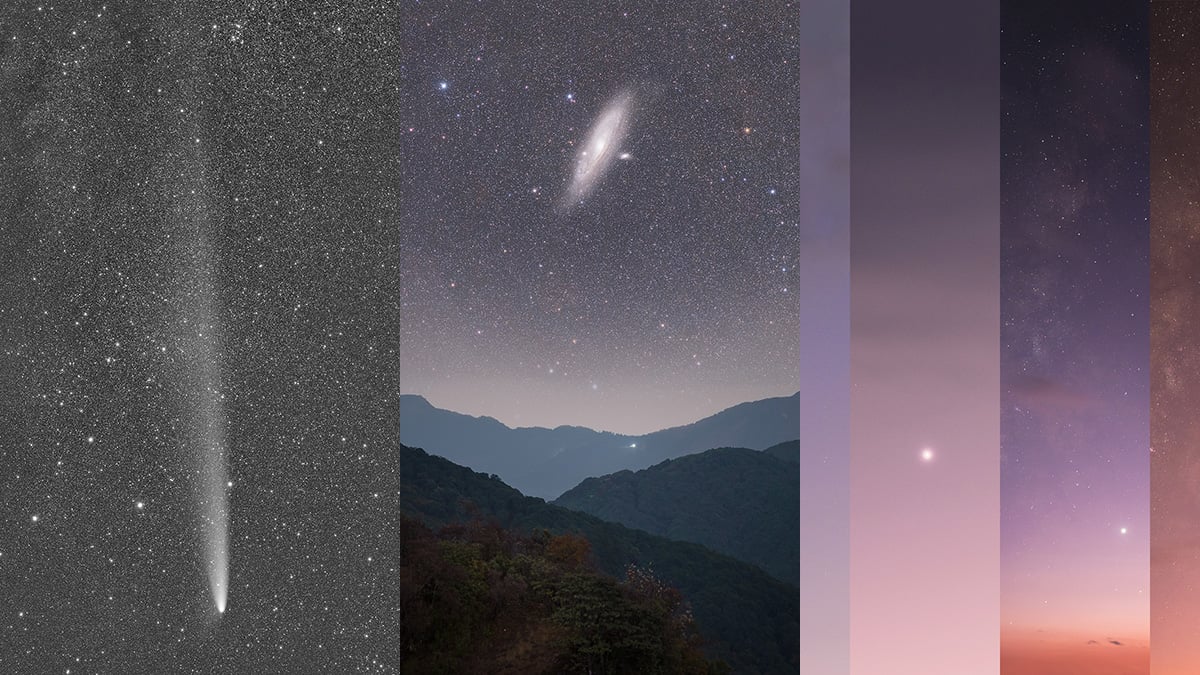
Creating an astrophotograph requires planning, photographing the night sky and careful processing. Combining all of these leads to an image that you may have envisioned even before you started doing any of these. One requires some patience and technical and artistic skill to achieve the desired results. In this article, I discuss stories and techniques behind creating some of my favourite images from 2024.
Portrait of Comet A3
Some of you might already be aware of the bright comet Tsuchinshan-ATLAS, which became the naked eye visible in October 2024. My previously planned trip to Singaila National Park, a dark sky location in the eastern part of India, coincided with the comet’s spectacle. As soon as the comet became bright after its perihelion, I planned to capture it during my trip.
I won’t lie, but I was nervous and anxious about it. This would be my first time photographing a bright comet from a dark sky location. I wanted to make the most of it but was unsure of the weather and the final results. I reached the location on 30th October 2024, and was greeted by clouds and fog. Just before sunset, while I and my two friends (who joined me for the trip) were looking at the sky, the clouds started clearing up. The western sky slowly became clear, and I could easily spot Venus during the twilight. All of us rushed to set up our cameras and managed to do so in time.
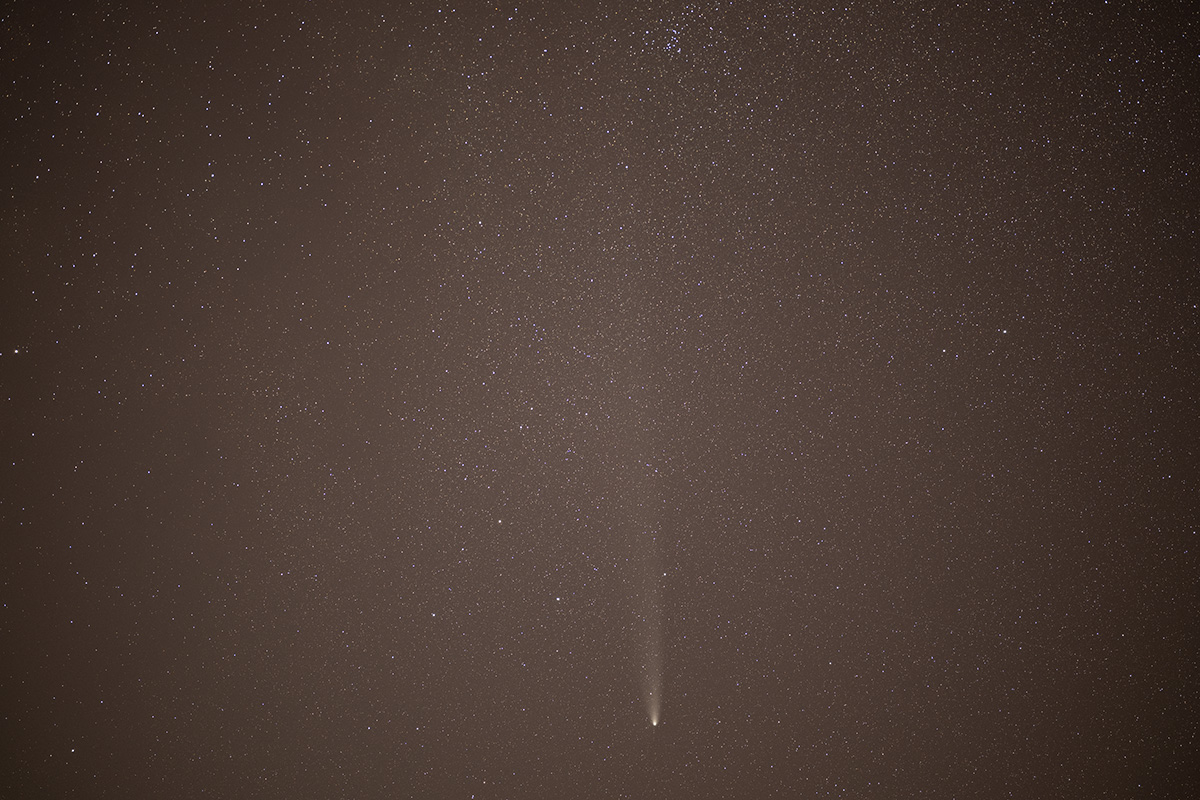
As soon as the sky became dark enough, we began with a wide-field set-up (around 20 mm) to see if the comet and the Sagittarius arm of the Milky Way were coming along well. During the focus test, I was overjoyed when I saw the comet for the first time on the back of our camera. The nervousness was still there. When it became completely dark, I switched to my second set-up with a mid-telephoto lens of 135 mm. Before the trip, I checked with other astrophotographers who had used this lens to get good details of the comet and to see if this focal length would perfectly suit the comet’s long tail.
I was initially unsure of the shutter speed. Comets move faster than the stars. Even with a tracker, I couldn’t do long exposure. I and one of my friends (who was using an identical set-up) decided to go with different shutter speeds to make sure that at least one of us would return with a good image of the comet. I went with a minute-long exposure, while my friend went with 30 seconds. Unfortunately, the clouds started rolling it soon after. I could manage to collect only 10 usable images.
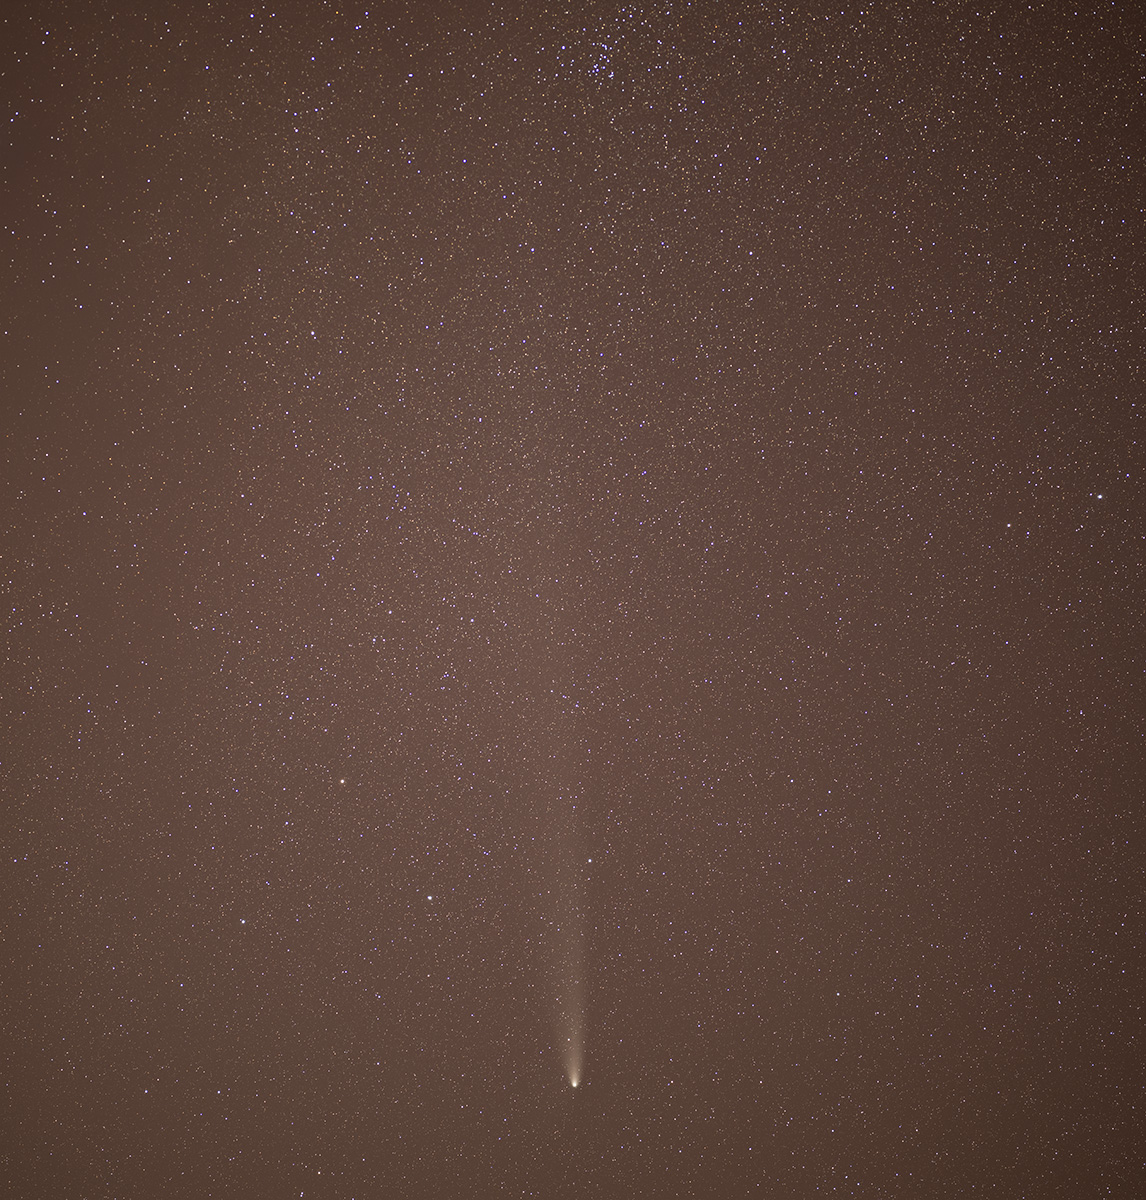
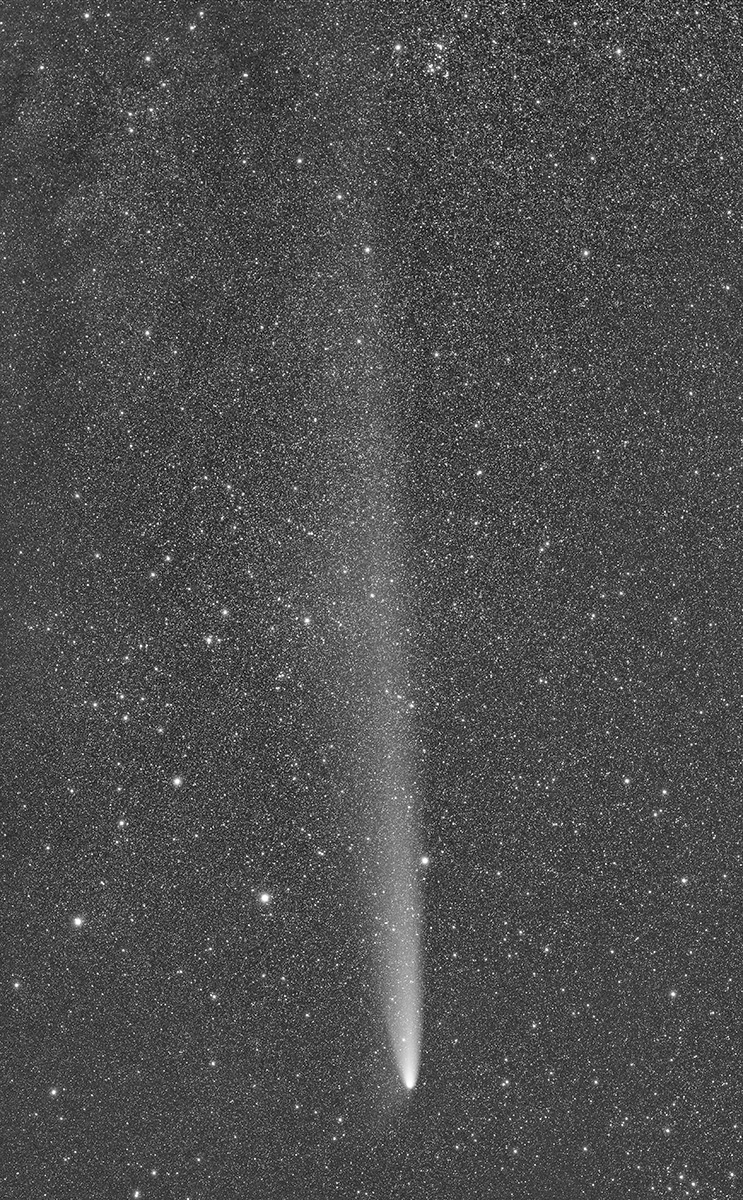
The processing workflow I followed for this image was the standard comet processing. The 10 images were stacked twice in Pixinsight, one with the stars aligned and the other with the comets aligned. Since the movement of the stars and the comet varied, this procedure is followed to process such images. The images were initially processed separately and then blended. Some final retouching was carried out in Photoshop. I decided to go with a monochrome image as I thought it did more justice to the comet.
Equipment details: Nikon Z8, Samyang 135mm, iOptron Skyguider Pro, Leofoto LS 364c + LH 40
Exif details: 10 * 60 seconds, f/4, ISO 1000, 135mm
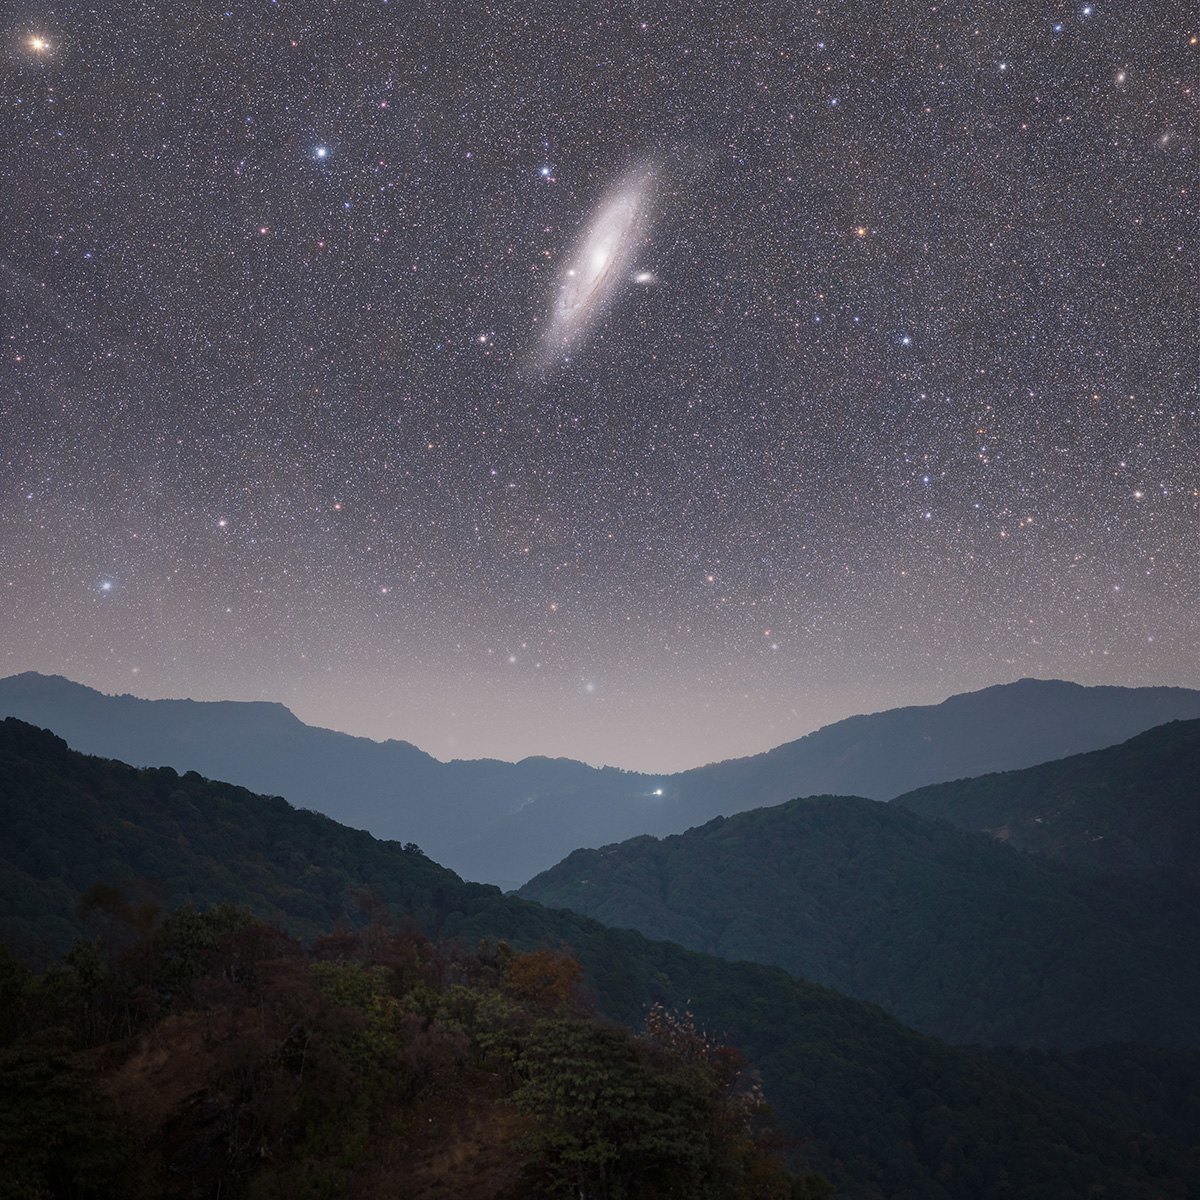
Andromeda over the Himalayas
I have a fascination for deepscape images. These kinds of images capture a deep sky image along with landscape elements during its rise and set. This image was captured during my trip to Singalila National Park in late October 2024 and also happens to be my last image of the trip.
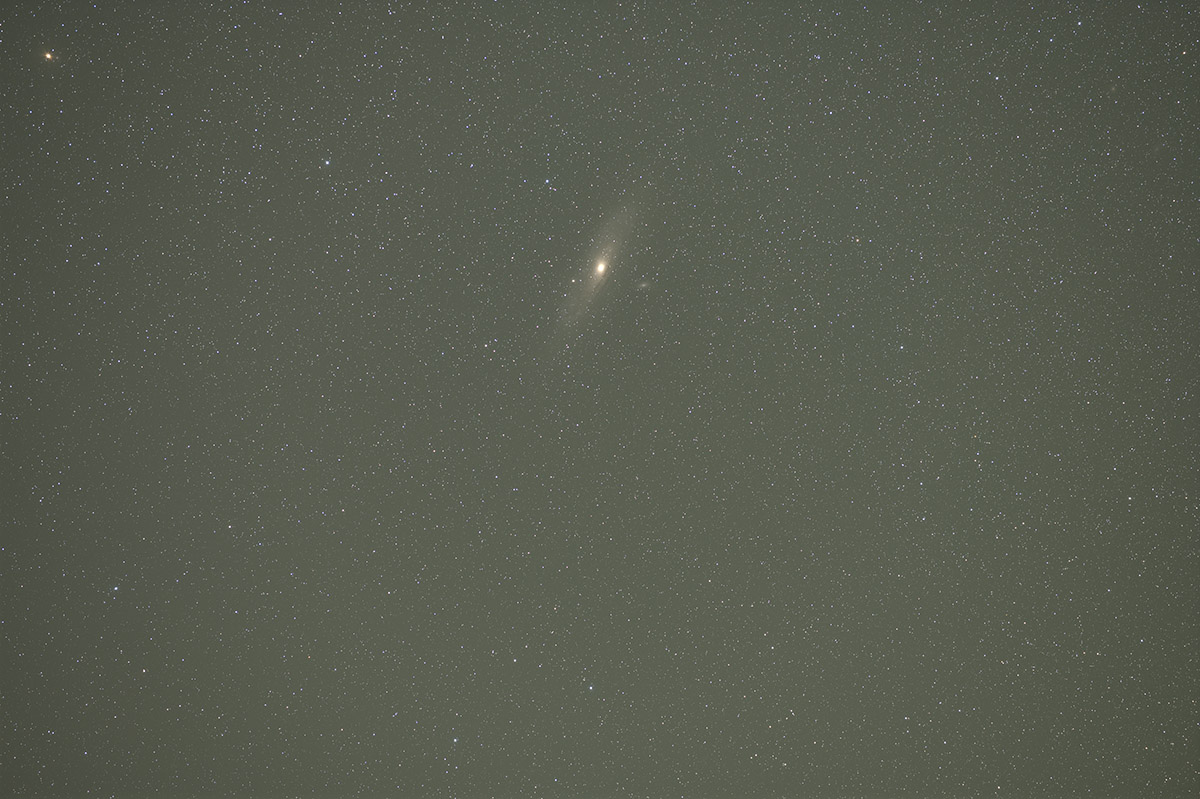
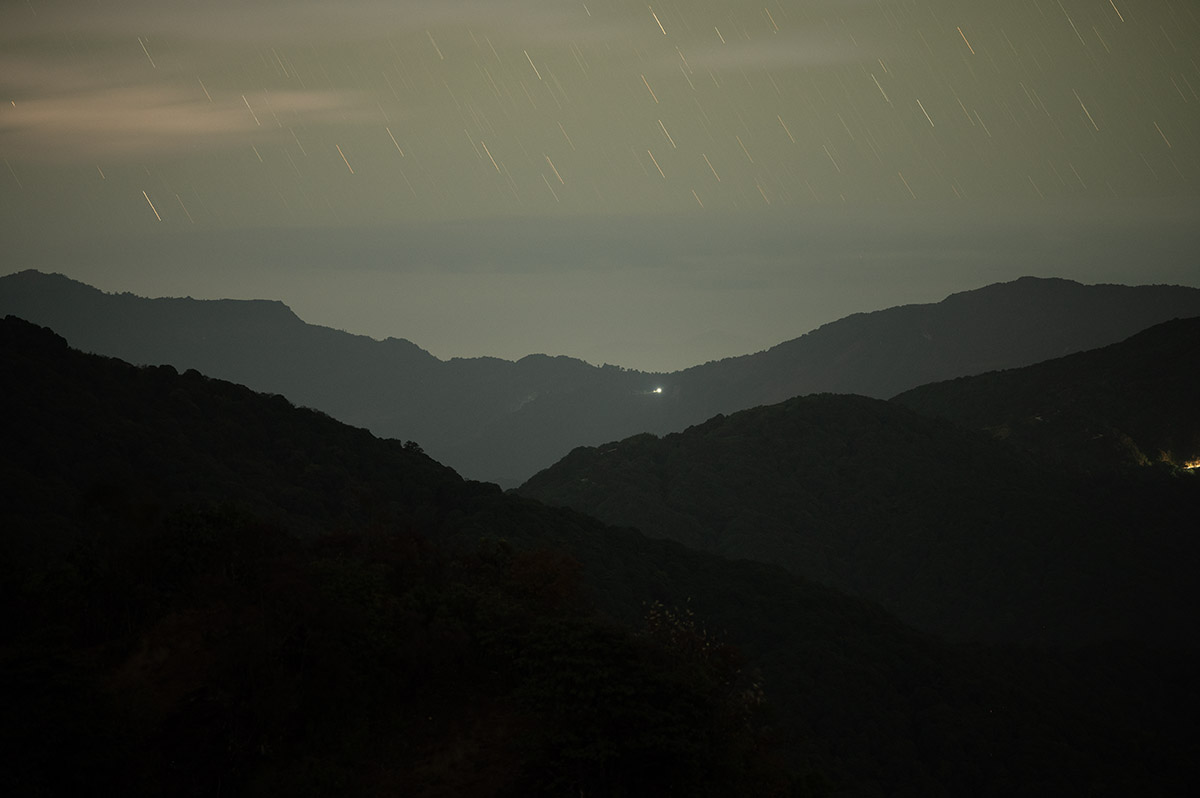
On the first 3 nights of the trip, I couldn’t manage to get any deepscape images. This was partially because of the weather and partially because of my lack of a backup plan. Every night, when the time came to photograph the setting Andromeda, the clouds would roll in the north and northwest directions. And since I did not have a backup plan to shoot another setting or rising deep sky image, I would simply switch to another nightscape image.
On the last night, around 2 am, I finally got the opportunity to capture the Andromeda galaxy. I began shooting Andromeda while it was around 20 degrees above the horizon. I photographed it for an hour until it came down to 8 degrees, and the horizon got hazy. The next step was to capture the foreground. A longer shutter speed was required for the foreground as it was way darker than the sky. I captured five images for the foreground.
The image was processed by following the standard procedure. The sky images were initially stacked in Sequator and processed in Pixinsight and Photoshop. During processing the image, I was surprised to find hints of IFN (Integrated Flux Nebula) showing up in the image. Considering the little integration time of only an hour, I never expected it to show up. However, since it was meant to be a deepscape image (and not a deep sky one), I went gentle with the stretching to make the image look more natural.
Equipment details: Nikon Z6ii, Samyang 135mm, iOptron Skyguider Pro, Leofoto LS 364c + LH 40
Exif details: 60 * 60 seconds, f/2.8, ISO 1600, 135mm (sky), 5 * 120 seconds, f/2, ISO 1000, 135mm (foreground)
Venus through twilight colours
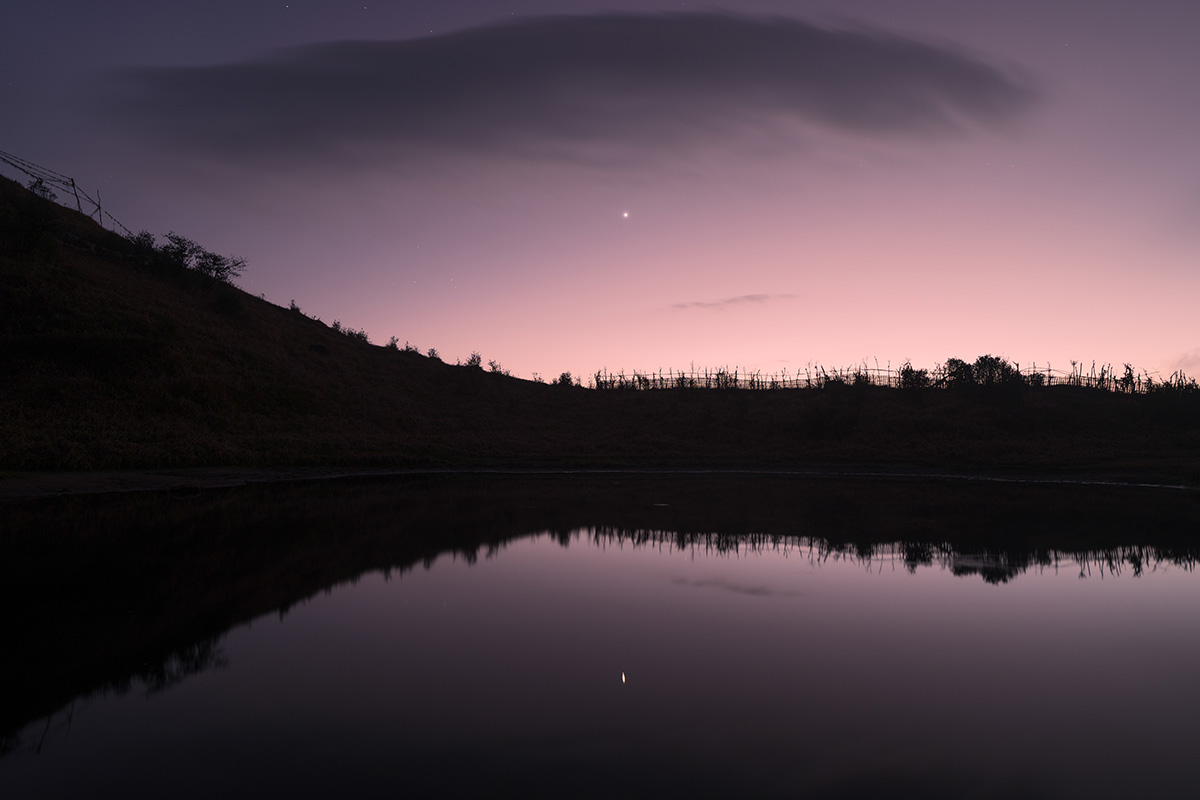
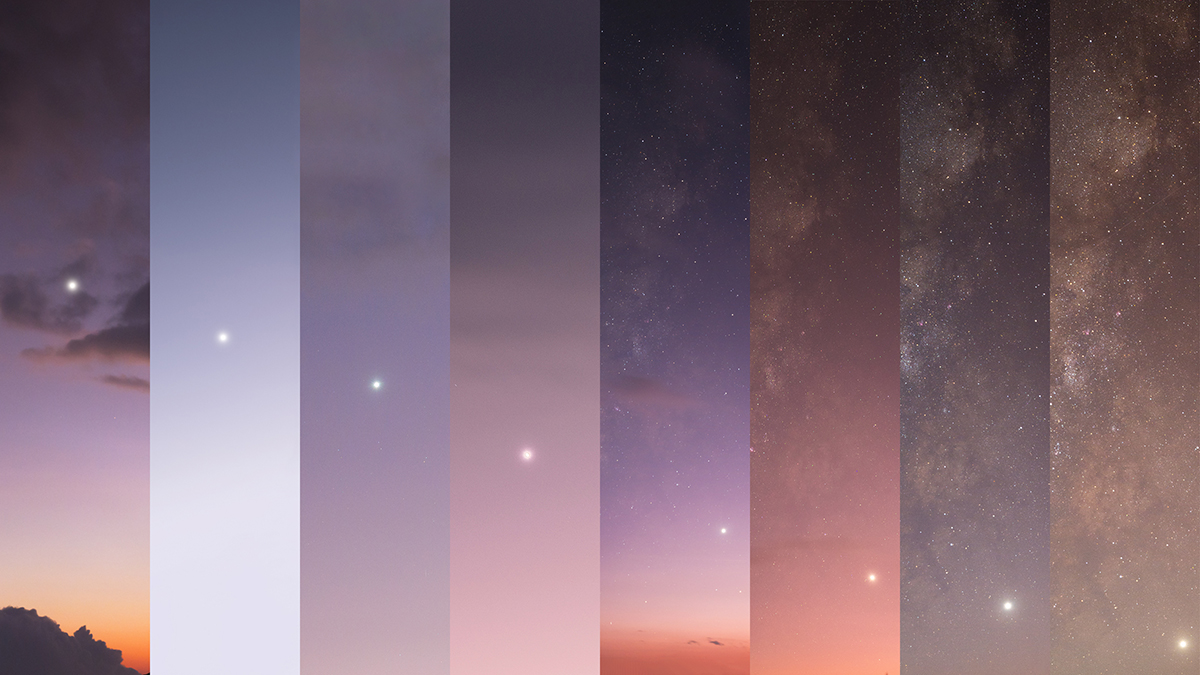
Although the image might look like it was rigorously planned and executed, it wasn’t. Well, there are some images that were never planned, yet they come out better than expected. This one is an example. During my trip to Singalila National Park, I spent quite a lot of time photographing Venus every evening. This was apparently a good time pass as I waited for the sky to get dark enough to photograph the Milky Way and other objects. Except for the third day, I got multiple images of Venus during different twilight phases.
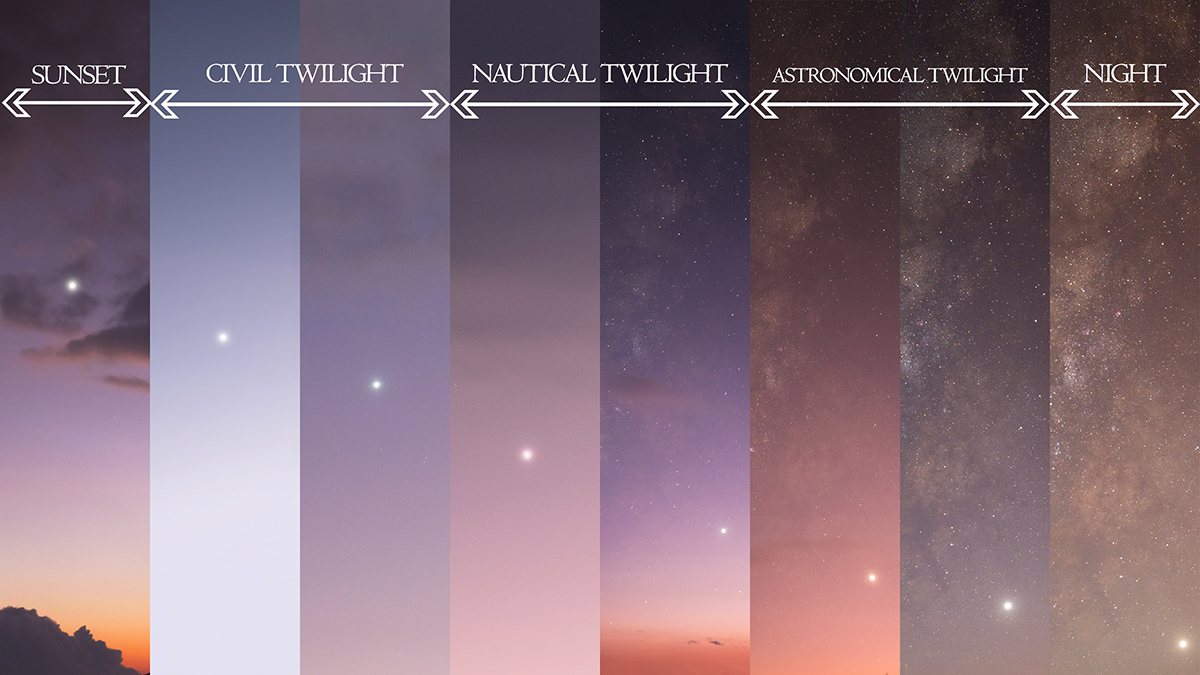
Although the images were there, I initially produced single images of Venus during twilight. Around 3 weeks after returning from the tour, one morning, it struck me that I would create a time-slice of Venus images, going from civil twilight to night. The hunt for the required images began soon after. In the initial stage, I sorted around 20 images of Venus from the trip. I checked for their timing, and the list went to 14. Another important aspect was to sort the images according to the position of Venus in the frame. After spending a bit of time finalising the composition, I sorted eight images that suited the time and position of the planet.
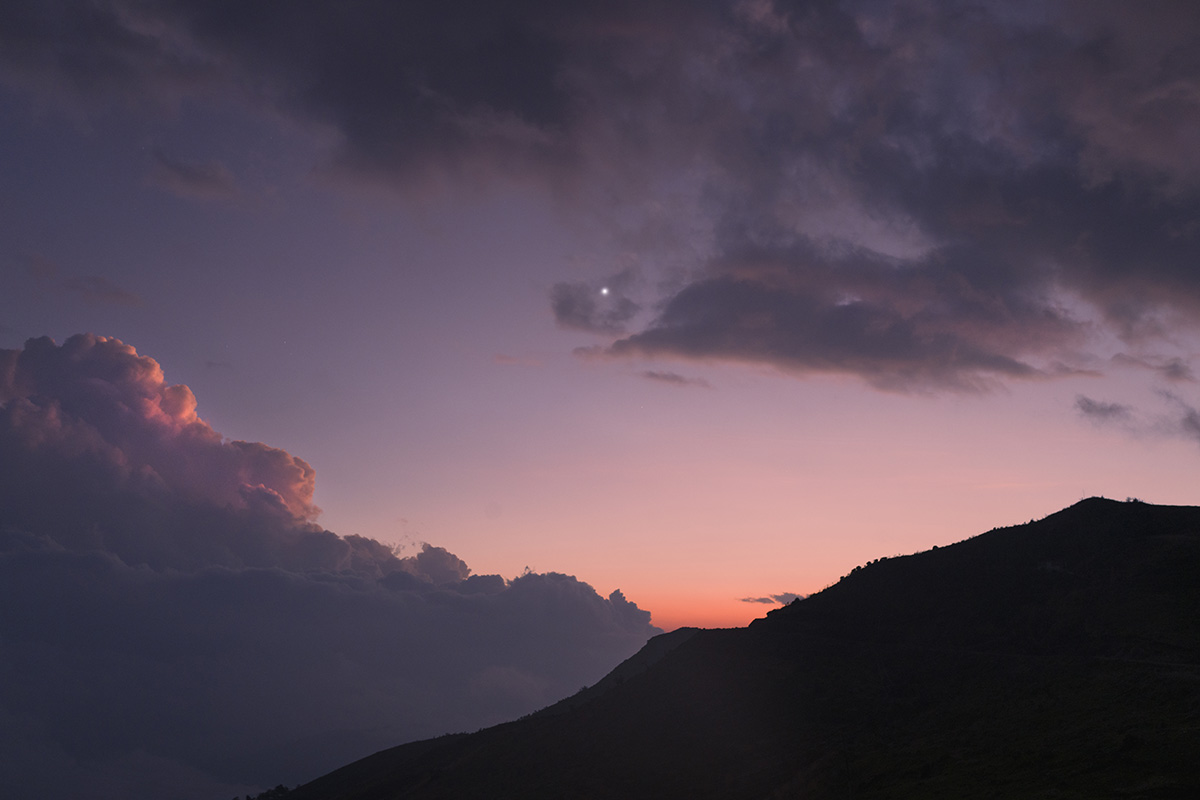
The image was composed in a manner that reveals how the background of Venus changes as the sky gets darker. Venus, being an extremely bright object, is visible and can be photographed right from sunset. However, the background stars do not start revealing until late nautical twilight. During this period (October-November 2024), Venus also happened to pass through the Sagittarius arm (of course, from our viewpoint). This also made the time-slice image reveal the Milky Way in the background.
The individual images were processed with Adobe Camera Raw. They were arranged in order of the timing of the photograph and cropped equally. The final collage was created in Photoshop.
Equipment detail: Nikon Z8, Nikon Z6iii, Nikon Z6ii, Nikon Z 14-24mm, Nikon Z 20mm, Leofoto and Benro tripods
Exif details: each image of the collage would have different shutter speed, aperture and ISO
This series of “How I created these images: Favourites of 2024” ends here. The goal of this series was to take you through the planning, photographing and processing behind some of the images.
Read the previous parts of this series here:
- How I created these images: Favourites of 2024 (Part I)
- How I created these images: Favourites of 2024 (Part II)
Clear skies!

Soumyadeep Mukherjee
Soumyadeep Mukherjee is an award-winning astrophotographer from India. He has a doctorate degree in Linguistics. His work extends to the sub-genres of nightscape, deep sky, solar, lunar and optical phenomenon photography. He is also a photography educator and has conducted numerous workshops. His works have appeared in over 40 books & magazines including Astronomy, BBC Sky at Night, Sky & Telescope among others, and in various websites including National Geographic, NASA, Forbes. He was the first Indian to win “Astronomy Photographer of the Year” award in a major category.


Join the Discussion
DIYP Comment Policy
Be nice, be on-topic, no personal information or flames.