


How to use coloured gels with studio strobes and softboxes
Dec 29, 2016
John Aldred
John Aldred is a photographer with over 25 years of experience in the portrait and commercial worlds. He is based in Scotland and has been an early adopter – and occasional beta tester – of almost every digital imaging technology in that time. As well as his creative visual work, John uses 3D printing, electronics and programming to create his own photography and filmmaking tools and consults for a number of brands across the industry.
Share:

Using coloured gels with speedlights has become pretty common. Many people who shoot with speedlights have given it a go at least a couple of times. But speedlights are quite easy to gel. All you need is a small strip of gel which you then gaffer tape over the front of the head. Studio strobes, though, are a different matter entirely. They’re not flat on the front like speedlights, and they project light in all directions.
You could, of course, just cover the entire front of your softbox with a massive gel sheet. But that can get expensive if you use many different colours. So, what can we do? Photographer Robert Hall shows us two options in this video on the Godox AD600 strobe. The first is the way he has been doing things, although it does have a problem. White light is still able to come out of the front, without a second piece of gel attached. One of his viewers sent him a solution to try that seems to work brilliantly.
There’s a couple of things to note here. The Godox AD600 flash tube has a built in protective glass dome around it, with ventilation holes to help expel heat. But, this still gets pretty hot. You’ll want to make sure the gels you purchase can handle the heat. Personally, I go with Rosco gels that are designed for use with hotlights. These can easily withstand the temperatures generated by a few flashes.
Robert also uses heatproof silicone bands to attach gels to the bulb, not rubber bands. Regular rubber bands would melt or just snap in a very short amount of time. You’ll also want to make sure not to cover up the vent holes on the glass dome surrounding the flash tube inside.
The gels Robert’s been using up until now have basically been a tube, with an open end. This means that part of the light is uncovered, throwing out white light. To try to overcome this, Robert extends the gel far beyond the end of the tube.
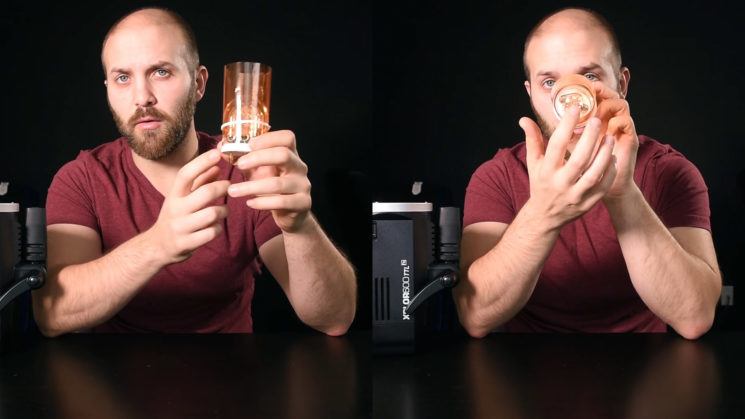
This is not an ideal solution, though. If the gels are for creative purposes, it might not be so bad. If you’re using gels for corrective purposes, though, this mix of white and gelled light can throw your colour off.
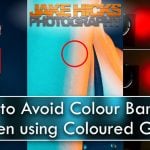
Robert was sent a set of pre-cut gels by a friend of his. That friend is Bryan Troll. You might remember Bryan, he made that epic full body Nikon camera suit for Halloween that actually worked and shot photos.
Cut in the shape of a cross, these gels wrap around the front and four sides of the light like an open cube. Again, these can be attached with the heatproof silicone band.

This offers a much more even and consistent gel goverage no matter what modifier you’re using.
Not all studio strobes have a glass dome covering the flash tube, so you might have to modify this solution slightly to make it work on yours. You don’t want your gels touching the flash tube itself. Even the heat resistant ones will melt if touching a flash tube that’s blasting out that much light and heat. So, make sure to leave a gap around the tube.
I’ve always used a variant of the “cross cube” whenever I’ve needed to gel studio strobes, too. It’s a great way to help ensure you’ve covered the light from the flash tube at all angles. And, because the light after that point is the colour you need it, there’s no need to actually put gels on the modifier itself.
How do you gel your studio strobes? do you gel the bulb or the modifier itself? Do you use a different shape to cover the flash tube? Let us know in the comments and show us how you do it.
[via ISO1200]

John Aldred
John Aldred is a photographer with over 25 years of experience in the portrait and commercial worlds. He is based in Scotland and has been an early adopter – and occasional beta tester – of almost every digital imaging technology in that time. As well as his creative visual work, John uses 3D printing, electronics and programming to create his own photography and filmmaking tools and consults for a number of brands across the industry.


Join the Discussion
DIYP Comment Policy
Be nice, be on-topic, no personal information or flames.
One response to “How to use coloured gels with studio strobes and softboxes”
Thanks for the article guys! I have made some nice improvements to the gels Rob used in this video to make them even better, and also now offer them in both Color Correction kits as well as vibrant Creative Color kits. They are also available for the AD600 as well as the AD200 and AD320 strobes. For more info check out http://www.flashgels.com or http://www.facebook.com/flashgels