


Two simple ways to copy the color grade from one image to another
May 15, 2019
Dunja Đuđić Kalinin
Dunja Djudjic is a multi-talented artist based in Novi Sad, Serbia. With 15 years of experience as a photographer, she specializes in capturing the beauty of nature, travel, concerts, and fine art. In addition to her photography, Dunja also expresses her creativity through writing, embroidery, and jewelry making.
Share:
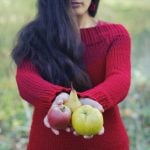
Color grading is a great way to change the mood of your images, and there is more than one way to do it. But other than doing it from scratch, you can copy the color grading of an image you particularly like, and add the same mood to your shots. In this video, Ted Forbes will teach you two simple methods for copying the color grade from one image to another, and you can apply it to any photo you like.
The first thing to have in mind is that every photo has highlights, midtones, and shadows. But there’s also a certain tint in all of them which make the color grading. The trick is to replicate these tints and copy the look from one image to another, and here are the two ways to do it.
Method 1
This first method is kinda approximate, but it can give you great results.
Start by opening the source photo and look at the highlights and the shadows first. Double-click on the foreground color and sample the color from the darkest point in the image. In Ted’s case, it’s a very dark shade of magenta. Then double-click on the background color and sample the brightest point. Ted got a very bright shade of greenish-yellow.
Go to your target image and create a Color Balance adjustment layer. We’ll follow Ted’s example here, but of course, use the colors that suit your images. Based on what you know from the previous photo, select the Shadows slider and add some magenta. Then select the Highlights and adjust the slider to add some green and yellow. You can also adjust the Midtones and add a bit of magenta.
The final photo may look a bit too saturated, especially if your starting point is a film image. But you can play with it from here: decrease saturation, adjust highlights and shadows by using Curves, and so on.
Method 2
The second method is a bit more “mathematical” as Ted puts it, or in other words more accurate. I particularly like this one and I tried it out in the example below.
Open your source image and create a new layer. Now, sample the darkest and the brightest colors again. You want to create swatches from them, so paint them onto the new layer with the Brush tool.
For this technique, you’ll also need to map the midtones. Go to Select > Color Range and select Midtones. Now hit Ctrl/Cmd + J to create a new layer. Go to Blur > Average and the entire selection will be turned into a single color. Sample it and paint it onto the new layer along with the highlights and shadows.
When you have your swatches, copy them from the source image onto the photo you want to edit. Make a Curves adjustment layer and make sure that it’s above the target image, but not above the layer with swatches, because you don’t want Curves to affect those.
Next, within the Curves adjustment layer, double-click on the three eyedroppers to select the colors. They allow you to map the highlights, midtones, and shadows, and you should sample the colors from your swatches.
Let’s start with the highlights. When you select the brightest color from your palette, Photoshop will ask you if you want to save the new target colors as defaults. Click “No” because you only want them for this image. Now, use the eye-dropper to select the brightest part of the image. Repeat the process with Shadows and Midtones, and you’ll have the Curves adjustment layer that color grades your image the way you want it.
Again, you can play a bit with saturation, brightness, and contrast. If a film image was your starting point, you may need to desaturate the target photo a little bit, perhaps add some grain… As I mentioned, I played with this technique, and here’s what I got. It could use some fine-tuning, but it’s not bad considering that I was rushing through it. : )


Have you experimented with any of these techniques? I know I plan to play with them a bit and see what I can get. If you decide to try them out, let us know if they work for you and feel free to share the results!
[How to copy the COLOR GRADE of ANY Image | The Art of Photography]
Filed Under:
Tagged With:
- Adobe
- |
- Adobe Lightroom
- |
- Adobe Photoshop
- |
- color
- |
- editing
- |
- Photo Editing

Dunja Đuđić Kalinin
Dunja Djudjic is a multi-talented artist based in Novi Sad, Serbia. With 15 years of experience as a photographer, she specializes in capturing the beauty of nature, travel, concerts, and fine art. In addition to her photography, Dunja also expresses her creativity through writing, embroidery, and jewelry making.
Related Posts
 How to color grade in Photoshop using only Solid Color Adjustment Layers
 This Color Wheels add on for Photoshop lets you color correct and grade photos as easily as video
 Start your color grade with the Infinite Color Panel
 Use Color Burn and Color Dodge to quickly add color and contrast to your photos
Join the Discussion
DIYP Comment Policy
Be nice, be on-topic, no personal information or flames.