


This is how YOU can download JWST RAW images: A step-by-step guide
Sep 27, 2024
Soumyadeep Mukherjee
Soumyadeep Mukherjee is an award-winning astrophotographer from India. He has a doctorate degree in Linguistics. His work extends to the sub-genres of nightscape, deep sky, solar, lunar and optical phenomenon photography. He is also a photography educator and has conducted numerous workshops. His works have appeared in over 40 books & magazines including Astronomy, BBC Sky at Night, Sky & Telescope among others, and in various websites including National Geographic, NASA, Forbes. He was the first Indian to win “Astronomy Photographer of the Year” award in a major category.
Share:

You must have come across the stunning JWST (James Webb Space Telescope) images on the web. After all, It’s a very impressive imaging device, so it captures great visuals. These images are post-processed by scientists. But did you know you can also download the JWST Raw images for post-processing and create your version? Here is a step-by-step guide on downloading the RAW images of JWST from the online archive.
Table of contents
The JWST repository:
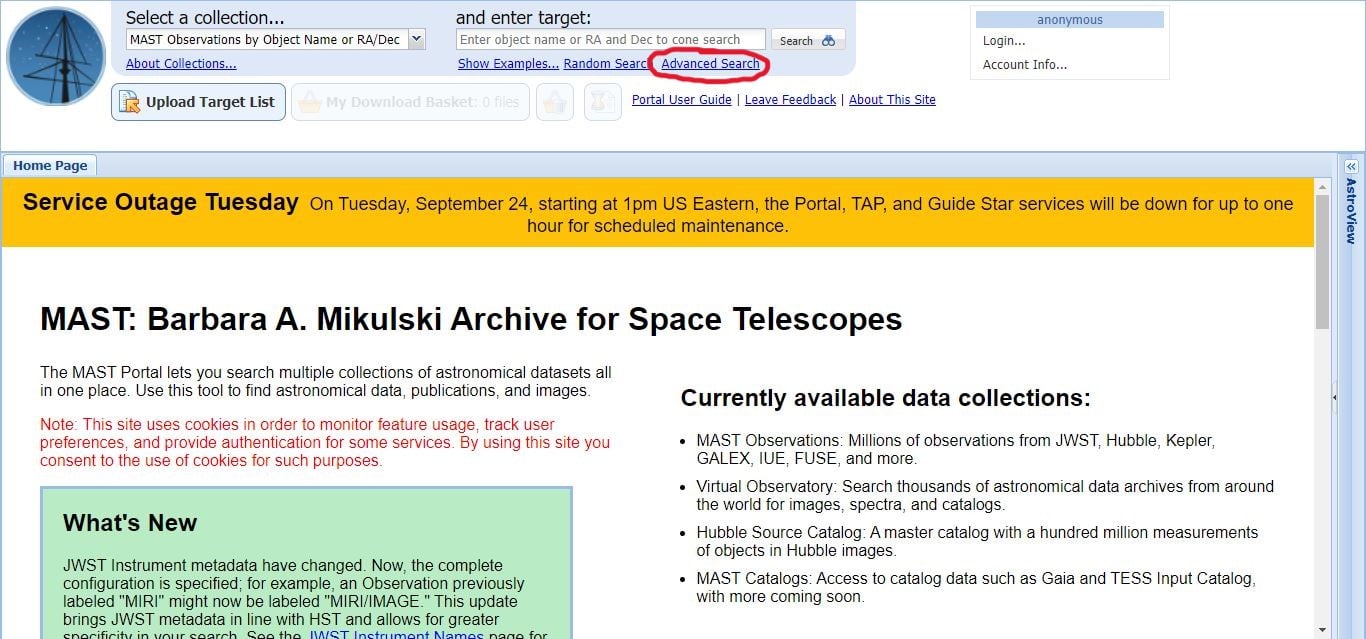
Go to the following webpage: it’s the repository of all JWST data (along with other missions): www.stsci.edu
Click on the “Advanced Search” option. This will open up a new window on the same page.
Locate the James Webb Mission:
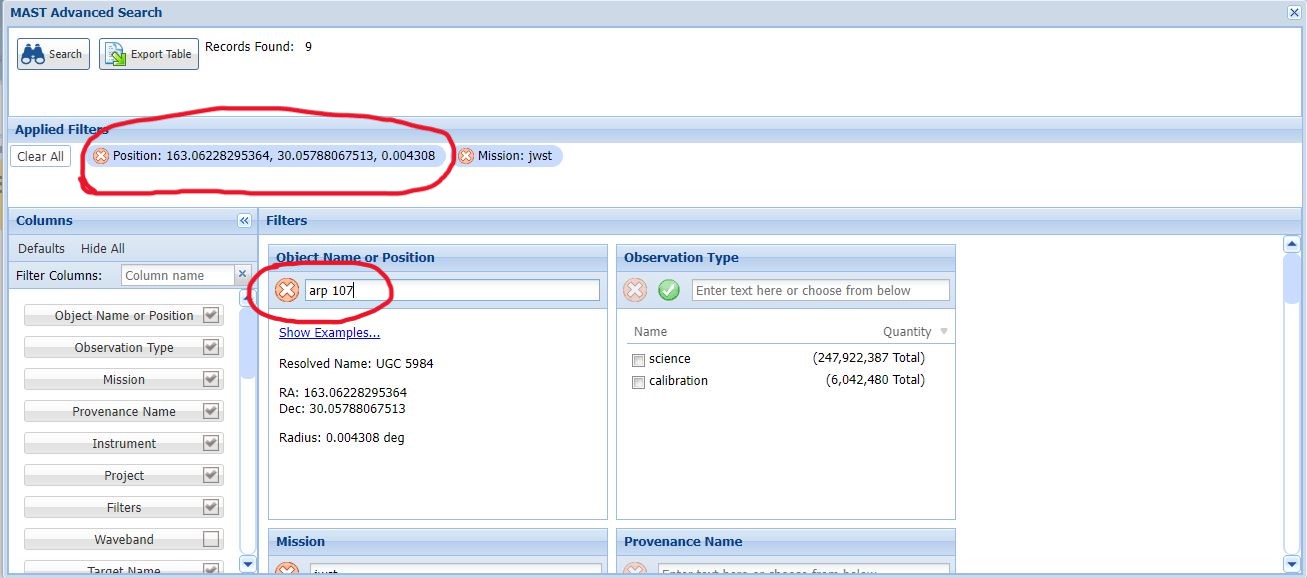
On this new window, you will get multiple options to filter your required data. Scroll to find the “Mission” tab and type “JWST”. Click on the suggestion that comes up. Once you click it, this filter will be applied and come up in the “Applied Filters” section.

Search for the specific object you would like to see:
Go to the “Object Name or Position” tab and type in the name of the object you want to find and hit ENTER. For example, we want to get the data for the latest released image of a group of galaxies known as ARP 107. To find this object, type in “ARP 107” and hit enter. This will automatically apply a position filter and will show you the number of “Records Found” at the top of this window. If you are not sure what image to download, you can check the list of JWST images here (or check out some of the James Webb photos we featured).
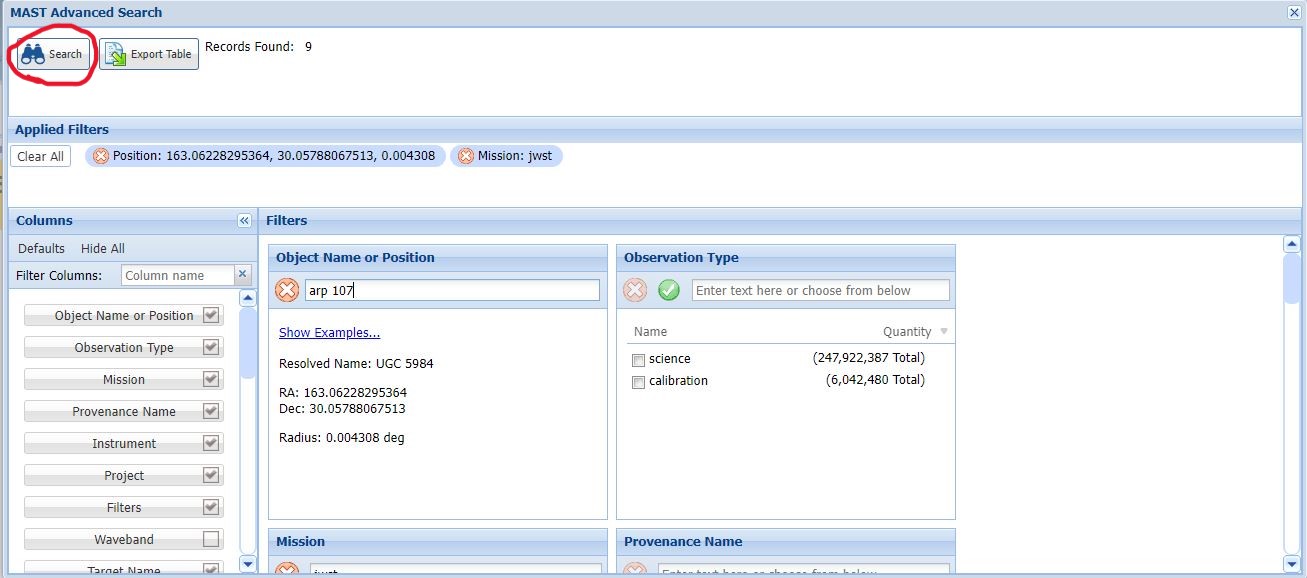
Click on the “Search” option at the top.
Select the files to download:
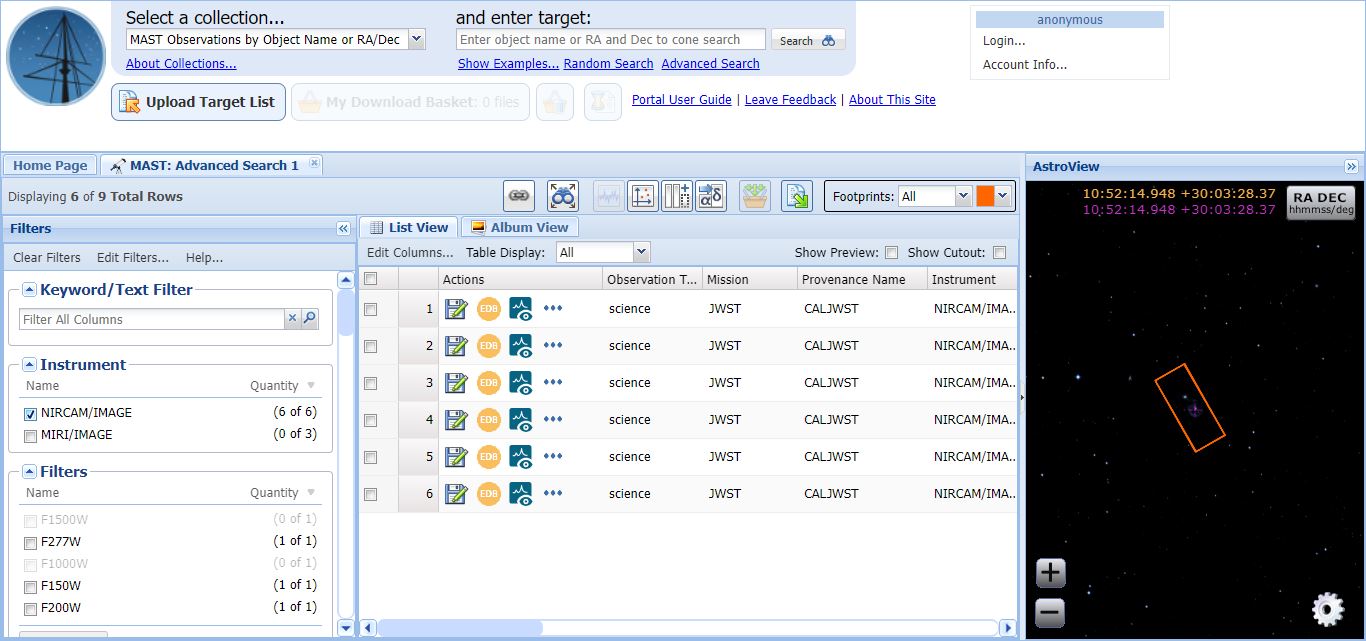
This will open up a new window showing all the data available for the searched options.
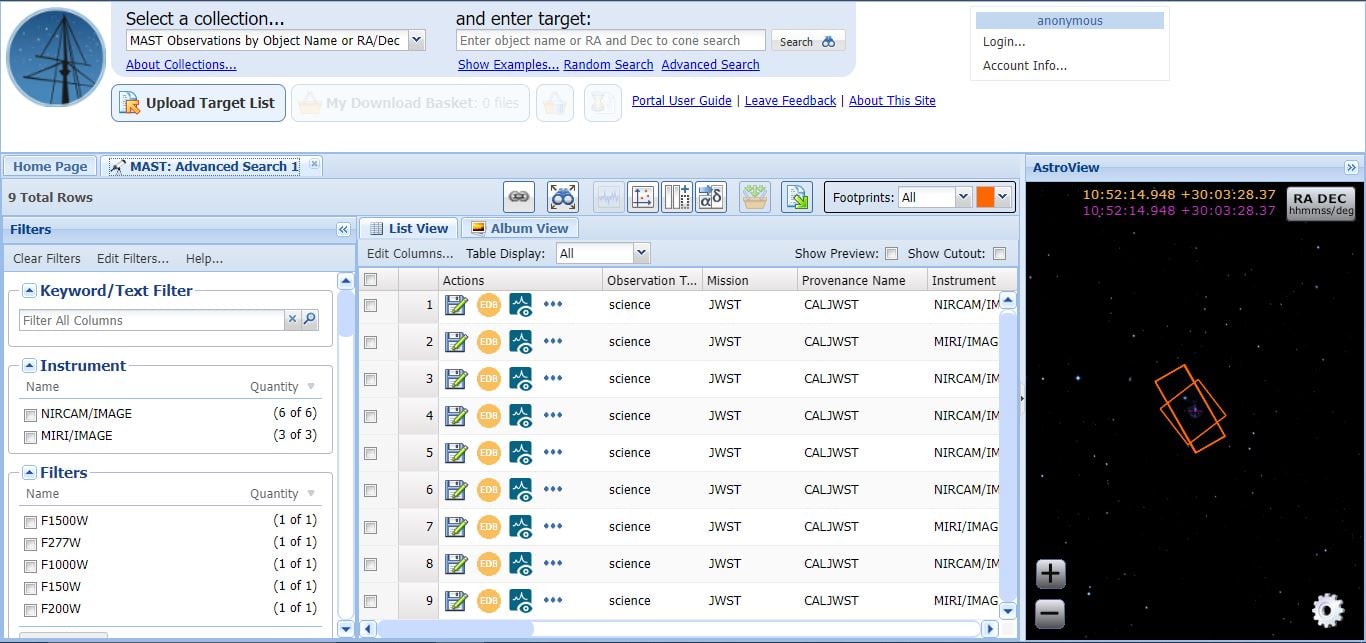
You can further filter this data by their instruments. Go to the “Instrument” tab on the left and click on “NIRCAM/IMAGE”.
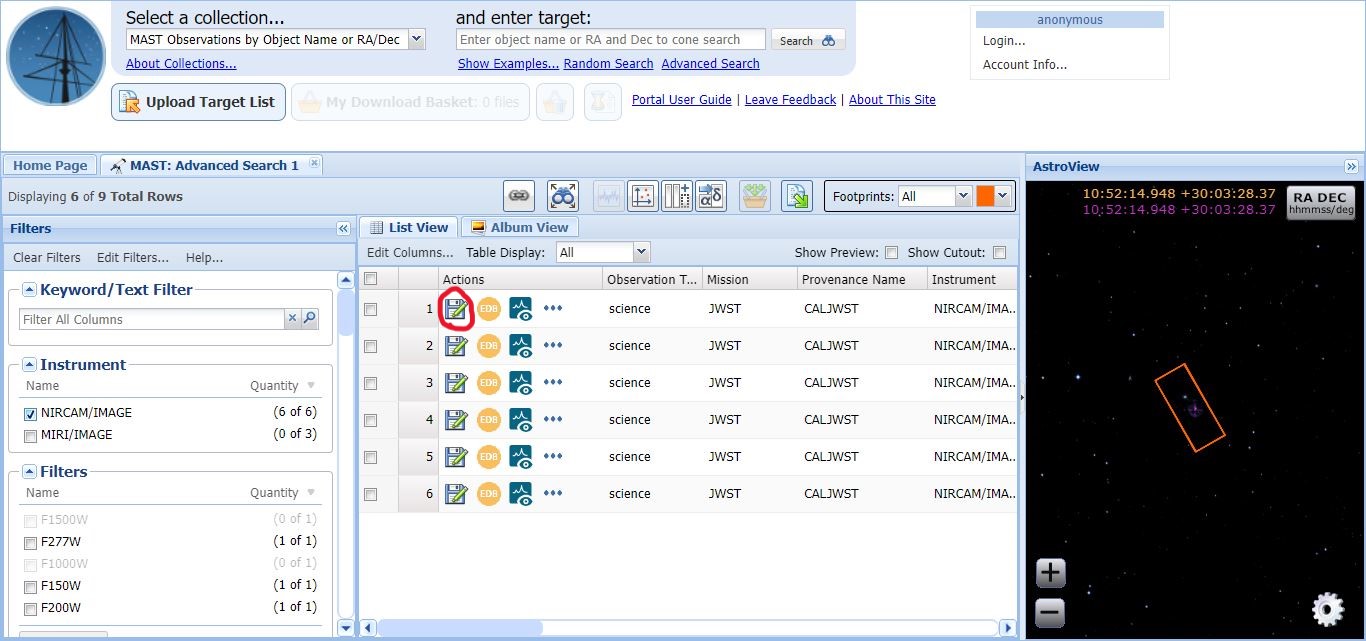
Click the floppy disk icon:
Your files are now ready to be downloaded. Now click the floppy disk icon beside each of the rows and this will start the download process. Note that the files are huge. Depending on your selection, it can be up to 1 or 2 GB. The downloading will take some time, depending on your internet speed.
Unzip and enjoy:
The data will be downloaded as zip folders. You will need to unzip the folders to access the image files. Create a new folder and save all the images there.
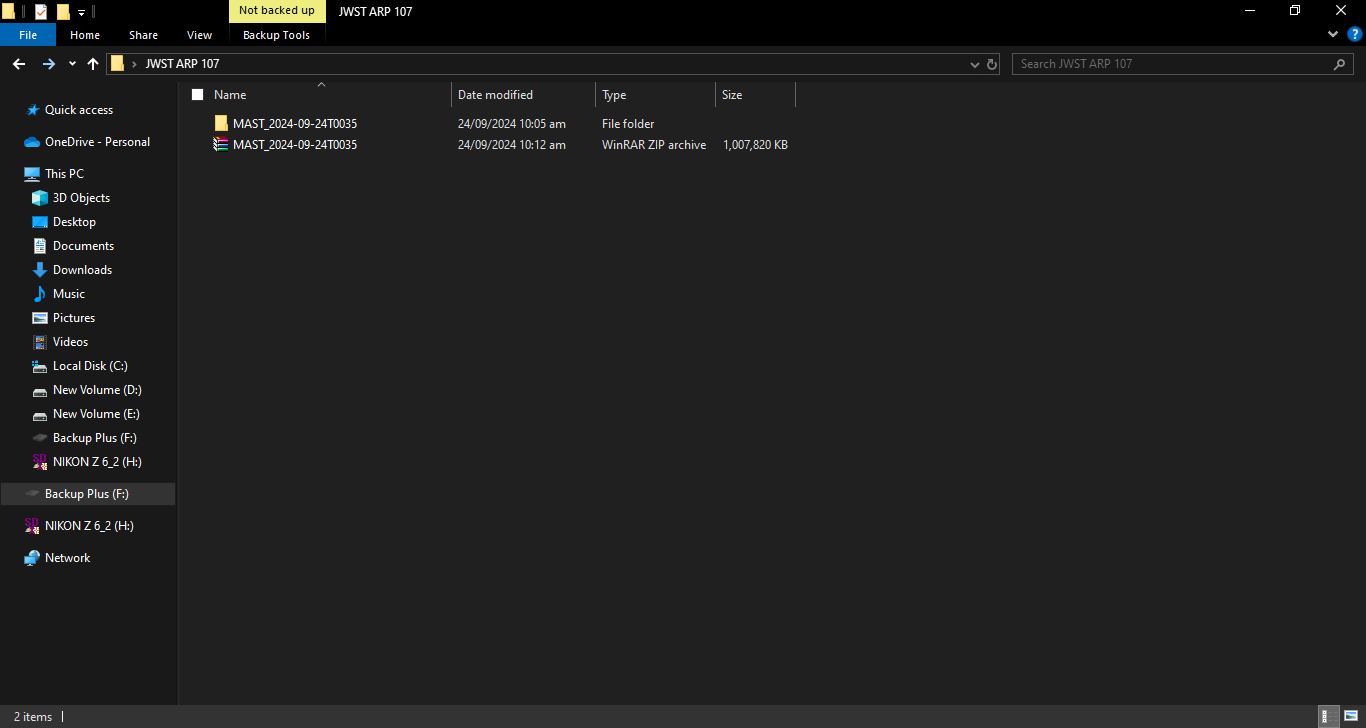
The working file will be saved in the following path: [MAST_2024-09-24T0035] > [JWST] > [jw06556-o001_t001_nircam_clear-f090w] > [jw06556-o001_t001_nircam_clear-f090w_i2d.fits]. Of course, the file names will vary depending on what object and filter you have downloaded.
Note that the JWST Raw files will be downloaded as FITS (Flexible Image Transport System). If you are using dedicated astrophotography software like Pixinsight or Siril, these will work. However, if you would like to use software like Photoshop, you will be required to convert these to TIFF (Tagged Image File Format). You can use an online converter or software like FITS Liberator. A complete guide to the usage of FITS Liberator is available here.
Now you can go ahead and enjoy creating a version of JWST image of your own.
Clear skies!

Soumyadeep Mukherjee
Soumyadeep Mukherjee is an award-winning astrophotographer from India. He has a doctorate degree in Linguistics. His work extends to the sub-genres of nightscape, deep sky, solar, lunar and optical phenomenon photography. He is also a photography educator and has conducted numerous workshops. His works have appeared in over 40 books & magazines including Astronomy, BBC Sky at Night, Sky & Telescope among others, and in various websites including National Geographic, NASA, Forbes. He was the first Indian to win “Astronomy Photographer of the Year” award in a major category.


Join the Discussion
DIYP Comment Policy
Be nice, be on-topic, no personal information or flames.
2 responses to “This is how YOU can download JWST RAW images: A step-by-step guide”
Nice article and seems like something really interesting to do………..by the files make no sense to a beginning astrophotographer……..cal.fits, stream.fits, uncal.fits, ramp.fits and so on……….none of which will open in ASI Studio Fits Viewer (says 8-lbit not supported), won’t stack in ASI Studio DeepSkyStacker (says Light Frames have errors), and even Siril finds no data to edit.
Got to be a better way,
Bill
Hi Bill.
The file names you’ve mentioned are first and second stage data from JWST. Many folders will have that. Maybe the folder you’ve downloaded does not have the third stage data (and that is common). What you should be looking at are i2d.fits files.
The original data is 32 bits. And these are stacked files, so your stacking software won’t be able to do anything with it.
To check if everything is working, you may download the exact folder mentioned in the article. Software like Siril or Pixinsight will open up 6 files at once (from the final jw06556-o001_t001_nircam_clear-f090w_i2d.fits file). And the one you will be using is the i2d_SCI file.
You may check this page for a better understanding of the different JWST files: https://jwst-docs.stsci.edu/jwst-science-calibration-pipeline/stages-of-jwst-data-processing#gsc.tab=0
Clear skies!