


This is how to use Photoshop to add a moon to a photo
Mar 7, 2020
Ole Henrik Skjelstad
Ole Henrik Skjelstad is a Norwegian math teacher and landscape photographer. He fell in love with photography in 2013 when he got a camera as a birthday present.
Share:

Sometimes you want to add a moon to a photo. Maybe it was missing in the frame to begin with. Maybe you made a mistake while shooting, and maybe you just want a nice photo with a moon in it. Today I’ll teach you how to add a moon to an image with photoshop.
The scene
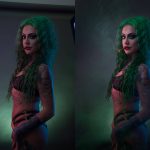
The image we will work with is from Jotunheimen, Norway. It was shot just after midnight in July 2019. This is how the image looks like after some preliminary adjustments in Lightroom:

Several Photoshop layers later the photo looks like this:

Adding the moon
You may ask: “How did you add that moon, and why did you create it?”
I’ll answer the first question first:
1. Add a new blank layer in Photoshop and set its blending mode to normal.
2. Pick the elliptical marquee tool and press Shift + Alt to draw a perfect circle with a fixed center.

3. You need to soften the edges of the selection so hit “q” for Quick Mask and go to Filters (on the top menu), then Blur and choose Gaussian Blur. The number depends on your image size and moon size, for my worflow, a number around 5 pixels works well.

After hitting ok in the Gaussian Blur dialog box hit “q” again to leave the Quick Mask.
4. Now pick a color using the color picker. Use the selected color to fill the circle. I picked one of the brightest yellows in the sky. Press down Alt + Delete to fill the selection with the color of your choice. Alt + Delete works to fill a selection with a color which is your foreground color. Use Ctrl + Delete for a background color.
5. The next step is to hit ‘d’ to deselect the active selection before you draw a new circle like the one in the image below.

6. Press “e” for the Eraser tool and with a big soft brush, remove the color in the new circle selection. The half-moon makes sense now. The sun is on the right, and the bright side on the moon matches that direction.

7. The moon in our example is way too big. Hit T for Free Transform and drag one of the corners with the ALT key pressed down to reduce its size. (The alt key preserves the ratio of the changed object)
It is of course possible, if desired, to add a little glow around the moon. In that case select a new blank layer set to for instance Soft Light and give the moon a dash with a soft brush using a brighter version of the moon color.

But why did I add the moon in the first place?
So why did I add the moon? There there are a few reasons. Firstly, there was a moon that night. Sadly, it was outside of the frame and I forgot to shoot an extra shot for that part of the scene. Also, the moon adds balance to the scene, it adds visual interest and it is an important atmospheric element.
I would love to hear your thoughts about this technique. Actually, I would also love to know if you consider adding a moon to a photo a legit action.

Ole Henrik Skjelstad
Ole Henrik Skjelstad is a Norwegian math teacher and landscape photographer. He fell in love with photography in 2013 when he got a camera as a birthday present.


Join the Discussion
DIYP Comment Policy
Be nice, be on-topic, no personal information or flames.
14 responses to “This is how to use Photoshop to add a moon to a photo”
No more than three moons or it looks tacky.
Legitimate for art, yes. For photography. No.
Definitively no. I’ve seen a photo with a fake full moon on a sun-set landscape. It’s just illogical.
No
My april 1st joke https://flic.kr/p/2iiaWQC
Adding moon is composite and has nothing to do with photography
I’m generally opposed to adding a real moon to a scene, I’m completely opposed to adding this kind of fake moon to the scene.
Adding a moon in general: As an astronomer, I can tell you that very few people do it right, and often it’s really obvious. Given the lighting/time of the scene, and a lunar phase, I can generally tell you where the moon is supposed to be and how it should be rotated. But most people do exactly what you did, put the points of a crescent moon completely vertically when that’s not how it should look. Or, put it in the wrong spot in general, like a full moon in that photo would be completely wrong (the full moon rises opposite sunset and sets opposite sunrise; the points of a crescent moon are radially away from the sun direction).
As a photographer, who has tried hard to get the correct exposures to actually capture the moon in an HDR and get some detail in there in the final product, the difference between just PS’ing in a moon versus what it really looks like is – forgive the expression – night and day. It often looks very amateurish just plopped in there without any glow due to atmospheric scattering, and people often have it too contrasty.
Also, people often composite it wrong, putting things like stars in the non-sunlit part, or putting various features behind the moon like clouds (the moon is well outside Earth’s atmosphere and so anything in Earth’s atmosphere will be in front of it). Or, people make other mistakes like make the non-sunlit part darker than the surrounding sky (it should be the same, or even slightly lighter due to Earthshine).
Regarding putting in a fake moon like the above: To me, it just looks tacky. You’ve a bright white (slightly yellow) crescent that has no detail and sharp edges and is facing the wrong way. To, to me, it looks tacky.
You give three reasons for doing this. The first one, “there was a moon that night,” is like me saying “there were condors at the Grand Canyon so that shot I took where I photoshopped them in is totally legit to do.” If it wasn’t in the photo, it wasn’t in the photo, don’t try to force it, do a panorama or shoot earlier or later when it’s where you want it to be. The second one, “the moon adds balance to the scene,” I also disagree with. Negative space is not a bad thing, not every part of your photo has to be busy. The third, “it adds visual interest,” I disagree with because to me it is distracting. The mountain and lake are the focus, the bright white (slightly yellow) thing you added in the upper-left corner is a distraction. And fourth, “it is an important atmospheric element,” I very much disagree with because it’s not part of the atmosphere, the photo works well without it, and just because people might associate some object with something else does not necessarily mean its omission hurts the final product.
How the moon looked that evening: https://500px.com/photo/1009892213/Jotun-II-by-Ole-Henrik-Skjelstad?ctx_page=1&from=user&user_id=4526460 This is shot around 20 mins earlier that evening. The moon I inserted is facing the right direction, and has just a little detail as this moon which is captured by the camera.
Moons are never full unless the sky is totally black. The sun has to be completely on the other side of the earth for a full moon to occur. I also see a sunset on the right and the light of a quarter moon in the left…. as if they don’t know that the moon only gets its light from the sun.
Laziness is a Disease…and this method has NOTHING TO DO with BEING A PHOTOGRAPHER
I’m sick of fake composites. Sorry y’all be true to form and scene.
IMO by adding a moon to a photo is wrong. The moon looks different depending on the lattitude and the date stamp on the photo would make it an altered photo and therefore ineligible for an art contest. Most of what I’ve seen is that the photos must be filmed in the RAW format rather than a JPEG.
As bad as traveling to a great landscape to photograph. But adding an interesting sky because it was overcast when you were there.
It took me a while, but I made a library of Moon pictures for each phase, so I can insert them in photos, but only where the moon actually was but was blown out.