


The Complete Lightroom and MIDI tutorial – My MIDI2LR Setup (final installment)
Feb 1, 2019
Carsten Schlipf

We love it when our readers get in touch with us to share their stories. This article was contributed to DIYP by a member of our community. If you would like to contribute an article, please contact us here.
Share:

In the final part of this series, I am giving you my configuration for the Behringer X-Touch Mini that I’ve shown you in the previous part. Of course, everyone has different workflows and the biggest advantage of generic MIDI controllers is that you can personalize all functions. So have a look at my configuration, play around with it and then change it to your needs.
I believe that when creating a good configuration it is important to focus on your top most important functions. Those that you use most of the time. For everything else you still have a keyboard and a mouse.
But let’s get started…
Installing Midi2Lr
Installing MIDI2LR is pretty simple. It is available for MacOS and Windows. Just download MIDI2LR from the list of latest releases. Do not select the debug installers (containing the word ‘debug’ in the file name). Run the installer and you’re done. I am using Adobe Lightroom Classic CC and the latest version works great. For earlier versions like Lightroom 6 you might have to download an earlier version.
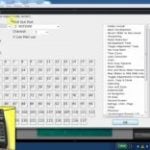
On the next start of Lightroom, you will see the fresh MIDI2LR window with no mapped commands.

When you have connected your MIDI controller already, pressing a button, moving a fader or turning a knob will start listing the related MIDI command (cc for knobs and faders, note for a button as explained in the previous part) and you can start mapping this to a Lightroom function. But we will add my provided configuration now.
Configuration
- Download my configuration package for the Behringer X-Touch Mini for MIDI2LR.
- Extract the downloaded ZIP file behringer-midi2lr-config.zip to a location, where it can stay permanently.
- If not done yet start Lightroom. In the MIDI2LR main window click on Settings. There change the profile folder and select the subfolder midi2lr\profiles from the location to where you have extracted the ZIP file in the previous step.

Next, we have to load additional MIDI2LR presets:
- From the Lightroom menu bar select File > Plug-in Extras > MIDI2LR > Load presets.
- From the location, where you have extracted the ZIP file, select the file midi2lr\presets.txt.
You’re done. If everything has gone right, you should be able to
- press the first button of the second button row to open the library module.
- press the second button of the second button row to open the development module with the basic module settings.
- turn the first knob to adjust the exposure of the current picture.
Next, I recommend to print out the overlay. You can cut out it already and put it on the controller or just print it out and place it next to the controller while getting used to all the functions. If you want to explore in detail what you can do right now, just skip the next chapter and scroll down to ‘Function Mappings’ below.
Overlay
In the overlay subfolder of the downloaded ZIP file, you will find two overlay versions: Black and White


Just use the one that you like more. Each overlay is available in 4 different formats:
- AI: If you have Adobe Illustrator I recommend to use this file. The print output should already ensure that it is printed in the correct size.
- PNG: If you do not have Adobe Illustrator I recommend to print the PNG file version. When printing make sure that the width of the output image is set to 25.3 centimeters. Then the overlay should fit perfectly on the Behringer X Touch Mini.
- SVG: Alternatively you can also use the SVG file. The main reason why I have provided this is to enable you to edit the overlay if you want to customize some assignments and you do not have Adobe Illustrator. You can edit this with the free editor Inkscape for example. Similarly, as for the PNG make sure that the print size is set to a width of 25.3 centimeters.
- PDF: If all fails you can try to print it as PDF. When printing, make sure to choose ‘Actual Size’ or a similar option in the print dialog if available.

You can print this on a stronger paper. I printed it on standard paper and then I have used a laminating machine using 100 microns laminating pouches to cover it in plastic to protect the overlay and make it stronger.
The dials are also used a lot for color adjustments. I recommend marking these with adhesive marker dots in the color of the adjustment that is controlled by that knob (got this idea from Dan Marker-Moore’s video). For example, I have bought these markers from Amazon with a diameter of 5mm. While you need just one marker for each knob and it seems to look like a lot of waste at first glance, for me it turned out that these stickers are very handy for many other use cases as well (e.g. marking Eneloop batteries that I have bought at the same point in time with the same color).

The most tedious task is to cut out the rectangular holes for the buttons. Have fun! ;-)

Apply strips of double-sided adhesive tape between the buttons.

Apply strips of double-sided adhesive tape between the buttons.

You’re done!
Function Mappings
Finally here is an overview of all Lightroom function mappings that are applied with my configuration. The overlay should help you to memorize all these functions. However, in some situations there are additional advanced functions that are not shown on the overlay.
Some basic principles that I’ve tried to apply wherever possible:
- Functions are assigned in the similar order as they appear in the Lightroom UI.
- Where applicable bank A adjust luminosity, bank B adjust colors and tones.
The six left buttons of the second row are common for all profiles. These allow you to switch between the basic profiles. First button switches to the library and the next 4 buttons activate different development profiles plus another one for activating the Tone Curves (everything written in UPPERCASE activates a profile).

In the pictures below you can see some filled out buttons. These are the buttons that you have to press in order to activate these functions or in more detail: load the respective MIDI2LR profile. In case there are multiple filled colors you need to press these in the order from bottom to top: first the common profile selection on the second row, then the sub-profile on the first row.
The fill color represents the text color on the overlay. For example, all library functions are printed in red text.
Library Profile
The library profile offers typical functions for culling like assigning ratings or color labels by pressing the knobs with the respective color and assigning ratings.

Development Profiles
Most of the development profiles make use of the layers as you can see below. Functions in black are common for both layers. Functions in green are active when the layer A is selected. Functions in orange are active when the layer B is active.


I am pretty sure that at the beginning you will need some time to get accustomed to all the functions. In general, I have tried to make the assignments as intuitive as possible by aligning the assignments with the order of the functions in Lightroom.
Again: in the end, these assignments are optimized to my typical workflows. You might prefer other functions. Then just change the mappings to your liking. My configuration shall serve just as starting point. Always keep in mind that there is no need to squeeze all available Lightroom functions on a MIDI controller. After all the keyboard and the mouse is still there and allows you to use the lesser used functions or those like tone curves that are simply easier to use with the mouse.
USB cable
One last thing. The USB cable that ships with X Touch-Mini has a straight connector. I recommend to replace this with an angled one. This will save a lot of space on your desktop.

Final Words
All this wouldn’t be possible without the hard work of the MIDI2LR developer. Once you get used to using a MIDI controller with Lightroom I am very confident that you will not want to miss it anymore. Please consider how much time and cost it saves you. And then consider to donate a share of the saved costs to the MIDI2LR developer through his website. The developer Rory Jaffe is doing a great job and is very responsive on the MIDI2LR forum whenever you experience a problem.
Of course in case you experience a problem with my configuration, please leave a comment and I will give my best to help you. Also I am eager to learn more about what you have changed from my layout and what works better for you.
All articles in this series:
- Introduction (part 1/3): Why you should prefer physical controls and what are the alternatives.
- MIDI Controllers (part 2/3): Criteria for choosing a suitable MIDI Controller and some example controllers.
- My MIDI2LR Setup (part 3/3): This article: My configuration for the Behringer X Touch Mini including overlays.
About the Author
Carsten Schlipf is a photographer and a hacksmith based in Germany. You can read more of his thoughts on his web site. This article was also published here and shared with permission.
We love it when our readers get in touch with us to share their stories. This article was contributed to DIYP by a member of our community. If you would like to contribute an article, please contact us here.
Related Posts
 The Complete Lightroom and MIDI tutorial – MIDI Controllers (second installment)
 The Complete Lightroom and MIDI tutorial – Introduction (first installment)
 The Complete Black and White Conversion Lightroom Tutorial
 Paddy For Lightroom Adjusts Images Via Hotkeys, Midi Controllers and External Keyboards
Join the Discussion
DIYP Comment Policy
Be nice, be on-topic, no personal information or flames.
94 responses to “The Complete Lightroom and MIDI tutorial – My MIDI2LR Setup (final installment)”
I love my midi controller! I went for the bigger option of the Behringer BCF2000 and love the motorised faders, they move to whatever the setting is for the image as I scroll through so the sliders show the actual value and the adjustments are absolute rather than relevant. Has made editing weddings so much easier!
Should probably do my own blog post on it sometime!
Andy | http://www.andydanephotography.co.uk
Looking forward to see your setup. The BCF2000 is a great controller for Lightroom. Too bad that it is no longer available. Today I think the Behringer X Touch Compact is a good successor.
And this plugin works with any midi controller? I might finally have a permanent use for an Arduino pro micro I’ve had laying around!
It should work with any MIDI controller that supports USB. However as explained in my previous part not all controllers work equally well.
Nicely done. I once thought of those controllers but the very high price of the once out there stopped me. Besides, with a keyboard, a mouse and a 11″ tablet (not to mention the occasional 24lbs Maine Coon) things get very messy on the desk.
However, with a reasonable price of around $90 CDN, it is something to think about. Thank you for all the hard work and the free goodies you shared with us.
Hi, combination of library+library section doesn’t work for me. :(
Please advise.
Sorry, I don’t understand what you mean.
Need a little info with this In LR at the MIDI2LR options screen you have something at every spot, can you give me a short explanation of what happens here. I know that the profiles are from the way you set up MIDI2LR but I never had anything else there. I have searched the web and found nothing.
Sorry for the late answer. I don’t monitor this page too much.If anyone has questions, please comment on my page here: https://www.aperturized.com/essays/2019/01/lightroom-with-midi-controllers-my-midi2lr-setup/
As for your question – I do not get what you mean. Can you elaborate a bit more?
I do not know what happens. I have already re-done all the steps and still the same error appears. https://uploads.disquscdn.com/images/4290de6daf52b7a4d3abfd65c7a62fbfab596ace809381e966f70eb29f5521d6.png
Just use the presets file, inside the profiles folder.
Any chance of getting the overlay in a PSD format for us that don’t have AI.
You should be able to import the SVG file into PSD.
Love these, and thank you. Have you considered making an overlay that covers the pots, too?
The overlay covers these as well. The top line of my overlay relates to these.
Hello! I am trying to get this up and running on my X-Touch Mini and I seem to be having an issue. After loading the default folder settings, and importing the presets.txt file, MIDI2LR seems to only see the “basic” profile (this is my guess, read on for details). When I click the first button on the bottom row, I get “Shadow Saturation 0/100”. Please advise as I would really love to speed up my workflow with these awesome resources that you have made available! Thanks.
Grayson Morgan ||| http://www.graysonmorgan.com
Looks like you X-Touch Mini has been configured to different notes. See my troubleshooting section at https://www.aperturized.com/essays/2019/01/lightroom-with-midi-controllers-my-midi2lr-setup/ on how to reset this.
Hey Carsten, Thank you very much for providing this elaborate setup and even including the labels! I am using it as inspiration whilst setting it up slightly different. Because my workflow is a little different for instance I do a lot of panoramas and hdr panoramas I set up some stuff to deal with the culling on those and I don’t use star ratings as I leave this to the client which syncs directly into Lightroom from Evlaa.
Yes, I noticed this as well. When you hit the B/W button it does however change the color panel to grayscale. But it does not switch the image to B/W. This worked in the past and seems to have been introduced by a recent update.
These are great! Thanks for building out a different UI flow than Dan’s. Although I loved his step-through tutorials, I find your layout much easier to grasp. After checking your diagrams a few times, I was able to navigate my X Touch Mini without any labels needed. Great for increasing the feel of editing by touch, and super helpful for the community. A million thanks!
Thank you very much
I use LR5 and LR6 will they work
LR6 – yes.
LR5 – maybe. You will have to use an older version of MIDI2LR, but I haven’t tested my setup with that.
LR5 no. It doesn’t support the commands that MIDI2LR uses to communicate with LR.
Thank you very much for sharing and the great tip with the series.
One minor drawback: Previosuly the B/W button was able to toggle between Color and BW. SetTreatmentBW is just one way. But at least it works.
I have also used your action series to set the BW treatment, when you open the Gray color profile and back to color when you use the Hue/Saturation/Luminance color profiles. Works great. Thank you so much for the tip!
I am updating my configuration and it can be downloaded from my site in a few miuntes: https://www.aperturized.com/essays/2019/01/lightroom-with-midi-controllers-my-midi2lr-setup/
Strange, I see your reply in my mail but not here. I am very glad I was able to help and thanks for updating your scripts. I am sure it will enlighten many more peoples workflow! You really did a great job with your documentation and making it available for free! Kudos!
I guess my response has been marked as SPAM. So there is a new version available from my website, which uses the suggestions from Alex to work around this issue. Thank you very much for the tips, Alex!
My pleasure! Thank you for your effort and work!
Hi, thanks so much for the layout profiles!
Quick question. Is there a way to change the increments that the adjustments in let’s say something like exposure go up and down?
when I use the knob to adjust temp or exposure, I feel like the values go up too high as I turn the knob. Any thoughts?
Thanks in advance!
Personally I don’t have an issue with the increments for exposure, but yes, temperature is hard to control using MIDI2LR. What can help is experimenting with the Limits option: https://github.com/rsjaffe/MIDI2LR/wiki/Plugin-Options-Dialog#Limits
Reduce the range of the temps and the increments wont be so large. You likely don’t need to use the far ends, most necessary temp adjustments will be in a small range. MIDI2LR by default limits this range, but the profile provided by the author expands it back to full.
Go to file, plugin extras, midi2lr general options, other tab and set the limits on top.
Hi Carsten – many thanks for your sensational package, perfect. I became aware of MIDI2LR only 2 days ago and with your package I am already editing with the XTouch Mini (did not know about these). Your directions and templates were great and although I was a little confused by the number of options in your profile, I am now getting the hang of using the XTouch with my left hand and my mouse with my right hand, very efficient. I also made up a very basic triangular shaped rest (using core flute) that allows me to have the XTouch tilted up on an angle making it very easy to see your template etc.
Also checked out your Website, really nice and some great images.
Also many thanks to the MIDI2LR developer Rory Jaffe for a brilliant job, you guys are clever and generous.
Many thanks – Brian
Thank you very much!
Hi Carsten. My XTouch Mini is on the way. One question. Does the MIDI2LR recognize double press on the encoders? Can you program a double press?
Not that I know, but I like the idea. Alternatively maybe a long press. You should post the idea on the Midi2LR Google Group.
Maybe dumb question..is there a way to flip left and right between photos on here? or do you guys just go back to the keyboard for that?
There are no dumb questions…
Yes – I use the keyboard for this as the cursor keys are very easy to use.
But Midi2Lr can do this and actually Next and Previous photo are mapped in the library profile. Look at the second last column of the buttons in the library profile:
https://uploads.disquscdn.com/images/7d887b215002328a04a392c0c1b5175a33ff517eb59c2332cc156a039c8e3407.png
If you want this in the other development profiles as well, you will have to free up some buttons and map these like in the library profile.
Hello and a big thanks to this super work :)
If you want i have translate the overlays into french (black and white). I can send you the ai / svg / png / pdf files !
Pierre (from France)
Bonjour Pierre. Merci beaucoup!
Unfortunately this is pretty much where my capabilities in French end. So I will not be able to maintain and support these in case of changes. But in case you have a place, where you can upload your translated overlays I will happily link these on my blog.
ok. I have not a place where i can upload this :/ . If you want you can just put a link of my contact ?
Bye
Yes, sure. I could do that. Please use the contact link on my website to send me the details: https://www.aperturized.com/pages/contact-me/
Note however that if I put your email address there it could result in lots of SPAM :-(
Bonjour,
Est-ce que vous pourriez partager le AI SVP afin de faire un heureux ? ;-)
Bonne journée !
Hi there,
I’ve been reading your article for the last 10 days or so and couldn’t wait to receive my X touch mini. I just received it today. Unfortunatly I can’t make it work.. I donwload the Midi2LR plug in, set up your profil but the X touch led’s didn’t stay enlightened for more thant a minute. I fugured that it was because I bought a bad usb cable so I changed it. I’m not sure what’s wrong, shoud the button stay lighted when pressed or not ? I’m beggining to think that my X touch has a problem. Nothing happens whenever I’m in Lightroom and pushed a button though I charged you set up profil inLightroom and Lightoom sees Midi2LR in the plugin menu.
I’m running LR 6.14, do you have any idea what could be the issue ?
Thank you
Hi Truman. It’s perfectly normal that the buttons do not stay lighted when you press them. They only light up shortly while you press them.
The buttons only stay lighted when set to ‘toggle’ mode. But this mode does not work with Midi2lr.
As you are running LR 6.14 you might have to use an older version of Midi2lr. Have you installed the most recent version, which is for Lightroom Classic CC?
Hi there, thank you for your response. Since yesterday I did understood why the buttons don’t (have to) stay lighted but what worries me is that the X Touch Mini doesn’t stay “on” for more thant 30 seconds to one minute. For whatever reason it shut itself off, and when it does I mean that if I press a button the button doesn’t lit, I have to take the Usb cable out and put it again in for the buttons to response to pressure…. and that only last for 30 seconds then the x touch is off again .
Glad that you found the issue. Nevertheless I find it strange that your X Touch Mini shuts down. I never experienced that. In my case at least the layer buttons stay lit all the time, as long as the computer is on. Even if I do not start Lightroom.
Hi Carsten!
Thanks for sharing your knowledge and all the information!
I am trying to get my X Touch Mini to work with MIDI2Lr. But unfortunately, the buttons seem to be in toggle mode (the buttons stay lighted when I push them. So I have to push them again to ‘re-activate’ them). Do you know ho to turn this mode off and change it to the right one? I even installed the Behringer Editor software, changed the behavior of the buttons as well as the encoders from ‘toggle’ to ‘momentary’ – but without any effect (I don’t know if or how to safe the setting onto the X Touch Mini).
Another strange thing: There are two buttons that get lighted simultaniously when I push one of them. Or might it be that my X Touch Mini is broken (I bought it used)?
I tried it on two computers, one Mac and one Windows. But I am having the same issued on both of them.
I would appreciate any help! Thank you very much :-)
You are on the right track. My assumption is that you forgot to dump the changes.
After you opened the X-Touch Editor on the Global tab you first need to select FROM HARDWARE – Get A to get your current layer A settings from the controller. Then you change the setiings on the other tabs. Then you must not forget to click on TO HARDWARE – Dump A to write these changes back to the controller. I guess you have missed this step.
After you have done this for Layer A, you need to repeat these steps for Layer B.
Hope this helps.
Hey Carsten!
Thank you for your answer. It was also the right one :-) I loaded the default settings in the Behringer Editor and dumped them to both banks. After that, the X Touch worked as it should. So thank you very much for your help!
Btw, I also checked on the problem with the two buttons getting activated by pushing one of them: In the BUTTONS settings there is also an option to choose the note that is assigned to a button. In my case, those two buttons had the same note assigned. That’s why they got activated when I pushed one of them. Setting the Behringer to default settings, also solved this problem :-)
Now I have to dig deep into your templates and your workflow ;-)
Thank you so much for this tutorial! Even though I ended up with an entirely different setup which fits my workflow, almost none of the buttons/dials are the same, it wouldn’t have taken me much more time without your useful info and (example) profiles.
It is already speeding up my workflow: quickly applying sharpness/noise to low/mid/high ISO images, changing settings of gradient/radial filters, zooming in and out in steps, changing between the panels that involve color (no more scrolling down to the Calibration Panel to give that Shadow Tint a tweak!), finally the Manual Lens Distortion back with the other Transform controls.
This is going to save me many many hours! Thanks again.
What would have been helpful is a small tutorial on how to create your own profiles from scratch. I figured it out eventually, but some things aren’t that obvious at first, since it involves the steps in the General Options menu where you assign keyboard shortcuts, chain-of-events, profiles etc.
I wasn’t able to find a step-by-step tutorial that explained that clearly. So maybe, if you ever feel like it, (or someone else, I might do it myself, but I don’t really have a blog-space set up), that could be a Part 4 of your series :).
There is a documentation in the midi2lr wiki on how to create your own profiles.
What i do on mine is attach a small thin strip of velcro above certain knobs (in this case, the hook portion of the strip above the Shadows and Blacks). I also have the fuzzy portion of the velco wrapped around the knob itself for Highlights.
This way, i know exactly which function is what by touch alone, as well as the surrounding knobs, without ever taking my eyes off the screen. This drastically speeds up editing, as i can control exposure, contrast, highlights, shadows, darkness, and temp, extremely quickly.
Awesome idea. I was always looking for a controller with a 4×2 layout of the knobs as with the 8×1 layout of the x-touch mini I always needed to look at the knob, when reaching for one of the inner ones. Will have to try our idea.
I can’t get the xml files to load in the MIDI2LR options profiles
I can not get the xml files to load in the MIDI2lr options profile when I copy and go to paste , paste is grayed out
Sorry, I don’t understand, which copy and paste options you are talking about.
Hi again!
Your setup ist great, but I’m having some troubles using it on my Laptop when I try to increase/decrease the brush size.
I have a german keyboard and that seems to cause problems which could be resolved using the “TranslatedStrings” file. Did you have to adjust anything to get it working? Or could you point me towards a tutorial for this issue? Would really appreciate your help. Thanks!
It’s a bit unfortunate to have two forums. One here and one on my own blog. So I would like to encourage everone to ask questions on my own blog.
There you will find something that could be related to your issue. A French guy mentioned issues with his keyboard layout as well. The problem is that some actions are emulated through keyboard shortcuts, where these differ in Lightroom depending on the keyboard layout. You will have to adapt the shortcuts to the ones you have to use on your keyboard.
Hello and thank you for the excellent work!
Is it possible to keep the buttons illuminated when choosing a setting? for example when I choose colors + saturation.
thanks
Hi Mario,
see this reply I gave on my blog: https://www.aperturized.com/essays/2019/01/lightroom-with-midi-controllers-my-midi2lr-setup/#comment-4423344579
Hello Carsten, i went to your blog but couldnt find this?
Unfortunately I had to change the CMS and with this all comments got lost.
The answer is no. Midi2Lr can only handle push buttons, not switches. So although ypu can change the button mode to a switch and keep the button lit, it does not work with Midi2Lr.
Wow, this is awesome. I’m really excited to give this a shot. It really feels like this will take some of the tedium out of the editing process for me.
Great work. If you are looking for a solution that is a bit easier to setup, checkout LrControl, my Lightroom plug-in for connecting to MIDI. Using the X-Touch mini is just plug-and-play and it is easy to configure as well. http://peltmade.com/lrcontrol/
thankyou so much for the tutorial but now in 2020 the configuration file doesnt exist and cannot be downloaded.Please fix these, sorry to bother you. Your overlay profile is amazing i wanna download it
Please go to my blog and download it from there.
Hello, is there a way to copy and paste all settings from one photo to the other ?
Thanks,
Eudes
Hello, is there a way to copy and paste all settings from one photo to the other ?
Thanks !
Eudes
Hello,
So great to have this tool.. Would it be possible to do previous and next through photos in development mode ? As I’m not able to find it. Would be perfect to do it with a knob.
Thanks.
Eudes
Yes, that is possible. Just assign the Page Up and Page Down keys to a function.
Thank you for this excellent work. It is really easy to set it up. REALLY HELPFUL!!!
i cant find the load presets option, am l missing something ?
There is no button. This is a menu entry.
This is great. Lots of functions worked as they should. However i am not able to adjust Sauration and luminance in color mode. Only HUE. Is there a way to change between these that I haven’t found? I get a fault message when pressing the four upper left buttons. Also, Are the knobs supposed to light up permanently when i change between functions?
Please have a look at the troubleshooting section on my website.
Hey mates,
If you want you can just print it on photo paper (A4 photo works fine). I used the PNG file and made sure the size was actually 24.9 and nos 25.3.
Cya
Hi Carsten, love your work!
Is it possible for you to update to include new sliders introduced in lightroom cc classic 10 or + ?
thanks
Thank you very much. In the meantime I have switched to Capture One and I am no longer using Lightroom.
However it’s pretty easy to change the functions yourself.
damn! good job. thank you
Thank you very much, Carsten, for sharing such a nice information!!
Do you know whether it is possible to use two identical Behringer X-Touch Mini but assigning different functions? If it is possible, do you know how to do it? I have two of them but my Mac cannot distinguish them…
Thanks for your answer!
Haven’t tried this yet, but on YouTube I saw one guy, who did that. But I cannot remember whether he was using Mac or Windows. But you should be able to find it there easily, if you search for “lightroom midi2lr behringer”.
https://youtu.be/oRGO7-dL7Pk
Thanks for the good job. Works like charm. Instead of putting color stickers on the knobs I am using color caps. Too bad that there is no different blue knob so both are identical. https://uploads.disquscdn.com/images/7ae1c4fae63c0ef6170523db458265b32ff972f269374843c211eb4fe4fbab83.jpg
Thank You,… ???
Thanks a lot !
I want to use the xtouch mini.
I have loaded the profile.txt with File – plug in extras – import configuration. When I check the general option in the Plugin extras all your profiles are loaded. But pushing a button or turning a knob does nothing. Looking at the assignment table non of the note are being used. What am I missing?
I can map different profiles on my Native Instruments Maschine Jam without any problem.
https://uploads.disquscdn.com/images/6e1875cd8fb7856714f6d1974a4b9b4b6d17e1af0babc19dbce8662a9a7c6539.png https://uploads.disquscdn.com/images/f20389f1bac059f30c77c8eb9a4784f1fb99c446703cc062986c2e1b9ce29390.png https://uploads.disquscdn.com/images/bc77a1bbf1be17741ba66e722488f7c0d445983061b0222c705e9b1531fc25f9.png
Hi!
Is there any chance to get your config?
Can you reupload your settings? It will be very helpful for me :)
I have zero control over this article. Please go to my original post on my blog at https://aperturized.com/lightroom-and-midi-33-my-midi2lr-setup.html
does anybody have an updated profile for the latest version of Lightroom classic?
Im having some trouble configuring it like the template :/ feels like im gonna throw the towel.
send help pls
Thank you very much for this! :)
Hi, for some reason your download site must be down because I can’t download the config file. Is there any other way to get it?
Hi Charlie,
I had the same problem but was able to find an archived copy in the Internet Archive: https://web.archive.org/web/20240511025935/https://aperturized.com/lightroom-and-midi-33-my-midi2lr-setup.html
Direct download link that worked for me is here: https://web.archive.org/web/20240511025935/https://aperturized.com/pub/midi2lr/behringer-midi2lr-config.zip
Good luck!
Thank you very much good man!
Hi, I can’t download the zip file because it blocks the site as not secure. Is there any other way to download it?