


Nail your focus every single time with this DIY lens calibration solution
Mar 27, 2017
John Aldred
John Aldred is a photographer with over 25 years of experience in the portrait and commercial worlds. He is based in Scotland and has been an early adopter – and occasional beta tester – of almost every digital imaging technology in that time. As well as his creative visual work, John uses 3D printing, electronics and programming to create his own photography and filmmaking tools and consults for a number of brands across the industry.
Share:

Whenever I buy a new lens, I have to calibrate it and AF fine tune five different DSLRs. Two are my primary stills shooters, and three are for video. But if I only have the video DSLRs out with me, and want to grab a few quick behind the scenes shots, I need to know their AF is spot on. So, I use the SpyderLENSCAL to calibrate every lens with every body. For me, it’s worth the cost.
If you’ve only got one camera and one or two lenses that you’ll only need to calibrate once, though, it might seem like a bit of a high expense. You buy it, use it once or twice, and then it just sits in a box. Well, there are other options. You can make your own. This video from Crafty Cams has been out for a while, but it’s recently become popular again and it’s well worth a watch.
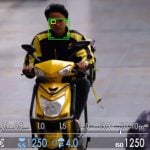
The basic process of building your own is quite simple. You just need a cardboard box you can cut up. Although you could use sheets of Foamcore for a more finished look. Then you print out a PDF file which contains the targeting images that you’ll use to focus your camera. These lets you quickly and easily see if your camera is front or back focusing, and by how much.
With the PDF file cut out into the main target area & measurement scale, the next step is to cut out the cardboard (or foamcore). This helps to ensure that all the surfaces are flat and smooth. The video shows the end of the box being cut at an angle. This provides a “foot” that can be weighed down to hold the end perfectly vertical.

The main face of the focus target is attached to the larger cardboard end piece. The video shows a 3M adhesive spray, which I’ve used myself and works wonderfully. The measure is then attached to a strip of cardboard. These two pieces then come together using a nail as a sort of hinge. To find the right spot for the hinge, you’ll want to look where the centre line of the focus target sits. Then just epoxy the nail to the back of the cardboard.
Once cured, you can push the nail straight into the side of the strip that has the measure scale attached to it.

And once you’ve got it built, here’s how to use it. This method also works for the SpyderLENSCAL or any other focus targets you wish to use.
Whether you buy or make your own focus target, the trick is to have the front of it parallel to your camera’s sensor. This ensures that when you focus on the centre of the target, the scale off to the side is oriented perfectly. If they’re not perfectly parallel, then you could accidentally add back or front focus where it didn’t previously exist.
But that’s all there is to it. Now you’ve no excuse to have out of focus photos with your DSLR.
Here’s that link again to download the PDF.

John Aldred
John Aldred is a photographer with over 25 years of experience in the portrait and commercial worlds. He is based in Scotland and has been an early adopter – and occasional beta tester – of almost every digital imaging technology in that time. As well as his creative visual work, John uses 3D printing, electronics and programming to create his own photography and filmmaking tools and consults for a number of brands across the industry.


Join the Discussion
DIYP Comment Policy
Be nice, be on-topic, no personal information or flames.
2 responses to “Nail your focus every single time with this DIY lens calibration solution”
A few weeks back I had to calibrate my newly bought 30mm 1.4, the guy I bought it from said it was defect and the AF didn’t work and it always misfocuses, so I got it really cheap. I opened it to clean and then calibrated it. AF works perfect and it’s as sharp as it could possibly be. Got an awesome lens for almost no money (y)
The time it takes to make one costs more than buying the actual one ?