















How to double process a Milky Way image
Feb 7, 2020
Ole Henrik Skjelstad
Ole Henrik Skjelstad is a Norwegian math teacher and landscape photographer. He fell in love with photography in 2013 when he got a camera as a birthday present.
Share:
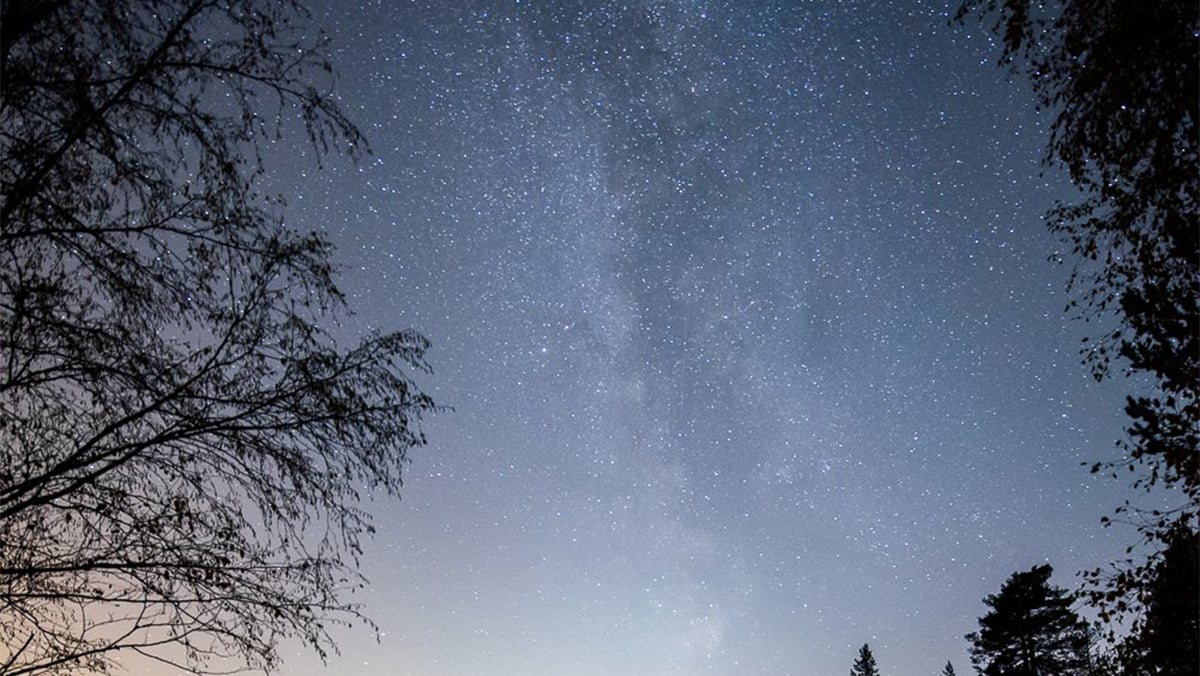
From the middle of August, it is dark enough for night photography here in the southern parts of Norway. The milky way season lasts to approximately December this far north. I try to head out as often as I can when there is no moon and the forecast predicts a clear sky.
It is always a delight to see the milky way in-camera, (here is the gear to help you get started) but bringing it out in post can often be challenging. One of the key challenges is that the night sky requires quite a different approach than the ground.
When it is very dark I prefer to shoot a few extra very long exposures for the ground to make sure I have enough shadow detail to work with.
Frequently, though, based on the in-camera histogram I shoot only one exposure. This means that if the histogram isn’t pushed too far to the left I assume I can bring out sufficient shadow detail in my post-work. If this is the case I will double process the image.
Here’s a quick tutorial on how it’s done.
This is the image we will double process:

And this is the straight out of camera histogram:

The very first thing I do is to right-click on the image to create a Virtual Copy which I will use for my shadow adjustments.
When I start out editing the original file I only have the sky in mind.

Here are the settings I used:

For the sky, I have set sharpening to zero and noise reduction to 20. The white balance is adjusted slightly. I have also used the brush tool and painted across the milky way to make it stand out more in the sky. These are the brush settings:

Adding Clarity to the Milky Way increases contrast but it also adds noise. To counter this I have also added some noise reduction. Quite often I play around with various brush settings to see what works best.
Below is how I edited the ground using the Virtual Copy:

The settings I applied:

When I opened the shadows to my liking it resulted in some magenta color cast in the darkest parts of the image:

With the help of the brush tool, this is relatively easy to rectify. I paint over the affected areas with the opposite color. My brush settings:

When I have finished my editing in Lightroom I highlight both images and right-click. In the pop-up menu, I go to Edit In and click Open As Layers in Photoshop.
The Layer’s Panel in Photoshop where the sky image is the top layer:

We need to blend the two exposures. In this example I am going to use Blend-If for the blending task. I double-click on the top layer. This brings up the Layer Style dialogue box. I am only interested in the Blend-If section. I move the various arrows around until I arrive at a blend I am happy with.
By pressing down ALT while dragging it becomes possible to split the arrows and feather our selection. These settings worked best for me:

Below is how the image looks now:

To my eyes, the foreground is too dark. So I add a white mask to the top layer. With black as my foreground color I use a soft large brush at around 50% opacity to reveal more of the foreground from the bottom layer.
The Layer’s Panel:

This is the image when I have finished the blending job:

The image will provide me with a good starting point for the rest of the processing in Photoshop.
Before/after comparison:
See more from DIYPhotography.net on Google
Add DIYPhotography.net as a trusted source. This makes
our stories more likely to appear in your Google Search results.
 Add as a preferred source on Google

Ole Henrik Skjelstad
Ole Henrik Skjelstad is a Norwegian math teacher and landscape photographer. He fell in love with photography in 2013 when he got a camera as a birthday present.
Related Posts
 A Double Blast in Space: VLT photographs a Double-Detonation Supernova
 Instagram accused of “double standards”, “fat-shaming” after banning parody image but not the original [NSFW]
 Even Better Softbox Part One – The Build Process
 Watch this Nat Geo big cat photographer show his editing process using a little cat
Join the Discussion
DIYP Comment Policy
Be nice, be on-topic, no personal information or flames.