


How I turned a dead Polaroid SX-70 into a working digital camera
Jun 26, 2019
Joshua Gross

We love it when our readers get in touch with us to share their stories. This article was contributed to DIYP by a member of our community. If you would like to contribute an article, please contact us here.
Share:

I wanted to see if it was possible to turn a dead SX-70 camera into a functioning digital camera without significantly modifying its outward appearance. I had no idea if this was reasonably doable but I set out to give it a try.
The finished product:


[Editor’s note: this article was also published here and shared with permission]
First, I disassembled the camera into its various components1. In order to do this, several hidden screws and pins had to be removed, as well as the original electronics for the head (back, left). The skin on the bottom of the camera had to be stripped to access the screws.

Here’s a shot from above showing all of the major component parts that I kept (and a few that I did not).

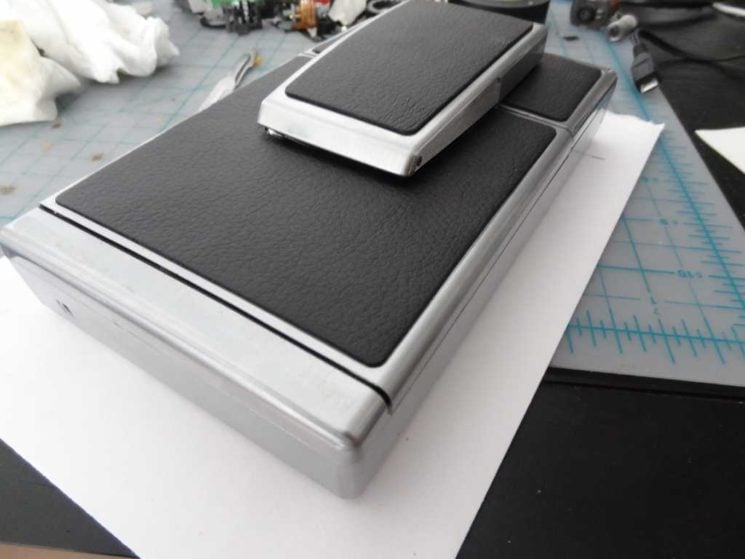
I used a Pi Zero W as the new “brains” for this camera. Pictured here is the Pi alongside the first screen and battery pack I tried. Unfortunately, both were too large to fit inside, so were later scrapped. The touch controller was (of course) unnecessary, as well.

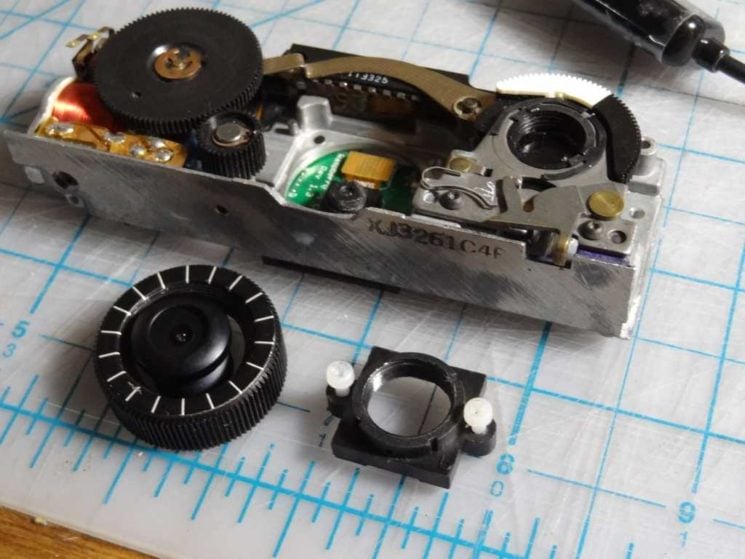
After realizing I had to downsize the battery and screen, I put that aside to focus on the lens assembly. This would prove to be the most complicated part of the entire project, since I had to fit the entire camera assembly—lens and CCD—into this head. You can see the original lens on the left (two parts). I wanted to reuse the focus wheel and exposure wheels, keeping intact their original uses.


The first attempt at fitting the CCD. The size of the board was right about the same size as the original lens base. I needed to make some adjustments to the head to fit the CCD in.

Since the head wasn’t very deep, I had a limited number of options about which lens to use. I wanted to fit it into the original assembly so that the focus wheel would operate. I tried a number of lenses; only fisheye lenses ended up being the right depth. Not ideal but I figured I could unwarp the photo in software.

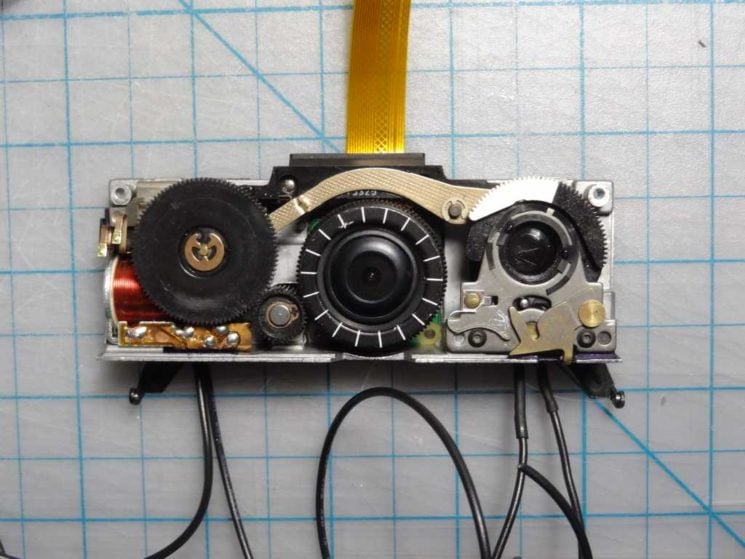
With the lens selected, the next step was to get the entire assembly into the camera head. You can see from these photos that the thickness of the assembly was quite a lot deeper than the original.
To make this work I was going to have to dremel out the metal body and mount the CCD board flush with the back, which gave me an extra bit of space. To get the lens to fit in the original housing, I used the plastic lens cap with the cover cut out; it served as a soft, perfectly sized gasket to hold the lens in place.


The body with the CCD mount area cut out. A dremel grinding bit was enough to round out the area to a perfect fit.

Fitting test. It works! On the left, the two wires are part of a photocell, which I’m going to use to adjust the exposure.

Final lens assembly. The wires on the left are soldered to the shutter button, and the wires on the right go to the photocell. I pushed the lens through the gasket to mount it flush, giving me a little more room, and superglued it all into place. The head assembly is done; now onto the body.
Next, planning the screen and body assembly.
Since the Polaroid SX-70 was an SLR camera, light was refracted from the lens to the Fresnel mirror (below the screen), which collected the light and reflected it back into the small eyepiece. The lens is now digital, so I need to remove the old mirror and put in a screen for a live preview.

This screen is 2.5″ and more compact than the first one I tried (the Pi Zero W is soldered under it to the pins). The image will be reflected into the eyepiece.
You can see in this photo a rough test of the reflected screen. The screen needs to be mounted upside-down so that the final image is reversed due to the mirror assembly in the camera. The image won’t be as distorted once the top is properly mounted.

Removing the Fresnel and film mirror.
The Fresnel mirror was plastic, but the mirror underneath (which reflected the light onto the film) was glass. This was a messy removal but we now have an exposed mesh surface and access to the film storage area below.

In order to fit the full screen assembly, along with everything else (battery, wiring) I’ll need to mount everything within the film storage area. Mounting the screen was the easy part—I cut away the mesh to fit the screen in, which sat nicely flush.


Now that I’ve fit the screen and Pi, I need to start laying out the other components: the battery, battery logic board (with charging port), and microSD card slot.
To do this, I decided to fit it all into an empty film case, which provided a way to plan and set pieces before inserting it into the camera.
Unfortunately, this battery is too big; I need to clear room for the screen to fit flush.

While I waited for a smaller battery to arrive, I planned the power switch connection. I needed the camera to turn on when pulled open and turn off when collapsed.
Fortunately, the SX-70 has a clever way of doing this: a small arm on the top actuates and a conductive pin slides between two contacts when opened, creating a power connection.


I wired up a capacitor to the battery logic board and connected the ‘enable’ and ground pins to the camera’s original power pins.
Adding this capacitor gives the Pi about 3 seconds to finish any writing ops before the voltage drops to zero.


New battery! The new battery provides 3,000 mAh but is larger and, more importantly, only 4mm thick. This allows the rest of the elements to sit nicely on top of the battery.
I’m also starting to figure out placement of the ports (SD, charging, and a spare USB port for debugging) for access when you open up the film compartment.

I stripped the USB hub down to its barest components (and re-soldered a few bad wires), and finished up the battery board.

Finally fitting the components into the body. You can see the port placement; to clean this up I’m going to laser cut a small panel.

The fitting of the head and body are complete! This setup was to test and tune the head components: shutter button and exposure wheel.

Soldering the wires to the GPIO pins. I used small 2-pin JST connectors to make the final connection easier.


I laser cut a front panel (thanks Austin!) and glued it into place—cleaned up the rough edges later. The ports have been rearranged slightly for a better fit.

It’s alive!
Time to get the software working now that everything is wired up and boots. I also laser cut an opaque panel to cover the mesh around the screen, preventing light bleed.

Putting on the top. Now that everything is fit, I started working on the software and wanted to test it with the eyepiece loosely in place.

First software test2. The screen displays a live image, as well as the current exposure time (in ms) and available space on the SD card.

To display and process images, I used Python and OpenCV. Live images are displayed fisheyed since de-fisheying at a reasonable framerate wasn’t possible. However, all captures are de-fisheyed.
This complexity wasn’t strictly necessary but the original Polaroid SX-70 didn’t have a fisheye lens and I wanted to stay true to that.
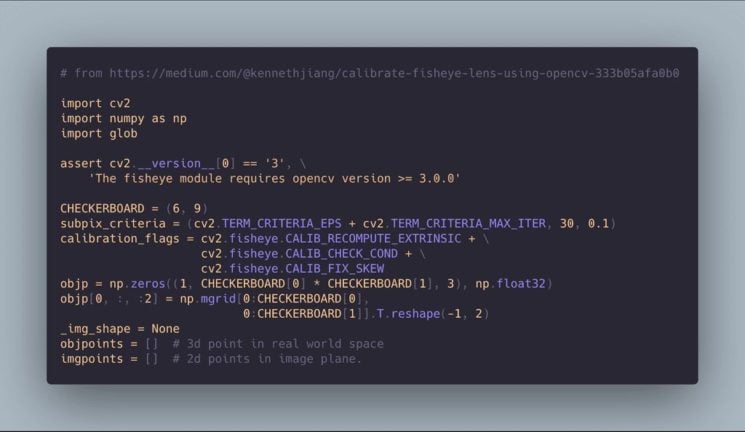
The distortion was calibrated using a checkerboard pattern (with the script above)3. Exported calibration constants were then used to generate a de-fisheye map that was cached as a pkl file and loaded onto the camera.


With the software complete and calibrated, it’s now time to reassemble the camera. The top and bottom plastic panels snapped back into place. I still need to re-skin the camera, but that’s next.

New skin applied. Fortunately there are quite a few sellers of replacement SX-70 skins; this is a black Italian cow leather. This is my one noticable deviation from the original look of the camera.

Assembly complete. Looking pretty good but it’s not done yet. The front branding and back instruction labels need some love.

It took a little while to find a printer4 that could print with similar quality and materials to the original labels but I found one out of the UK that does a great job.
The front label is foil-backed, the letters are punched-out, and I matched the type, placement, scale, and shapes so that these labels are stylistically identical to the originals.

Front and back labels applied.
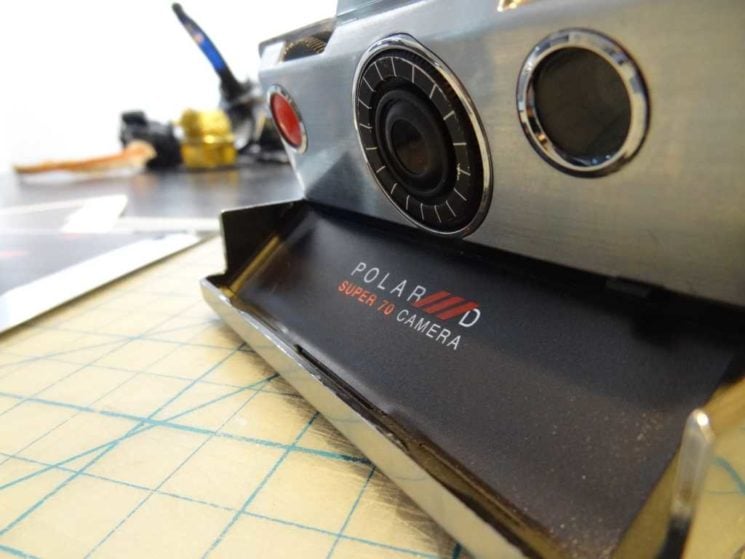

The completed camera. It took a total of 8 months on-and-off in my spare time to complete this project. Was there a point to it? Absolutely not. Was it fun? Hell yeah.


The output. Like the original Polaroid SX-70s, there is a lot of variety in the quality of the output. You can see some distortion and haloing at the edges from unwarping the photos, which is unavoidable.
Overall, I’m reasonably happy with the results. Perfection is for DSLRs.


References:
- I used this “manual” when disassembling the camera. Unfortunately the photo quality is poor, so this was just a broad guide and I had to wing it along the way.
- If you’re interested, take a look at the code that powers the camera.
- This article was incredibly helpful in clarifying the OpenCV de-fisheye APIs.
- Diginate printed the labels and did an excellent job.
About the Author
Joshua Gross is currently the Managing Partner at Planetary, a Brooklyn-based digital product studio. You can read more of his writing on his blog and follow him on Twitter.
We love it when our readers get in touch with us to share their stories. This article was contributed to DIYP by a member of our community. If you would like to contribute an article, please contact us here.
Related Posts
 Polaroid launches new “Mint” digital pocket printer & 2-in-1 instant digital camera
 This photographer turned a broken computer into a working large format camera
 Polaroid: GoPro Session looks a lot like Polaroid Cube, Let The Court Decide
Join the Discussion
DIYP Comment Policy
Be nice, be on-topic, no personal information or flames.
3 responses to “How I turned a dead Polaroid SX-70 into a working digital camera”
so basically you took the guts out of a working digital camera and put them into the old camera?
Wow, great job! You could win a contest on Instructables with this.
so cool! I remember trying to get my polaroid to take paper – such a hassle with correct exposure