


Hands On Datacolor Spyder5 Elite Review
Share:

Datacolor was recently kind enough to send us a Spyder5 Elite to review prior to today’s official launch.
I spent the last couple weeks using the Spyder5 Elite to calibrate four of the screens that I use on a regular basis: both IPS and TN displays, my laptop and an HD TV.
Here are the results of our hands on Datacolor Spyder5 Elite review.
What Is a Datacolor Spyder5?
The Datacolor Spyder is a line of monitor calibration tools used to make sure that the colors you see on an electronic display are as close as possible to their true color.
The Spyder has a built in colorimeter that accurately measures the color, brightness, white point and tone response of your display during calibration. The calibration software then takes the responses it receives from the sensor to create a display “profile” that automatically corrects for any variations from the desired output. This “profile” is loaded every time you start your computer so you are always looking at a color corrected screen.
The Spyder5 is the next generation of Datacolor’s flagship monitor calibration device. Three models of the Spyder5 have been released: Spyder5EXPRESS, Spyder5PRO, and Spyder5ELITE.
Datacolor describes the new line as:
…designed for passionate photographers who want to see, share and print their images the way they were intended.
Why Monitor Calibration is Important
Most of the images photographers create these days are bound for the internet and will be viewed on a multitude of screens with drastically different image quality capabilities. So, asking why monitor calibration is important is a valid question.
In the end, it comes down to quality control.
If you are a professional photographer, a dedicated hobbyist or other creative professional working from a screen, you have a responsibility to deliver consistent quality work to your clients. Therefore, monitor calibration should be a critical part of your workflow.
Disclosure
I have been using a Spyder3ELITE since 2007 to calibrate the various displays I have used over the years as a professional photographer – so I guess you could say that I’m a satisfied customer.
Unboxing and Build Quality
The box includes the Spyder device, a validation code and instructions on how to download the application software and instruction manual.
(I don’t miss the software CD/DVDs that used to ship with computer hardware, but I do miss written paper instruction booklets. Of course, I’m probably just old fashioned.)
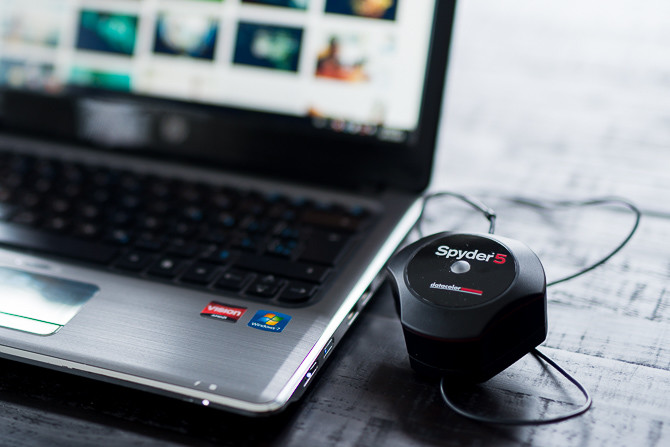
If you have used a Datacolor Spyder in the past, you will immediately notice that the Spyder5 has been completely redesigned. Datacolor promises that the Spyder5 features an improved tonal response and the industry’s only 7-detector optical engine.
The Spyder5 looks more like a small hockey puck than a spider, but its still solid and well made.


Monitor Calibration – Hands On
In order to fully test out the capabilities of the Datacolor Spyder5 Elite, I used it to calibrate the four screens that I use most often:
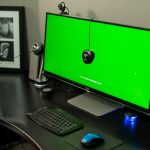
1. My main photography and video editing monitor:
An LG 34″ ultrawide display (QHD 3440 x 1440) with a professional grade IPS (in-plane switching) panel (click here for our full review of this monitor). This monitor is in my office and is my day to day studio workhorse.

There was only a minimal change to the color and contrast of this monitor after calibration – although it did have a slightly cool color shift out of the box.
This is a nearly new high end IPS computer display, so I wouldn’t expect a big change. However, the change was noticeable enough that it would have effected my ability to set an accurate white balance without calibration with the Spyder5.
The Spyder5 calibration utility also confirmed that this monitor ( LG 34UM95 UltraWide IPS monitor ) covers 100% of the sRGB colorspace and even 79% of Adobe RGB.
2. My living room desktop PC:
A 22″ Acer HD 1920 x 1080 display with a consumer level TN (twisted numeric) panel. I use this monitor to occasionally edit and export work when I actually want to spend time at home once in a while.

This is a mid-range consumer level monitor and a few years old. Without calibration it is excessively bright resulting in poor contrast in the blacks, and it has a pronounced blue color shift.
It is significantly better after calibration. The Spyder5 calibration utility also showed that this display covers 98% of the sRGB colorspace.
Without calibration, this monitor it is unusable for photo editing. Besides the difficulty in setting an accurate white balance, the biggest problem was that the excessive brightness made it impossible to set reliable exposures or black levels in my images – which is totally unacceptable.
However, with regular calibration this shows that even a consumer level TN display can be used for photography and video editing (in fact, I used a pair of TN displays for years before I upgraded to the LG – but I had to make sure they were always calibrated).
3. My travel laptop:
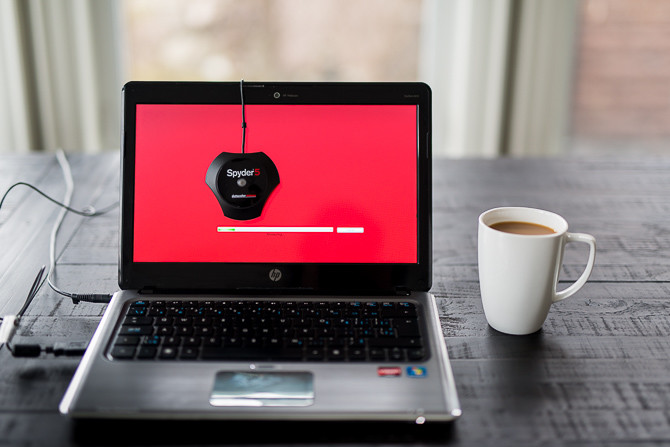
An old 13″ HP with an HD 1920 x 1080 display. I don’t really use this laptop for any serious work, but I do bring it with me to the cottage for basic editing.


Here are before and after photos of my laptop. Its hard to show properly online (especially if you’re viewing this on an un-calibrated display…), but before calibration this laptop screen had a very strong blue cast and very poor contrast. Interestingly, according to the Spyder5 this screen only covers 67% of the sRGB colorspace…which makes it a very poor choice for any serious photography or video editing.
4. My studio TV:
A 55″ Samsung LED HD 1920 x 1080 Smart TV. I often shoot tethered with this TV which hangs on the wall in my studio. Its a great way for models and clients to get instant feedback.

Unfortunately, you can’t calibrate a stand-alone smart TV – it has to be connected to a computer as a secondary monitor. However, if you are using a TV as a tethered display like I do, that is exactly how it is connected anyway.
In order for my studio TV to be useful as a reference monitor, it has to be calibrated so that it shows the photos I’m taking as true to the original as possible. In the sample photo, you can see the massive difference in color and brightness between the TV and my laptop – which is exactly why it’s so important to calibrate every screen that you will be using as part of your workflow.
Interestingly, this Samsung Smart TV covered 100% of the sRGB color space – so it is actually a much higher quality display than my laptop screen!
Hands On Using the Spyder5
The display calibration process is relatively straightforward with a step by step wizard that walks you through the process.
I got very good results by just using the default settings and in most cases I don’t think you would ever have to go beyond that.
However, if you are fastidious about the calibration your displays, there are a number of advanced features for setting a particular color temperature, gamma point, brightness and target color space.
Here is the calibration process that I used for my LG monitor, step by step with the Spyder5 Elite:


This step seems a little redundant to me. If I have to enter the make and model of my display, the software should be smart enough to know which controls it has.


I did have a few problems with this step. The ambient light sensor seems very sensitive to small shifts in light. For example, with the sensor sitting on my desk, I got an initial reading of “Very Bright”. Dimming the lights in my studio didn’t seem to have much affect – I still got “Very Bright”, even when the lights were pretty dim. However, by using my hand to cast a shadow over the sensor, the reading went from “Very Bright” to “Very Dim”.
In the end, I tricked it into reading a “Medium” level (by placing the sensor sideways) and went with that.


Depending on your calibration settings, there might be another small step to set your display’s brightness level during the calibration sequence. Also, the Spyder has to be plugged into a USB port. If your PC is under your desk like mine is, the wire will probably be too short. I had to move a few things around to get it to reach.


Now, every time you start your computer, it will automatically load your calibrated display profile and show accurate color and contrast.

There are also a number of other display analysis reports that you can run:
- Gamut – graphs the display’s color saturation.
- Tone Response – graphs the display’s tone response and white point.
- Brightness and Contrast – brightness, contrast and white point at different brightness settings.
- White Point at Different OSD Settings – brightness, contrast and white point at different color target presets.
- Screen Uniformity – Maps the uniformity of the display’s brightness and color.
- Color Accuracy – Analyzes how accurately the monitor display’s various colors.
Conclusion
If you’re an advanced hobbyist, a professional photographer, film maker, designer or anyone who relies on a screen as part of their work, there really is no excuse not to use an automated display calibration system.
The Datacolor Spyder5 is one of the most popular display calibration options available and really does a nice job of making sure that the colors you’re seeing on your display are as accurate as possible.
The PRO version is Datacolor’s top seller and should meet the needs of most users.
The ELITE version offers more sophisticated calibration options. Its nice to have them available if you want to tweak your calibrations, but to be honest – for most users the default settings will work just fine.
If you work with video, it is important to note that the ELITE version also includes video color standards (PAL SECAM, NTSC, Cineon, ITU-R Rec. BT.709 and ITU-R Rec. BT.2020). The ELITE version can also be used to calibrate a projector.
Here are the pros and cons of the Datacolor Spyder5:
Pros:
- Easy to use, step-by-step wizard.
- Accurate monitor calibration, even with the default settings.
- Automated system with hardware to check colors – much more accurate than trying to calibrate by eye.
- Well built and reliable (I have been using a Spyder3ELITE for 8 years).
Cons:
- Ambient light and brightness settings may be a little subjective.
- Step-by step wizard could be further automated to eliminate unnecessary user input for default calibrations.
- Another device with another wire on your desk (I’m not sure why this couldn’t be a wireless device).
Would You Recommend A Datacolor Spyder5 To A Friend?
If you are looking for an automated display calibration system, the Datacolor Spyder5 is a great choice and I would absolutely recommend it.
With a retail price of $129 for the Spyder5EXPRESS, $189 for the Spyder5PRO and $279 for the Spyder5ELITE, the Spyder5 is a reasonable investment towards a quality photography / video workflow and should last for years (as I mentioned, I have been using the same Spyder unit to calibrate all my displays every month for 8 years).
You can use the Spyder5 to calibrate as many screens as you want without purchasing additional licenses, so if you own multiple devices, the Spyder is increasingly cost effective.
The Spyder5PRO version should suit the needs of most users, however the Spyder5ELITE does offer some options that may be necessary for working creative professionals.
If you are already using an earlier version of the Spyder (a Spyder3 or Spyder4), I wouldn’t worry about an upgrade – unless you are planning on also upgrading to a wide gamut and/or 4k / 5k display.
The Spyder5 does have an improved sensor (improved tonal response and the industry’s only 7-detector optical engine) and its specifically built for wide gamut and 4k / 5k displays – but for the four screens I tested it on (none of which were wide gamut or 4k / 5k) the calibration workflow and results are not noticeably different that what I was used to with an 8 year old Spyder3 – and I’m sure the Spyder4 is even that much more similar.
To fine out more, click on the model you are interested in: Spyder5EXPRESS, Spyder5PRO, and Spyder5ELITE.

JP Danko
JP Danko is a commercial photographer based in Toronto, Canada. JP can change a lens mid-rappel, swap a memory card while treading water, or use a camel as a light stand.

Join the Discussion
DIYP Comment Policy
Be nice, be on-topic, no personal information or flames.
5 responses to “Hands On Datacolor Spyder5 Elite Review”
I guess the device cannot be used with the LG software and thus program the monitor’s hardware LUT rather than an ICC profile. This would be a better solution for your main device if it were possible.
JP,
I know there are some other devices that don’t require an ambient light level adjustment, or an option to turn it off, and you will get a better calibration if you don’t take an ambient reading. The sensors are often not great and if there is any way to manually enter the room’s brightness(as in getting the data from a dedicated light meter) this would be better as the included meters are easily thrown off. Also, it could be wireless, but the wire serves the purpose of allowing it to hang on your monitor without the need for extra hardware, so either way there is a bunch of stuff in your workspace.
I guess one good reason to upgrade is the new design. The Spyder5 is more compact and more portable than previous generations. I like that it now has a cap that acts as anchor, effectively solving two annoyances.
I just used the software I downloaded from their site.
I know this was posted a while ago, but the fact is, many users don’t even use the software that comes with the unit, but rather a FREE version that they claim to be superior. The Spyder hardware works better and more effectively with it than the “proprietory”. In fact , users are claiming, to purchase the EXPRESS model, because the spyder software downloads are different with each product. The free software is equal to the elite software apparently.