


Get Started With Studio Lighting for Less than $100
Share:

If you’re relatively new to photography, studio lighting can seem like a whole other world.
If you’re like me when I started with studio lighting, you probably have a pretty decent camera and have seen a noticeable improvement in the quality of your photography as you have learned to work with natural light.
But sooner or later you’ll realize that if you really want to progress as a photographer – you’re going to have to learn to effectively use artificial light.
The good news is that getting started with studio lighting can be really easy, fun and you can do it for less than $100 in gear!
The first studio light photograph that I learned how to take was a one-light studio portrait – so if you’re interested in learning studio lighting, lets start there.
Gear
The first step in learning studio lighting is to learn to work with off camera hotshoe strobes and then build your knowledge and equipment from there.
While hotshoe strobes are technically not “studio lights” in the traditional sense, what you will learn from working with hotshoe strobes in a studio setting is directly transferable to working with full size studio lights.
The best thing about working with hotshoe strobes in a studio setting is that you can get fantastic results with gear that is accessible to everyone.
Camera & Lens
Since you are working in a controlled environment, studio photography typically doesn’t require the latest camera technology or expensive fast lenses. The sample photo in this article was captured with a 10 year old Nikon D200 and a standard 18-55mm f/3.5-5.6 kit lens.
(I am not including the camera and lens in the total cost since you probably already own that – but a Nikon D200 and a used kit lens wouldn’t be worth much more than $100 either).
You can get great results in studio with pretty much any DSLR or mirrorless camera made in the last 10 years – provided it has either a PC sync port, or a hotshoe (more on that in a moment).

Strobes
In studio we almost exclusively work in manual, so you also don’t need the latest and greatest ($$$) TTL hot shoe strobes. When you’re just learning, you don’t need big expensive studio strobes either.
For the sample photo in this article, I used an ’80s era $20 Sunpak hotshoe strobe that I bought used from my local camera store.
The only feature that you need on your flash is a manual power setting.

Triggering Off-Camera Flash
Triggering an off-camera flash can seem a little complex, confusing and expensive – but it doesn’t have to be.
By far the easiest and least expensive solution is to use a PC sync cable. Here are a few options from my favorite cable supplier Flash Zebra:
Camera PC sync port to strobe PC sync port (Screwlock PC-PC cable $15).

Camera PC sync port to strobe hotshoe adapter. (Screwlock PC-Miniphone cable $15, Strobe Hotshoe Adapter $18.50).
Camera hotshoe adapter to strobe hotshoe adapter. (Camera Hotshoe Adapter, Screwlock PC-Miniphone cable $15, Strobe Hotshoe Adapter $18.50)
If you really want to go wireless, you can use your on-camera pop-up flash set to minimum power to trigger your off-camera flash with the built in optical slave. If you’re using an old, inexpensive strobe that doesn’t have a built in optical slave sensor (like my Sunpak) you can get an optical slave adapter.
Or you can use a set of inexpensive Cactus V6 radio triggers.

Light Modifiers
Once you have your strobe off camera – the next step is to experiment with different light modifiers.
To get started, my personal favorite is a shoot through umbrella($15 B&H) with an umbrella bracket ($22 B&H).

For reflectors, sheets of white foam core (available at any office supply store) work great and are very inexpensive.
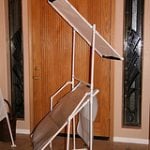
It helps to have a light stand as well – but I made due for years by propping my strobes on bookshelves, chairs etc.
One Light Portrait Example
Here is the recipe to set up your own one-light studio portrait:
Set your camera to manual mode, 1/200th shutter speed, f/5.6, ISO 200, flash white balance.

Set up your off-camera flash on a light-stand (or have an assistant hold it for you), with a shoot-through umbrella on about a 45 degree angle from your subject. Set your strobe to manual mode and set the power to about 1/4 to 1/2. Take a test image and increase or decrease the flash power as required.
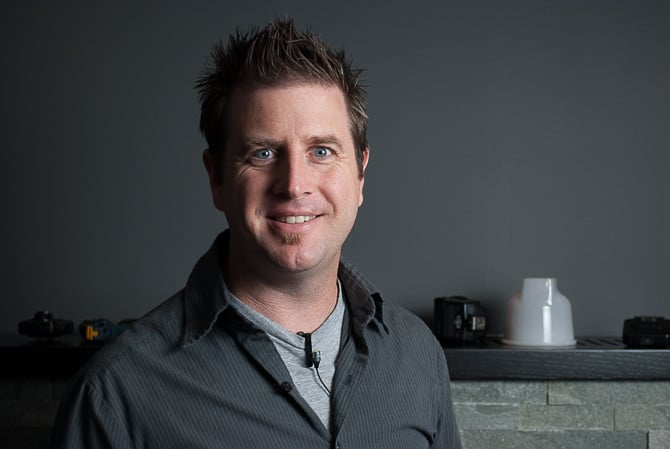
This is your key light.
Set up a piece of foam core reflector opposite of the strobe. The reflected light will fill the shadows on the dark side of your subject and make the light from your key light appear less harsh.

This is your fill light.
If the shadows are still too harsh, you can place another piece for foam core below your subject’s face to bounce the light up from below.

This is another fill light.
Finally, to separate your subject from your background, set up a foam core reflector above and slightly behind your subject.

This is your hair light.
And don’t forget that all photography needs to be polished up in post. With a few Lightroom adjustments, here is your finished one-light studio portrait!


Learn More
If you want a much more in-depth explanation of this tutorial – I just released a full online class on Skillshare that covers everything in detail.
We arranged for 100 free enrollments only for DIYP readers – just click here to claim yours (first come first serve, expires in one month from today).
Or, if you miss the free enrollment, don’t worry – you can also get a 14 day free trial that includes access to this class and other photography classes on Skillshare – just click here.

JP Danko
JP Danko is a commercial photographer based in Toronto, Canada. JP can change a lens mid-rappel, swap a memory card while treading water, or use a camel as a light stand.


Join the Discussion
DIYP Comment Policy
Be nice, be on-topic, no personal information or flames.
4 responses to “Get Started With Studio Lighting for Less than $100”
Thanks :)
That key light photo is just begging to be a meme.
Hahaha – totally! It’s hard to talk, take your own photo and model at the same time :)
I LOVE my cactus v6 triggers! However if you’re using an older manual flash which doesn’t support TTL using the v6 is overkill as you won’t be able to use 80% of the v6’s features. Grab yourself a pair of the cheaper cactus v5 triggers instead. You can buy the cactus v5 twin pack for the same price as a single v6. Having a radio trigger which costs more than twice that of the flash does sound a bit ridiculous to me.