


Everything you ever needed to know about shooting and editing timelapse
Jun 20, 2016
John Aldred
John Aldred is a photographer with over 25 years of experience in the portrait and commercial worlds. He is based in Scotland and has been an early adopter – and occasional beta tester – of almost every digital imaging technology in that time. As well as his creative visual work, John uses 3D printing, electronics and programming to create his own photography and filmmaking tools and consults for a number of brands across the industry.
Share:

If you ever wanted to get into timelapse, but didn’t know where to start then Bloomberg documentary filmmaker, Griffin Hammond is here to help.
In these two videos, Griffin shares how he shoots and edits timelapse sequences from start to finish. While your camera and lens may be different to those chosen for these videos, the principles are the same, no matter what you’re using.
Many cameras these days have built in intervalometers that let them shoot timelapse without external attachments, but you may find that using an external intervalometer gives you much more control over how your sequence is recorded. It may also be your only option if there isn’t one built into the camera.

The one shown in the video is the Pixel Timer Remote Control Shutter for Panasonic & Leica cameras. Personally, I use the Yongnuo MC-36R, which is basically an inexpensive 2.4Ghz wireless clone of Nikon’s MC-36, but compatible with both Nikon and Canon.
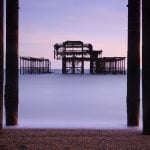
Shooting in the daylight can be a hassle. With the kind of shutter speeds you need in order to actually have smooth motion when played back at regular video framerates, your ISO simply won’t be able to go low enough to let you get half second exposures in broad daylight, even if you’re stopped all the way down to f/32.

Like Griffin, I often use the B+W 10 stop ND filter for daylight timelapse to get those long exposures. Screwing on a filter is often less hassle than dealing with square filters and holders, especially if you’re in a rush. That being said, the Lee Big Stopper is also an excellent option and lets you create great images.
Timelapse can offer some amazing results, but you don’t have to limit your final project to just timelapse sequences. You can also intermix timelapse with regular paced video, or even go slow motion, for some great effects.
This is where editing comes in, and Griffin’s second video takes us through the process of turning our sequence of still images into a piece of video.
Griffin is using Final Cut Pro X for this example, but the same basic process applies in Adobe After Effects, Premiere Pro, or one of the countless other applications available for turning a sequence of stills into video footage.
Personally, I prefer to use an Adobe based workflow for timelapse. Shoot RAW on the camera, bringing image sequences into After Effects, and then bringing those compositions into Premiere for cutting together.
This allows me to process the footage in Adobe Camera Raw as I would with stills, and keep or adjust those settings at will once it’s loaded into After Effects as the footage remains raw throughout the process. It’s a little like shooting raw video using CinemaDNG.
What do you use to shoot and edit your timelapse sequences? Let us know and show off your work in the comments.

John Aldred
John Aldred is a photographer with over 25 years of experience in the portrait and commercial worlds. He is based in Scotland and has been an early adopter – and occasional beta tester – of almost every digital imaging technology in that time. As well as his creative visual work, John uses 3D printing, electronics and programming to create his own photography and filmmaking tools and consults for a number of brands across the industry.


Join the Discussion
DIYP Comment Policy
Be nice, be on-topic, no personal information or flames.
2 responses to “Everything you ever needed to know about shooting and editing timelapse”
Absolutely adore anything about lighting
Thats pretty good