


Creating pet portraits on black (featuring Loki)
Oct 22, 2017
Paul Monaghan

We love it when our readers get in touch with us to share their stories. This article was contributed to DIYP by a member of our community. If you would like to contribute an article, please contact us here.
Share:

One of the things I love about photography apart from creating images is the ability to share what I do in the hope to inspire others, with that in mind I wanted to write how I photographed the newest member of our family, Loki.
While at first glance this look’s like it was shot in a studio, it was actually shot in my kitchen which has a pine table with a floral wallpaper in the background but I fixed that by using an Ikea GLASHOLM black table (great for product shots!) on-top of the dining room table and a black velvet material hanging from a pole as the background.

As you can see from the image above, I used two lights for this setup the main light being inside a 60x60cm Softbox up high in-front of the subject with a second light at lower power to fill at a soft rim on the back right.
The camera I used for this shot was the Sigma sdQ-H with the Sigma 50-100mm f1.8 Art lens (here’s a little shot I did earlier)

And the Cactus v6ii trigger to control the lights which I reviewed here.

Anyway, back to the shot, what you see here is almost SooC (straight out of camera) except for a crop that I did later as Loki liked to move around so I shot a little wider to give me some wiggle room and lastly some dust removal which I will go into soon but first here are the settings from Sigma Photo Pro.

Almost everything is set to normal here, except Luminescence noise reduction which I put to “minimum” as it helps pull out fine details that “normal” hides, the other things I did was turn down the exposure just a tad and add a little -fill light (unique to sigma software I think?) which softens the highlights a little.

Looking at the image at 100% you can see all the fine dust that the black glass has picked up, now I did wipe this clean before the shoot but with loki running around and the fact we have a parrot its pretty normal for some dust to settle while shooting but I have an easy way to deal with this so over to photoshop after exporting this as a 16bit Tiff.
Once the file is open it photoshop I pressed “Layer, Duplicate layer” then “Filter, Noise, Median…”

As you can see this opens a popup, move the preview window to a part of the image with the dust you want to remove and adjust the Radius till it vanishes then hit OK. This will remove the dust while still keeping color info (reduced to burry shapes) but its a little too clean so next up I goto “Filter, Noise, Add Noise…” which will open a new popup.

The settings here will change between shots but generally, I find 1.33%, Uniform and Monochromatic works well, this add’s a little noise into the median layer to help it blend in the next part.
Now we create a mask onto the Median Layer, “Layer, Layer Mask, Hide All” this will create a black mask onto the Median Layer, select the mask and use a white brush to paint out the dust on the black glass as you can see I did here.

You can’t use this trick on the subject as it will also remove hair or other detail so for those parts go back to the good old healing brush and stamp them out manually.
I’ll leave with one last shot of Loki from this setup and thank you for taking time out to view this page and I hope this has helped someone on their own photography journey.


About the Author
Paul Monaghan is a portrait photographer based just outside of Glasgow, Scotland. You follow his work on Instagram and Facebook. This article was also published here and shared with permission
We love it when our readers get in touch with us to share their stories. This article was contributed to DIYP by a member of our community. If you would like to contribute an article, please contact us here.
Related Posts
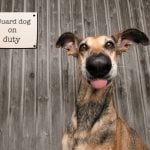 Finalists of 2020 Mars Petcare Comedy Pet Photo Awards remind us why everyone needs a pet
 Don’t think you need a pet? Comedy Pet Photography Awards 2021 winners will prove you wrong
 You don’t need a pet? Think twice with Comedy Pet Photography Awards 2022 finalists
 500px threatens to ban an artist after featuring him as “Photoshop Master” on its own blog
Join the Discussion
DIYP Comment Policy
Be nice, be on-topic, no personal information or flames.
5 responses to “Creating pet portraits on black (featuring Loki)”
nice, not easy to keep these table clean. I tried a big plexiglass and spray paint black on one side, big mistake, even if you clean it with plexiglass cleaner…. it just attract dust like crazy, time consuming to remove them all in Ps or AP.
The glass tables are not so bad, the median filter tip is great for removing lots of dust but only on non detailed areas.
Thanks for taking the time to comment.
the link you gave bring to a honeycomb glass table, but at that price I’ll go take a look. inpainting always work for removing dust on glass surface (in AP). I’ve always been looking at home depot and other hardware store, never thought of Ikea and their cheap good deal.
thanks
they do or did have black glass versions of there tabletops, I got mine from the store in Glasogow Scotland.
When I shot my tom cat in the beginning of February, I used a slightly different setup, but it still came out great. https://uploads.disquscdn.com/images/251dab73f9950fa12facffdb8b6e8f2781cee05af8e4c893645d2a45517c29c7.jpg