


How I started (and succeeded) photographing space from my backyard
Mar 24, 2023
David Joyce

Dunja Djudjic is a multi-talented artist based in Novi Sad, Serbia. With 15 years of experience as a photographer, she specializes in capturing the beauty of nature, travel, concerts, and fine art. In addition to her photography, Dunja also expresses her creativity through writing, embroidery, and jewelry making.
Share:

My name is David Joyce and I am an astrophotographer, taking photos of our universe right here from my backyard. I’ve been into astronomy ever since I was a child, so choosing astrophotography was a logical step to take once I got interested in photography.
In this article, I will guide you through the process, challenges, and ups and downs I’ve had on this journey. But more importantly, I’ll share the final “recipe” I ended up with that will help you overcome the obstacles and take stunning photos of space from wherever you live. And last but not least, I will show you some of my photos for inspiration and a reminder that you can be an astrophotographer even if you don’t leave your home.
How it started
When I was a young child, my parents used to have a large book called The Atlas of the Universe which briefly went over each of the planets in our solar system as well as asteroids, comets, galaxies, and nebulae with distance, mass, etc. all listed. I used to stare at the photos that were in this book and I was just blown away by how large and distant some of these objects were. Of course, this was over 30 years ago, so the images weren’t great. In fact, many of them were actually drawings. But they were enough to keep me interested in all things cosmic ever since.
I purchased a few telescopes over the years to use visually with minimal success because I didn’t have the budget to invest in decent equipment and didn’t really know what I was doing. When my budget increased, I took the time to do some research and bought an 8” Schmidt-Cassegrain telescope to use visually.
After a few months of observing the universe through my new telescope, I realized that light pollution is quickly killing this hobby for those of us living in cities. There wasn’t much to see other than the planets, the moon, and a handful of deep space objects (DSOs). In my mind, there were really only 2 options: travel to an area with darker skies to observe or try astrophotography which allows us to see more through the camera by stacking many long exposures. After more research, I settled on astrophotography.

Gear I use for astrophotography in the city
I learned that starting out with a telescope with over 2000mm of focal length was not a good idea, so I purchased a small wide-field refractor telescope with a native focal length of 430mm and a reducer to get it down to 344mm at f/4.8. Additionally, I needed an equatorial mount as opposed to an alt/azimuth mount which allows the telescope to track objects in the night sky without field rotation in our images because the mount can be aligned with the north celestial pole.
Next, I needed a camera. I briefly contemplated going with a DSLR, but after doing more research, I realized that a dedicated astronomy camera would be better for my purposes. DSLRs used for astrophotography benefit by being modded, which would remove the included UV/IR filter. This would allow more Hydrogen Alpha gas to come through, and it’s quite prevalent in space. Doing a modification like this would render the camera nearly useless for terrestrial photography, so I decided to invest in a ZWO asi294mc Pro cooled camera as my first camera for astrophotography. Having the sensor cooled allows for low noise sub-exposures and makes adding dark calibration frames to the stack much easier.
Now I needed a computer to use for my image acquisition software, and I decided to go with a ZWO AsiAir Plus. This is a small Raspberry Pi-based unit with an included power hub and USB hub and it mounts directly to my telescope mount.
So, by now, I had a camera, a telescope, a mount, and a computer; what else do you need to take good quality photos of deep space objects? An autoguider!
Telescope mounts work exceptionally well, considering they are trying to keep an object centered in our view as it appears to move across the night sky. But they’re not perfect… An autoguider is a second telescope that is mounted on top of the main telescope with another camera attached taking consecutive short exposures (2 seconds in my case).
The software included with my AsiAir unit will select a few of the stars in the image taken by the autoguider and find out how much they are moving between each exposure and send information back to the mount as to how it needs to correct its tracking in order to keep the object centered. This all allows for perfectly round stars. Without autoguiding, stars will often look egg-shaped and the object being photographed will look blurred.
Fast forwarding a bit, I ended up changing my camera from a color camera to a monochrome camera which requires the use of filters to capture luminance, red, green, and blue data when imaging in broadband (for galaxies, star clusters and reflection nebulae) and Hydrogen Alpha, Oxygen III, and Sulfur II filters when imaging in narrowband (for emission nebulae). To house my filters and to automate the switching of filters throughout the night, I use an electronic filter wheel which is also controlled with the AsiAir software.
Lastly, I use an autofocus motor which is automated so that throughout the night, I can stop my imaging session briefly to make sure I have perfect focus. Before I acquired an auto focuser, I used what is called a Bahtinov mask which fits over the end of the telescope. It has slots in it so that when pointing at a bright star it will create diffraction spikes that you can use to achieve perfect focus by centering the spikes. One thing to keep in mind when using one of these masks, they work great to focus but if left on during imaging, most all of the stars will have spikes coming off of them and will ruin your images. One morning, I woke up to bring in my telescope and look at what I had captured when I realized I had left the Bahtinov mask on all night, eight hours of data wasted…

Shooting astrophotography
Doing all I mention above allows me to automate most things. So, when shooting, I start out by setting my telescope and mount facing north and pointing near the star Polaris, known as the North Star. I initiate a polar alignment routine which aligns my telescope mount to the north celestial pole. Then I can set up an imaging plan for the night using the AsiAir software telling it which objects I want to photograph, which filters to use, how many exposures to take, how long the exposures should be and how often to autofocus. This lets me go back inside and I can remote in to the onboard computer to monitor things if needed, or go to bed and wake up with tons of data to play with!

Processing astrophotography
Processing astrophotography data can be tedious. I use two different software programs for this, DeepSkyStacker for pre-processing which is what registers and stacks each of subexposures together. By stacking them, it reduces the overall noise in the image and brings out more detail as more time is added. Most of the time, I will shoot a single target over many nights and combine the data for sometimes up to 20 hours total.
After stacking, you will have what is called a linear image that will need to be stretched and post processed and for that I use an another astro specific software program called Pixinsight. Here, I will stretch the image and typically remove the stars to process the nebula/galaxy separately from the stars and recombine at the end to produce a full color final image.
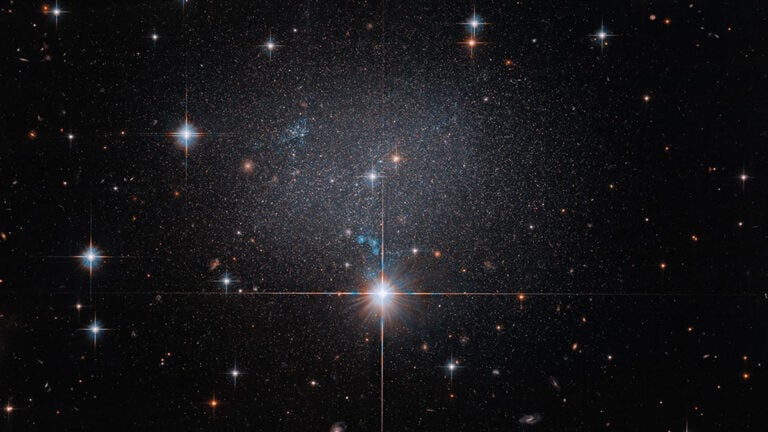
Every time I finish processing an image, I’m still amazed just like I was as a child flipping through The Atlas of the Universe book. It’s amazing to me that I’m able to capture images of these objects that are sometimes over 50 million light years away and are unimaginably large from my own backyard. For me, astrophotography is a very humbling experience. It helps me to realize just how small we are when compared to the universe.


About the Author
David Joyce is an astrophotographer based in Lexington, Kentucky. During the day, he works as a web developer and on clear nights, he will be busy working on collecting ancient photons from the universe. You will find more of David’s work on his website and Instagram.
We love it when our readers get in touch with us to share their stories. This article was contributed to DIYP by a member of our community. If you would like to contribute an article, please contact us here.
Related Posts
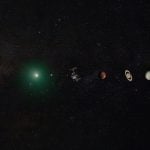 This solar system photo was composited from photos shot from a photographer’s backyard
 Photographer captures ISS astronauts’ spacewalk from his own backyard
 Photographer captures iconic “Pillars of Creation” from his own backyard
 Photographer “goes to Moon” for this photo of Mars… without leaving his backyard
Join the Discussion
DIYP Comment Policy
Be nice, be on-topic, no personal information or flames.