


9 Cardboard Hacks That Will Transform Your Filmmaking (For Free!)
Feb 13, 2026
Darlene Lleno
Darlene Lleno brings a unique perspective to DIY Photography as someone who grew up surrounded by camera gear but chose words over lenses. With five years of writing experience, she specializes in photography content that’s both technically informed and genuinely passionate. Growing up with a photographer twin brother meant camera talk was everyday conversation in her household. While he mastered capturing moments, Darlene discovered she preferred being the subject and the storyteller behind the scenes. As a travel enthusiast and mother of two, she understands the importance of preserving life’s precious moments. When not exploring new destinations or writing for DIY Photography, you’ll find her reading or tending to her garden. Her approach to photography writing is refreshingly authentic, she may not be behind the camera, but she knows exactly what it takes to help others capture the shots that matter most.
Share:
Video Source: https://www.youtube.com/watch?v=cZ9O7xBV5L0
Creating DIY filmmaking hacks from cardboard brings back the creative spirit of budget filmmaking. Before expensive gear became accessible, filmmakers built solutions from household materials. Cardboard remains one of the most versatile, free materials for solving common production problems. These nine hacks replace gear costing hundreds of dollars with solutions you can build in minutes.
Why Cardboard Works for DIY Filmmaking
Cardboard costs nothing if you save boxes from deliveries and purchases. It’s sturdy enough for most filmmaking applications yet easy to cut and shape with basic tools. The material is lightweight, making it perfect for temporary solutions and on-set modifications.
Most importantly, cardboard encourages creativity. When you can’t simply buy a solution, you’re forced to think like the filmmakers who invented cinema. This problem-solving mindset improves your overall filmmaking skills beyond just saving money on gear.
Tools You’ll Need
Gather these basic supplies before starting your DIY filmmaking hacks:
- Cardboard boxes (various sizes and thicknesses)
- Box cutter or sharp scissors
- Gaffer tape or duct tape
- Clear packing tape
- Ruler or measuring tape
- Marker or pen
- Aluminum foil (for some hacks)
- Optional: water-based marker for temporary markings
Most filmmakers already own these items. If not, the total investment is under $20 and serves countless projects beyond these specific hacks.
Hack 1: Camera Slider
Professional camera sliders cost $100-500 for smooth tracking shots. Build a functional version from cardboard that delivers surprisingly good results for static shots and slow movements.
Step 1: Cut Your Track
Cut a long piece of cardboard for your slider track. A 24-30 inch length works well for most situations. The width should accommodate your camera base plus some extra space.
Step 2: Create the Camera Platform
Cut a smaller rectangular piece that fits inside the long track piece. This becomes your camera platform that slides along the track. Test the fit to ensure smooth movement without being too loose.
Step 3: Add Guide Rails
Cut two long strips of cardboard the same length as your track. These act as rails to keep the camera platform moving straight. Use gaffer tape to attach these strips to the sides of your long track piece, creating a channel for the platform to slide through.
Step 4: Test and Shoot
Place your camera on the smaller platform piece. Pull the platform smoothly along the track for horizontal sliding shots. The cardboard creates enough friction to hold the camera steady while still allowing movement for cinematic camera movements.
This DIY filmmaking hack works best for lightweight cameras and smartphones. Heavy cinema cameras might overwhelm the cardboard structure, but for run-and-gun shooting with mirrorless cameras, it’s perfectly functional.
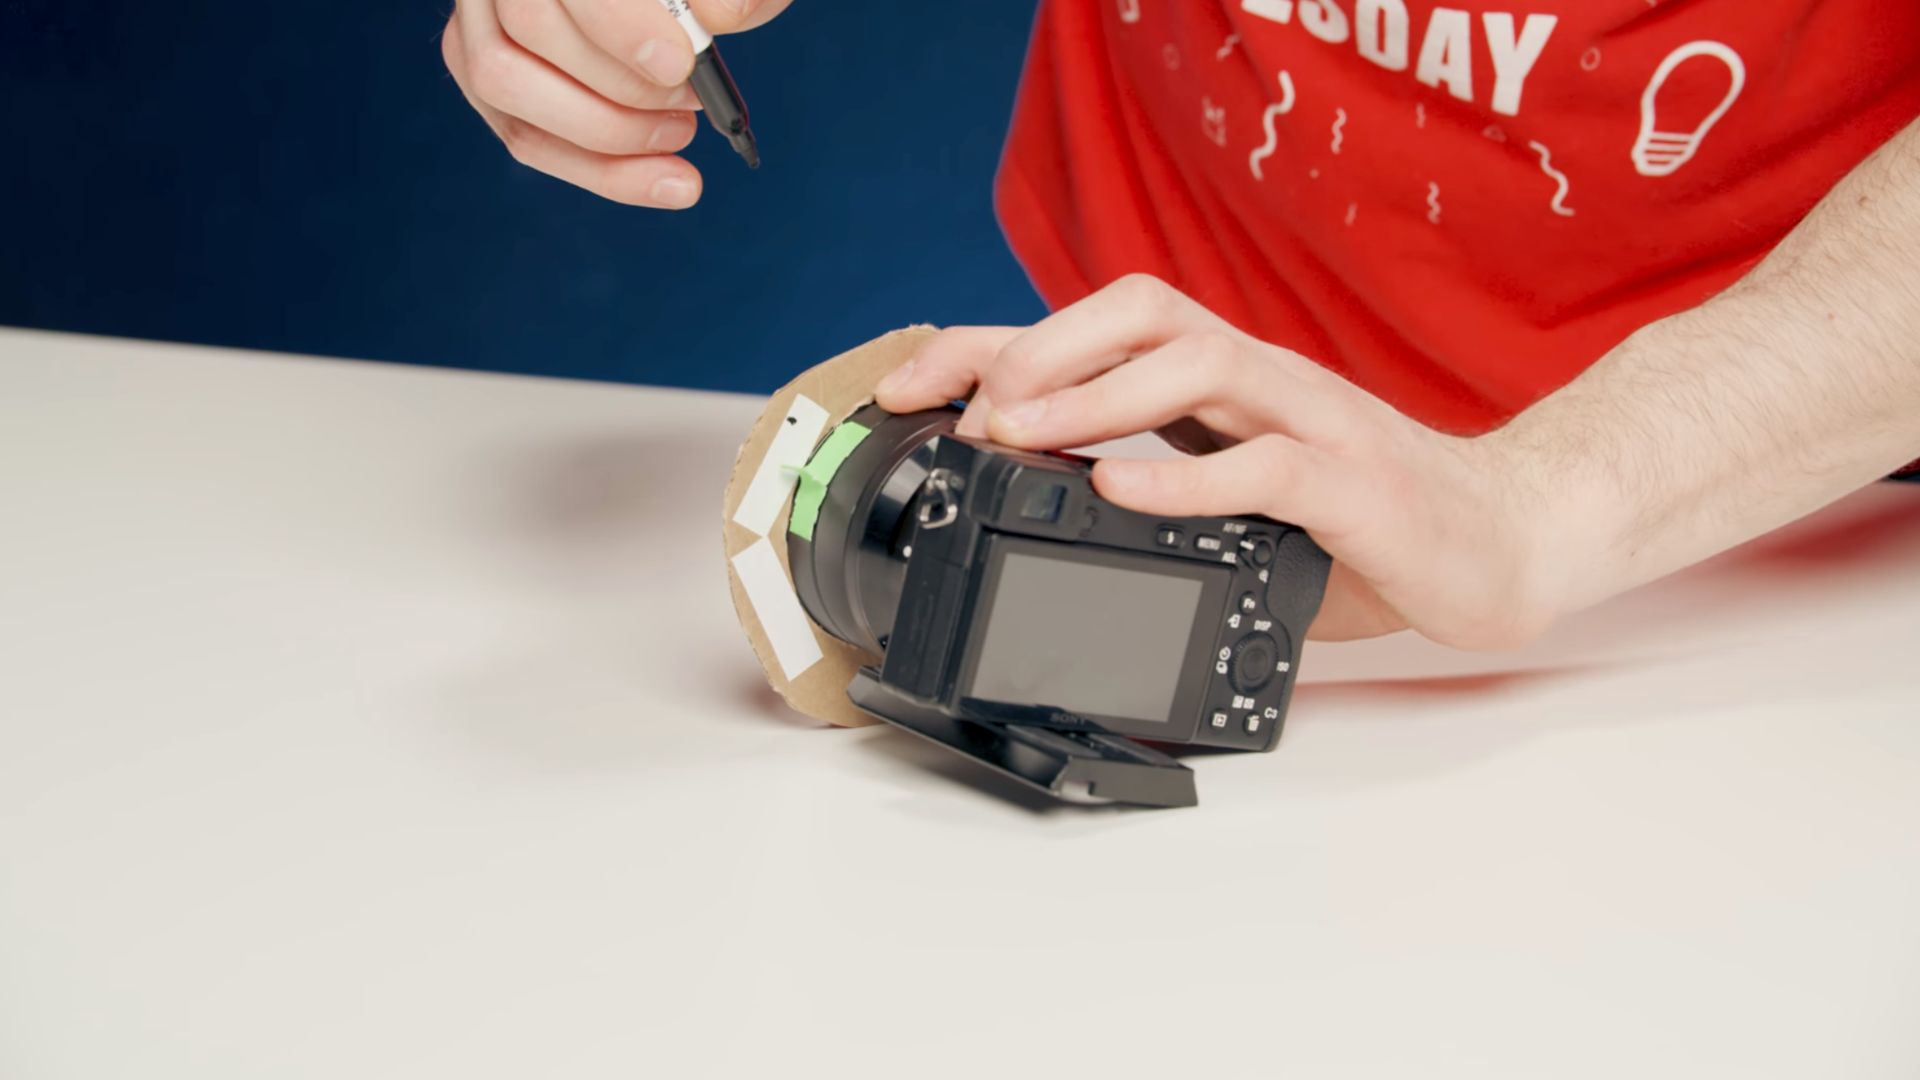
Hack 2: Focus Marking Ring
Professional focus marking systems cost $50-150. Create your own reusable version that works with any lens for precise focus pulls.
Video Source: https://www.youtube.com/watch?v=cZ9O7xBV5L0
Step 1: Trace Your Lens
Place your lens on cardboard and trace a circle around it. Cut out this circle, then cut around it again to create a donut shape. The hole should fit snugly around your lens barrel.
Step 2: Add Clear Tape
Cover one side of your cardboard donut with clear packing tape. This creates a smooth surface for water-based marker annotations and makes the ring more durable.
Step 3: Create a Reference Point
Cut a small piece of tape and fold it to create a pointer. Attach this to your lens’s focus ring. This pointer indicates which mark on your cardboard ring corresponds to your current focus position.
Step 4: Mark Your Focus Points
Mount the cardboard ring on your lens with the taped side facing you. Use a water-based marker to mark focus distances on the ring. As you adjust focus, note important marks for your shot (like actor A’s position, actor B’s position, etc.).
The water-based marker wipes clean with a damp cloth, letting you create new marks for each shot. This DIY filmmaking hack is essential for professional focus pulling without expensive follow-focus systems.
Hack 3: Microphone Stand
Commercial microphone stands cost $20-100. When you don’t have a dedicated sound person, this cardboard solution positions your shotgun mic perfectly.
Step 1: Cut Two Rectangles
Cut two rectangular pieces of cardboard approximately 12×8 inches. Sturdy, thick cardboard works best for supporting microphone’s weight.
Step 2: Create Mounting Holes
Punch or cut holes in both cardboard pieces. Position one hole slightly higher than the other to create an angled mount. The holes should be slightly larger than your shotgun microphone’s diameter.
Step 3: Thread the Microphone
Insert your shotgun mic through both holes. The two-hole system stabilizes the microphone at an angle, pointing toward your subject.
Step 4: Position and Hide
Place your DIY filmmaking microphone stand behind objects on set, close to your talent. The cardboard disappears behind props while the mic captures clean audio. This works brilliantly for interview setups and dialogue scenes.
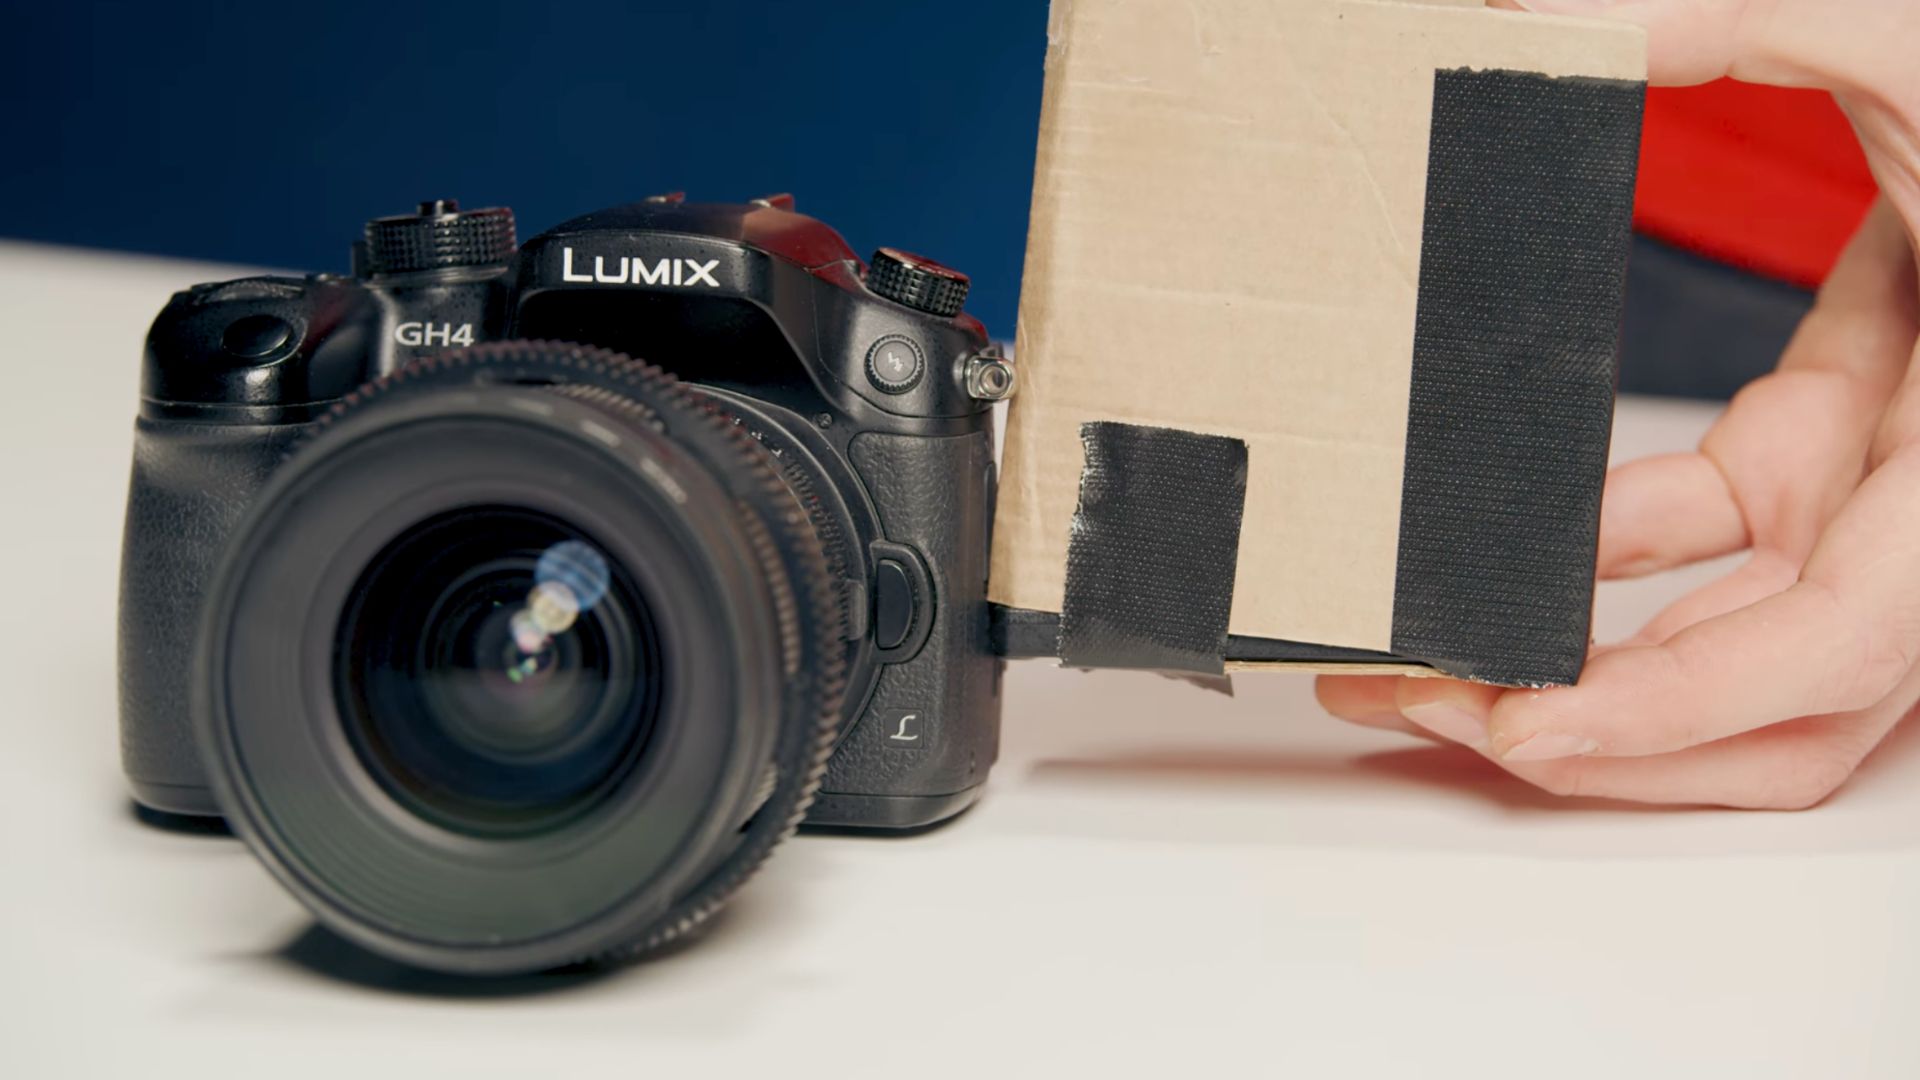
Hack 4: LCD Sun Hood
Commercial LCD sun hoods cost $30-80. Build a custom version that fits your specific camera and folds flat for transport.
Step 1: Measure Your LCD
Cut a long cardboard sleeve that wraps around three sides of your camera’s LCD screen. The fourth side (where the screen hinges) stays open.
Step 2: Create the Back Panel
Cut another piece of cardboard to match the size of your LCD screen. This becomes the back of your sun hood, the side opposite where your screen flips out.
Step 3: Assemble the Hood
Tape the back panel to your three-sided sleeve, creating a box shape. Fold this around your LCD screen and secure the two sides together with tape. Make sure the hood fits snugly but can be removed easily.
Step 4: Attach and Remove
Your DIY filmmaking sun hood now slides on and off your camera LCD. It blocks sunlight and glare, making your screen visible even in bright outdoor conditions. This is crucial for proper exposure monitoring and outdoor photography work.
Video Source: https://www.youtube.com/watch?v=cZ9O7xBV5L0
Hack 5: Portable Softbox
Professional small softboxes cost $40-150. Create a portable version using a shoebox that transforms harsh LED lights into flattering illumination.
Step 1: Prepare the Shoebox
Take a shoebox and poke a hole in the back. Size this hole to fit your flashlight or small LED light. The light needs to fit securely without falling through.
Step 2: Line With Foil
Cover the inside walls of the shoebox with aluminum foil. This reflects and multiplies the light output. Smooth the foil as flat as possible to avoid hotspots.
Step 3: Add Diffusion
Cover the opening (where the shoebox lid normally goes) with white paper, parchment paper, or thin white fabric. This diffuses the harsh light source, creating soft, flattering illumination.
Step 4: Insert Light and Shoot
Push your LED light through the back hole. The foil reflects light around the interior, and the diffusion material spreads it evenly. You now have a portable softbox for portrait lighting that costs nothing.
Important: Only use LED lights. Traditional hot lights can ignite cardboard and cause fires. LED lights stay cool enough for safe use with this DIY filmmaking hack.
Hack 6: Cucoloris (Cookie) for Background Patterns
Professional Cucoloris panels cost $30-200. Create custom light patterns using simple cardboard cutouts.
Step 1: Choose Your Pattern
Decide what shadow pattern you want. Common choices include window frames, venetian blinds, tree leaves, or abstract geometric shapes. Draw your pattern on cardboard.
Step 2: Cut the Pattern
Use a box cutter to carefully cut out your pattern. For window frames, cut out the “glass” areas. For blinds, cut parallel horizontal lines. The cutout areas let light through while the solid areas block it.
Step 3: Position and Light
Place your Cucoloris between your light source and subject or background. The light passing through creates recognizable shadow patterns. Window shadows suggest indoor scenes, while leaf patterns imply outdoor forest settings.
This DIY filmmaking technique adds production value by creating environmental context through lighting alone. It’s used extensively in cinematic lighting setups to establish mood and setting.
Hack 7: Foreground Framing Elements
Create interesting foreground elements that add depth and context to shots without building actual set pieces.
Step 1: Cut Your Shape
Cut shapes in cardboard that suggest specific viewpoints. Classic examples include keyholes (suggesting someone spying), binoculars (POV shot), or abstract shapes that add visual interest.
Step 2: Position at Lens
Hold your cutout cardboard close to your lens while filming. The shape falls out of focus but frames your subject, adding depth and storytelling context.
Step 3: Experiment With Distance
Moving the cardboard closer to the lens makes the frame softer and more subtle. Holding it farther away creates sharper edges. Adjust distance based on your desired effect.
This hack makes shots more visually interesting and adds layers to your composition. It’s particularly effective for creative photography where standard framing feels too ordinary.
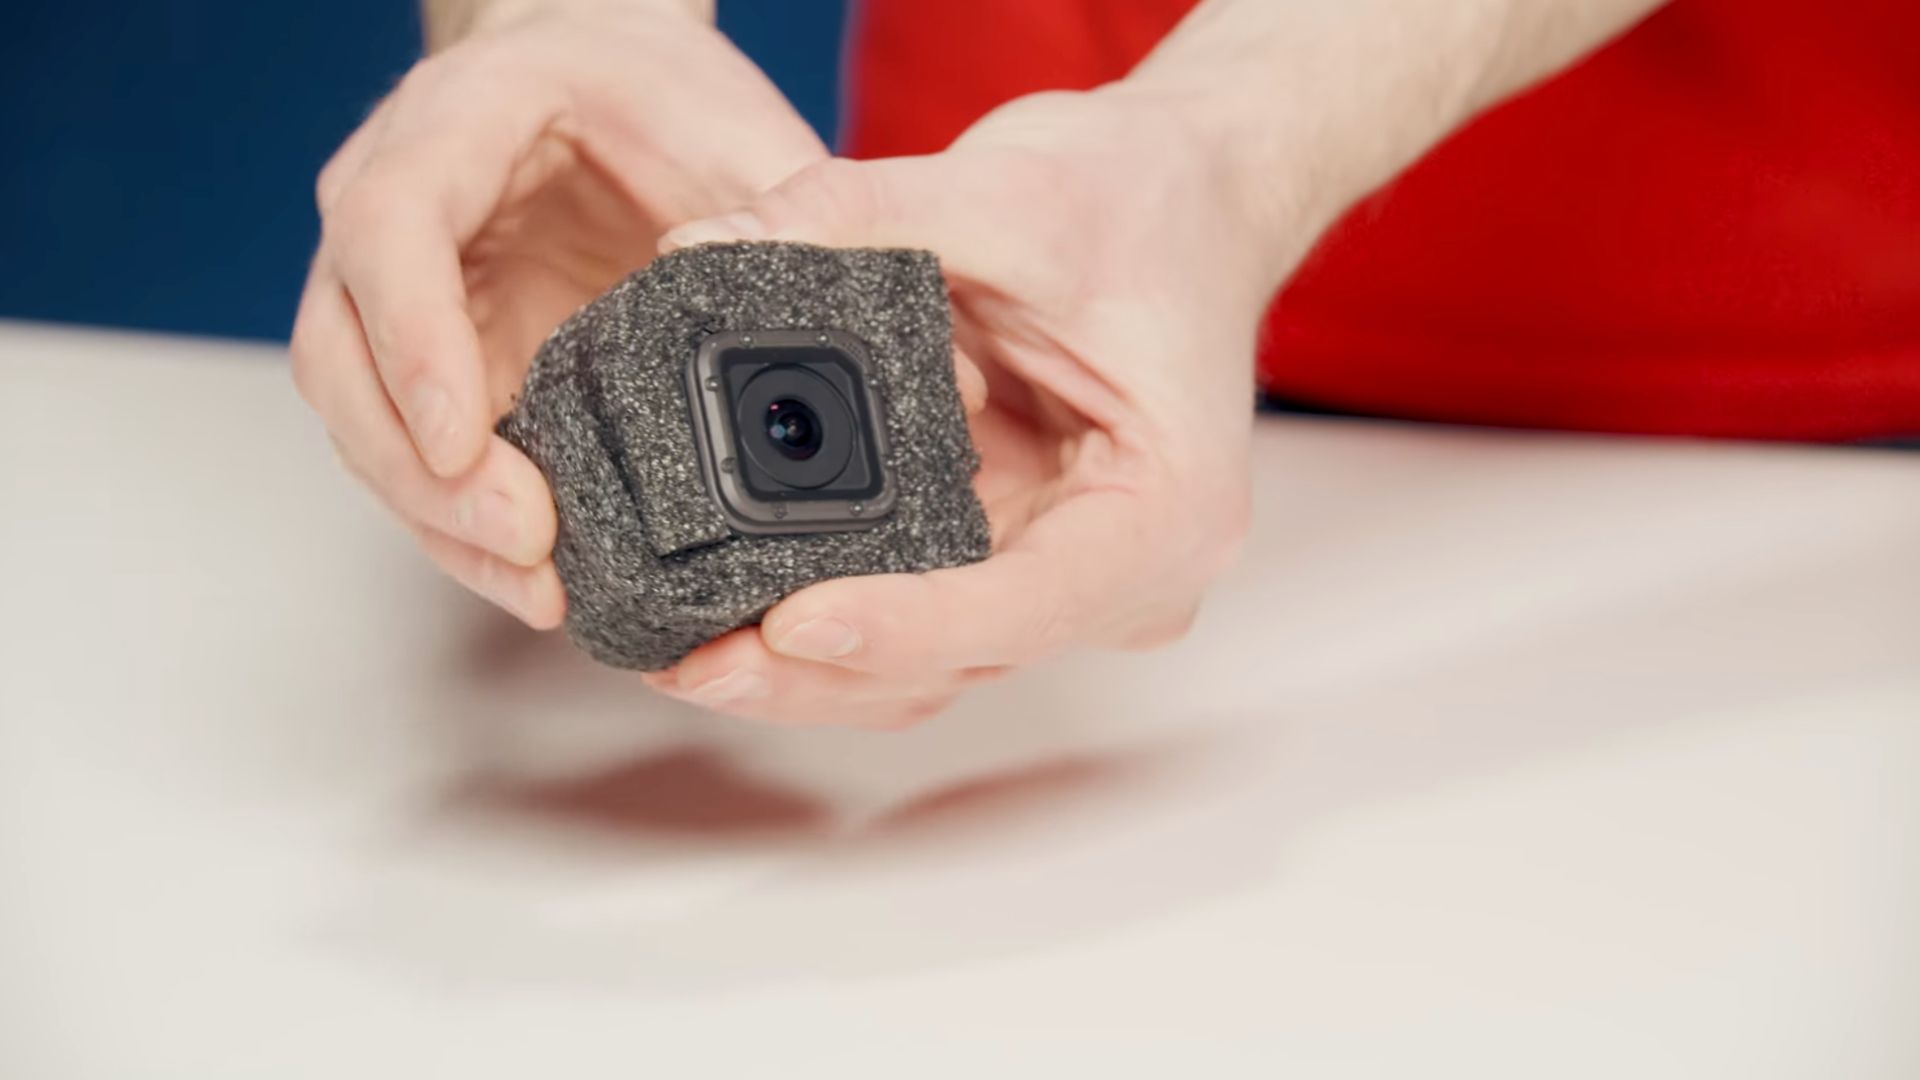
Hack 8: Throwable Camera Rig
Create dynamic POV shots by safely launching your camera through the air.
Video Source: https://www.youtube.com/watch?v=cZ9O7xBV5L0
Step 1: Build Protective Cage
Wrap foam around a small, sturdy camera like a GoPro. The foam absorbs impact when the camera lands. Secure the foam with tape to create a protective cage.
Step 2: Create Rocket Tail
Cut out two identical rocket tail shapes from cardboard. These should be large enough to provide stabilization but not so heavy that they affect the throw. Connect the two pieces together for a three-dimensional tail.
Step 3: Attach Tail to Camera
Fix your rocket tail to the foam cage using strong tape. The tail acts as a stabilizer during flight, keeping the camera pointed forward.
Step 4: Test and Throw
Practice throws in safe areas first. The rocket tail stabilizes the camera’s orientation, creating smooth POV shots of flying objects. This DIY filmmaking hack works great for baseball hits, thrown objects, or any shot requiring an airborne camera perspective.
Only use this with durable action cameras. Never attempt with expensive cinema cameras or equipment you can’t afford to replace if something goes wrong.
Hack 9: LED Panel Filter Holder
Professional filter frames for LED panels cost $30-100. Create custom holders for any light using cardboard.
Step 1: Measure Your Light
Cut two rectangular cardboard frames that fit within your LED panel’s borders. The frames should be slightly smaller than the panel itself.
Step 2: Sandwich Your Filter
Place your gel filter, diffusion, or color correction filter between the two cardboard frames. Tape the frames together, sandwiching the filter securely.
Step 3: Insert Into Light
Push your completed filter holder into your LED panel. The cardboard frames hold the filter taut and flat across the light source. The filter now modifies your light output cleanly without tape marks or wrinkles.
This DIY filmmaking solution works for colored lighting effects, diffusion, or any filter modification. Build multiple frames with different filters for quick on-set changes.
Tips for Better DIY Filmmaking Hacks
Use double-wall cardboard for projects requiring extra strength. Single-wall cardboard from shipping boxes works for most hacks, but critical components like camera sliders benefit from thicker material.
Paint your cardboard black to make it less visible on camera. Brown cardboard can appear in reflections or edge lighting. A coat of black spray paint or even black marker makes the cardboard gear less noticeable.
Reinforce stress points with extra tape or additional cardboard layers. Corners and mounting points take the most abuse. A few extra minutes of reinforcing these areas extends your DIY filmmaking gear’s lifespan.
When to Upgrade From Cardboard
These hacks work brilliantly for learning, testing concepts, and budget productions. If you find yourself using a particular solution repeatedly, consider investing in the professional version. The cardboard prototype proves you actually need the gear before spending money.
Use DIY filmmaking hacks as permanent solutions for lightweight equipment and occasional use. For heavy professional gear or daily production work, invest in proper equipment designed for the stress.
The Creative Value Beyond Cost Savings
Building your own gear teaches problem-solving skills that make you a better filmmaker. You understand how the equipment works because you built it yourself. This knowledge translates to better gear choices when you do buy professional equipment.
The resourcefulness developed through DIY filmmaking helps on every production. When something breaks on set, you can MacGyver a solution rather than shutting down. This mindset is invaluable for independent filmmakers working with limited resources.
The Cardboard Camera Gear That Works
These nine cardboard DIY filmmaking hacks prove that creativity matters more than budget. A camera slider, focus marking system, microphone stand, LCD sun hood, portable softbox, cucoloris, foreground elements, throwable rig, and filter holders all cost essentially nothing while solving real production problems.
The spirit of DIY filmmaking deserves a comeback. Modern filmmakers sometimes forget that cinema was built by people who invented solutions rather than buying them. Embrace that creative tradition by building at least one of these hacks for your next production. You’ll save money, learn valuable skills, and reconnect with the resourceful creativity that defines great filmmaking.

Darlene Lleno
Darlene Lleno brings a unique perspective to DIY Photography as someone who grew up surrounded by camera gear but chose words over lenses. With five years of writing experience, she specializes in photography content that’s both technically informed and genuinely passionate. Growing up with a photographer twin brother meant camera talk was everyday conversation in her household. While he mastered capturing moments, Darlene discovered she preferred being the subject and the storyteller behind the scenes. As a travel enthusiast and mother of two, she understands the importance of preserving life’s precious moments. When not exploring new destinations or writing for DIY Photography, you’ll find her reading or tending to her garden. Her approach to photography writing is refreshingly authentic, she may not be behind the camera, but she knows exactly what it takes to help others capture the shots that matter most.


Join the Discussion
DIYP Comment Policy
Be nice, be on-topic, no personal information or flames.
One response to “9 Cardboard Hacks That Will Transform Your Filmmaking (For Free!)”
It’s nice to see this place is finally getting back to DIY hacks and gear. Leave the click-bait “news” stories to Fstoppers or DPReview.