


Turn That Office Scanner into a Large Format Digital Camera
Aug 26, 2025
David Prochnow
Our resident “how-to” project editor, David Prochnow, lives on the Gulf Coast of the United States in Ocean Springs, Mississippi. He brings his expertise at making our photography projects accessible to everyone, from a lengthy stint acting as the Contributing How-To Editor with Popular Science magazine. While you don’t have to actually build each of his projects, reading about these adventures will contribute to your continued overall appreciation of do-it-yourself photography. A collection of David’s best Popular Science projects can be found in the book, “The Big Book of Hacks,” Edited by Doug Cantor.
Share:

It’s hiding right there in plain sight. There’s an 8MP digital camera hiding in your office and it’s just begging for you to make high resolution photographs. Where is this camera hiding? It’s lurking inside your scanner. Say, what? Just lift the lid on that scanner and you’ll be able to make high resolution photographs that will stun your office coworkers. All it takes is a little bit of “follow-the-leader!”
No, that doesn’t mean dropping your trousers and jumping up on the scanner screen for making an impromptu portrait of your boss–that would give a whole new definition to quiet cracking.
Instead, the leader that you’ll be following is the light trolley that is housed underneath the surface glass of the scanner. First off, let’s address three questions that you are probably worrying about. “Do I have to disassemble the scanner?” No, you won’t need any tools or disassembly of your office scanner. This is a completely non-destructive process.
“Why do you call an 8MP digital camera ‘high resolution’ when that’s so puny?” Don’t forget, that an 8MP scanner is resolving each print at 300 dots per inch (DPI) which is more than enough resolution for making gorgeous 8- x 10-inch photographs. And, finally, this last question could be a deal breaker for some office workers.
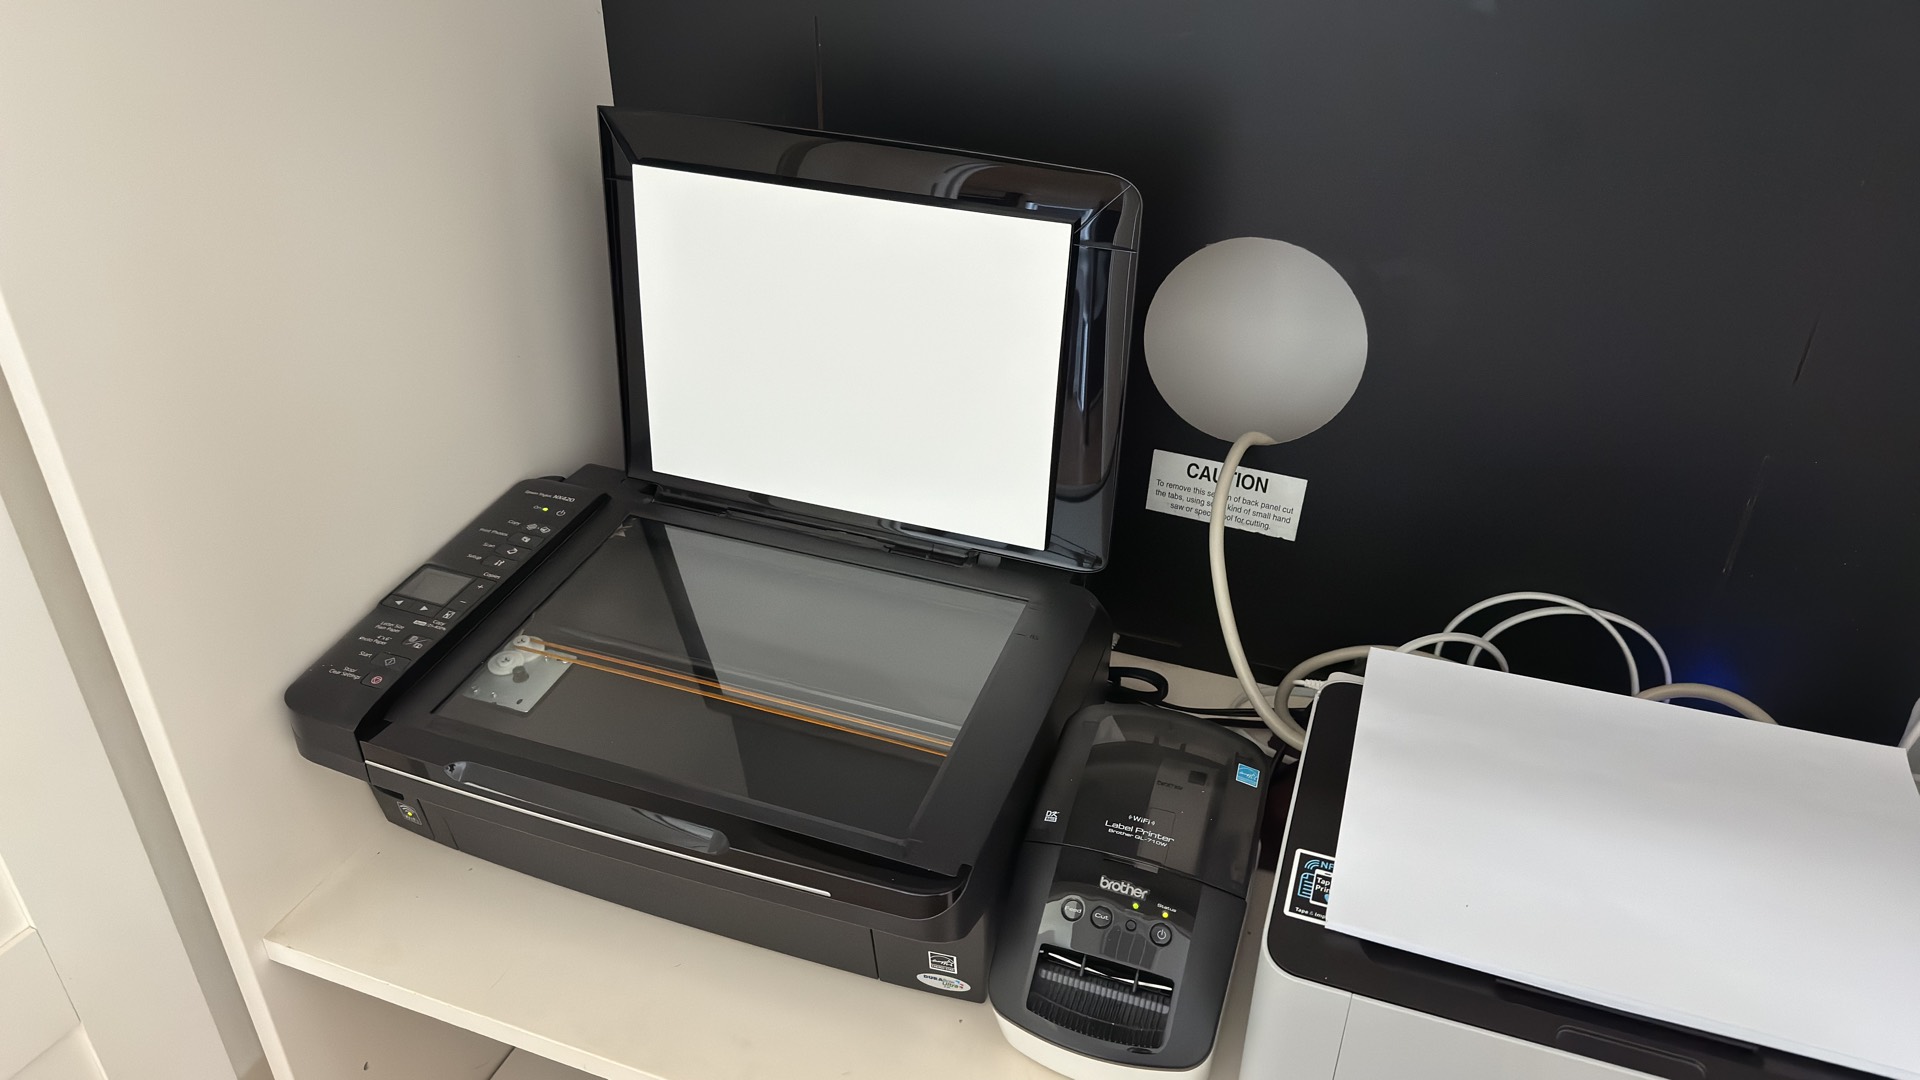
“Do all scanners work for this technique?” Well, yes and no; yes, all scanners can be “made” to work, but only flatbed scanners with a direct connection to a PC or wireless connection via a smartphone app will work without any hardware modification. Networked document scanners with automatic sheet feeders won’t work without some employee-terminating disassembly. Now that those three questions have been answered, let’s make some ‘scanner-graphs.’
[Related Reading: How to build a DIY 4×5 large format digital scanning back from a portable flatbed scanner]
[Please note: Portable “wand” scanners could work, but they have not been tested with this technique.]
Follow the Leader
The ideal scanner for this technique is a flatbed scanner. Begin by lifting or removing the scanner lid. Connect your computer or smartphone to the scanner and run a “blank” test scan. This process will enable you to watch how the light-emitting scanning trolley system works. In basic operation, the scanning light will illuminate and the trolley will slowly move the light assembly down the entire length of the glass screen.
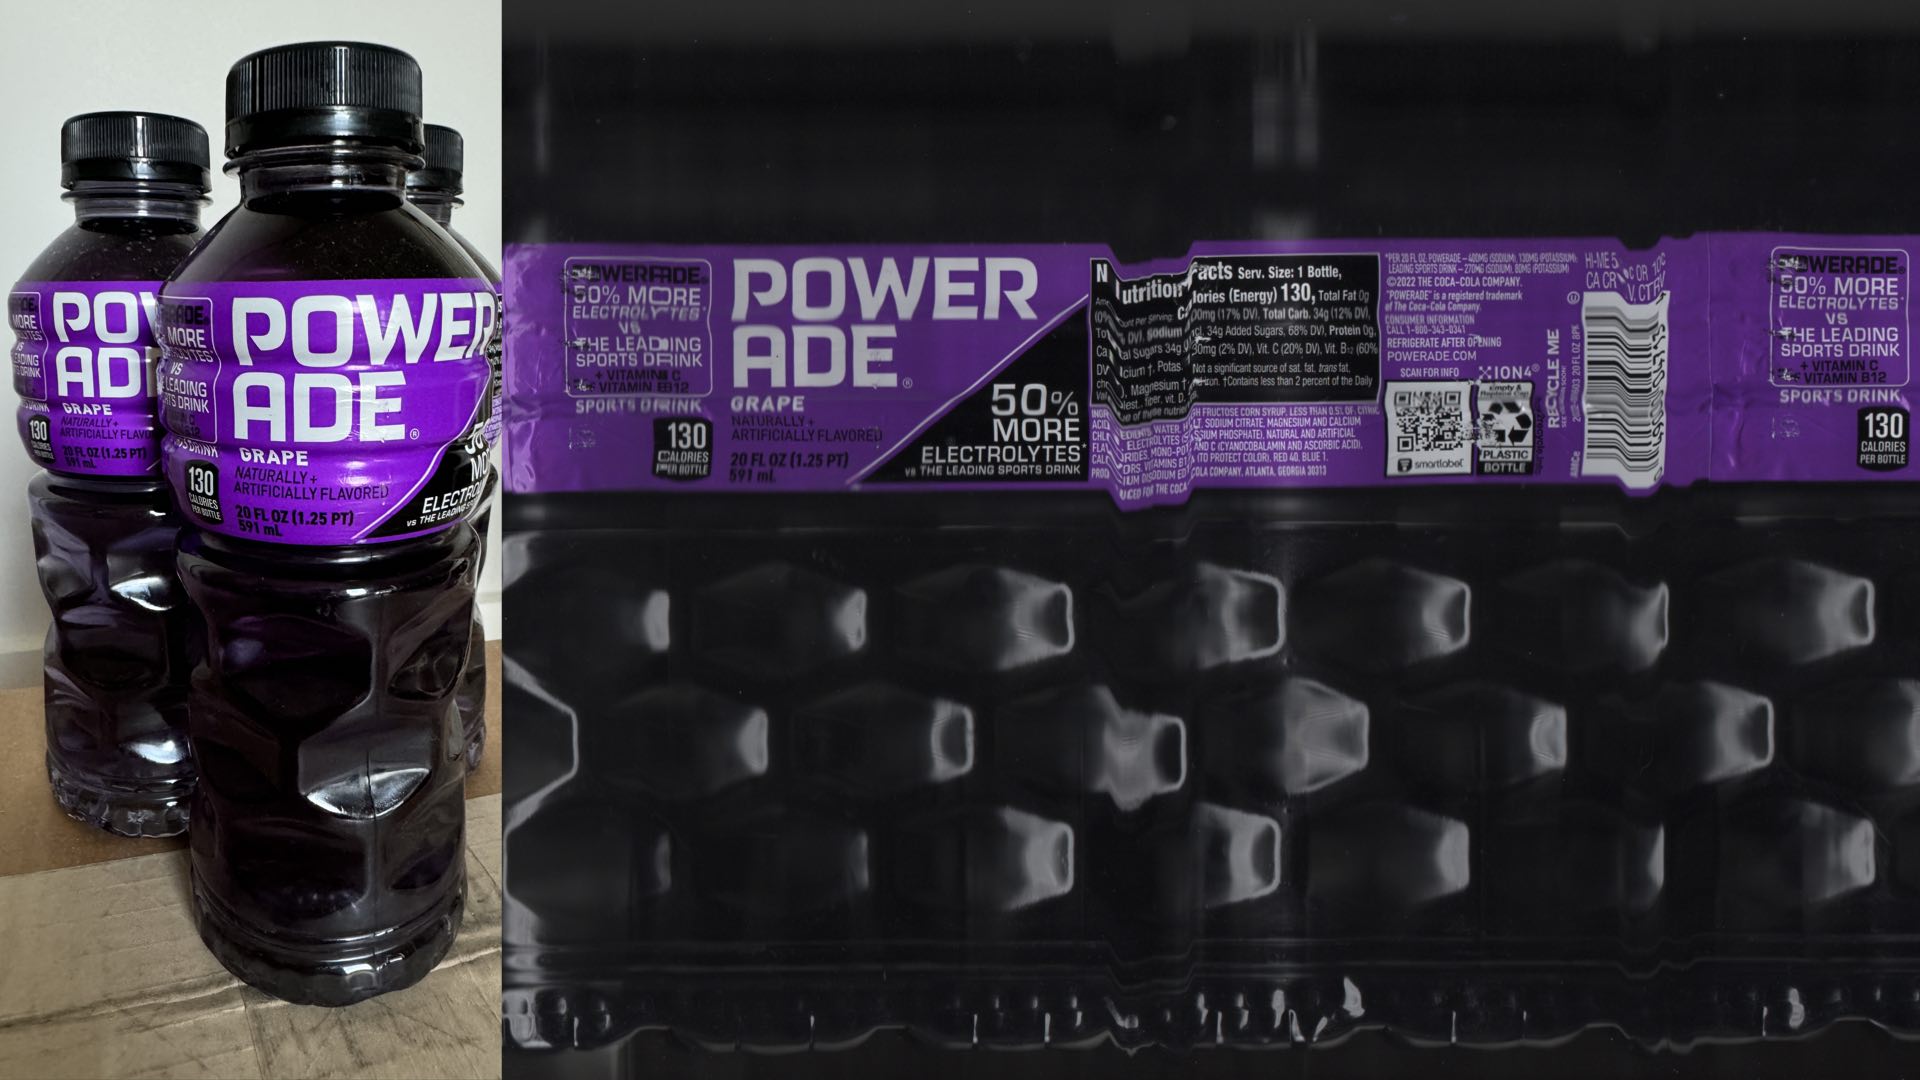
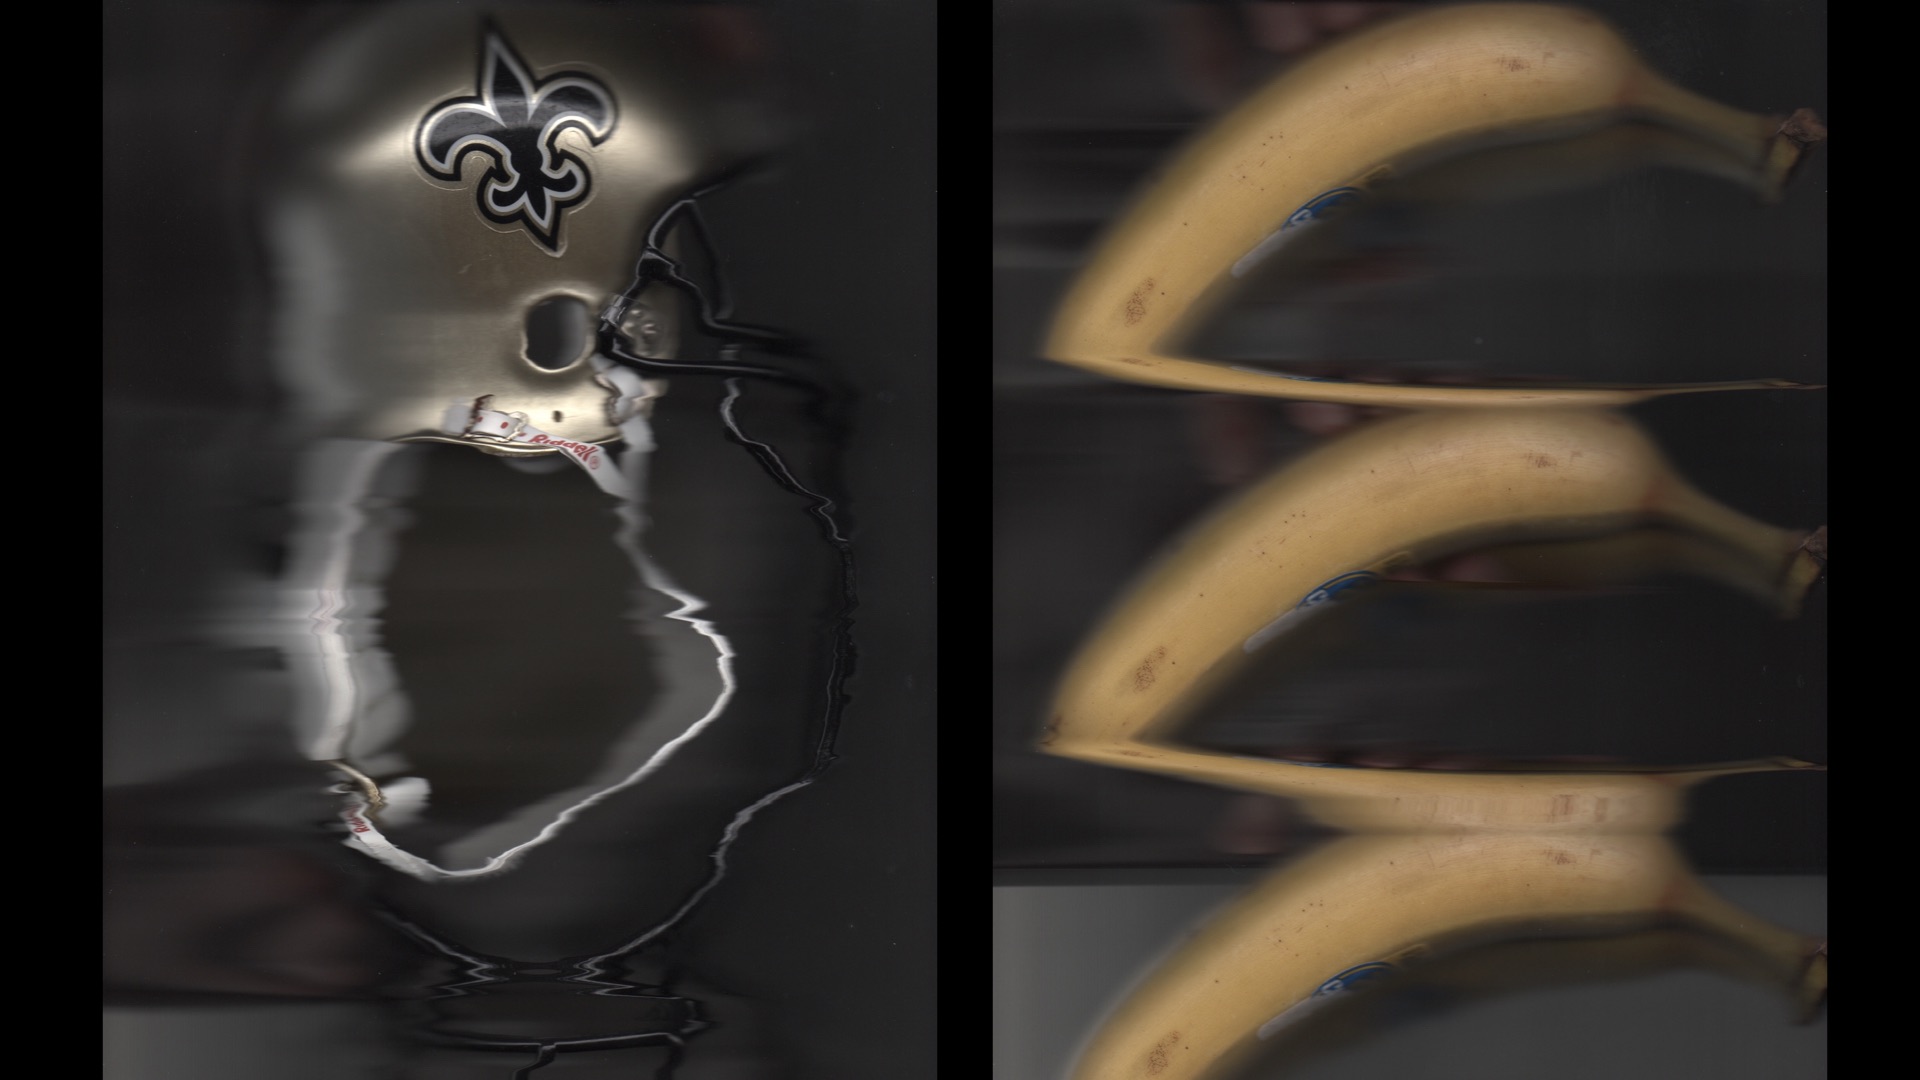
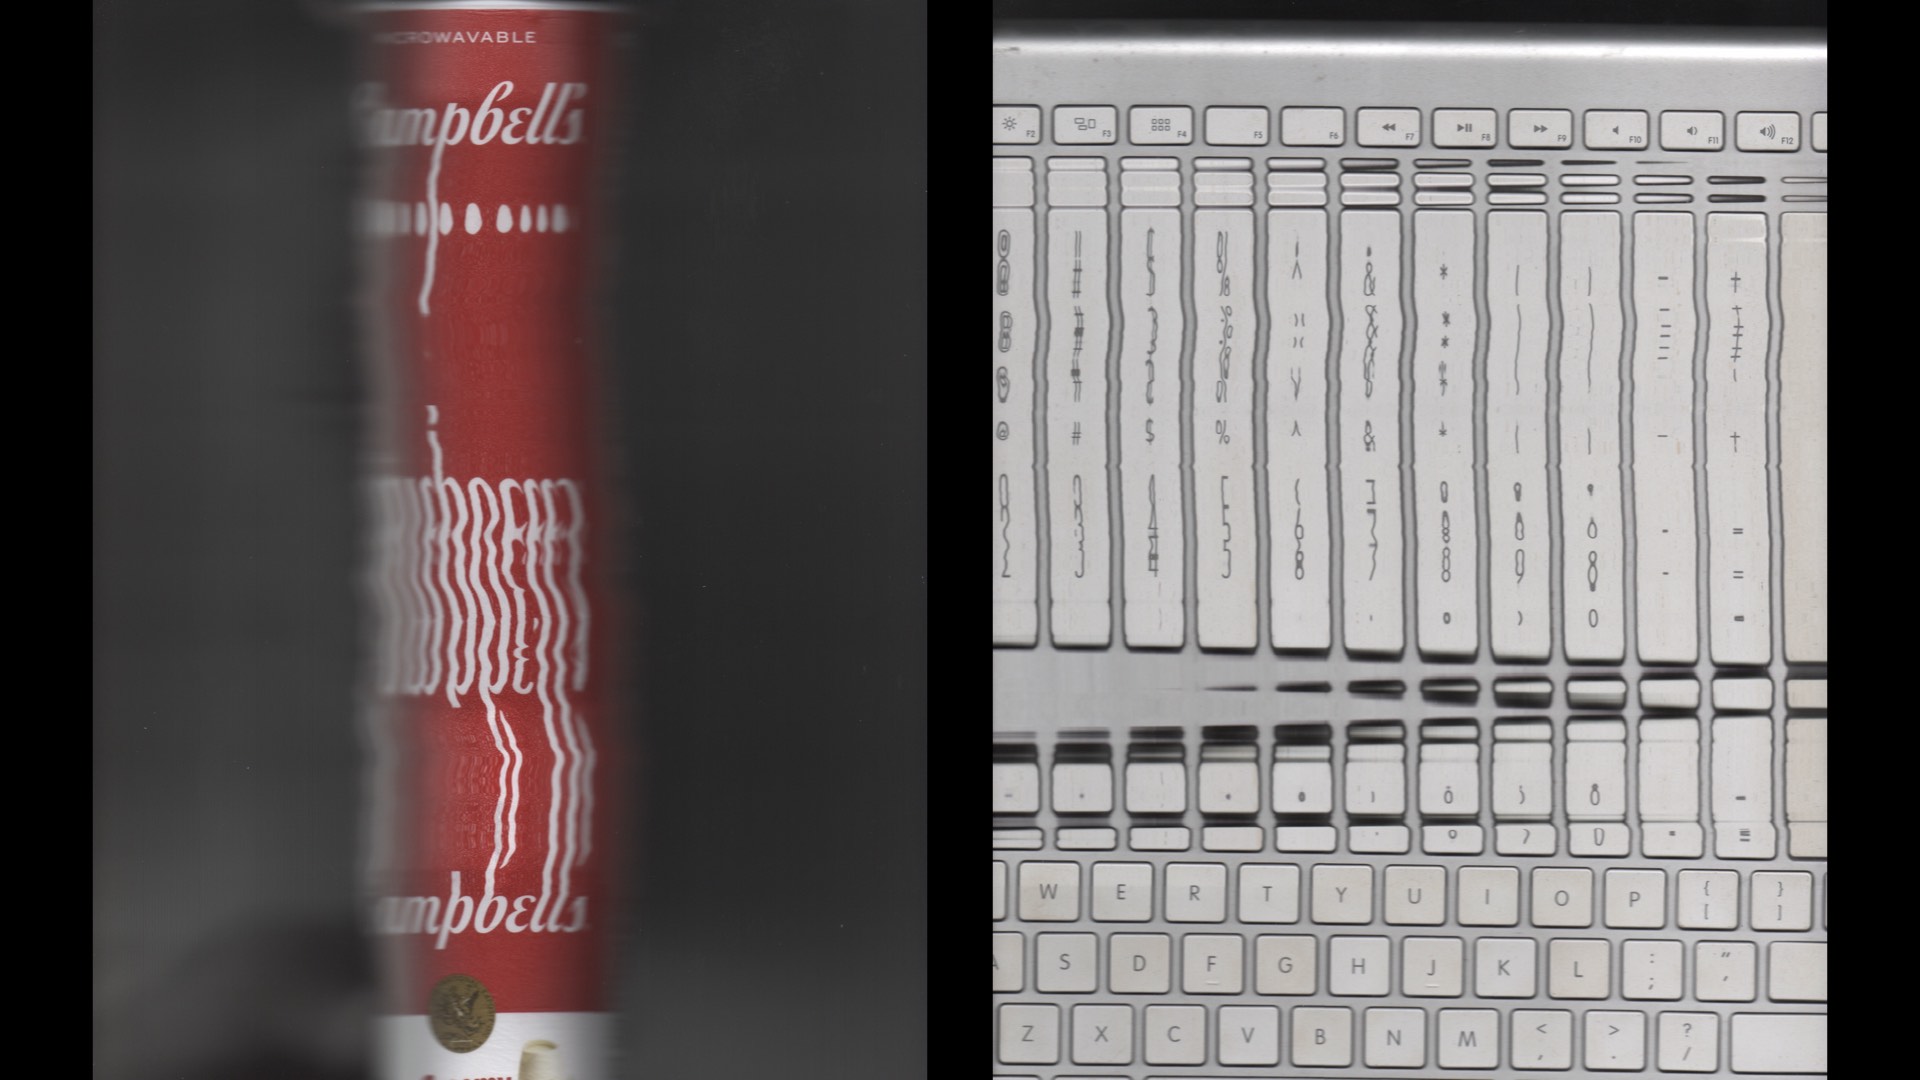
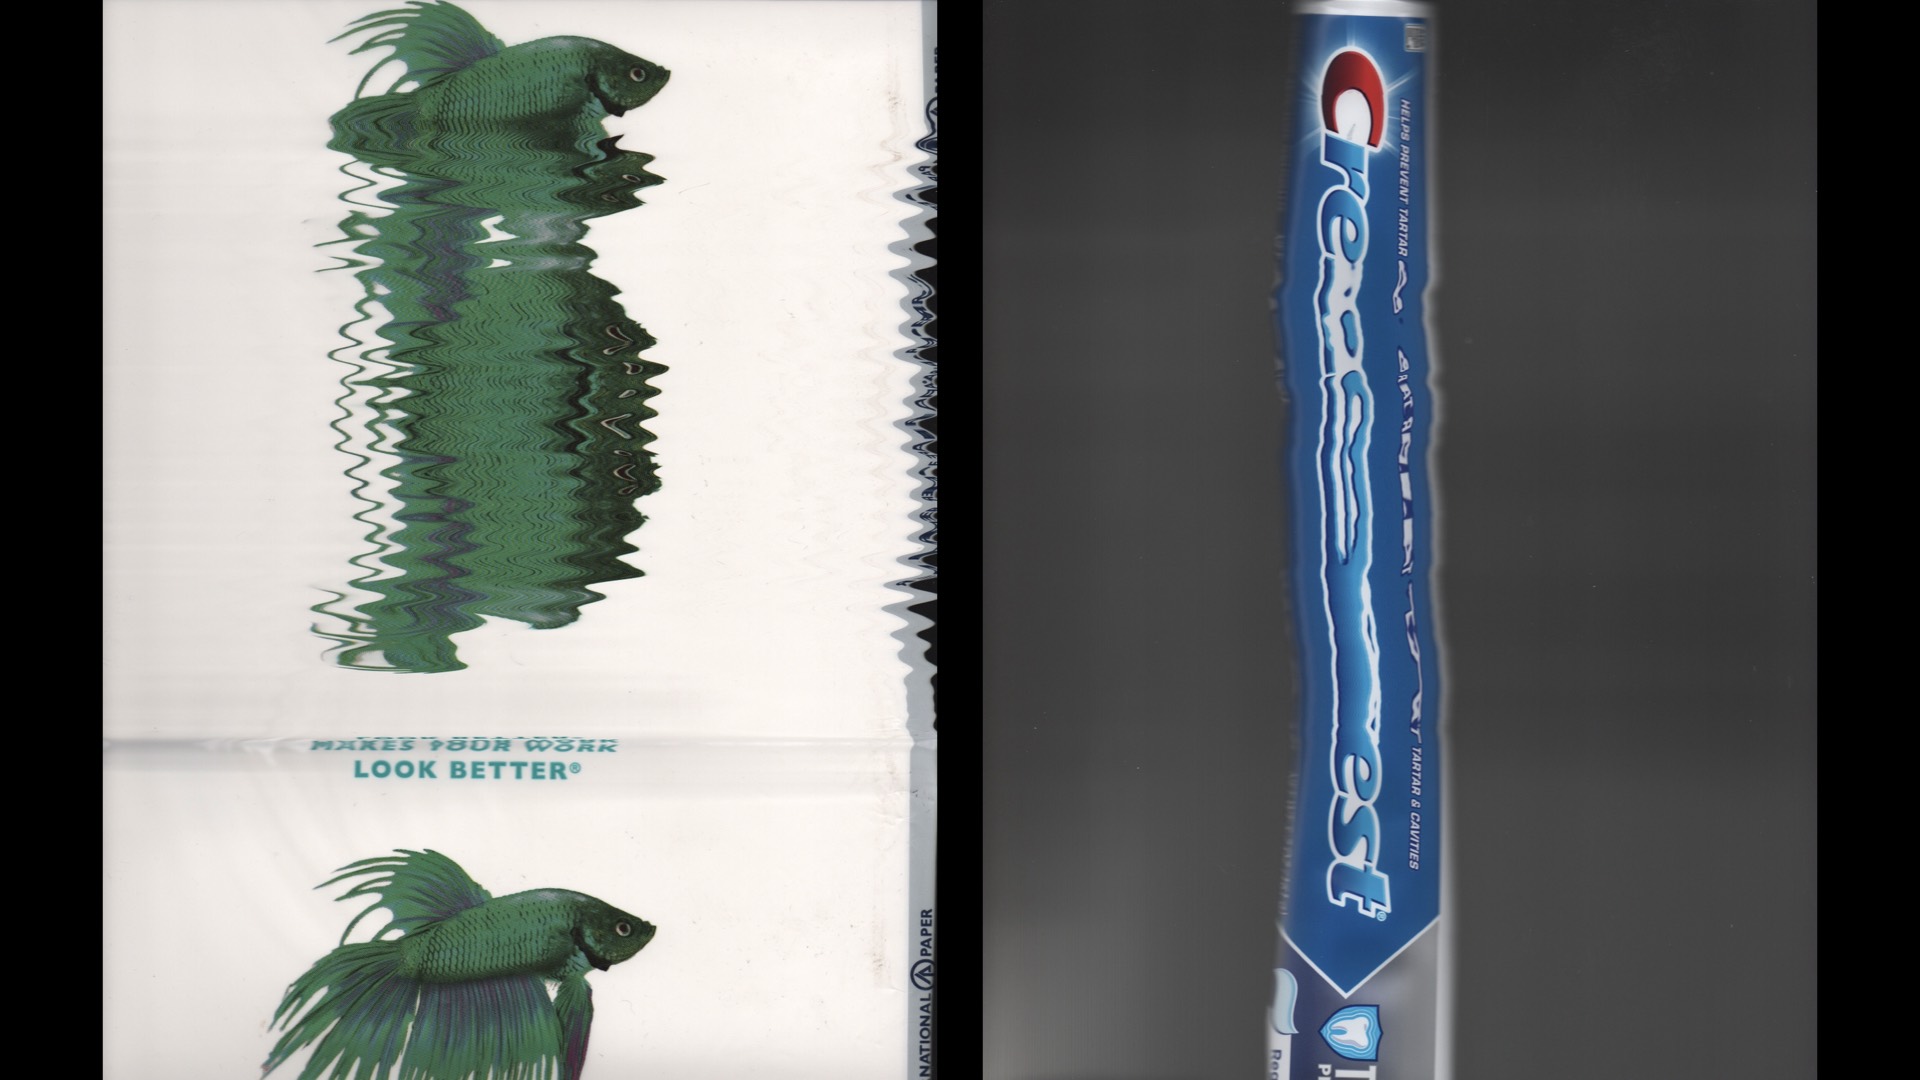
Now that you have a general idea of the speed of the trolley’s movement and the intensity of the light, you are ready to make a test scanner-graph. Oh, also, you should note that the “depth-of-field” of the scanner’s light and sensor unit is roughly less than 1/2-inch. Therefore, a good scanner-graph will be made as you move your subject in close contact with the glass screen following the movement of the trolley.
Please study these first two sample subjects. Both the natural view of each subject along with its scanner-graph are shown side-by-side:

Once you’ve mastered these basics, the real fun with scanner-graphs can begin. Move ahead of the trolley or move back-and-forth while following its movement; the sky’s the limit when you are making a scanner-graph.

Enjoy.
Filed Under:
Tagged With:

David Prochnow
Our resident “how-to” project editor, David Prochnow, lives on the Gulf Coast of the United States in Ocean Springs, Mississippi. He brings his expertise at making our photography projects accessible to everyone, from a lengthy stint acting as the Contributing How-To Editor with Popular Science magazine. While you don’t have to actually build each of his projects, reading about these adventures will contribute to your continued overall appreciation of do-it-yourself photography. A collection of David’s best Popular Science projects can be found in the book, “The Big Book of Hacks,” Edited by Doug Cantor.
Related Posts
 How to build a DIY 4×5 large format digital scanning back from a portable flatbed scanner
 Get that 4×5 large format look by photographing the ground glass of a large format camera
 Photographers turn empty building into a camera obscura to create epic large format photos of London
 Large format from a full-frame digital camera? Yes, it can be done
Join the Discussion
DIYP Comment Policy
Be nice, be on-topic, no personal information or flames.