


6 Tips to get cleaner smoother footage out of your Mavic Pro
Feb 1, 2017
John Aldred
John Aldred is a photographer with over 25 years of experience in the portrait and commercial worlds. He is based in Scotland and has been an early adopter – and occasional beta tester – of almost every digital imaging technology in that time. As well as his creative visual work, John uses 3D printing, electronics and programming to create his own photography and filmmaking tools and consults for a number of brands across the industry.
Share:

DJI have had a hard time filling orders for the wildly popular Mavic Pro. Since its announcement shortly after Photokina, they’ve just not been able to keep up. Now, though, they finally seem to be getting there, and the Mavic Pro is in a lot of hands. Every day I’m seeing a ton of new footage shot by them, and while some of it is excellent, there’s a lot out there that needs some work.
The folks over at FliteTest seem to have noticed this, too. In their new video, they provide 6 tips to maximise the abilities of the Mavic Pro. Most of them will also help you to produce smoother and cleaner footage.
Most of the tips relate directly to helping you create better footage, but one of these is good common sense with any drone. That’s removing the props when doing things like firmware updates. The last thing you want is for those props to spin up when your hands are close.
Updating the firmware with a drone as new as the Mavic Pro usually brings safety and flying features. But, it can bring filming & photography advantages, though, too. More stability in your flights mean smoother footage. New updates can also offer things like better exposure control, more accurate colour, and other features.
The rest of the tips, though, are pretty much exclusively aimed at giving your the best footage or photographs.
- If you’re shooting 1080p, don’t be afraid to hold back and use digital zoom. Or, shoot 4K and crop to 1080p in post.
- Tap to focus. The Mavic’s camera lens focus can be adjusted, and you’ll want to make sure your subject is sharp.
- Use Tripod Mode for in-air timelapse sequences.
- Remove the props while doing firmware updates – and actually do those updates!
- Use a long cable with the Mavic Controller to use a full size tablet instead of your phone
- Remove the camera gimbal cover to increase footage quality
The first tip, has been one of the major arguments for the use of 4K cameras in general. Despite the fact that few people can watch 4K content, being able to produce 1080p content on a 4K camera provides options. It means you can crop in post for a tighter view. It’s like shooting with a longer lens. You can do this “in-camera” through the app if you’re shooting 1080p. Or, you can just shoot 4K and do it in post. It’s the same argument for 6K and 8K cameras now that 4K is becoming a little more mainstream.

The next point is a big one, famously missed by Casey Neistat when he first attempted to fly the Mavic Pro. It resulted in some not too great footage, although he was still quite impressed. Tap the screen to focus the Mavic’s camera lens where you need it to be. If you don’t want to deal with it in-flight, set it to infinity from the ground, and then don’t worry about it.
Using tripod mode for timelapses is something I hadn’t really considered. I know many people use it to keep a relatively static position when filming in the air, which is its intended purpose. But to slowly drift, and speed up the whole thing for timelapse produces very impressive results. This will chug through batteries, though. So, make sure you have a bunch of spares if you plan to do a lot of these.

Using a longer cable to attach the Mavic controller to a full size tablet might seem like a hassle. But, it lets you get a much larger view of the scene than you’ll see from a phone or small tablet. I’ll often work the same way with FPV, using a larger monitor on a stand to receive the signal and view what the camera sees rather than a small scree on my controller. It makes it much easier to see what’s going on.

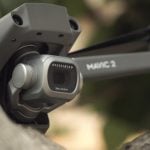
Finally, removing the cover for the gimbal & camera. This might sound like an obvious one, but there are times where protecting your camera is more important than the footage itself. So, you may choose to leave it on. Or you might just leave it on by default, not even thinking about removing it. Getting that out of the way of your lens, though, is going to be the single biggest quality boost your footage can receive.
What other tips do you have for getting better footage on the Mavic? Or for shooting footage with drones in general?

John Aldred
John Aldred is a photographer with over 25 years of experience in the portrait and commercial worlds. He is based in Scotland and has been an early adopter – and occasional beta tester – of almost every digital imaging technology in that time. As well as his creative visual work, John uses 3D printing, electronics and programming to create his own photography and filmmaking tools and consults for a number of brands across the industry.
Related Posts
 Sync and embed timecode into GoPro footage for cleaner multicam and 360° footage
 Tips To Make Your Next On Location Shoot Go Smoother And Yield You Better Photos
 How the DJI Mavic Air stands up against the Spark, Mavic Pro and Phantom 4 Pro
 DJI Mavic 2 Pro review shows a substantial upgrade over the original Mavic Pro
Join the Discussion
DIYP Comment Policy
Be nice, be on-topic, no personal information or flames.
One response to “6 Tips to get cleaner smoother footage out of your Mavic Pro”
According to DJI removing the gimbal cover is not optional. It blocks the air intake for the cooling fan. You are always supposed to remove the cover before flying.