


5 Tips for lighting a green screen for a clean key
Dec 2, 2016
John Aldred
John Aldred is a photographer with over 25 years of experience in the portrait and commercial worlds. He is based in Scotland and has been an early adopter – and occasional beta tester – of almost every digital imaging technology in that time. As well as his creative visual work, John uses 3D printing, electronics and programming to create his own photography and filmmaking tools and consults for a number of brands across the industry.
Share:

One would think that lighting up a green screen would be similar to working with something like a white seamless backdrop. But there are a few differences. Unlike a white seamless, green screens aren’t blown out beyond your camera’s dynamic range. They can also reflect colour back onto your subject. And you’re usually shooting on a green background for different reasons than white.
In this video, Aputure’s Ted Sim teams up with David Carmichael from Corridor Digital to bring us five tips to light our green screens. The tips, are, of course, aimed primarily at video shooters, but green screen is becoming a common technique with photography, too. Many of us also shoot both stills and video, so having a single set up that can work for both is ideal.
So, what are the five things you need to consider when shooting green screen?
What is your green screen made of?
This might seem like a strange question, at first. But, the material from which your green screen is made has a big effect on how easy the footage will be to work with.
Ideally, you’ll want a permanent fixed cyc wall painted with matte green chroma key paint. You don’t want to use gloss, as it will reflect the lights and other objects in the environment back toward the camera. Lights reflected off your glossy green screen won’t show green any more, they’ll be white.
That’s not an option for most of us, especially if we’re shooting on location. So, a green muslin backdrop, or a pop up green screen can work well. Do be careful, though, some popup green screens can be very reflective. Choose wisely.

Generally, a green screen is easier to work with than a blue one. It sits on the opposite side of the colour wheel to human skin, which provides a nice contrast for keying. If your subject is wearing something green that closely matches the background, then you might want to go with blue. Personally, I’ve also found that subjects with blonde hair tend to key out better on a blue screen, too.
Light your subject first
When working with a white seamless, one would typically light the background first. You want a nice smooth spread of light so that it’s lit evenly across the entire surface. Bring your subjects forward of the background, flag the background lights to prevent spill, and then light them separately.
With green screen, you generally want to work the opposite way. You light your subject first, so that the lighting on them matches the scene you’re going to be compositing them into. Then once they match, you light up your background to provide a nice even illumination across the surface.

If you’re unable to film your actors while at the location, think about how you would light them if they were there. You generally want to augment and compliment the natural lighting in the scene. Figuring this out at the location itself and jotting down some notes makes it easier to match the light on your subject when you’re in the studio.
Evenly lit background
There are tricks you can do with various adjustment layers and garbage mattes to compensate for uneven lighting. But, it’s a lot easier to key out your footage if your background is evenly lit to begin with. It’s also a lot less work, and much faster to fix it on the day, than it is to try to correct it in post. With only one or two lights, it can be difficult to get it perfect, but you want as little variance as possible in brightness and colour.

You’ll also want to bring your subject as far forward from the background as space and the size of your green screen will allow. This will prevent colour from the background reflecting back and spilling onto your subject.
Exposure tools
If you’re using an external monitor, false colour is a fantastic way to ensure that you have an evenly lit green screen. False colour looks at the brightness levels in your scene to offer a quick glance at how your exposure stacks up.

You can see in the image above, that the green screen is slightly brighter toward the centre of the background than it is in the four corners. It doesn’t matter too much if it falls off in areas away from your subject, as those can be masked out pretty easily. As long as it’s even around your subject, you’re good to go.
If you don’t have an external monitor, you can always shoot tethered to an Android or iOS device running qDslrDashboard. It’s an $8 app which provides, amongst other things, allows you to stream liveview to your mobile device. It also features several different overlay modes, including false colour. This is a technique I use often, wirelessly, with a 1080p Nexus 7 tablet when shooting video with Nikon DSLRs.
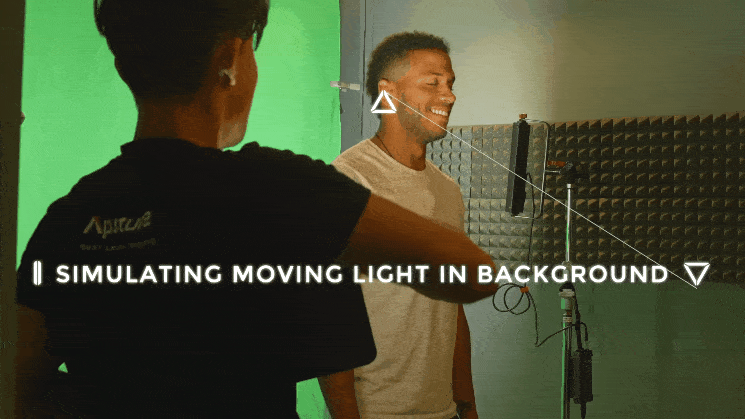
Lighting gags
This one’s more for video than for stills, and it’s an extension of lighting your subject. Once your talent and your background are lit, you need to think about other elements that might interfere with the light in the real world, and help further sell the composite. For example, if your subject is supposed to be driving down the street, they’re going to be passing a lot of street lights. Or it could be an interior shot with a flickering light on the wall or ceiling. So you’ll want to recreate this effect in the studio, too.
The video is loaded with a bunch of other great mini-tips, as well. So, it’s worth a watch. Even if your focus is photography and not video, you’ll still probably pick up a few tricks.
What other tips do you have for working with green or blue screens? Do you use them with stills? Or do you prefer to use white or grey? Let us know in the comments.

John Aldred
John Aldred is a photographer with over 25 years of experience in the portrait and commercial worlds. He is based in Scotland and has been an early adopter – and occasional beta tester – of almost every digital imaging technology in that time. As well as his creative visual work, John uses 3D printing, electronics and programming to create his own photography and filmmaking tools and consults for a number of brands across the industry.


Join the Discussion
DIYP Comment Policy
Be nice, be on-topic, no personal information or flames.
One response to “5 Tips for lighting a green screen for a clean key”
My top 5 tips are – Separation, separation, separation, separation and separation.