


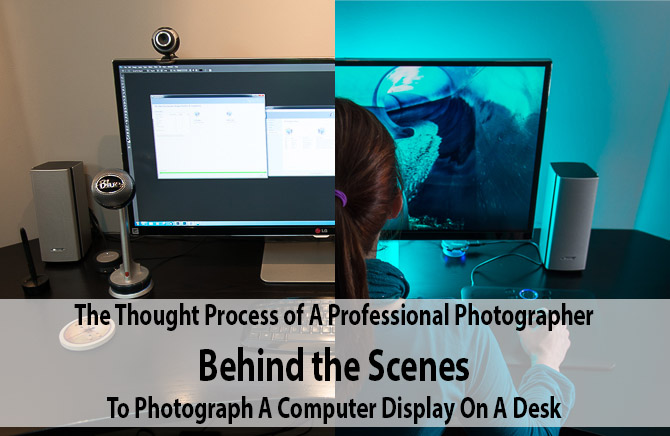
The Thought Process of a Professional Photographer: Behind the Scenes to Photograph a Computer Display On A Desk
Share:
In our previous post where I reviewed the 34 Inch 21:9 UltraWide Display – LG 34UM95, I had to include a few photos of the display sitting on my desk. I could have used an advertising photo, but for a hands on review, I wanted to show the monitor sitting on my actual desk.
As it turns out, the final shot was a teeny bit more involved than I was planning and I think that you might find the thought process along the way pretty interesting.
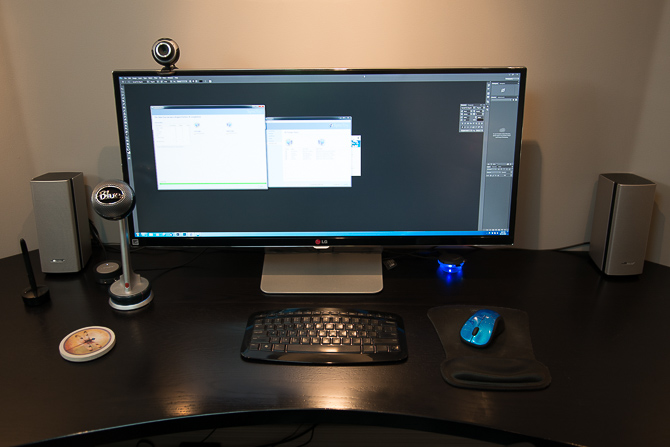
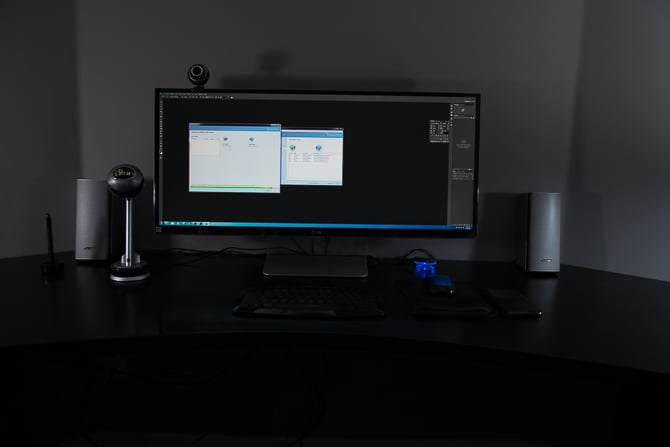
Here is my first photo, overhead halogen ambient light and a little daylight through a small window on the left. Well, actually the very first photo I took was on my phone, a Galaxy Note III. The reason I started with my phone is because its the easiest and fastest way to get an image from a camera into an article – but that photo looked even worse than this one. So thinking that maybe the camera was the problem (duh), I pulled out the D800, metered for what the camera told me was the proper exposure and snapped this pile-o-sheep.
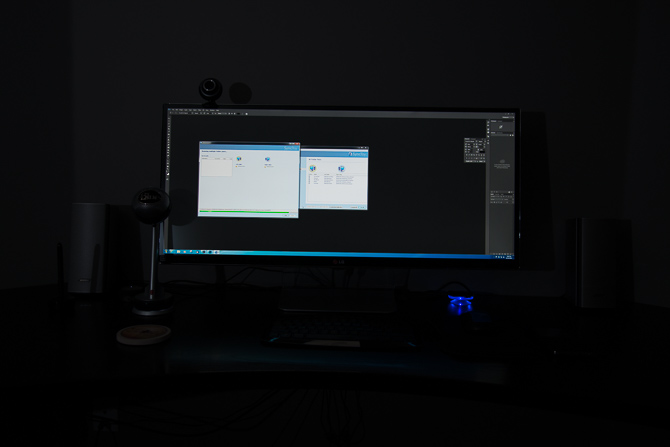
Ok, so first of all, the display is too bright – the camera effed up. How did my D800 not know that I was writing an article about a computer monitor and therefore wanted said computer monitor to be properly exposed. No problem, there is a reason the Terminator franchise is so popular – its because we secretly hate smart-ass computers that think they are better than us. So overrule the computer and chimp the settings in manual to properly expose the computer screen.
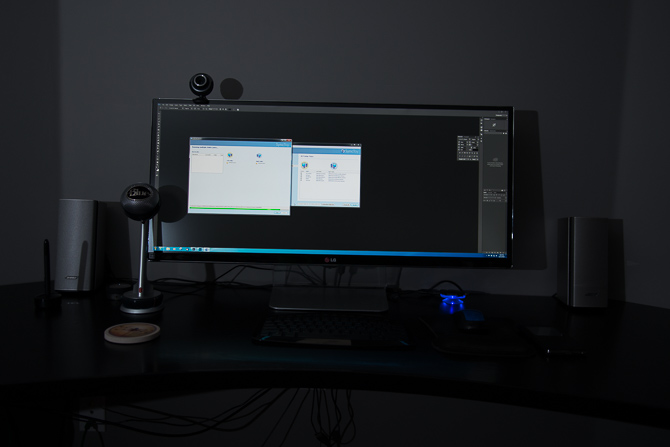
Bah, the display is properly exposed but now the rest of the scene is black. Fine, I can solve this – since the ambient light sucks, I will make my own light with a strobe. I still wanted to keep this simple so I got one SB-800 flash and put it on the desk behind me pointing straight up. A nice generic bounce off the white ceiling – that should do it right?

Neuman! That doesn’t look much different than the ambient photo. Except the screen is properly exposed…although there is now a giant glare ball right in the middle. Right, I can fix that – dial down the flash power a bit, move the flash to the side so that the light isn’t bouncing directly back to the camera and set the white balance from auto to daylight to even the colors out (the display is calibrated to daylight and the flashes are just slightly warmer).
OK, maybe this is progress. Its not as blatantly awful as the first three, but now it just looks like it was taken by a 10 year old with a pop up flash. So, lets try to make the light more interesting. You know what always looks interesting and edgy? Light from the side – lets move the flash to the side of the monitor on the desk in front of me, just out of the frame.

Ah-ha – progress – but the light is a little harsh. Maybe I just need a light modifier to soften it up a bit. Let’s try a Gary Fong Lightsphere – partly because I am too lazy to set up a softbox and lightstand, and partly because those $50 pieces of plastic were the first light modifiers I ever bought and I need to use them once in a while because I am still pissed that they cost $50.
Now we’re getting somewhere. But I still don’t like that shadow on the wall and the light on the right is too dim. Sorry Zack Arias, but one light isn’t going to cut it this time. No problem, I have more – lets put another flash with another Lightsphere on the desk to the other side of the monitor…and, while we’re at it, why don’t we put something interesting to look at on the monitor.
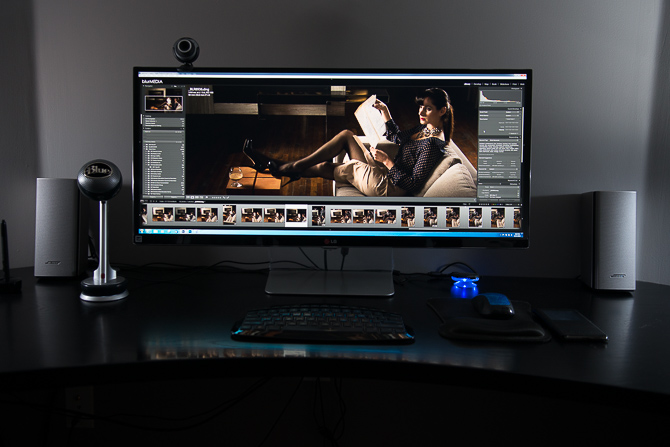
Ka-chow! Now that looks like something that is worthy of being shared with the world.
Here is what it looks like behind the scenes: the strobes are Nikon SB-800s with a Lightsphere on each. They are triggered by Cactus V6 radio triggers. Oh, and by the way, I had a few issues with the Cactus V6 triggers in the beginning (read the review here), but they have quickly become my go-to system for triggering my strobes. The camera is set to ISO 400, f/2.8 and 1/60th. The strobe on the left is at 1/128th with a frosted Lightsphere. The strobe on the right is at 1/64th with a clear Lightsphere.

Put a fork in me, I’m done…right? Well cool your jets there buster – you still have to process this photo. Friends don’t let friends publish un-retouched photography (is that a double negative?). Here is the final, final – after a few minor Lightroom adjustments. Tweaking the contrast, blacks, highlights, vibrancy and a few exposure gradients to darken the edges and draw the eye in.

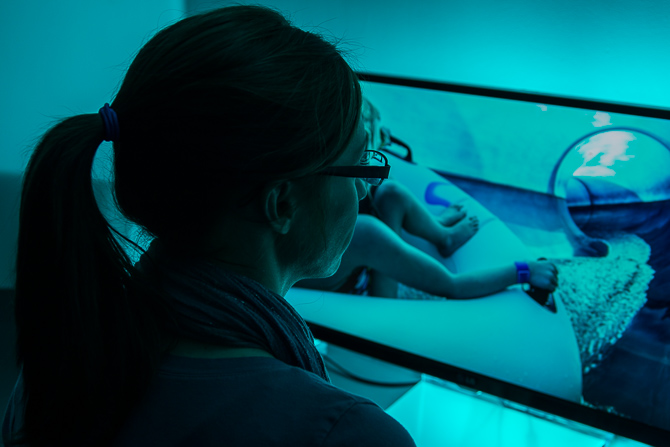
Now I’m done. Well…yes…for the LG 34UM95 review…but I spent all that time cleaning my desk…and the scene is looking pretty cool…so what would it look like if I put up some bright blue photos on the display and then stuck another strobe behind the screen with a deep blue gel to mimic the light from the screen, and then get a lifestyle model to sit in front of it pretending to edit photos (by lifestyle model I am referring to my wife, one of my kids, or possibly a cat).
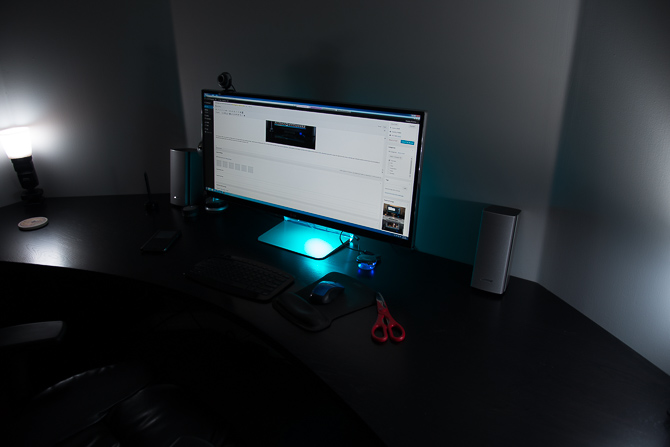
Ya, nope. Flash taped to the back of the screen pointing down looks exactly like a flash taped to the back of the screen pointing down. Too much light on the desk top…easy to fix spread out the dicks (just Google “Flight of the Conchords” and thank me later). I added an extra gel and the built in diffuser and aimed the light straight back at the wall.
Getting closer, but now there is too much light coming out the top – it doesn’t look right. I aimed the flash down on a 45 and put a piece of paper behind the monitor stand to diffuse the light before it hits the base and turned up the power by a stop. I also liked the color of the first gel better – so I took the second one out and doubled up the first. Finally, I found a photo with a lot of the same color blue.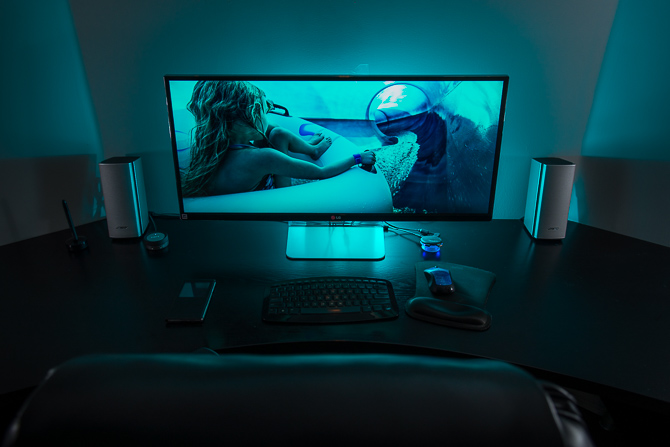
Now there’s some awesome sauce. Bring in the models!
 “That looks great so far, but I’m going to come to the side to shoot the next one, so can you please try to look a little less pissed off?”

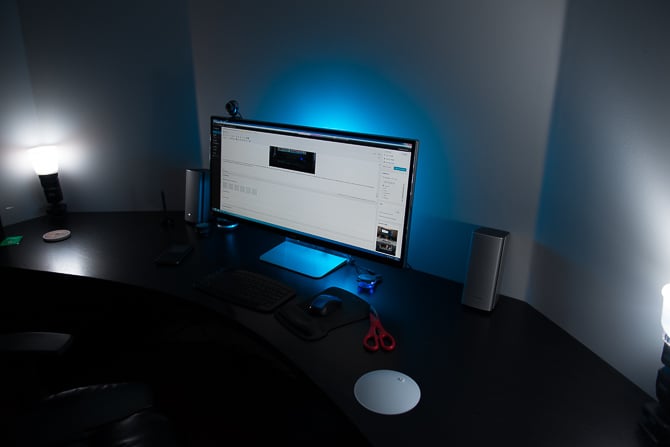
And last but not least – I know you’re wondering what it looks like lit by only the blue strobe behind the monitor without the white light strobes on the side. Me too.
So there you go – the journey from a gawd awful ambient light snapshot to what I think are some pretty cool photos of a computer monitor sitting on a desktop.
Have You Ever Started With A Simple Snapshot That Led To A Totally Different Photo?
Leave a comment and let us know!
Filed Under:
Tagged With:

JP Danko
JP Danko is a commercial photographer based in Toronto, Canada. JP can change a lens mid-rappel, swap a memory card while treading water, or use a camel as a light stand.
Related Posts
 How to photograph dolls with this Barbie Dreamtopia behind the scenes video
 Now you don’t even have to be a professional photographer to be a certified professional photographer
 Go Behind The Scenes Of A Vogue Fashion Shoot With With Legendary Photographer Horst P. Horst Circa 1946
 Photographer takes you behind the scenes of this dreamy conceptual image
Join the Discussion
DIYP Comment Policy
Be nice, be on-topic, no personal information or flames.
4 responses to “The Thought Process of a Professional Photographer: Behind the Scenes to Photograph a Computer Display On A Desk”
Nice.
Thanks for sharing the progress. This is often more interesting than simply looking at the result.
yep, that’s exactly how my desk looks all the time…well, except a beer instead of wine, an over-flowing stack of papers for depth, some dust for texture, and random stuff from my kids for color. jk, lol, but really.
thanks jp! its good to see how pros put in work to make a shot.
ps. standing desks rule (and not just to keep little kids from touching your stuff)
I was shooting a mug a couple of nights ago, for no reason except that its my favorite mug and I need more shots for my product portfolio. After about an hour of playing around things had moved from still life snapshot to some pretty complex lighting and staging that was far beyond a typical product shot.
I’m not quite finished, but its taken quite an interesting turn. If you give yourself the time and don’t get bogged down with a singular vision things can indeed go in some pretty interesting directions, even the most mundane of shots.
Haha, yes.
We once tried to make a city silhouette as gigapixel image.
Turned out to be 6 Month of work to get that 450 Models into place and costs me 41% of my hairs.