


This Is How to Use AI in Lightroom to Retouch With Ease
Jun 27, 2025
Anzalna Siddiqui
A psychology major in her third year of Bachelor’s, Anzalna Siddiqui has endless curiosity for the human mind and a deep love for storytelling – both through words and visuals. Though she hasn’t taken up photography as a profession, her Instagram is where her passion finds its home. In addition to this, she’s a travel enthusiast who never travels without her camera because every place has a story waiting to be captured.
Share:
I came across something amazing for anyone who loves photography, particularly portrait photography. There is a new trend in the way photographers are polishing their images, and it uses some very clever AI. Mark Newton demonstrates this does not involve wild changes, but subtle touches that really do make a big difference.
Easy Face Retouching in Lightroom
Suppose you have got a great portrait, but perhaps there is a small flaw, or maybe the eyes need a bit more shine. Marks shows that the old way of doing this was to go deep into complicated software. However, today, much of that heavy lifting is being done by artificial intelligence, such as retouching in Lightroom.
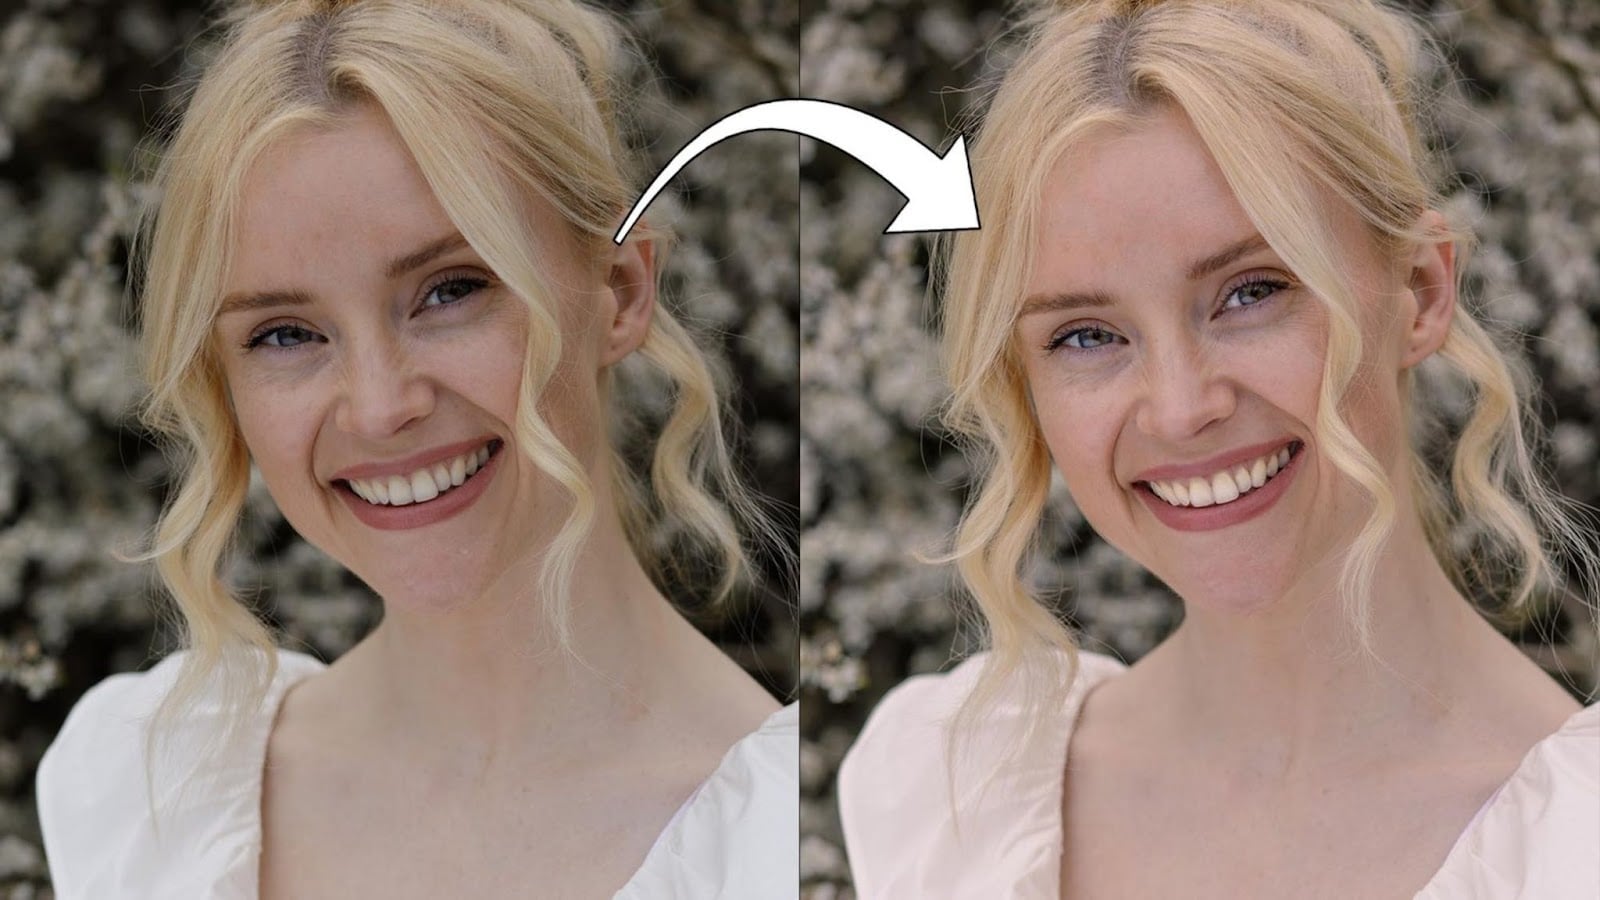
The lesson I watched had a portrait of “Rosie” in it, and she was already looking quite good, which the teacher pointed out as perfect for this speedy retouching in Lightroom process. Here, the intention is not to correct big problems, but to work with what you already have.
Here is the workflow he showed:
Begin with the Fundamentals: Crop and Spot Removal:
First, as with any good photo edit, it started off with a crop. This serves to draw the viewer’s eye to the subject. Next, it was onto the time-honored Heal tool within Lightroom. This is where you zap out any minor blemishes, such as a small scar or a prominent vein across the nose.
The teacher zoomed in to 200% in order to ensure no detail was left behind, effortlessly adjusting the brush size and feathering for a smooth merge. It is surprisingly great at those little flaws.
Initial Raw File Adjustments:
Before getting into the AI magic, they did some run-of-the-mill raw file adjustments. This involved adjusting the white balance, which was a tad too yellow, to a natural daylight setting. Next were the adjustments to highlights and shadows, backing off detail in brighter spots and pushing up darker tones.
Adding a touch of whites for glint and blacks for contrast perfected the basic appearance. Already at this point, viewing the before-and-after was stunning, revealing a clearly brighter and spotless image.
Achieve Flawless Features with Retouching in Lightroom
Now, this is where things get really neat. It is the reason why retouching in Lightroom is becoming a standard. Lightroom’s AI can automatically identify people in your images and then automatically break down their faces into various segments.
Targeted Face Enhancements with AI Masks:
The trick here is employing Lightroom’s masking capabilities. Once you instruct Lightroom to find people, it recognizes unique areas such as “facial skin,” “eyebrows,” “eye sclera” (that’s the white of your eyes, who would have thought?), “iris and pupil,” and “lips” and “teeth.” The instructor began by choosing the “entire person” to generate a mask.
This provided a gentle bump in the shadows throughout the entire subject, making Rosie really “pop” off the page. Labeling each mask, such as “entire person” or “eyes,” is a tidy trick for keeping yourself in order.
Brightening Eyes:
Then it was the eyes, which are essential in every portrait. By painting a new mask just for the “iris and pupil” and the “eye sclera,” the instructor was able to brighten these spaces. A slight lift in the whites and shadows under this mask added a beautiful sparkle to Rosie’s eyes, making them more alluring. It is such a subtle thing, but you cannot help but notice the extra life in the portrait.
Perfecting Smiles:
Last but not least, the teeth. Once more, a mask was made up just for the “teeth.” Although the AI did an excellent job of choosing most of them, a quick brush-in was applied to add in any that were overlooked. At last, a simple boost of the “whites” setting in that mask lightened the smile naturally without causing that look of being too bleached. The teacher even moved the “amount” slider to discover that sweet spot, making the teeth whiter but still natural-looking.
Final Thoughts
The process of retouching in Lightroom with these AI-masks is all about speed and consistency. For photographers dealing with big shoots, being able to make these nuanced adjustments and then sync them across several images is an enormous time-saver. Though more advanced retouching may still require a tool like Photoshop, with more layered control, Lightroom is distinctly upping its game for fast, high-quality portrait boosting.
This shift in photography editing tools is really intriguing to photographers who want top-notch results without the tedium of slow manual processes. What else will these intelligent tools figure out how to do, you wonder?
[Portrait Retouching in Lightroom]

Anzalna Siddiqui
A psychology major in her third year of Bachelor’s, Anzalna Siddiqui has endless curiosity for the human mind and a deep love for storytelling – both through words and visuals. Though she hasn’t taken up photography as a profession, her Instagram is where her passion finds its home. In addition to this, she’s a travel enthusiast who never travels without her camera because every place has a story waiting to be captured.
Related Posts
 Quickly and easily retouch shiny skin in Photoshop & Lightroom
 Stellar Photo Recovery 12 Lets You Recover Your Lost Photos and Corrupted Files with Ease
 Selfie Editing Apps Are Rendering Retouch Artists Unemployed. Not! (yet)
 Retouch4Me is a suite of Plugins that use AI to retouch your photos in the blink of an eye
Join the Discussion
DIYP Comment Policy
Be nice, be on-topic, no personal information or flames.