


This DIY digital Box Brownie conversion has built-in WiFi and microSD slot
Jun 14, 2023
John Aldred
John Aldred is a photographer with over 25 years of experience in the portrait and commercial worlds. He is based in Scotland and has been an early adopter – and occasional beta tester – of almost every digital imaging technology in that time. As well as his creative visual work, John uses 3D printing, electronics and programming to create his own photography and filmmaking tools and consults for a number of brands across the industry.
Share:

The humble Kodak Brownie is one of the most loved and classic cameras ever made. While film has seen a big resurgence over the last few years, the Brownie and many other box cameras like it are still out of commission. We’ve seen new film stocks, sure, but we haven’t seen all of the old formats come back. The Kodak Brownie, in particular, used 117 format film. You can reroll and repurpose 120 format film, but it can be a pain.
So how can you take advantage of Brownie and similar cameras today? Well, you can make them digital, of course. That’s the project that JGJMatt took on with his Kodak Brownie digital conversion. And unlike most DIY camera projects, this one doesn’t use a Raspberry Pi. Instead, it uses the inexpensive (and easily available!) ESP32.
What is the Kodak Brownie?
The Kodak Brownie was released in 1900 and was the first truly portable, small camera for the masses. Its ease of use also made it very appealing to the public at large. At the time, it sold for a mere dollar. Sure, inflation has happened since then, but that still only equates to around $35 today. The price isn’t surprising when you realise that Kodak initially targeted this camera towards children, with over 150,000 shipped in its first year of production.

It was later succeeded by the Kodak Brownie II a year later. This one sold for the whopping price of $2. The significance of this one is that it swapped over to 120 format roll film, which means it can still be used with film available today – assuming the camera itself still works. It was a leatherette-covered cardboard box when it was first released but switched over to metal box construction in 1924. Later models switched over to 620 format film – you can respool 120 onto 620 to be able to keep using those today.
How to shoot a Kodak Brownie with today’s tech
The modern modification of that old Brownie camera involves an ESP32 microcontroller, an ESP32Cam module and a variety of other components. While you’re not going to get exactly the same types of images as the original Brownie, you’ll still get to have the experience of shooting with that style of camera. You’ll never be entirely sure whether the image captured by the sensor will actually match what you see through the viewfinder or not. So, it brings back a little of that surprise element that stops you from worrying so much about settings.
JGJMatt’s first step was to dismantle and completely clean up the camera and each of its constituent parts. With cameras that are over 120 years old, they’re not going to be in pristine condition, so some cleaning is almost definitely going to be required. Dismantling the camera is also required to remove the lens and other internal components that need to be gone to make space for the ESP32 camera system.

While there are a variety of different microcontrollers or single-board computers available these days, JGJMatt used an ESP32 Cam module that includes an ESP32-S board. This board provides WiFi connectivity but no Bluetooth control. You’ll also need a battery LiPo charging board, an M12 lens, and a handful of other components. You’ll also need a 3D printer – or at least access to one – to print some of the parts to mount everything inside the Brownie.
With the electronic components all wired together, the code uploaded and everything inserted into the old Brownie body, you’re pretty much ready to go.
Will this work with other cameras?
Hypothetically, as long as you can get the components to fit, these electronics should work in just about any camera. JGJMatt says that the same models should fit into most other box cameras of the time as they all had a very similar form factor. If you wanted to convert other types of cameras, perhaps a TLR, you’d have to design your own 3D-printed internals.
If you want to have a go at your own DIY digital conversion, head on over to Instructables. JGJMatt has made the complete parts list, STL files, and ESP32 code available to download. He’s also provided complete instructions covering everything from dismantling and cleaning the camera to reassembly, fitting the components and getting everything ready for your first shot. He also has some hints in there for turning this into an infrared camera!
[via Hackaday]

John Aldred
John Aldred is a photographer with over 25 years of experience in the portrait and commercial worlds. He is based in Scotland and has been an early adopter – and occasional beta tester – of almost every digital imaging technology in that time. As well as his creative visual work, John uses 3D printing, electronics and programming to create his own photography and filmmaking tools and consults for a number of brands across the industry.
Related Posts
 How to construct the world’s most well built and best looking DIY light box
 Sony Releases The a77 II – Will 79 AF Points, Built In Wifi Remote And Pro Movie Features Shift The Market?
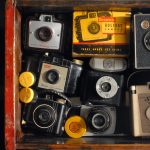 Kodak Brownie – The Most Important Piece Of Photography Cardboard Ever Made
 Angle grinder vs tripod plate – How to still access your battery slot with small cameras
Join the Discussion
DIYP Comment Policy
Be nice, be on-topic, no personal information or flames.