


No Camera, No Darkroom, No Problem – Make Instant Photograms
Oct 12, 2025
David Prochnow
Our resident “how-to” project editor, David Prochnow, lives on the Gulf Coast of the United States in Ocean Springs, Mississippi. He brings his expertise at making our photography projects accessible to everyone, from a lengthy stint acting as the Contributing How-To Editor with Popular Science magazine. While you don’t have to actually build each of his projects, reading about these adventures will contribute to your continued overall appreciation of do-it-yourself photography. A collection of David’s best Popular Science projects can be found in the book, “The Big Book of Hacks,” Edited by Doug Cantor.
Share:
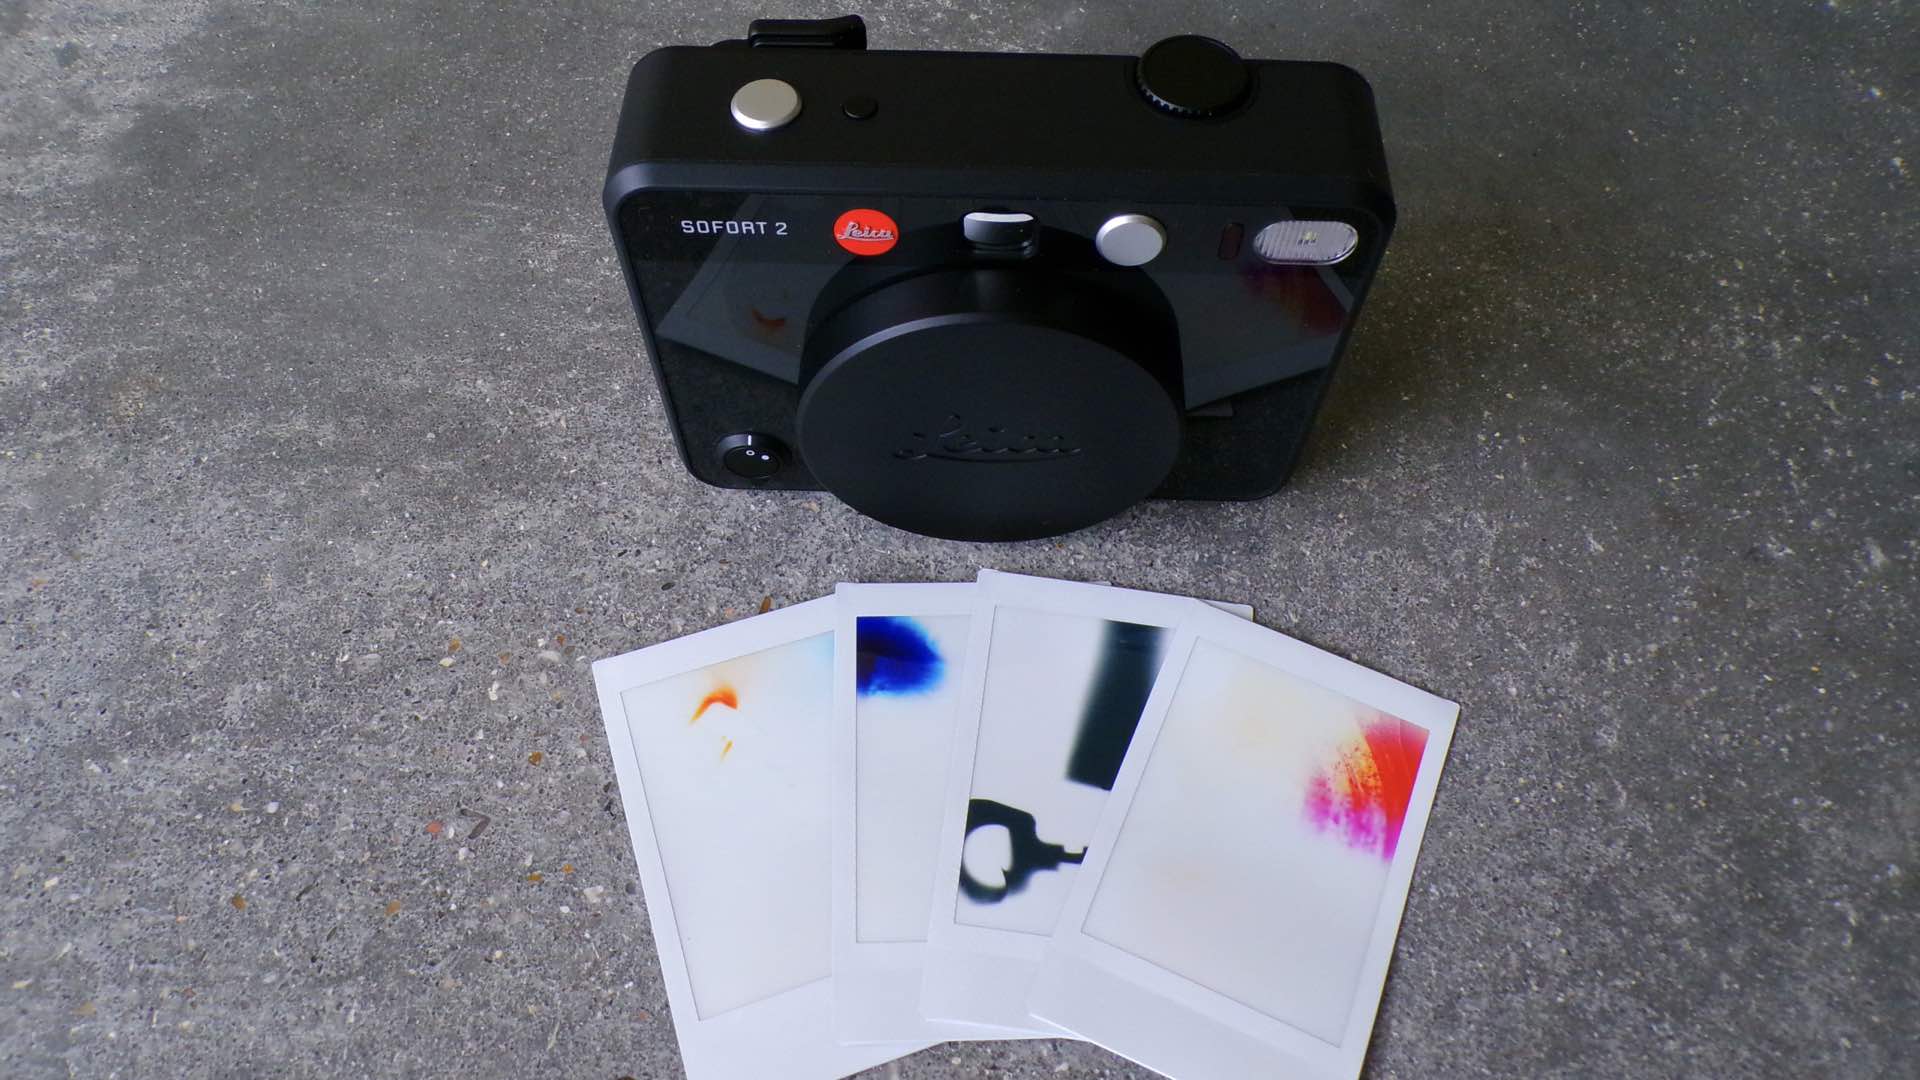
László Moholy-Nagy was a maestro at making photograms. In its simplest terms, a photogram is a photograph that is made without a camera. Typically, this form of camera-less photography is performed in the darkroom. Luckily, with the advent of instant film, the dependency on a darkroom, along with its associated chemicals and trays, has been largely eliminated. Yes, you’ll still need a “kinda” darkroom, but just about any household room will work.
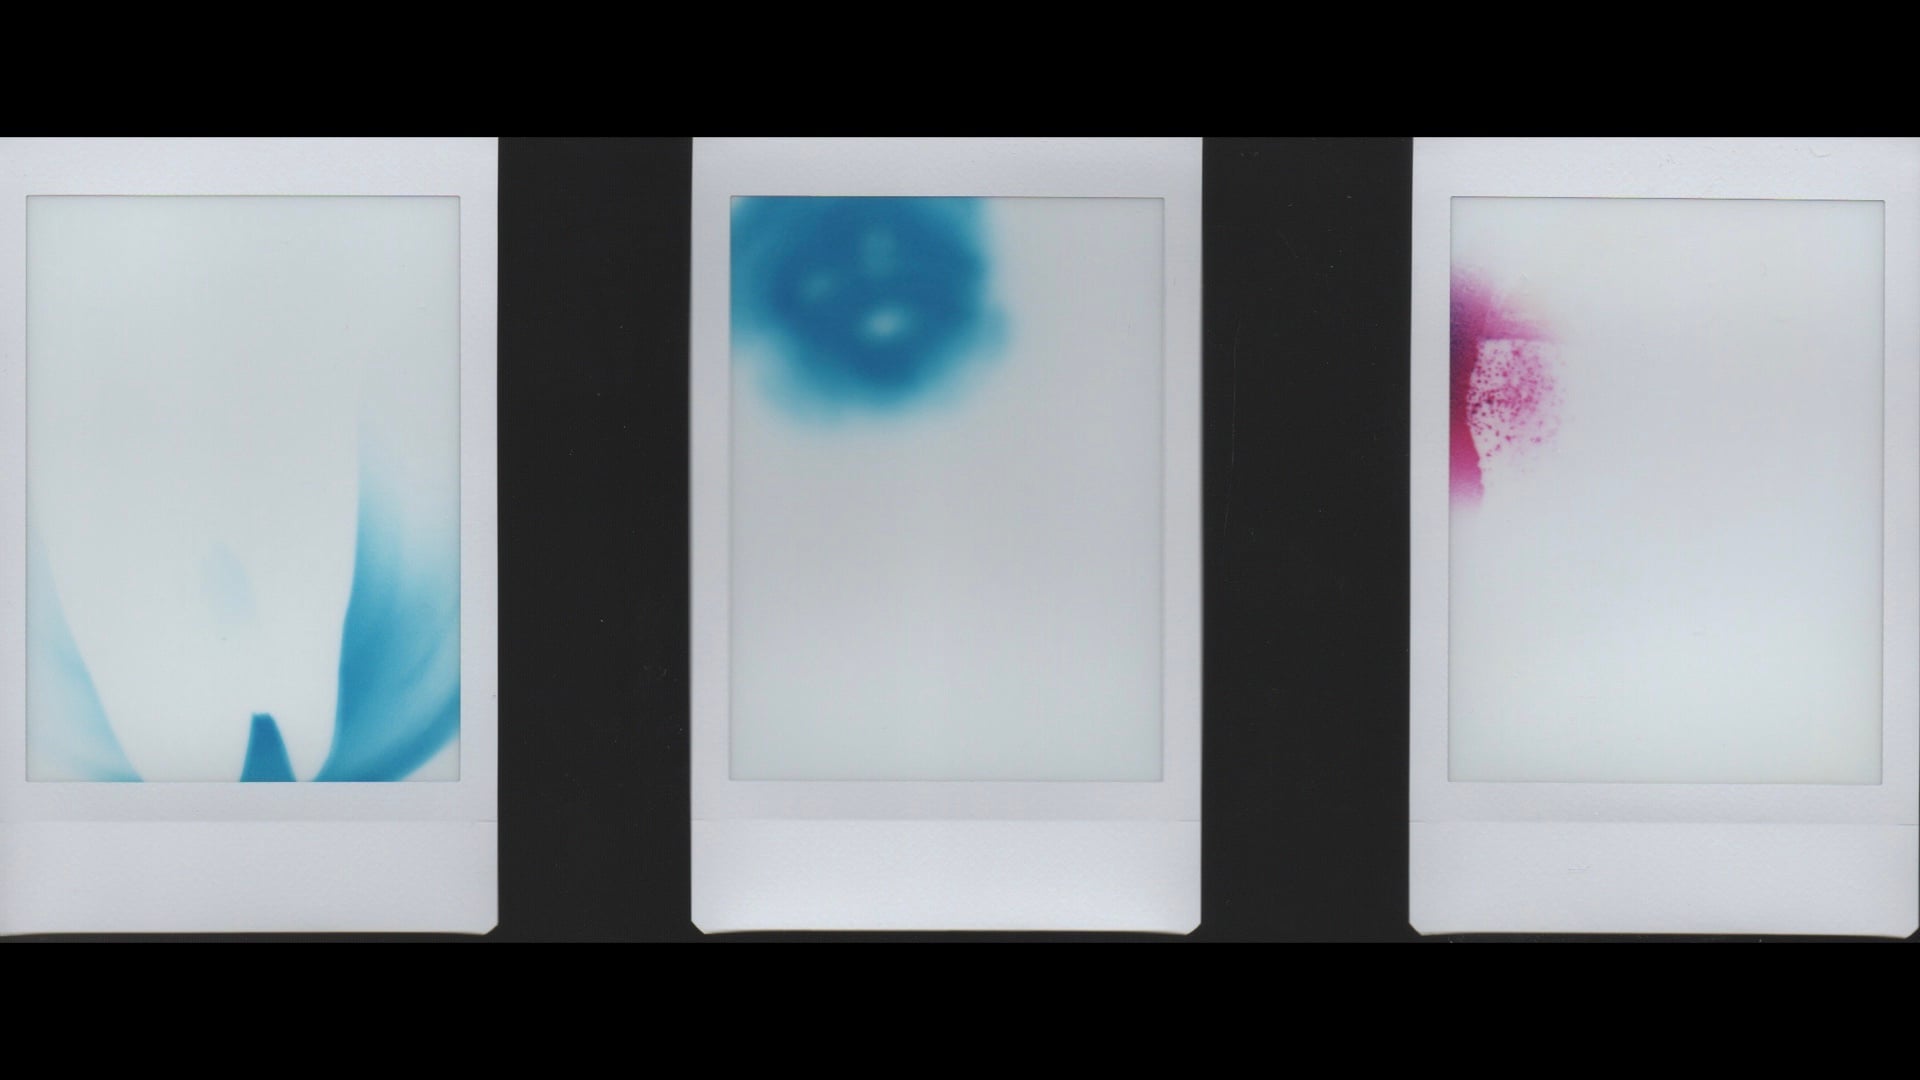
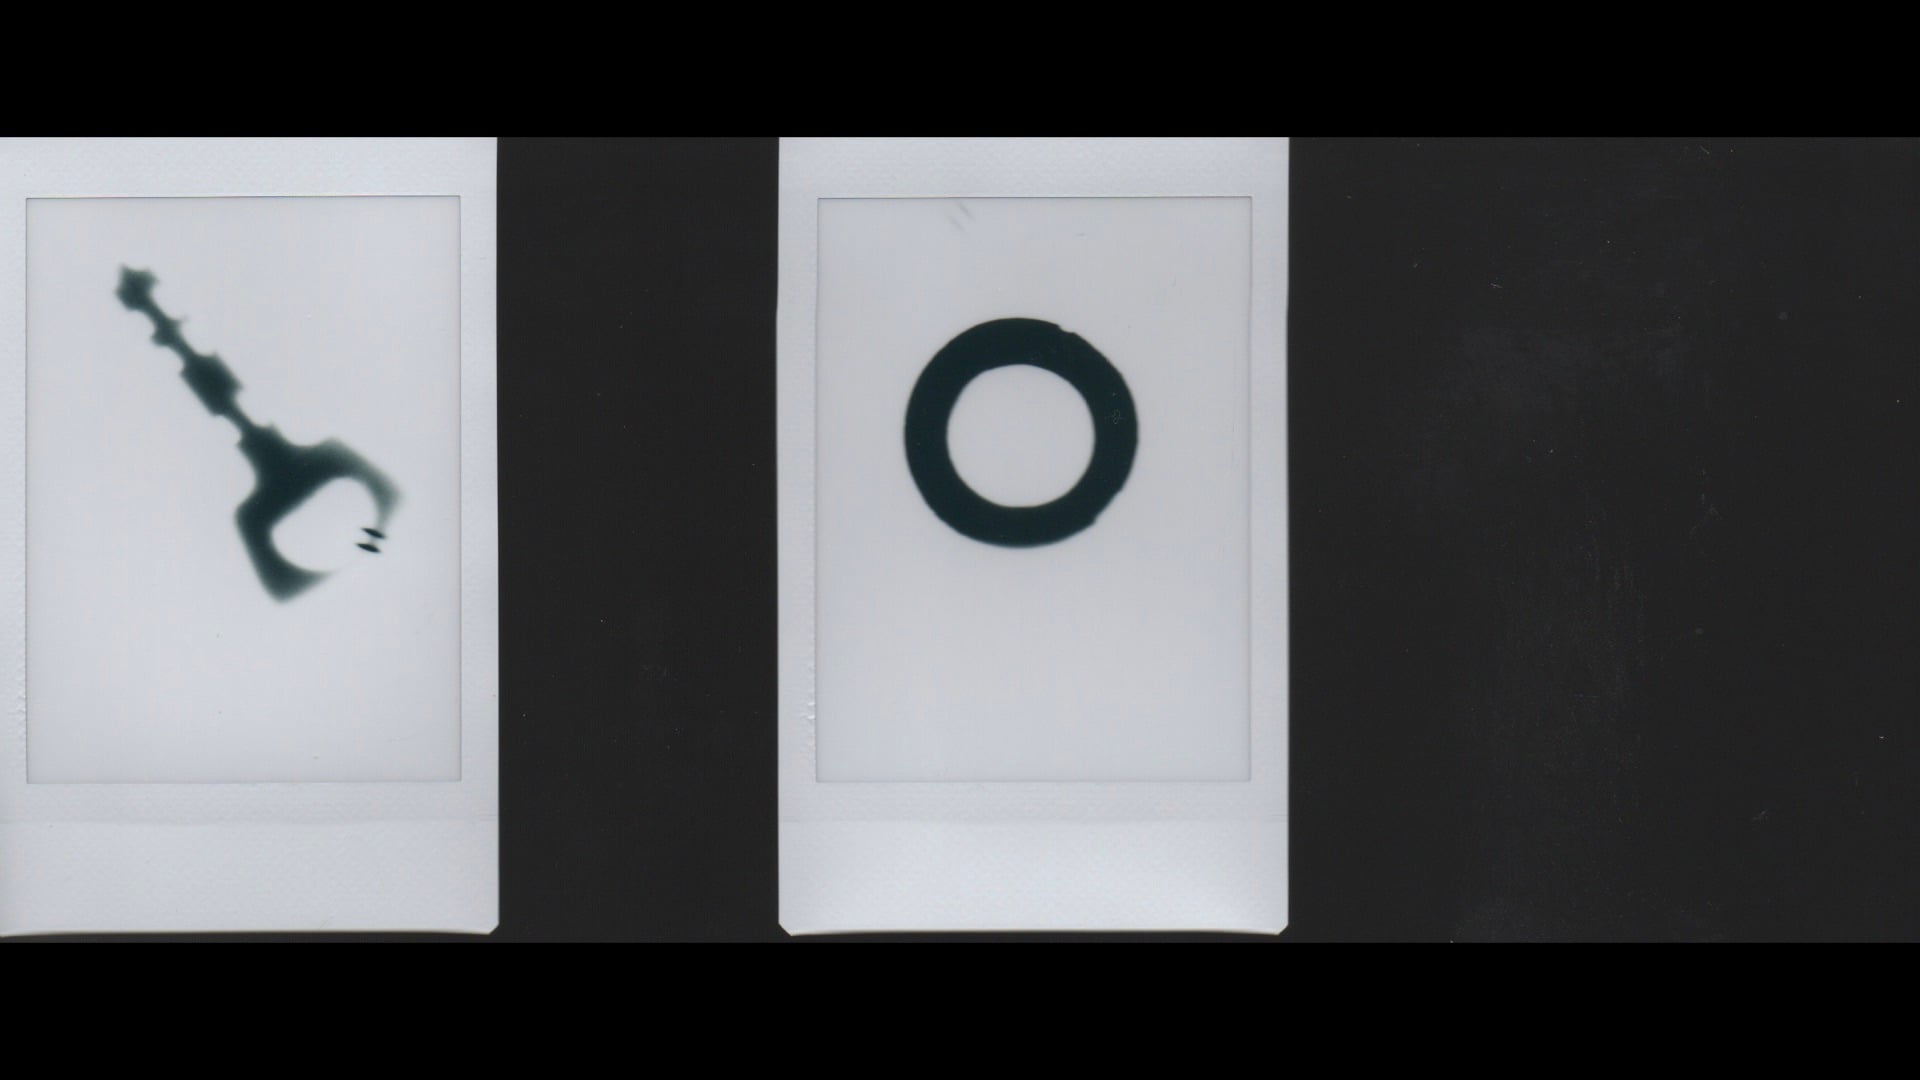
Making a photogram isn’t just about dropping a couple of “things” onto a sheet of photographic paper and claiming that you’re done. Rather, a photogram is painting with light on a canvas of sensitized photographic emulsion. Furthermore, being independent of a camera, a photogram becomes the truest expression of an image that you have previsualized in your mind’s eye.
[Related Reading: This photographer plays with dirt to create stunning photographic prints]
Seeing your preconceived image take form on photographic emulsion is a priceless achievement. Additionally, endowing this image with color adds another dimension to your visual statement. Summarizing all of these artistic attributes into a single collective photogram is a defining moment that every photographer should attempt to complete.
In the Blink of an Eye, an Exposure is Made
While conventional photograms require a darkroom, using Fujifilm instax™ instant film eliminates the need for a dedicated darkroom. Instead, any room in a house can be used provided that you can reduce/eliminate all major light leaks. For example, placing a towel along the base of the entry door. Once this task has been completed, you’ll be able to make effortless photograms.
Your instax camera will be your darkroom and developing laboratory. Any instax camera will work for this chore. The exposure of your photogram is made with an electronic flash. Once again, any flash will work for properly exposing instax film. One factor about your chosen flash that you’ll have to evaluate, however, is the power output of the light energy. In this context, you’ll point the flash towards the ceiling in your prepared room and discharge the flash using the “test” button. If the flash is too bright, you can apply layers of tissue paper over the flash’s lens. In any case, test exposures of film must be made for determining the final configuration for your electronic flash.
During the making of your photograms, you’ll follow this procedure:
- Prepare your room.
- Load a film pack into your instax camera and eject the black cover slide.
- Acquire your objects for arranging on your photogram. A suggested beginning “test” object is a coin.
- Turn on your flash and begin charging its capacitor.
- Turn off all room lights.
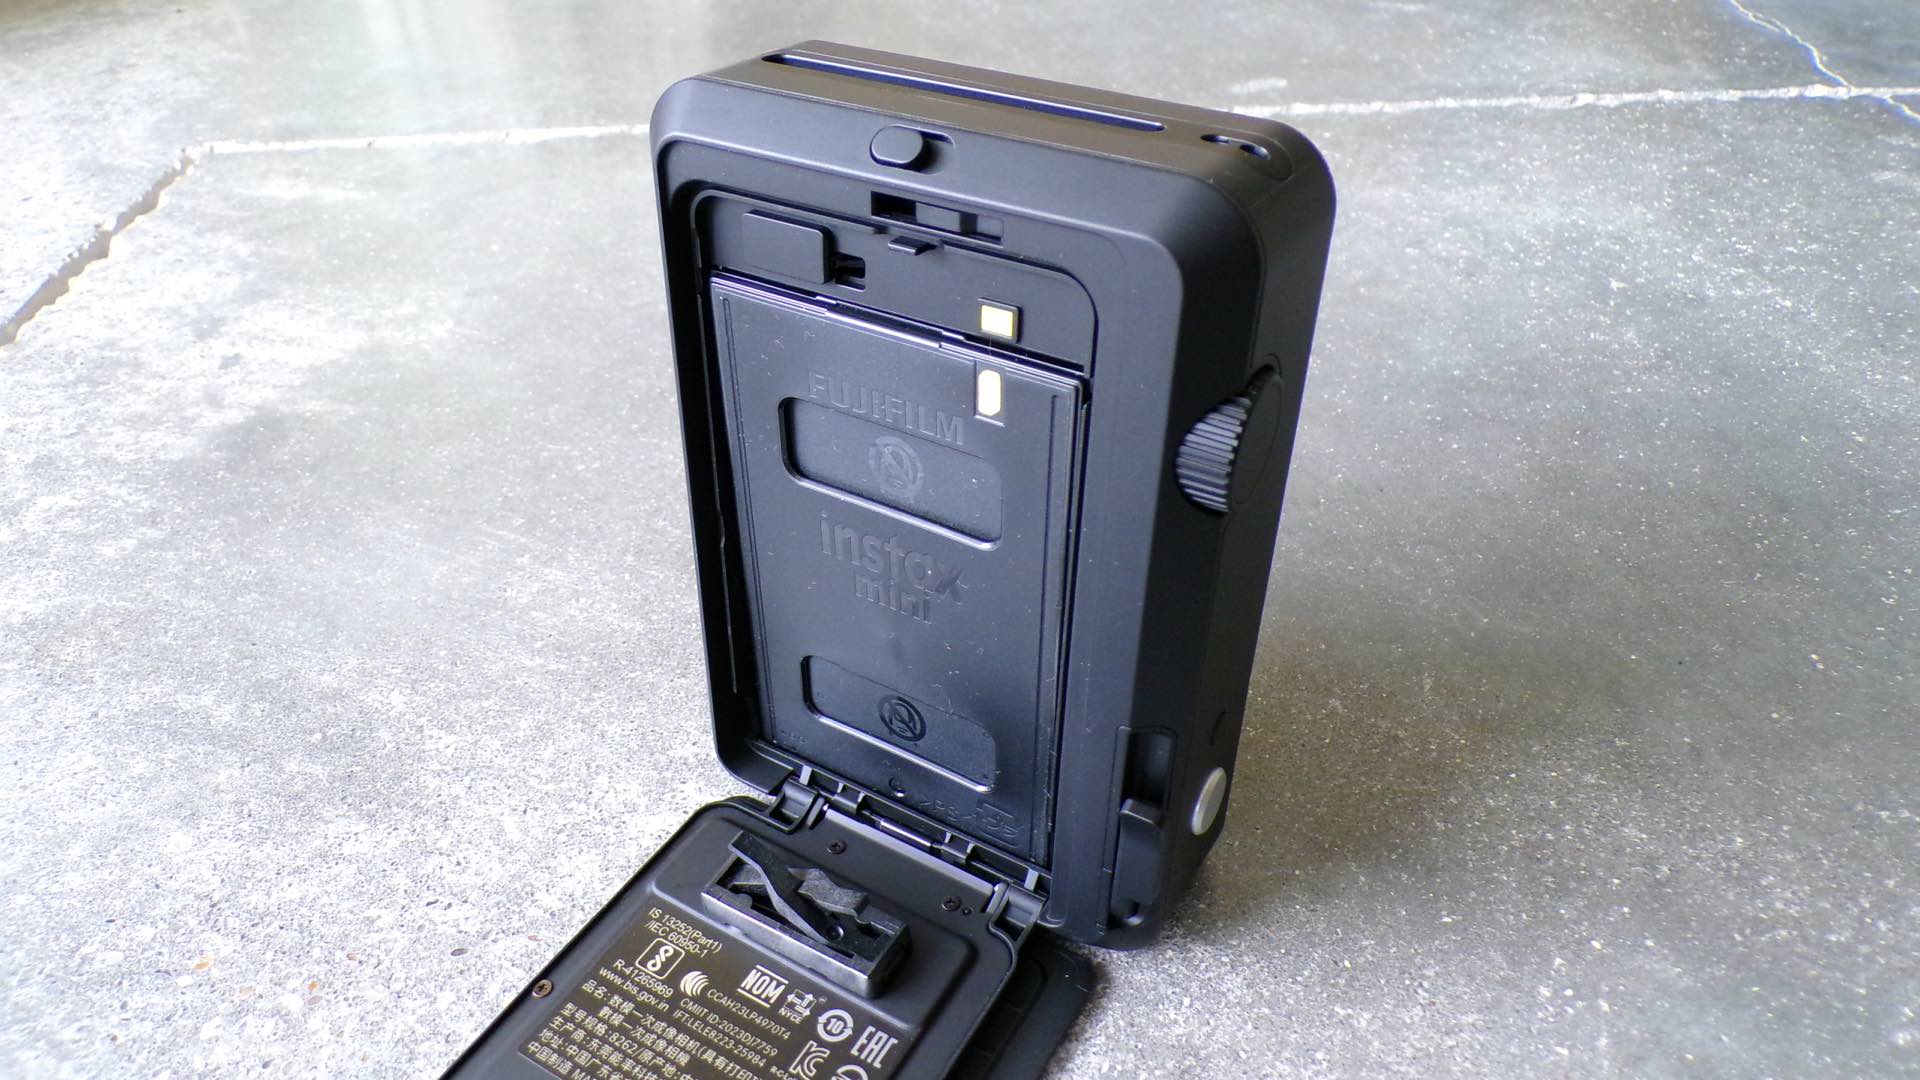
- Open your instax camera and carefully remove the film pack.
- Lay the film pack (film side UP) on a flat surface and arrange your previously selected objects on top of the film.
- Point your electronic flash at the ceiling and press the test button.
- Remove your objects from the film pack and carefully reinsert the pack into your instax camera. Ensure the film side is facing the camera’s lens AND the thicker portion of the film pack plastic frame is facing upwards towards the top of the camera.
- Eject the print and watch your photogram develop.
[Please note: Most instax cameras automatically eject the black cover slide upon insertion of the film pack inside the camera. This is great! If you’re camera does NOT automatically eject this cover slide, manually eject the slide. Use this same manual ejection technique for printing your photogram. Do NOT press the shutter button for ejecting the print unless you cover the camera lens, first. You do NOT want to “take” a photograph.]

Remember, making photograms is an art form. And making successful photograms is not just a case of “trial and error” slapping of various objects on film. It’s a careful and methodical selection and arrangement of objects that “suggest” an overall image that you are attempting to replicate from a previsualized concept generated in your mind’s eye. Along the road to this sought after conclusion, you’ll make a lot of failed photograms. Treat these failures as stepping stones towards arriving at the exact imagery that delivers your desired impact. When this process is properly completed you will have a photogram.
Enjoy.
Filed Under:
Tagged With:

David Prochnow
Our resident “how-to” project editor, David Prochnow, lives on the Gulf Coast of the United States in Ocean Springs, Mississippi. He brings his expertise at making our photography projects accessible to everyone, from a lengthy stint acting as the Contributing How-To Editor with Popular Science magazine. While you don’t have to actually build each of his projects, reading about these adventures will contribute to your continued overall appreciation of do-it-yourself photography. A collection of David’s best Popular Science projects can be found in the book, “The Big Book of Hacks,” Edited by Doug Cantor.


Join the Discussion
DIYP Comment Policy
Be nice, be on-topic, no personal information or flames.