


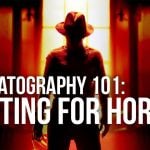
How to make five horror lighting setups with a single light
Oct 30, 2017
Dunja Đuđić Kalinin
Dunja Djudjic is a multi-talented artist based in Novi Sad, Serbia. With 15 years of experience as a photographer, she specializes in capturing the beauty of nature, travel, concerts, and fine art. In addition to her photography, Dunja also expresses her creativity through writing, embroidery, and jewelry making.
Share:

Halloween is just around the corner, so you may want to make some scary photos or videos for the occasion. Jordy Vandeput of Cinecom.net shows you five lighting setups inspired by famous horror movies and series, and you can recreate them all using a single light source.
The guys from Cinecom used Aputure 120D to create all five lighting setups. They are mainly aimed at video, but some of them can be used for photography as well, f you want to make some scary (self)portraits.
1. Mysterious forest

In this setup, the guys recreate the forest scene from Stranger Things. The Aputure 120D is running with a battery, and they put the light high on a tree. A setup like this will recreate the feel of a mysterious forest at night. You can also add some fog to make the effect even scarier. But if you ask me, a forest and a single light at night is scary enough (especially after watching Stranger Things).
2. Scary silhouettes

This setup is inspired particularly by The Exorcist, although you can see it in other horror movies as well. If you want to create scary, mysterious silhouettes, put the light directly behind the actor. Use a smoke machine to fill the room with fog, which will emphasize the light rays. Expose for the highlights, which will make the actor/model appear as a silhouette.
3. Peek-a-boo

I guess you’ve watched It. Well, this setup is inspired by the scene when the clown is luring from the sewage. Only a small part of the actor’s face is illuminated, and Jordy recreates this light with a pretty simple trick – he shines the light through a tube. You can add a toilet paper roll over the light to achieve this, but be careful, because the light gets too hot. You can also try this with the flashlight, but keep in mind that it doesn’t have such a strong output.

4. I’m watching you

This lighting setup recreates the scene from Annabelle, where a narrow beam of light is sliding from one side of the doll’s face to the other. This recreates the feeling that someone (or in the case of this movie, something) is watching you. And it’s very simple to achieve it. Just take a piece of cardboard and cut a long, narrow hole in it. Shine the light through it, and that’s it.


5. Don’t go into the basement!

What would the horror movies be without curious characters going into the basement? The light’s off, and there’s only a flashlight to help you see what’s in there. To create this scene, you can use an actual flashlight, but again, it doesn’t have a very strong output. Jordy uses Aputure 120D again and attaches a Fresnel mount to it. He creates a narrow beam of light and moves it fast around the room. If you’re filing a scene like this, Jordy points out that moving the camera slowly while the light moves fast will add to the feeling of suspense. This way the viewers won’t have enough time to see well what’s in the basement – which leaves room for some scary surprises.
These were five quick and pretty simple tips for some last-minute Halloween photos or videos. I’d also add the “light-from-below”, like the one from The Blair Witch Project. That scared the hell out of me when I was a kid. What’s your preferred horror lighting setup?
[5 HORROR Lighting Setups with 1 LIGHT | Cinecom.net]

Dunja Đuđić Kalinin
Dunja Djudjic is a multi-talented artist based in Novi Sad, Serbia. With 15 years of experience as a photographer, she specializes in capturing the beauty of nature, travel, concerts, and fine art. In addition to her photography, Dunja also expresses her creativity through writing, embroidery, and jewelry making.
Related Posts
 10 Different Lighting Setups Using A single Light And A Single Softbox
 These five lighting techniques will help you create scary horror scenes
 Learn three dramatic portrait lighting setups with just a single speedlight and a 5-in-1 reflector
 3 Lighting Setups (And 2 Tips) For Tasty Beverage Lighting
Join the Discussion
DIYP Comment Policy
Be nice, be on-topic, no personal information or flames.