


Improve Your Images Easily with this AI Image Enhancer
Jan 28, 2025
Cemal Ekin

Alex Baker is a portrait and lifestyle driven photographer based in Valencia, Spain. She works on a range of projects from commercial to fine art and has had work featured in publications such as The Daily Mail, Conde Nast Traveller and El Mundo, and has exhibited work across Europe
Share:

These days, many tools utilize advanced technologies collectively known as AI or artificial intelligence. These technologies can also be used to create “photographs,” paintings, or other creations. I prefer to distinguish between using these technologies to create or edit in post-processing. Creation is for the artists, who may use various tools to edit and modify their creations. These tools may range from a simple brush in Photoshop to advanced noise reduction or sharpening with AI.
Your views may differ from mine and although I stated them up front, I do not intend to argue those points. Instead, I will share my experiences with a tool in this domain, Aiarty Image Enhancer.
Some Images Need Improvement
After receiving a review license from Aiarty, I tried it on different frames in my collection. The results were less than impressive as I did not see much improvement. I wrote to their team and expressed my concern and the reply was “Your images are already sharp.”
Then it sank in a little better. This was a piece of software to correct some unexpected problems. The image may be a little out of focus, slightly blurry, too noisy, and maybe not large enough. Then I focused on thousands of photographs I scanned, prints, slides, or negatives.
Aiarty Image Enhancer
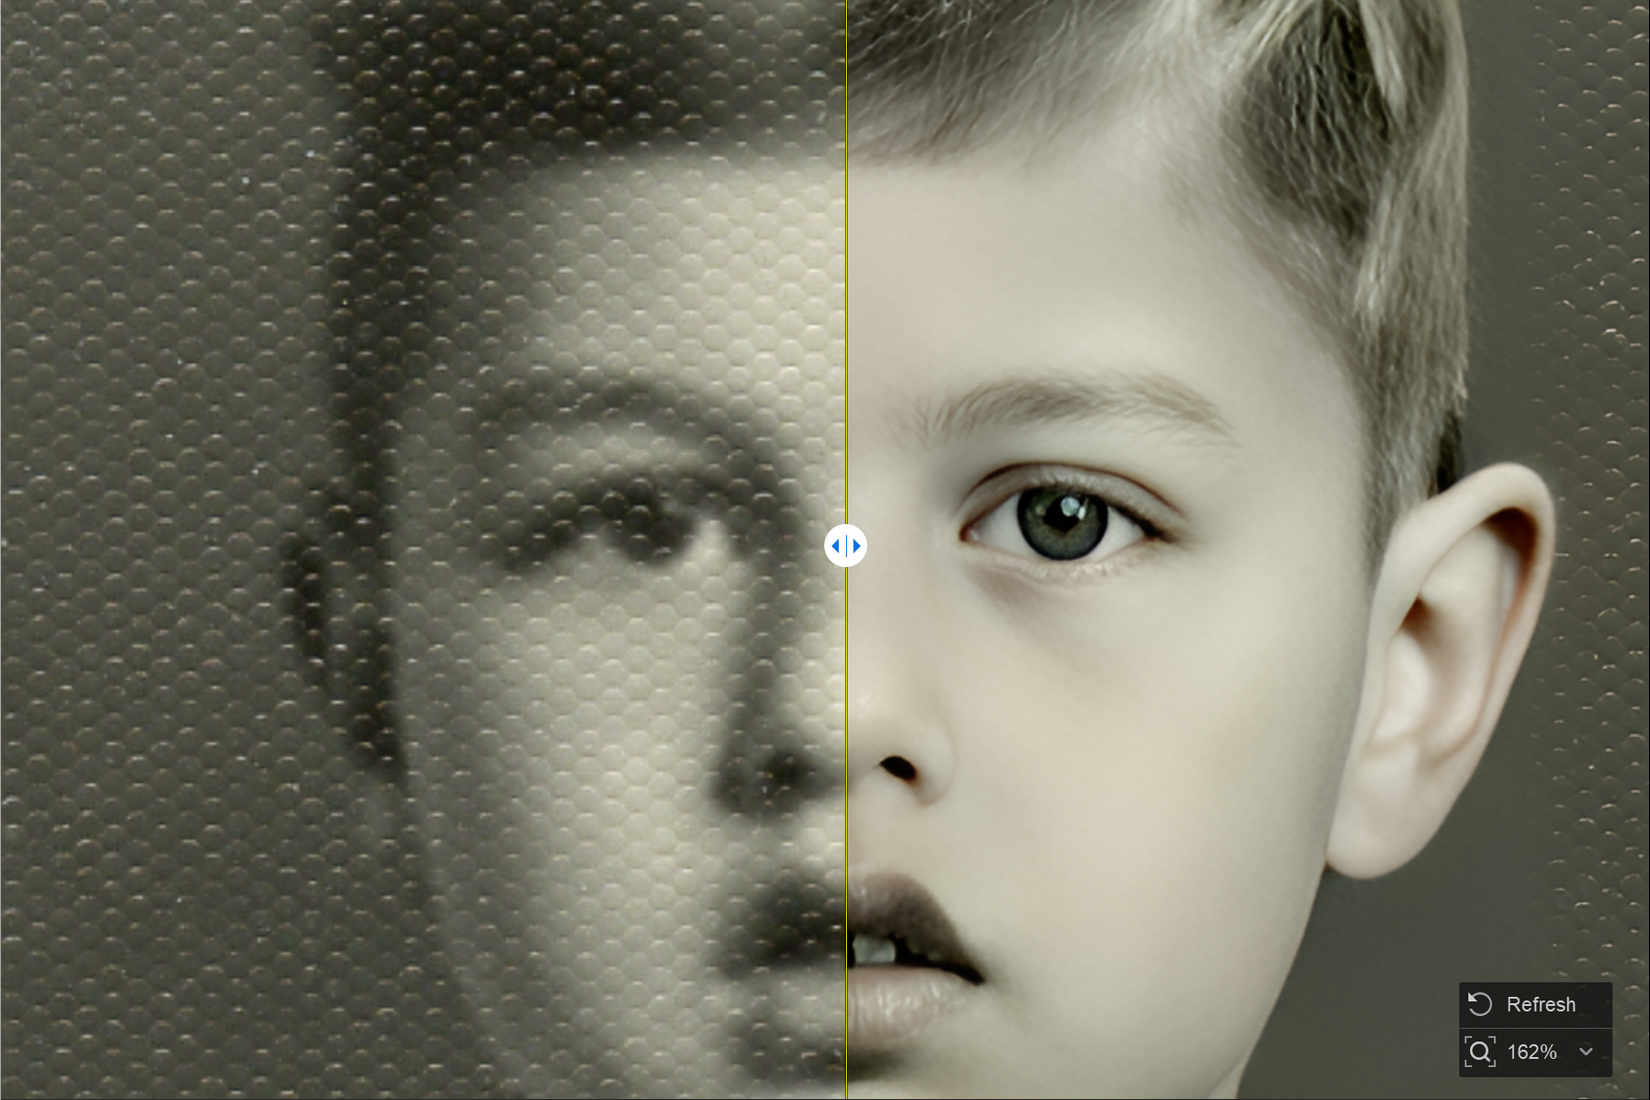
Aiarty Image Enhancer is very simple to use, maybe a little too simple in some ways. You can find extensive instructions on their guide page for this product. There are options for selecting AI models and then it does its thing. In addition to model selection, there are a couple of other checkboxes to activate special functions. One that may be of particular interest to users with scanned photographs is the Face Restoration function. Essentially it recreates the face using the broad features in the original photograph. Here is a summary of the models on their website and when to choose them.
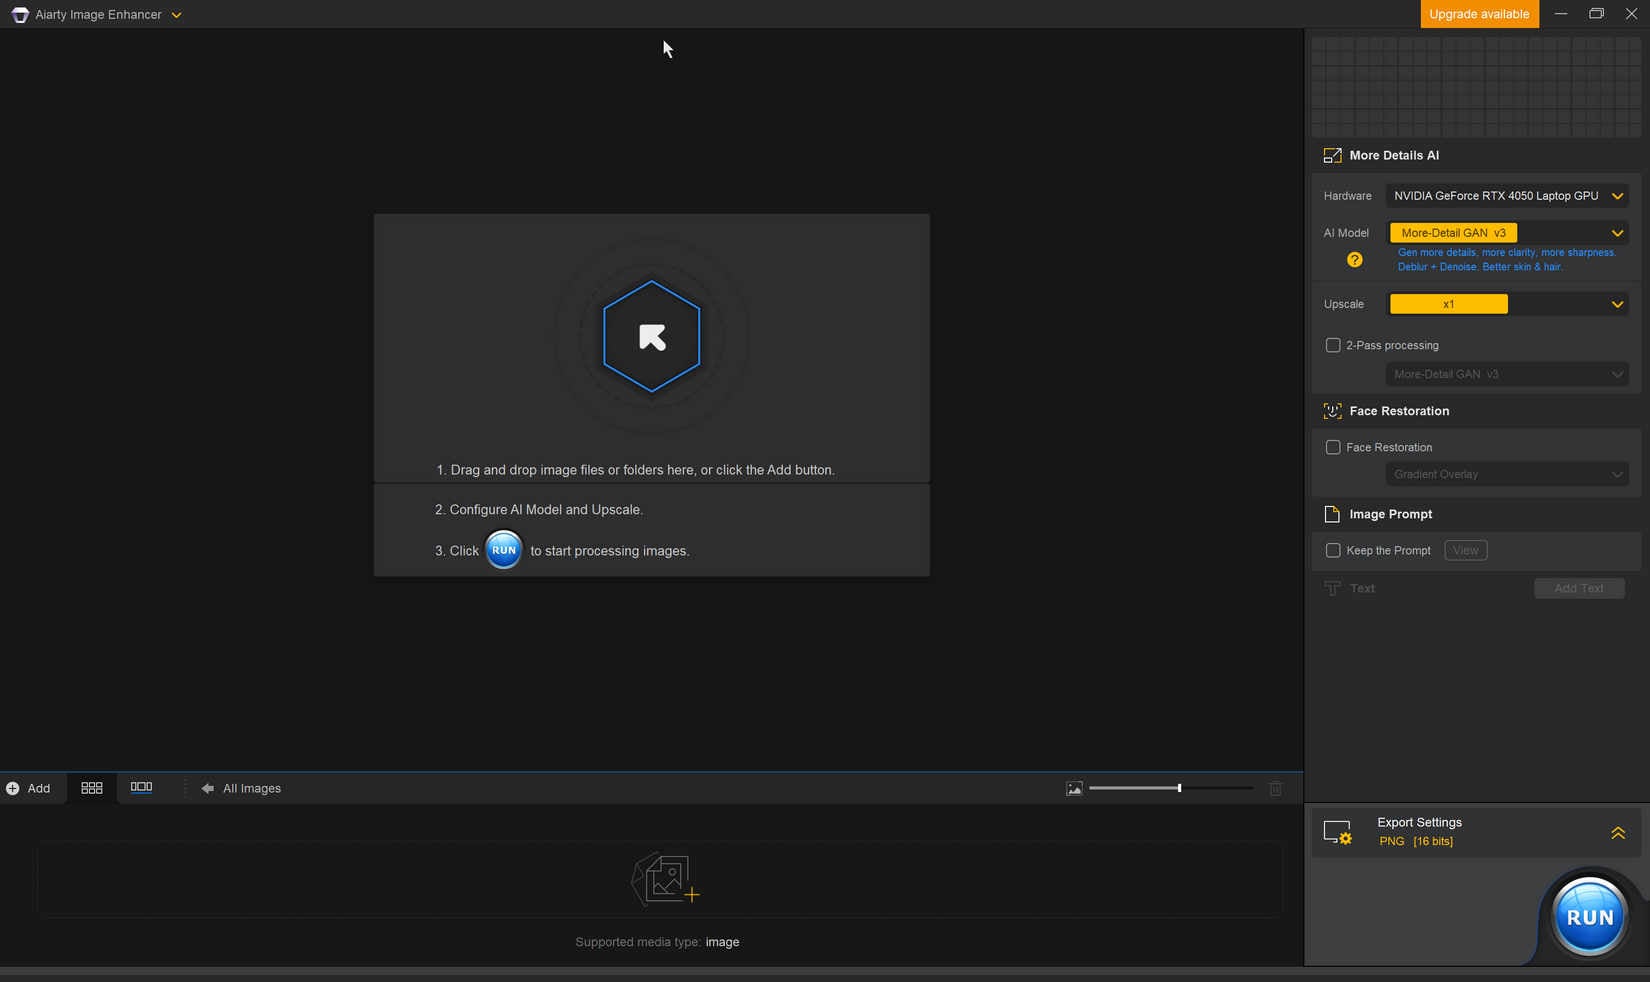
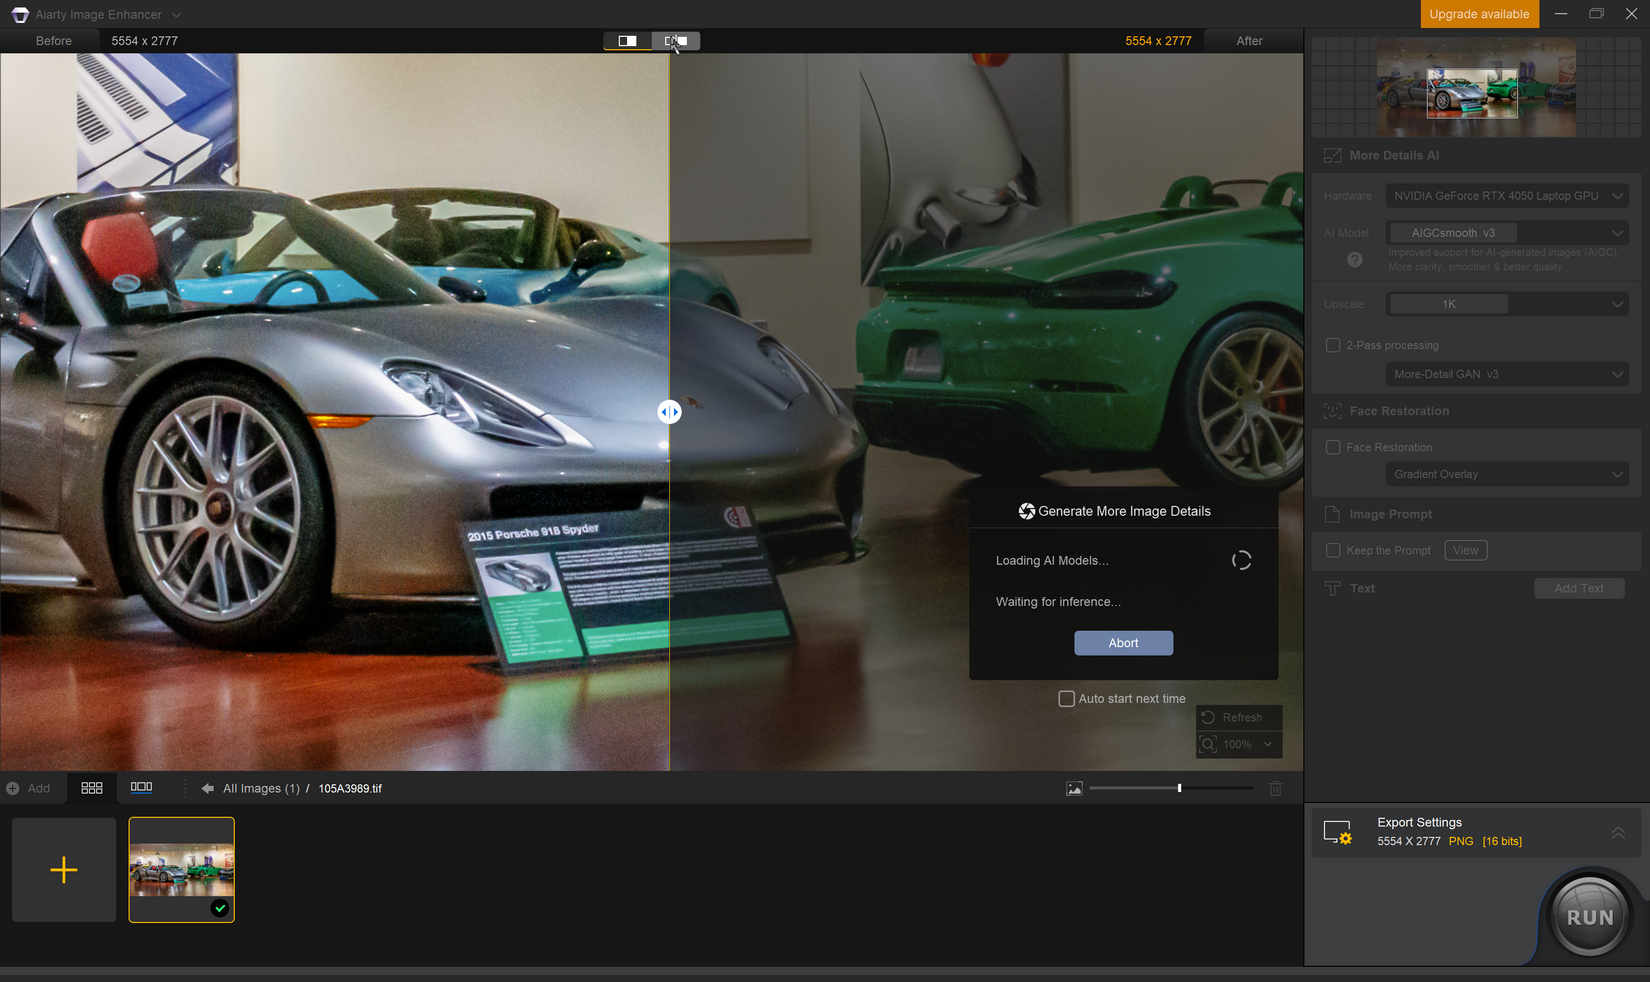
At the bottom of the UI is the container area to hold the images to be processed. Above that is the viewing area, which gets split into before/after sections, as you can see above. Alternatively, you can display before and after versions side-by-side. On the right are the model selections and a couple of checkboxes that can be activated. The slider in the middle lets you compare the before-and-after views of the image.
Workflow
The workflow starts by selecting images in your collection and then dropping them into the container. It does not recognize PSD format files, so they need to be exported to one of the supported file formats before loading them to Aiarty: TIFF, JPEG, JPG, or PNG. I have not tried other image formats.
It can be configured to start working on the images as they are dropped into the container area. Depending on the image size and the additional functions selected, it quickly processes them for viewing. Either one at a time or by selecting more than one, exporting the processed images finalizes the results. It can save images in JPEG or PNG formats, the latter in 16-bit. The export folder can also be selected in the process configuration.
What Is It Good For?
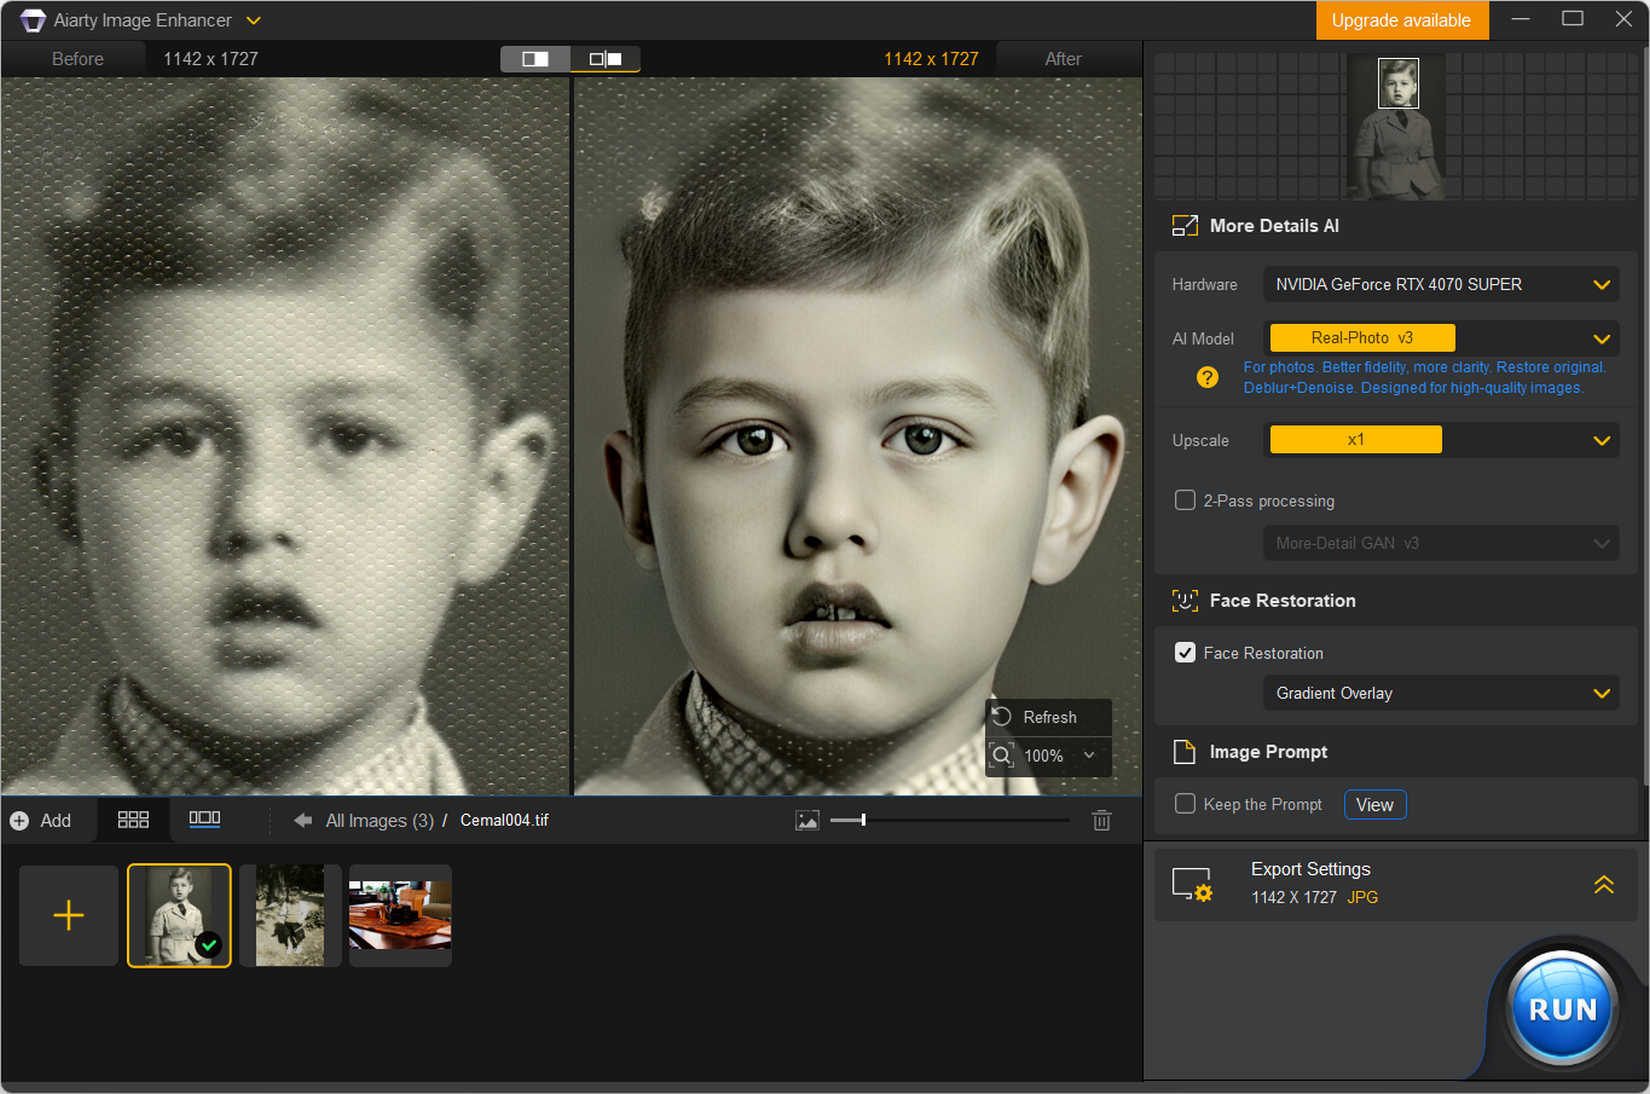
As mentioned before I have not noticed any appreciable benefit for my standard digital images. So, don’t get your hopes up! But, if you have some slightly blurry photos or have some with motion blur, Aiarty can help reduce them. It has more visible benefits for old scanned photographs, especially those scanned from prints. One of those features is Face Restoration which produces artificially good results for the faces, even with a slight hint of color. Look at a few sample pictures processed in Aiarty Image Enhancer and see if you agree with the artificially good description for the Face Restoration feature. Of course, some may like this result; to each her/his own.
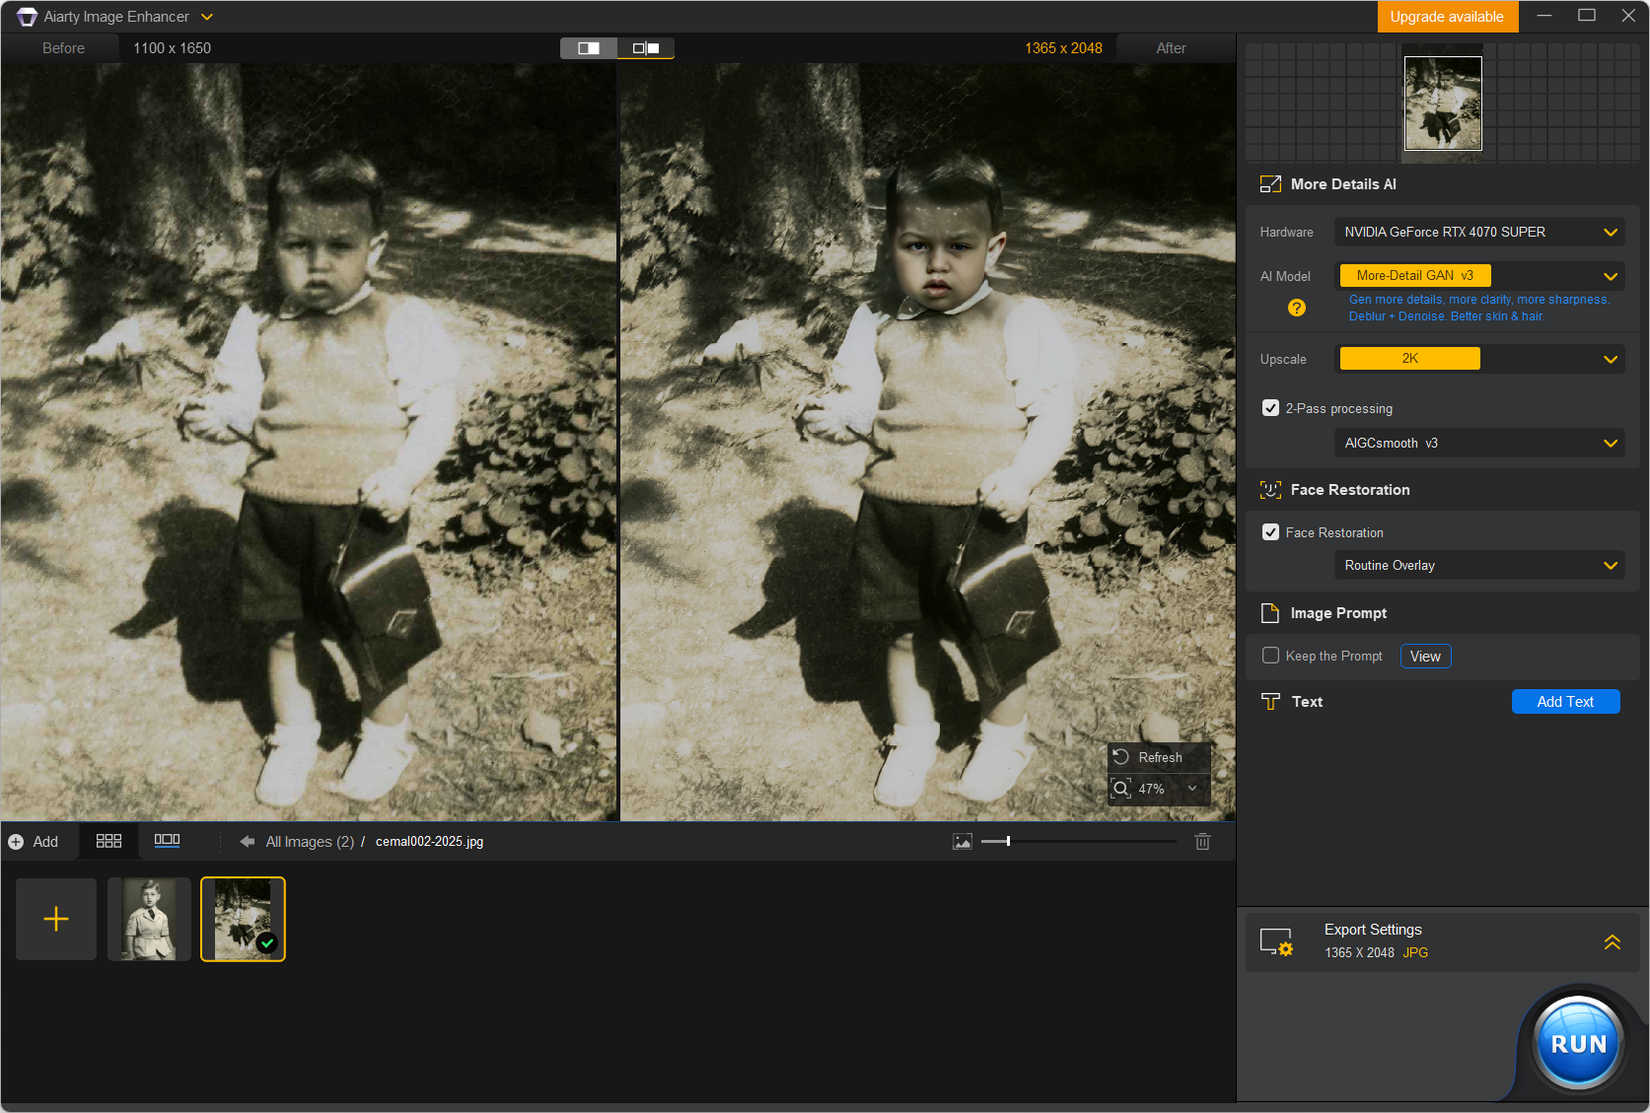
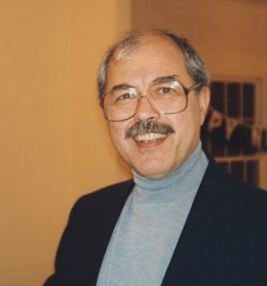
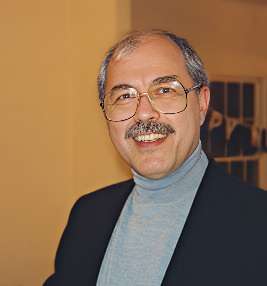
If you have a group photograph, face restoration may be a welcome feature as it can enhance all the faces. Here is one I processed using that, move the slider to see the difference. You will also notice the slightly sharper presentation on the clothing, ties, and other edges. For some reason, unlike the previous examples, the skin colors became cooler after the enhancement.
Another important feature of the Aiarty Image Enhancer is upsizing the images. It can enlarge them up to 8x the original size. If you have small old photographs scanned rather small, you can easily enlarge them up to 8 times their original size or 8K dimensions. The maximum enlargement is 32K, meaning the long dimension becomes 32,000 pixels. Of course, you can also enlarge your recent digital captures if necessary. Here are some samples. A print scanned at 100 dpi, enhanced in Aiarty, and then enlarged 4 times the original. This is when I wish there were a way to adjust the final impact. Of course, you can try a different model and see if that produces less aggressive results.

Conclusion and Wishes
Aiarty Image Enhancer is reasonably priced, currently $99 for a lifetime copy, and quite capable for certain tasks. Even when I used full-size, high-resolution TIFF files as input, processing was quick. You can experiment with different models, but it may be a better idea to read about them in their guide. Trying them one at a time has no penalty, of course, and you may gain some more insight if you have the patience.
Although I find the results quite good, I wish there was a way to lower their impact on the images. This is especially true in Face Reconstruction with puzzling color casts, sometimes warmer sometimes cooler than the original. Some adjustments may be too strong for some tastes, like mine. But overall, Aiarty Image Enhancer is an easy-to-use tool for adding more structure to some images.
About Cemal Ekin
Cemal Ekin is a photographer and a professor emeritus of marketing at Providence College. Other than doing photography and writing about it, he also gives lessons and organizes workshops. You can learn more about Cemal and find more of his work on his website Kept Light. This article was also published here and shared with permission.
We love it when our readers get in touch with us to share their stories. This article was contributed to DIYP by a member of our community. If you would like to contribute an article, please contact us here.
Related Posts
 Best AI Photo Enhancer: Elevates Image Quality and Resolution Up to 32K [Time-limited Free]
 Skylum’s new AI Sky Enhancer for Luminar adds detail and drama to your skies
 New Luminar 4 will use AI skin enhancer to automatically make your portraits flawless
 MyHeritage photo enhancer shows you what your ancestors really looked like
Join the Discussion
DIYP Comment Policy
Be nice, be on-topic, no personal information or flames.