


A closer look at the new 100mm F2.8 Pergear macro lens
Dec 5, 2024
Cemal Ekin, coauthored by Dennis Goulet

Alex Baker is a portrait and lifestyle driven photographer based in Valencia, Spain. She works on a range of projects from commercial to fine art and has had work featured in publications such as The Daily Mail, Conde Nast Traveller and El Mundo, and has exhibited work across Europe
Share:

This will be the second Pergear macro lens review after my earlier 60mm version. The new one is a 100mm f-2.8 lens capable of 2X magnification. They contacted me for a review and provided a sample lens for this review. Although I received a free lens, there are no affiliate links in this article, I do not receive any commissions on sales, and I will likely donate the lens to a good cause.
My friend Dennis Goulet who is experienced in macro photography came to help with the test shots. We also discussed various aspects of the lens. I thank Dennis, my coauthor of this article for his contribution.
Table of Contents
- Pergear 100 mm f/2.8 Macro 2x
- On The Camera
- Record Keeping
- Evaluation Environment
- Shooting On A Tripod Is A Must
- Started With A Pocket Watch Mechanism
- Before and After Little Editing
- Conclusions and Suggestions
Pergear 100 mm f/2.8 Macro 2x
The shipping and inner packaging were similar to the previous one, snug, and well-fitting. The 100mm macro is longer than the 60mm as expected and also heavier. The solid feeling with all metal construction is comforting but the weight is substantial. Everything has a price! It is a solid piece of lens.


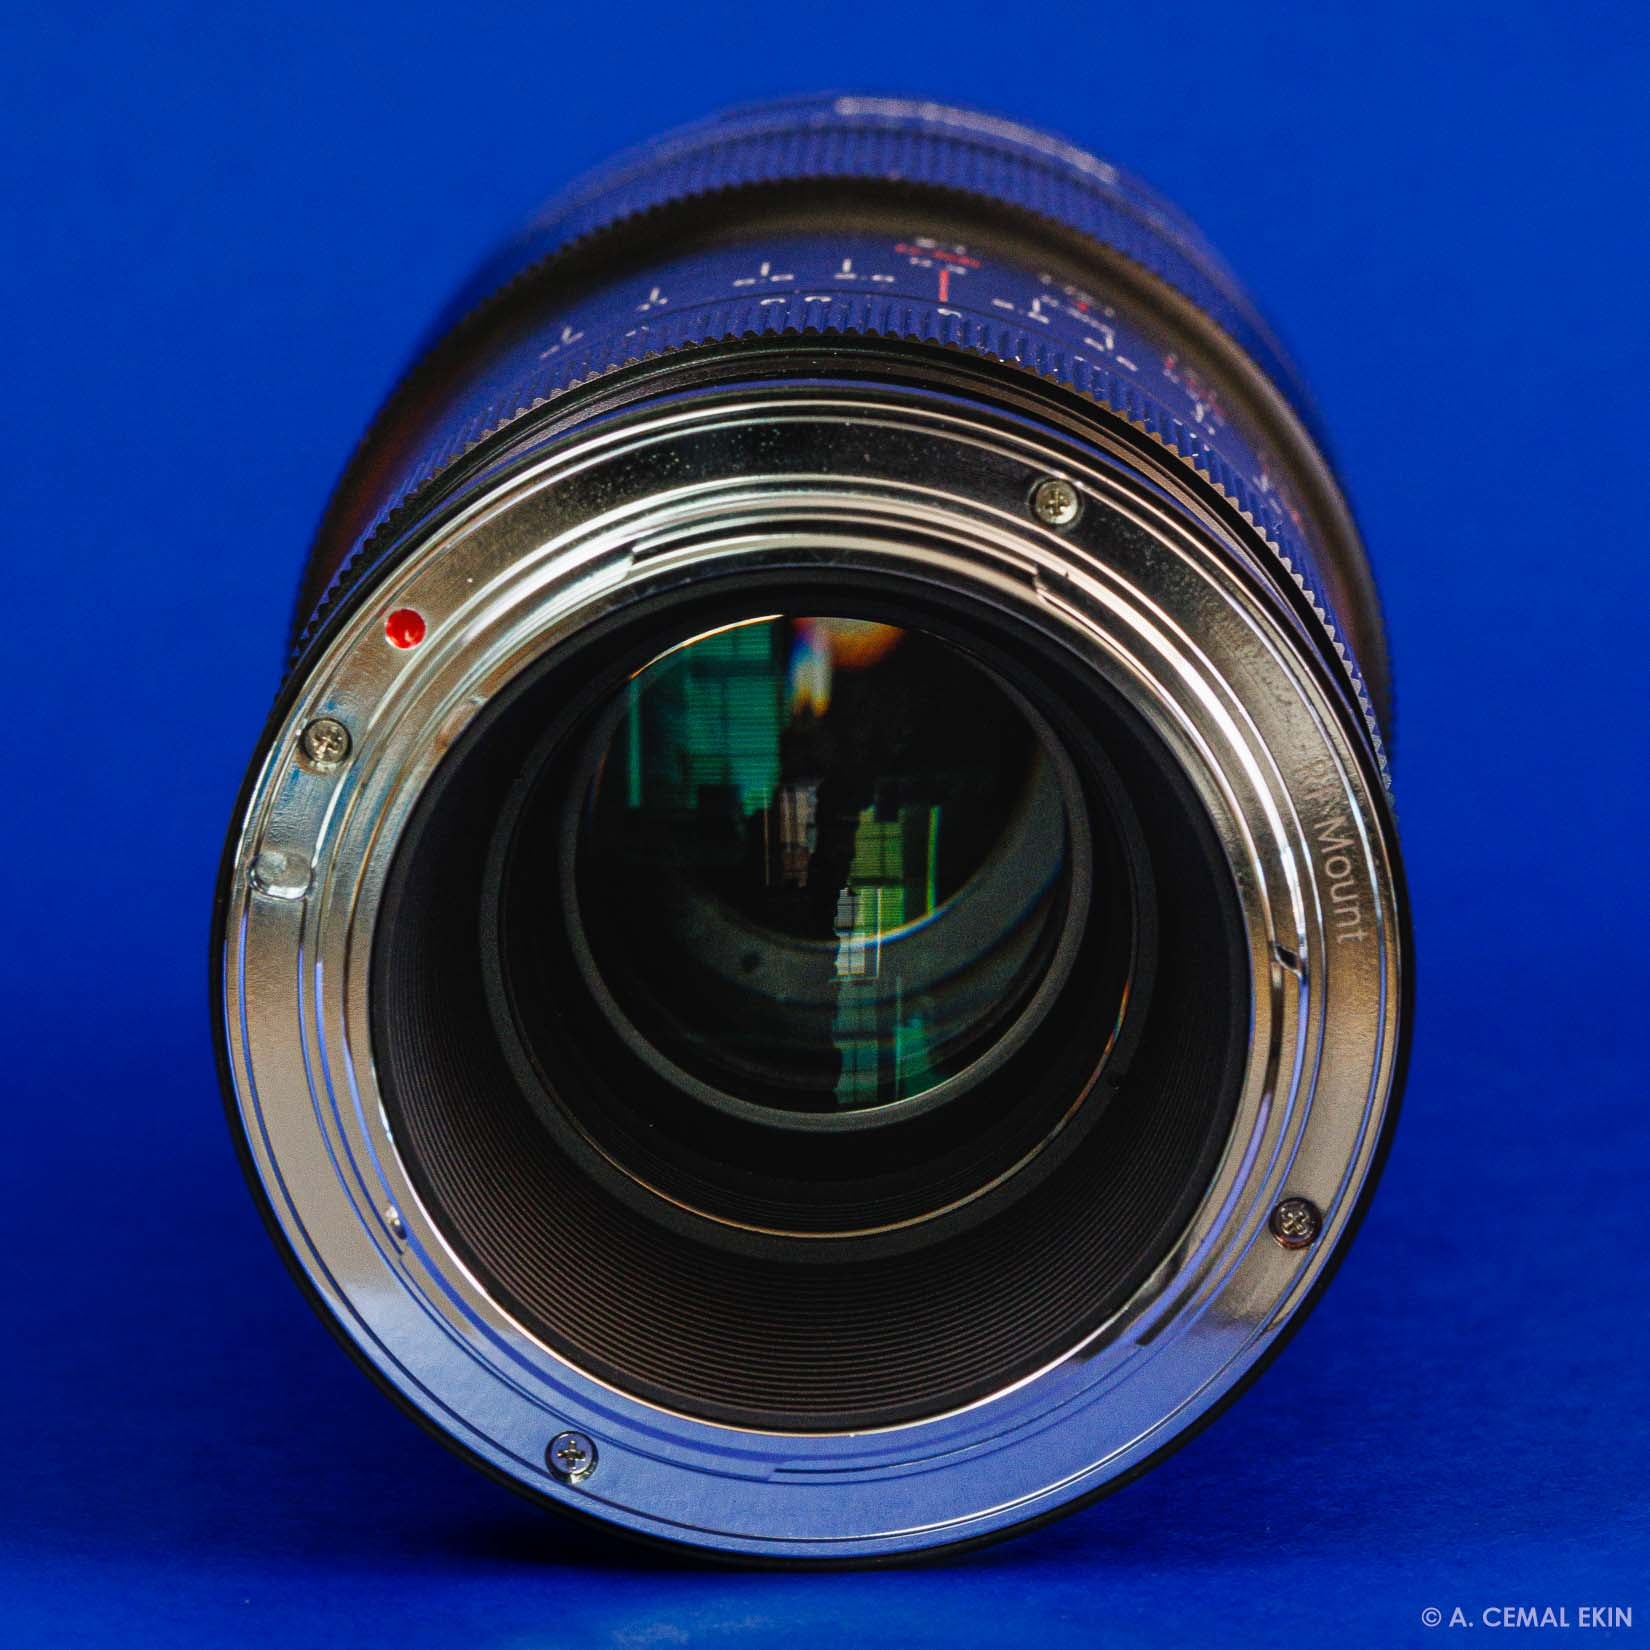
On the camera
Like the previous one I reviewed, this lens has no electronic connection to the camera. Therefore there is no autofocus or any information like the f-stop or the focus distance passed on to the camera to be included in the EXIF set. Since the camera does not see any lens, you may have to change the camera setting to allow shutter release when there is no lens on the camera. I learned that from the previous mistakes.
Record keeping
This time, we decided to write the f/stop on a piece of paper and take a picture of it before the actual photo. After the shoot, I used the LensTagger Lightroom plugin to add the f/stop to each shot. When exporting the images I kept all the EXIF data for curious readers. After the initial series of shooting the same frame at different apertures, we stayed with f/8 for all the other shots.
Evaluation environment
For evaluating the macro photography performance, I will use the following:
- A Canon R7 32.5 MP APS-C CMOS sensor camera
- A sturdy tripod
- Macro focusing rail
- Cable or remote release
- A pair of LED light panels as needed
Shooting on a tripod is a must
Most macro photography is done on a tripod anyway; but, for this lens, it is almost a must. The stiff focusing ring and aperture dial are still problems with this lens. If the focus ring had a little longer throw it could help for more precise focusing. Stiff movement combined with a short rotation changes the focus substantially even with minimal movements.
The aperture ring is also quite hard to rotate and has no click-stops, which makes using the lens unnecessarily harder. It is practically impossible to change the aperture or focus setting without some slight movement of the frame.
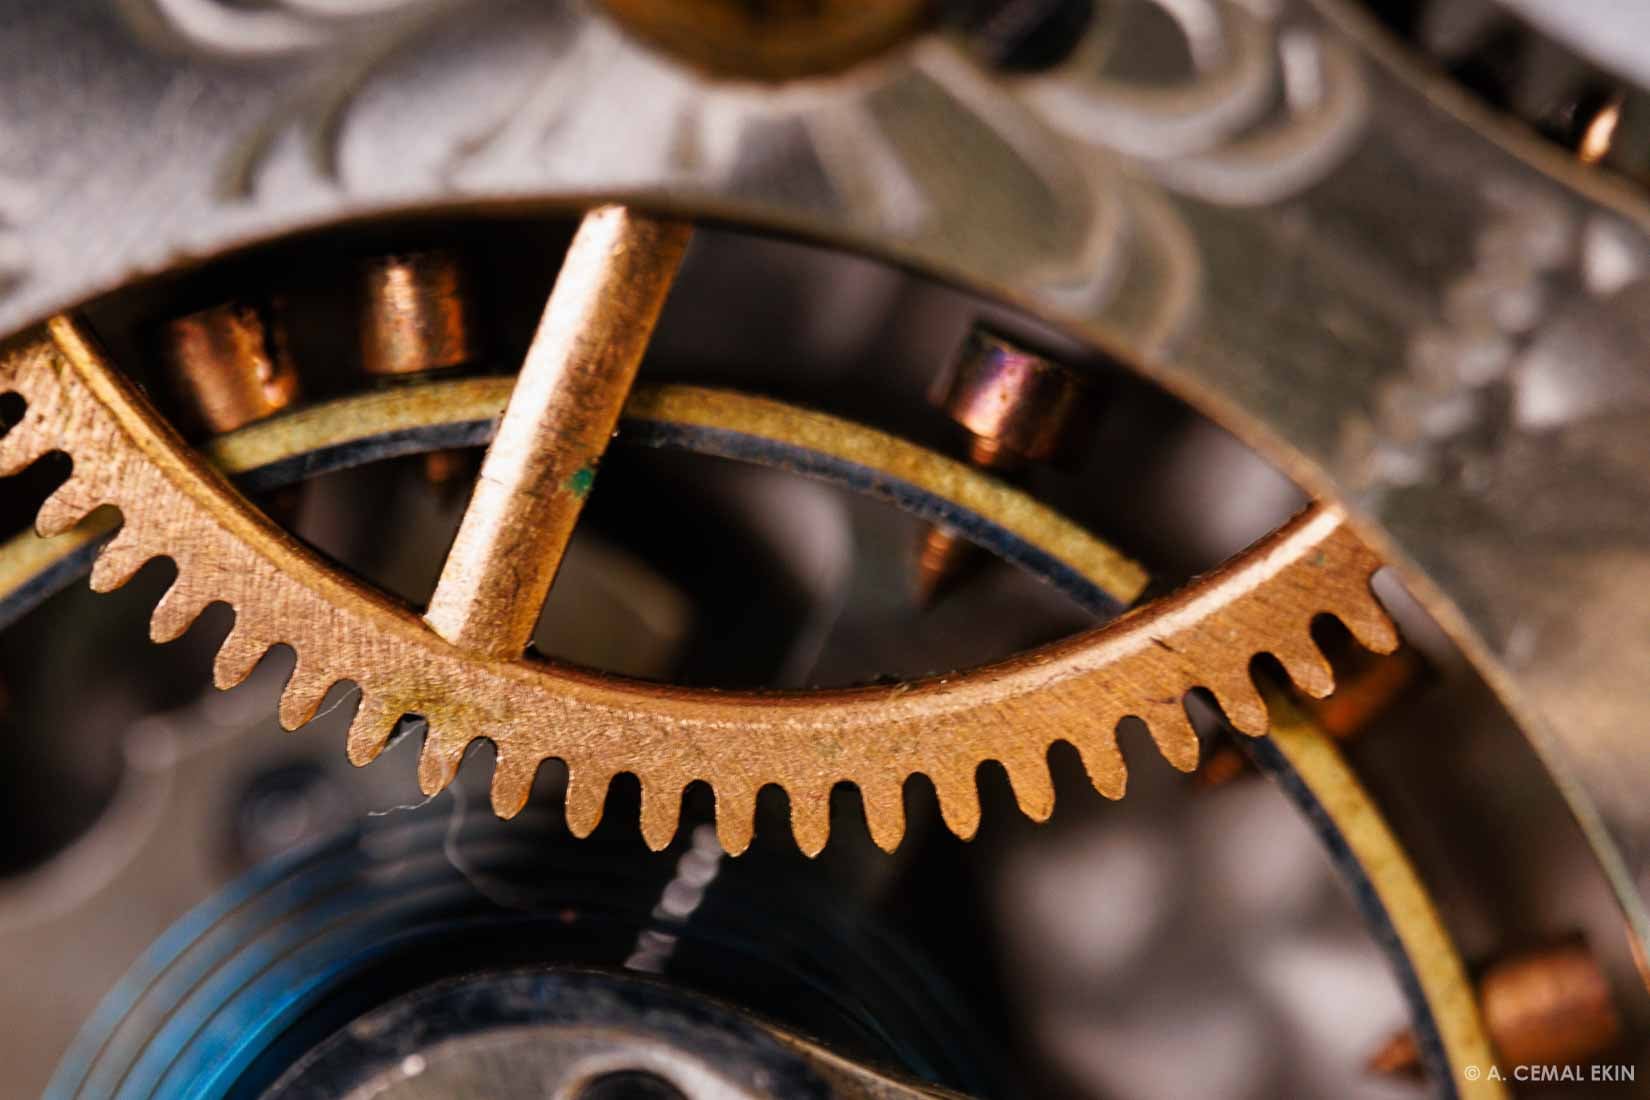
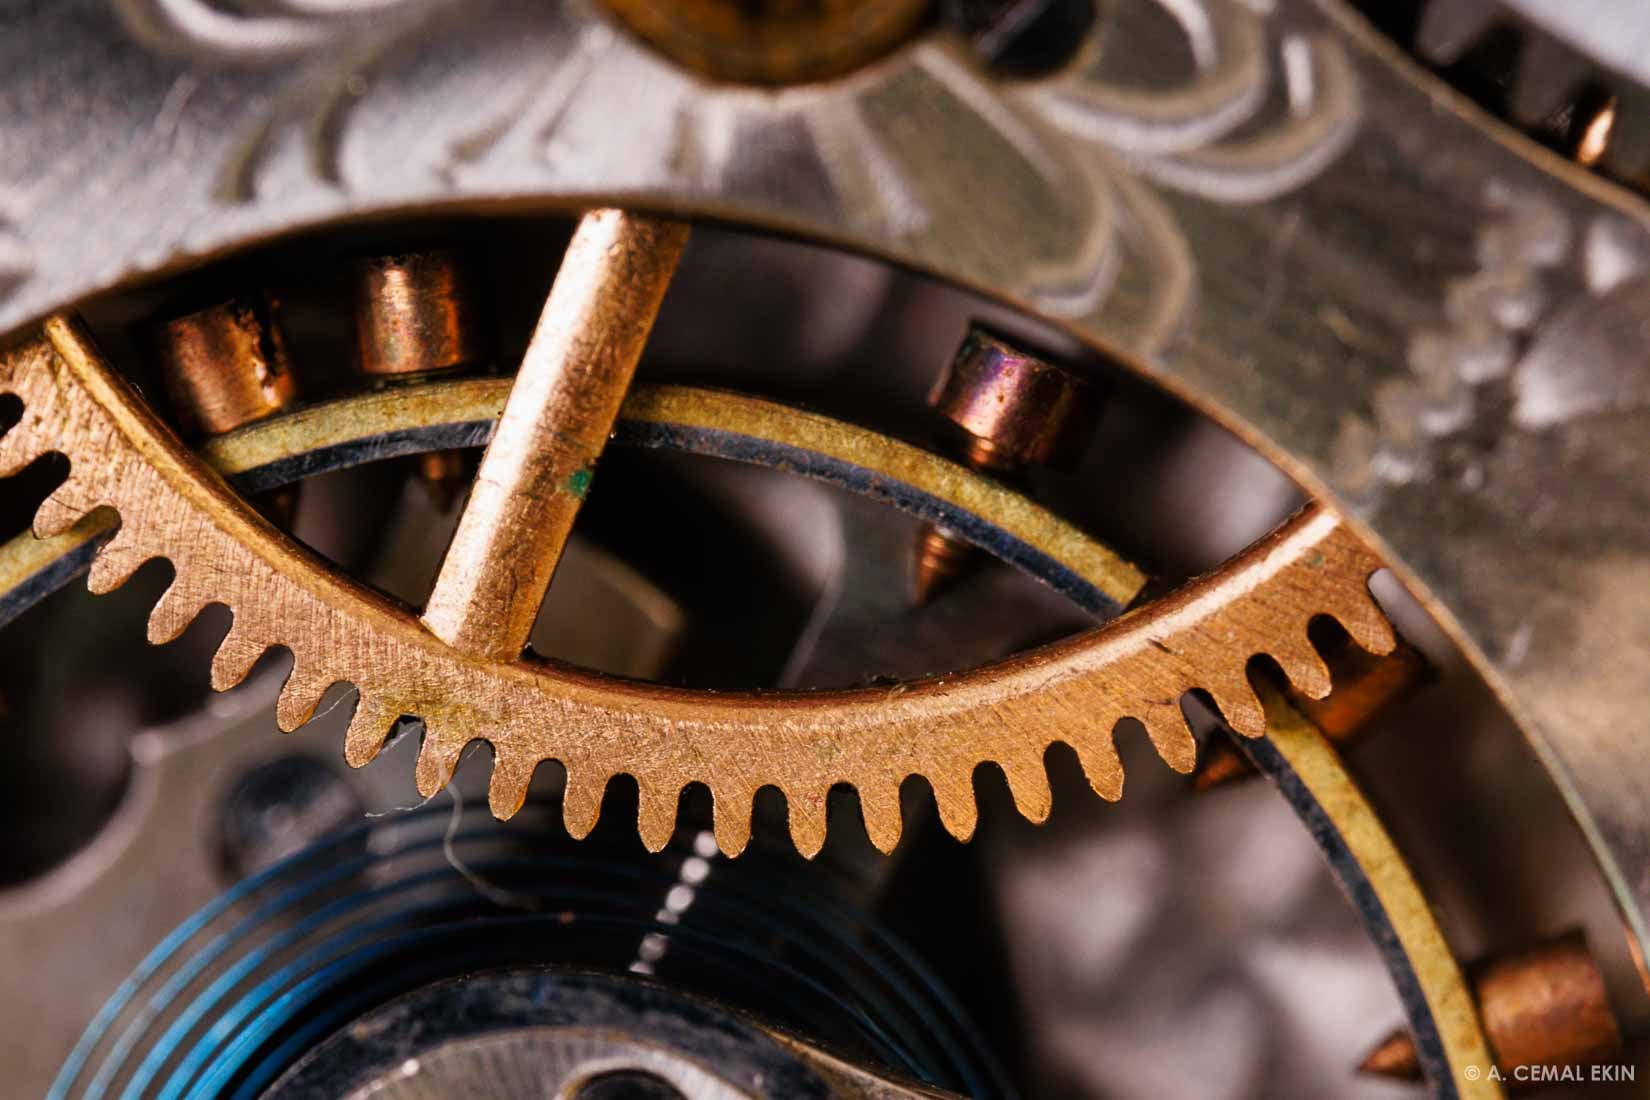
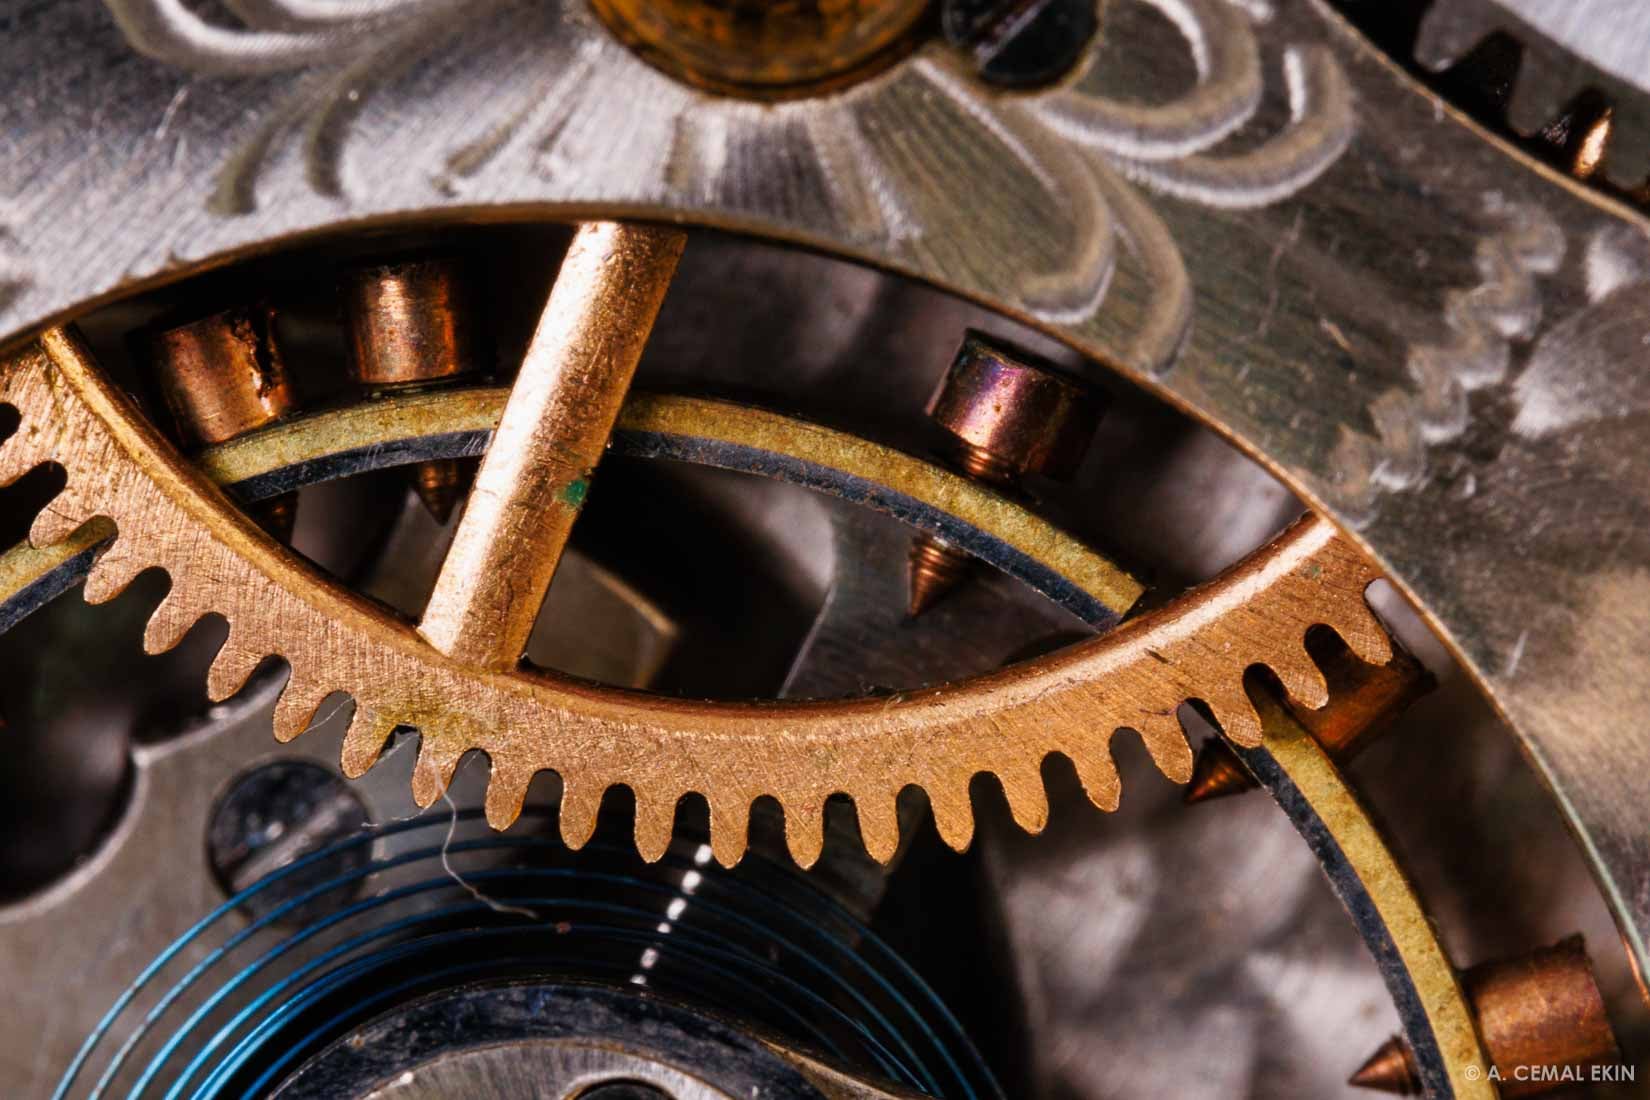
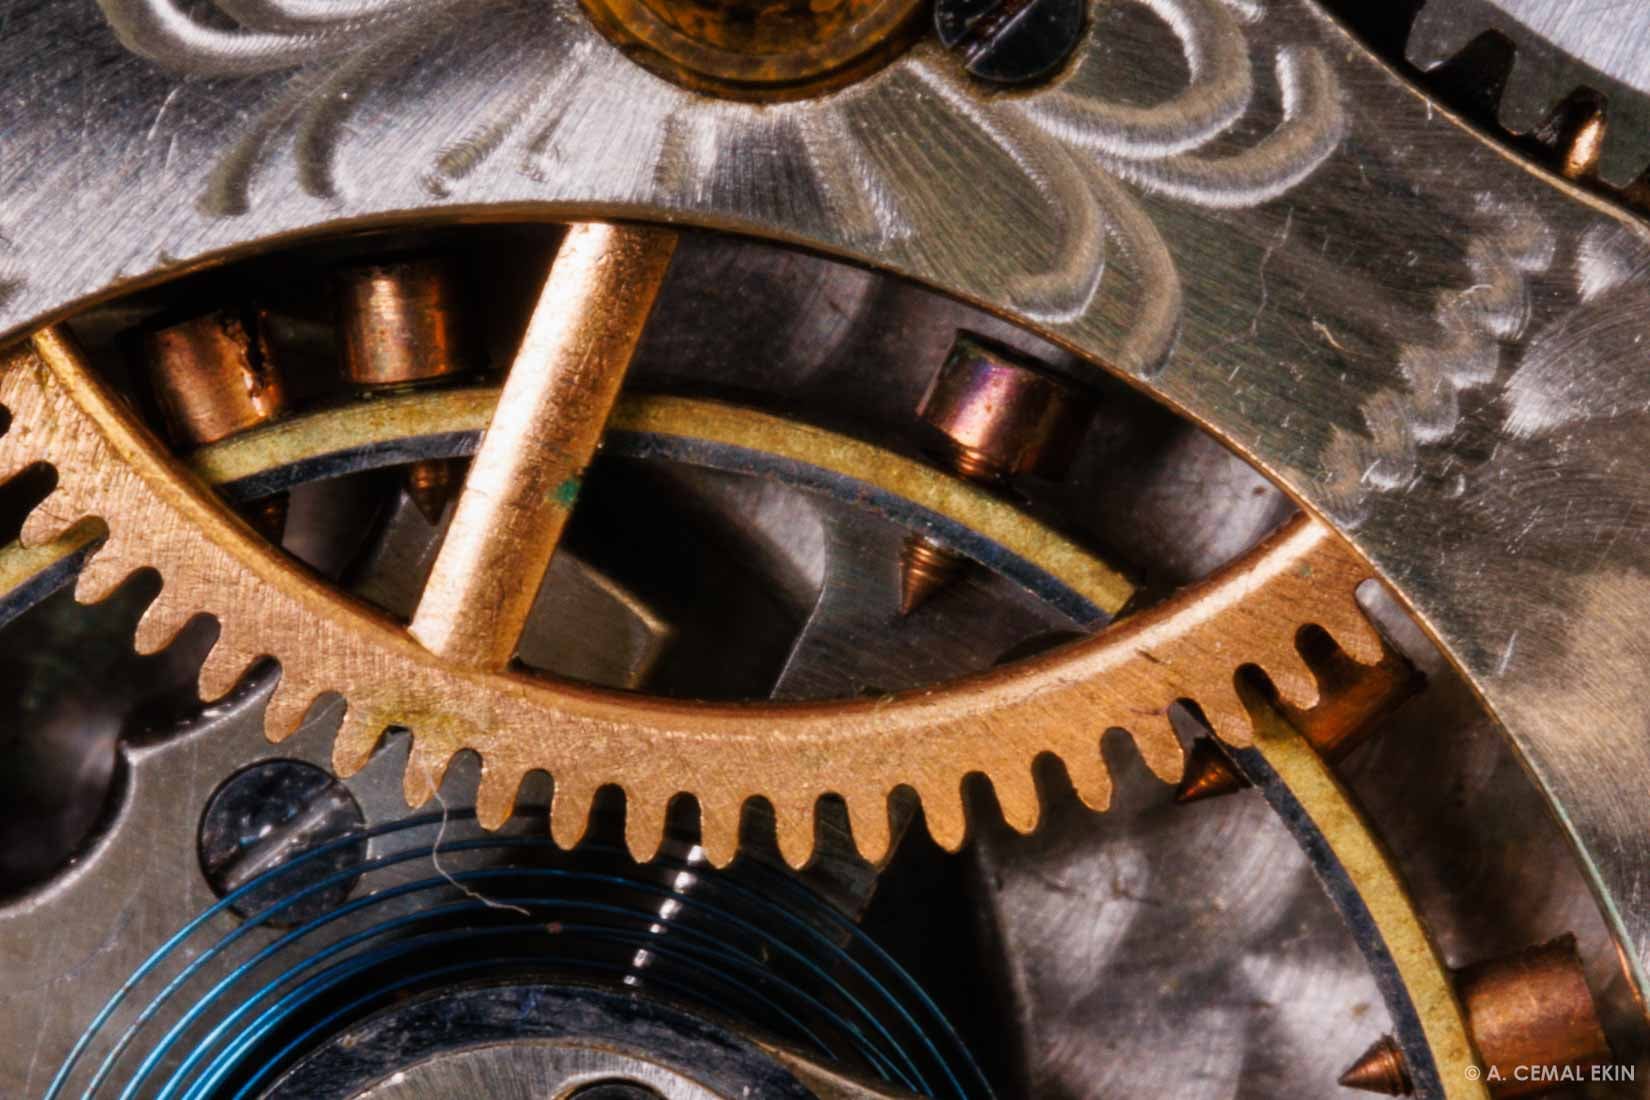
Started with a pocket watch mechanism
Dennis had brought with him an old broken pocket watch. We set up its innards as the first series of images shot at apertures starting with 2.8 and up to 22. The slight increase in the depth of field at smaller f-stops can be seen even in these scaled-down images. The first series is at 1:1 magnification.
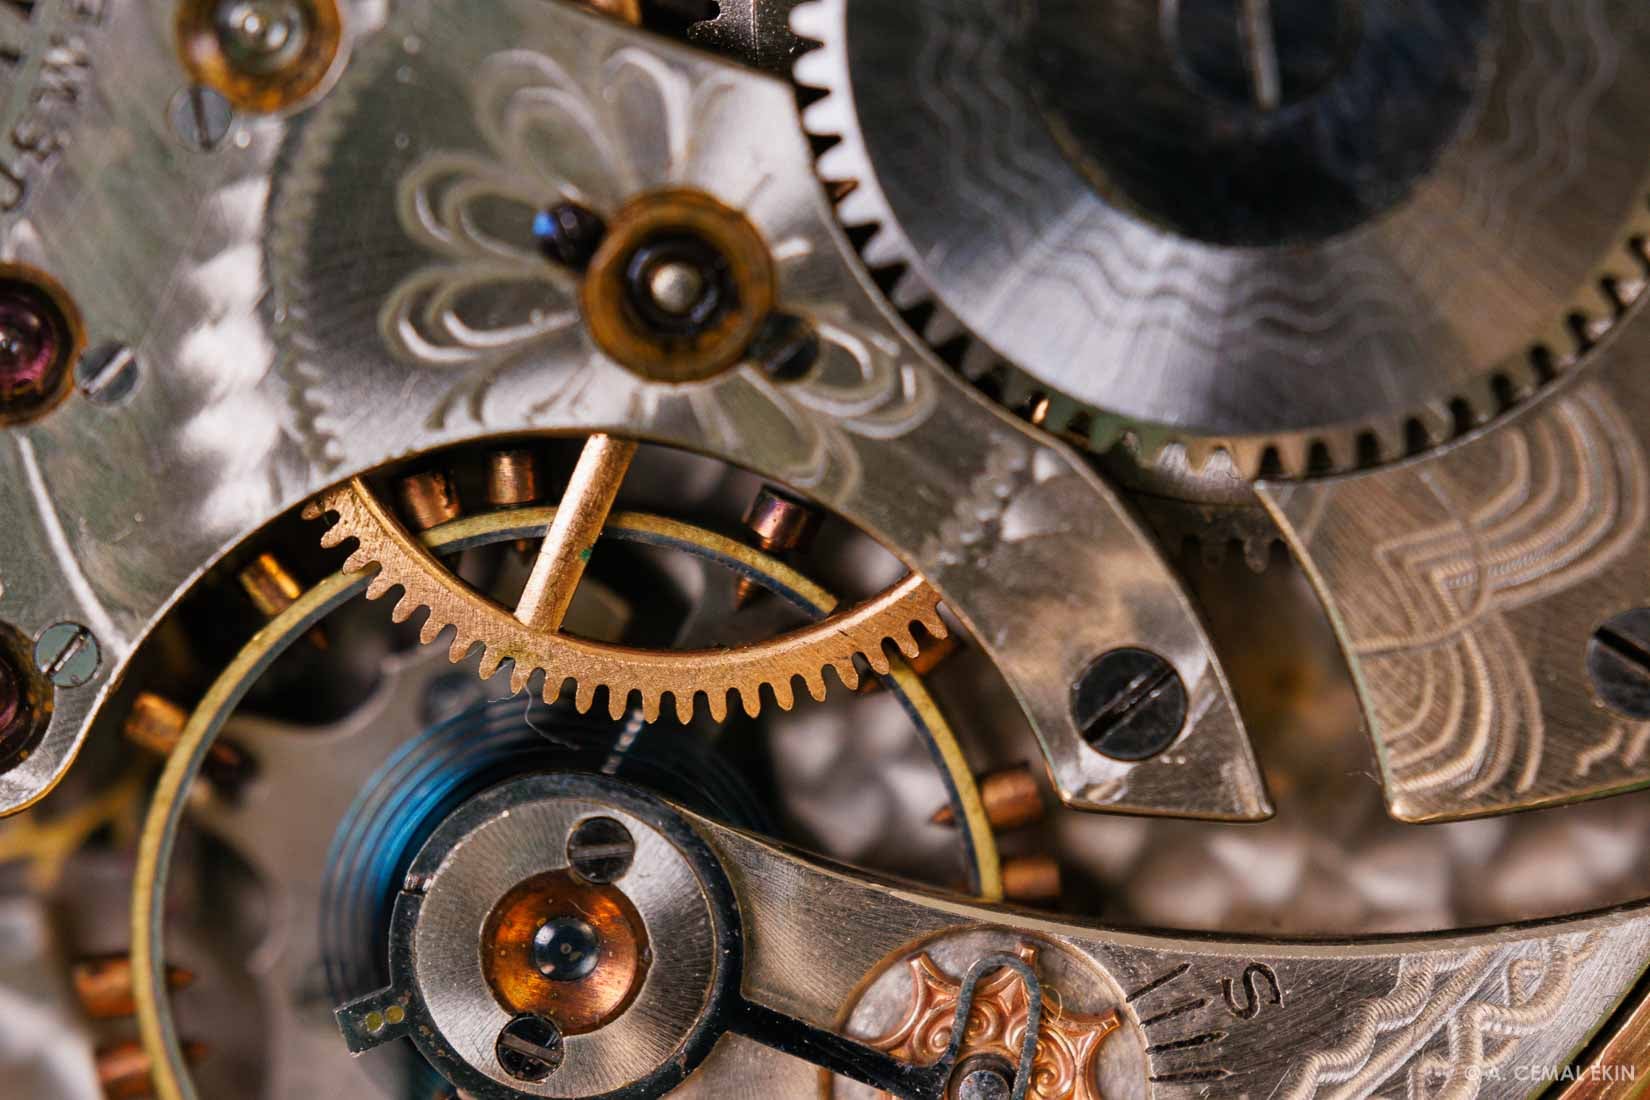


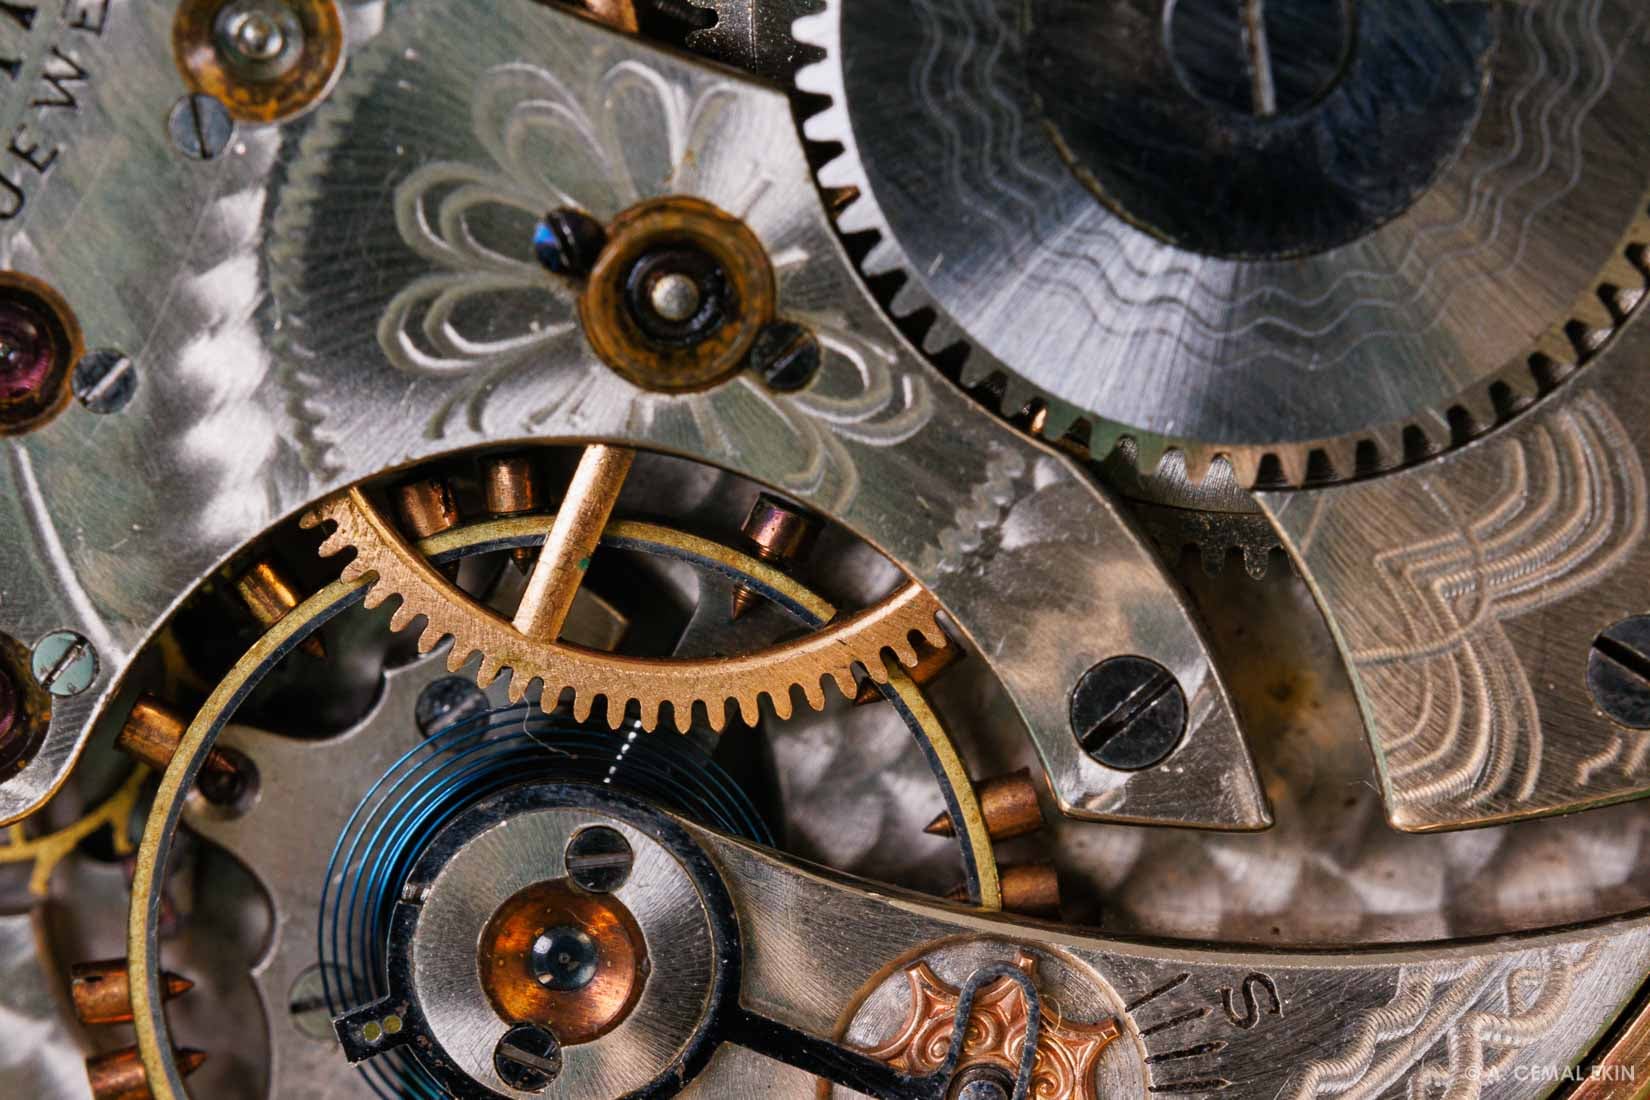

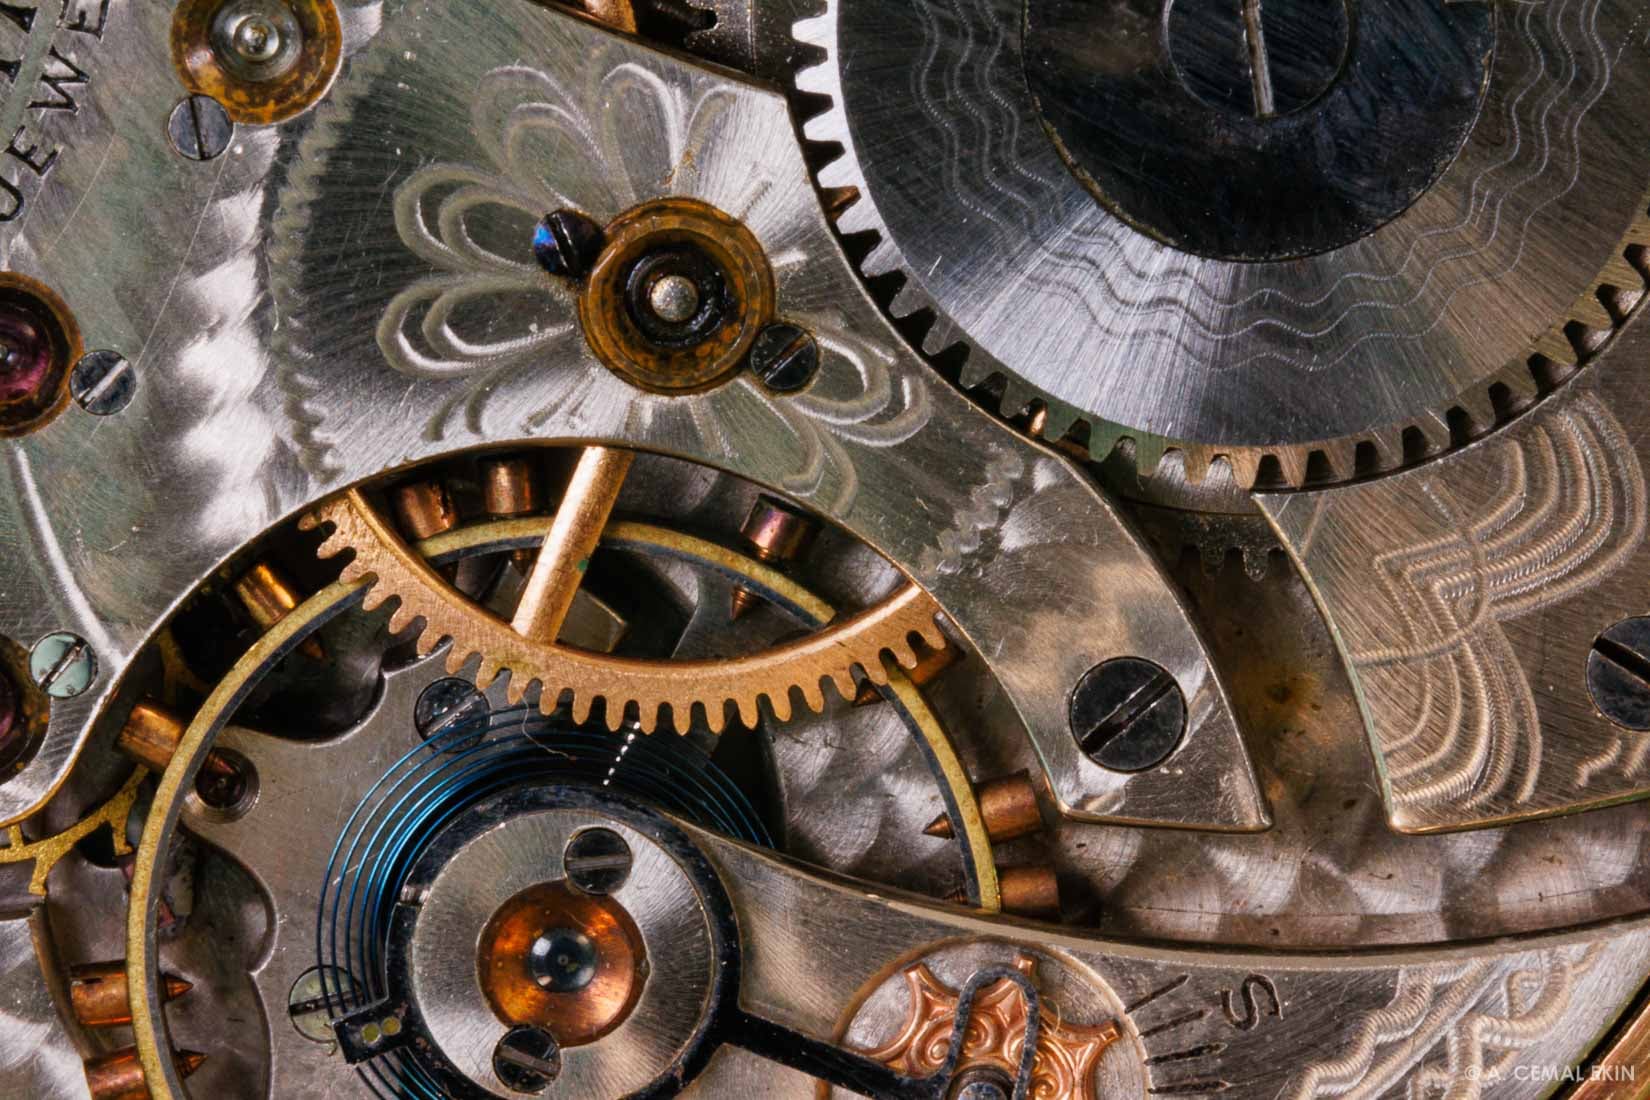
After that, we set it to 2:1 magnification. Although the image quality was reasonably good at 1:1, it seemed slightly less at the higher magnification, especially at wider apertures. As we approached f-11 and f-16 it looked better but not as good as at 1:1 magnification. The sweet spot for the aperture seems to be around 8-11. Generally, the unedited image quality was between acceptable and good at a price many could afford. With a little editing and applying proper sharpening, they can easily become very good depending on the subject.


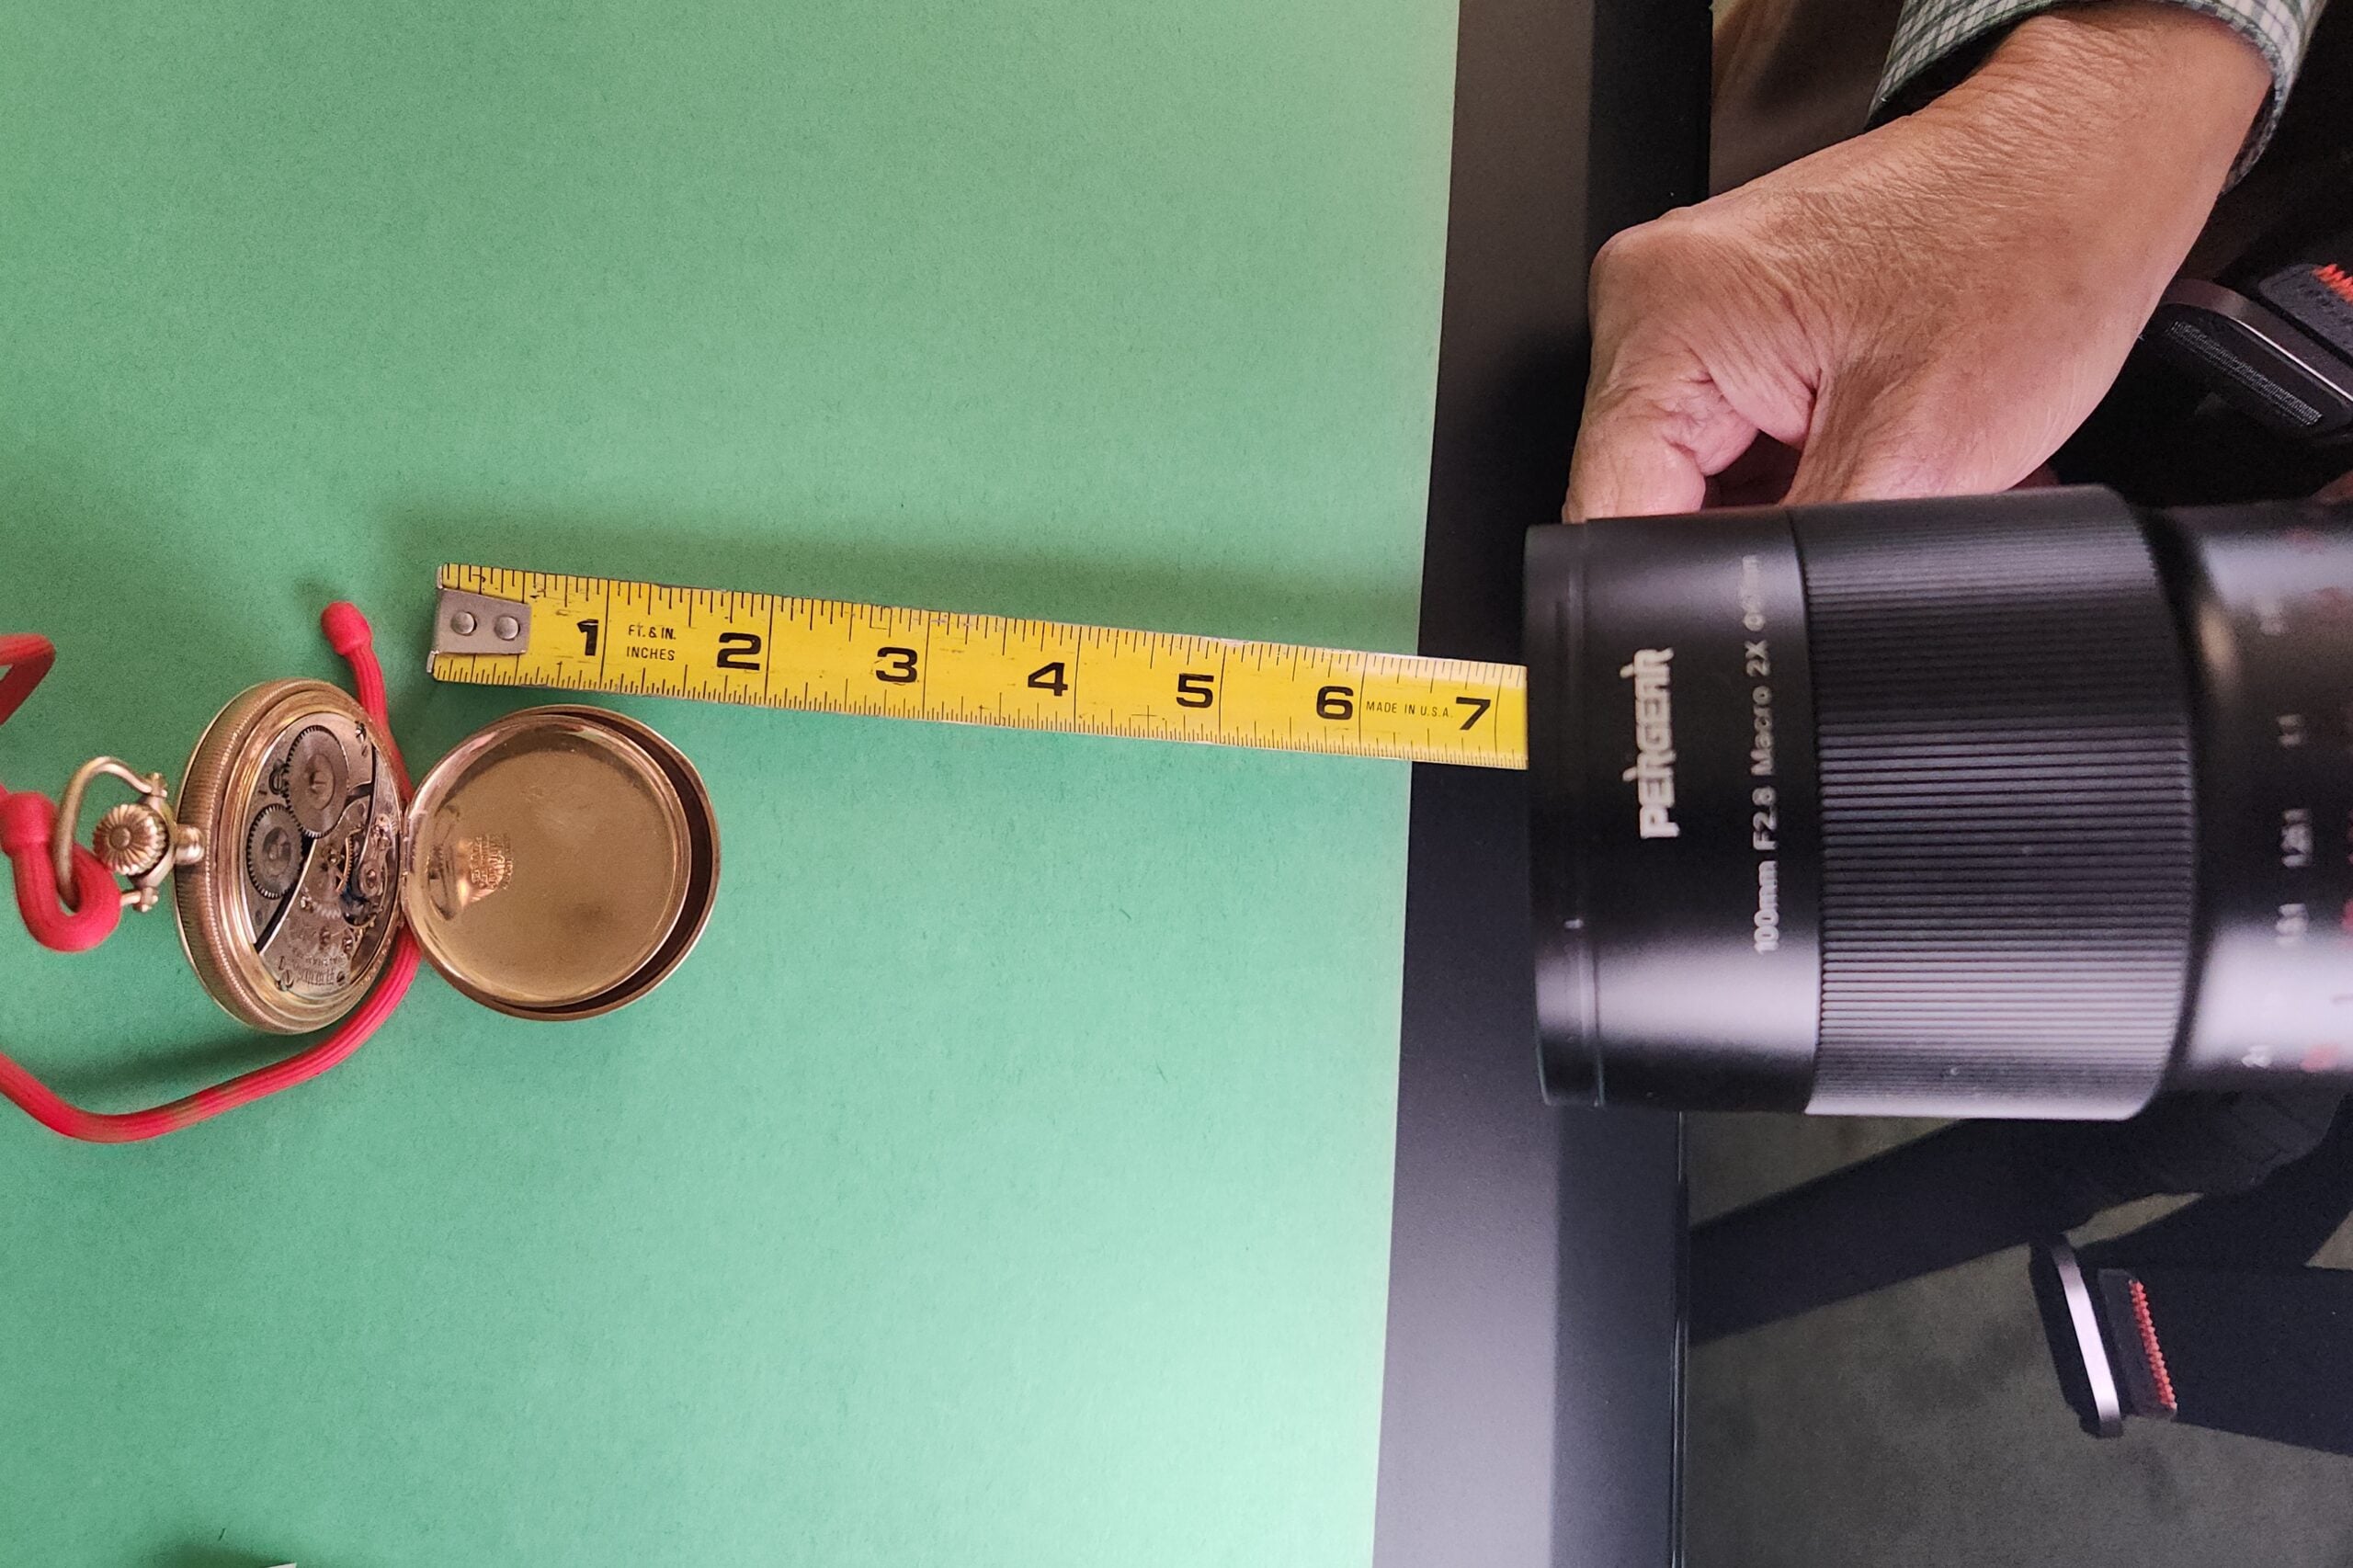
We photographed a ruler to check the magnification levels, and I repeated the test the next day. Since the Canon R7 sensor measures 22.2 x 14.8 mm, we wanted to see how much of the ruler would fit in at 1:1 and 2:1 magnifications. As you can see in the following pictures, the magnification ratios are approximate. The 1:1 magnification fits 27 mm, and the 2:1 magnification captures 13 mm instead of 22.2 and 11.1 mm respectively.


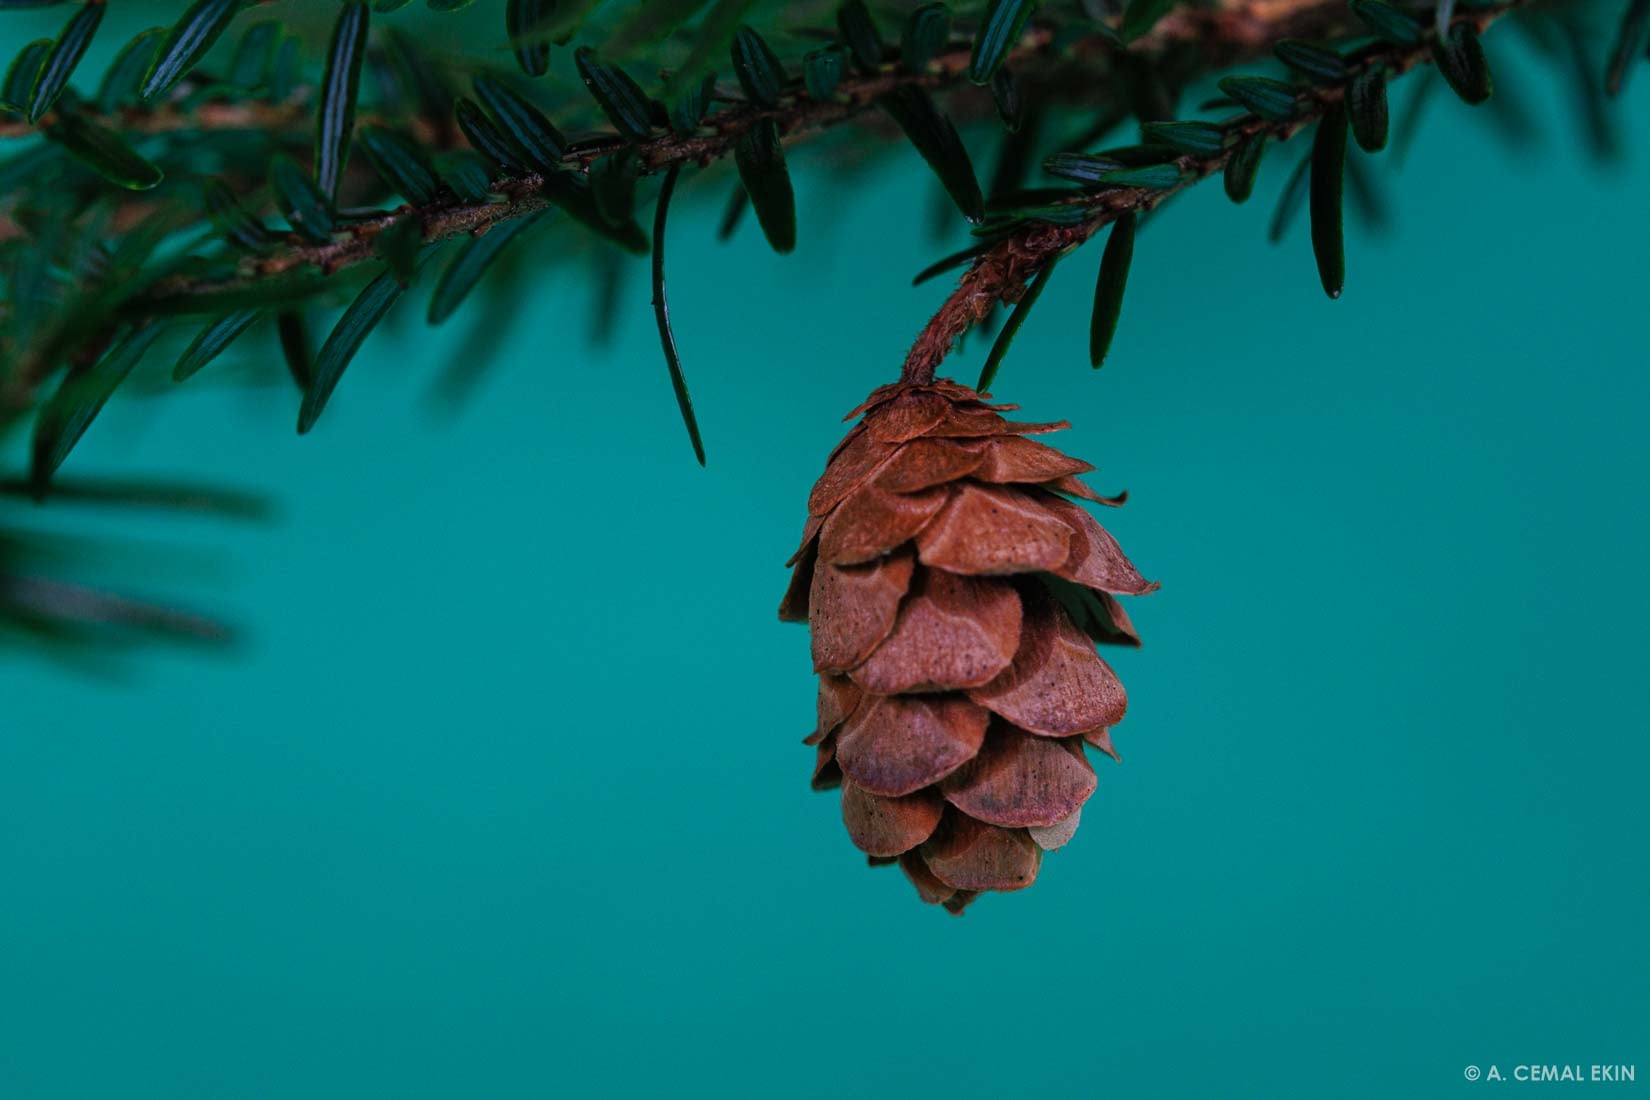
The longer focal length provides a comfortable working distance from the subject even at the highest magnification. The following images show the approximate working distance at 1:1 and 2:1 magnifications. At less than these high magnifications, the working distance is even more comfortable as the pine branch detail shows in the last image.

Before and after a little editing
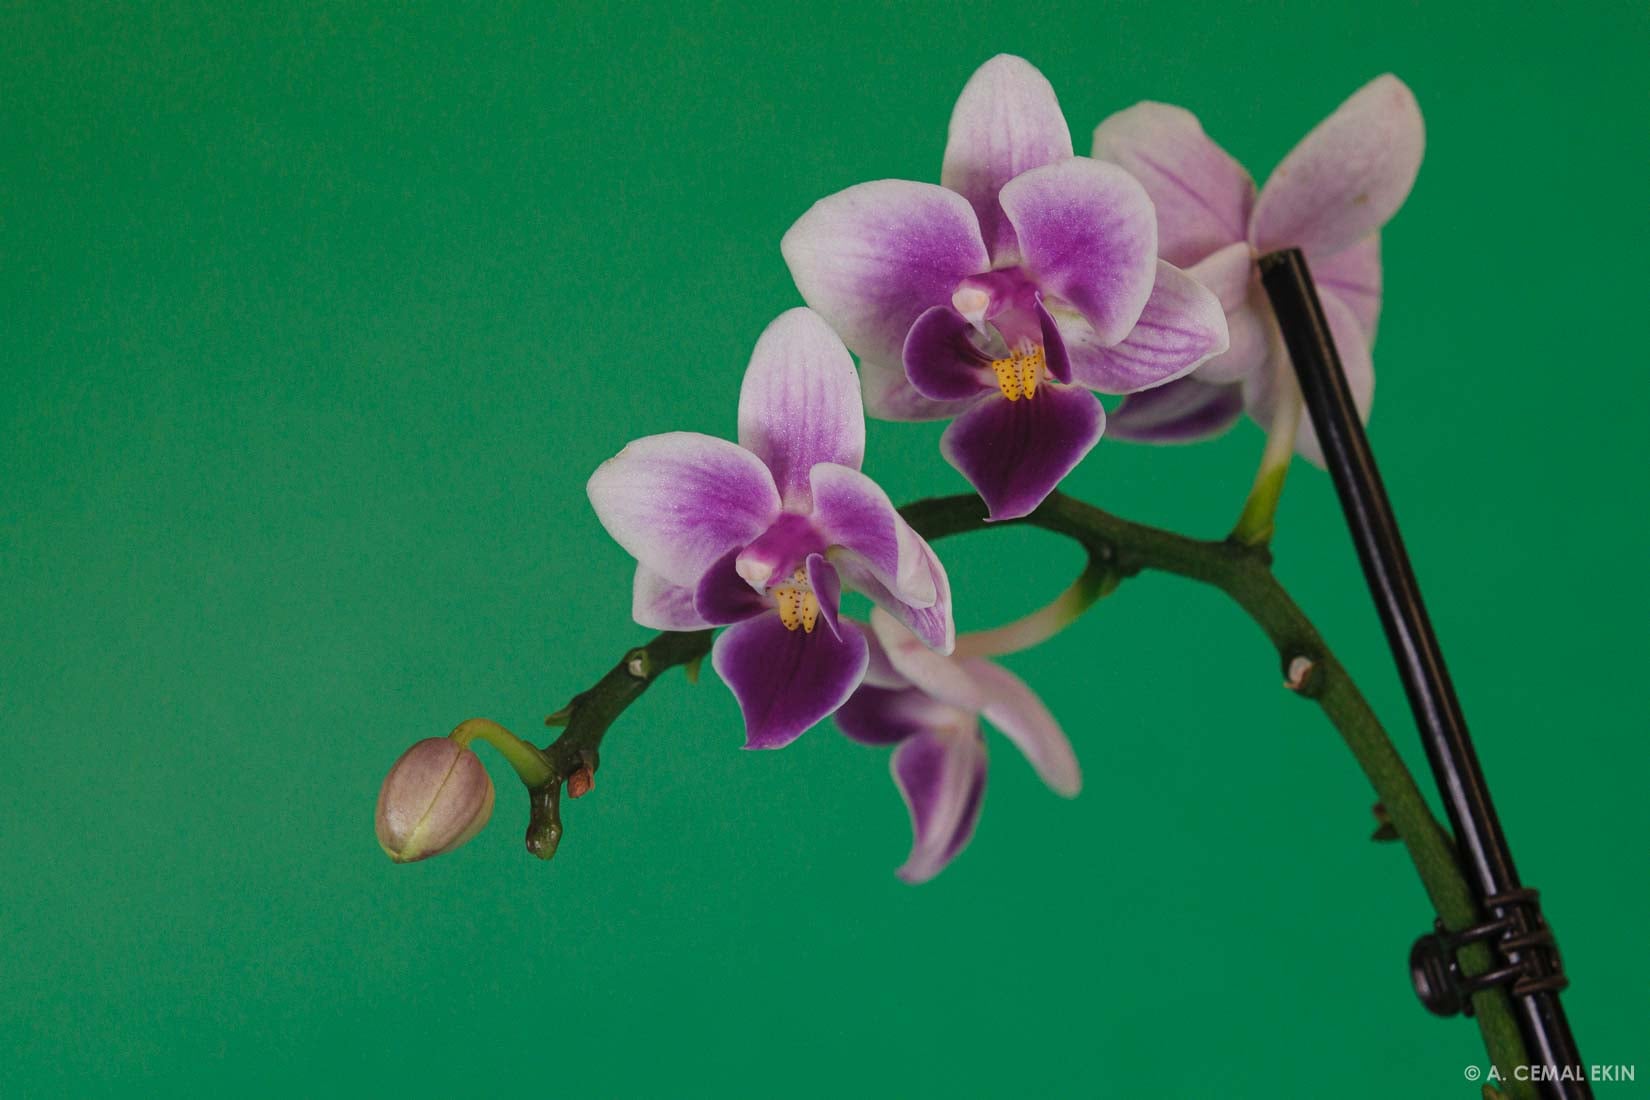
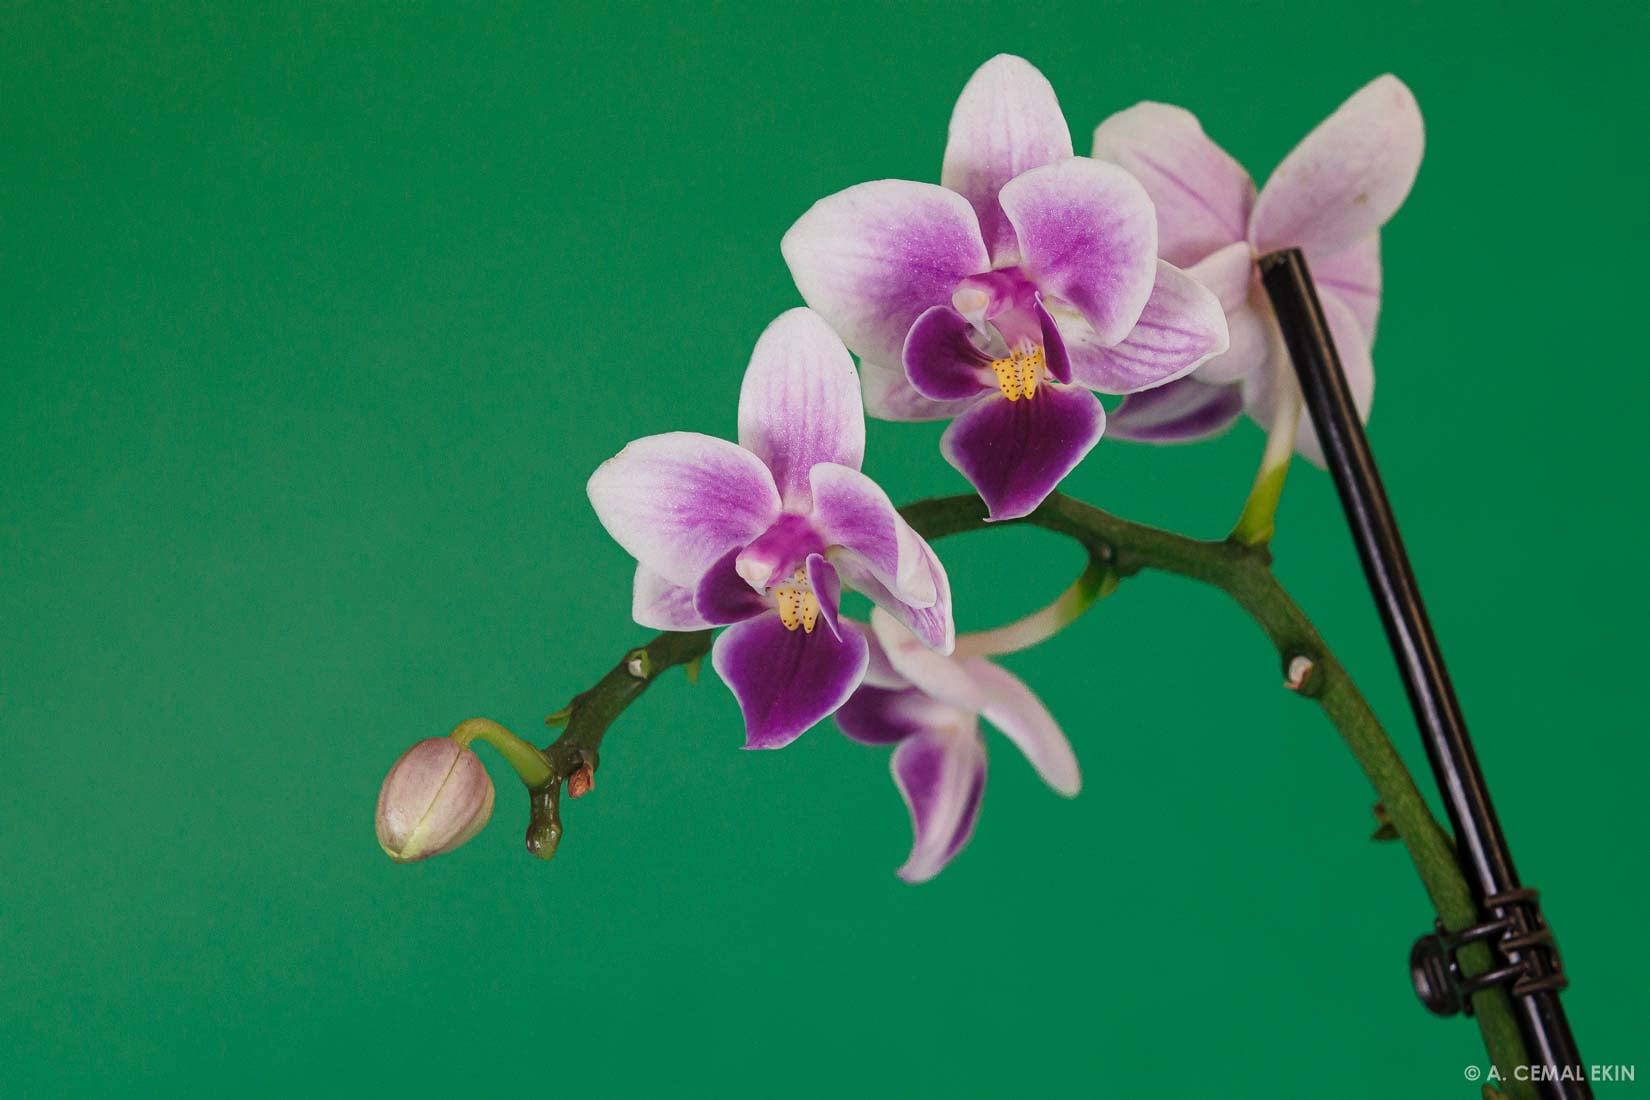
The above images are not edited to add extra sharpness, clarity, tonal quality, etc. With little editing in Lightroom, the looks of a capture can change to please the eye. I used one flower photo we photographed and quickly edited the main subject. You can see the difference a little editing makes.
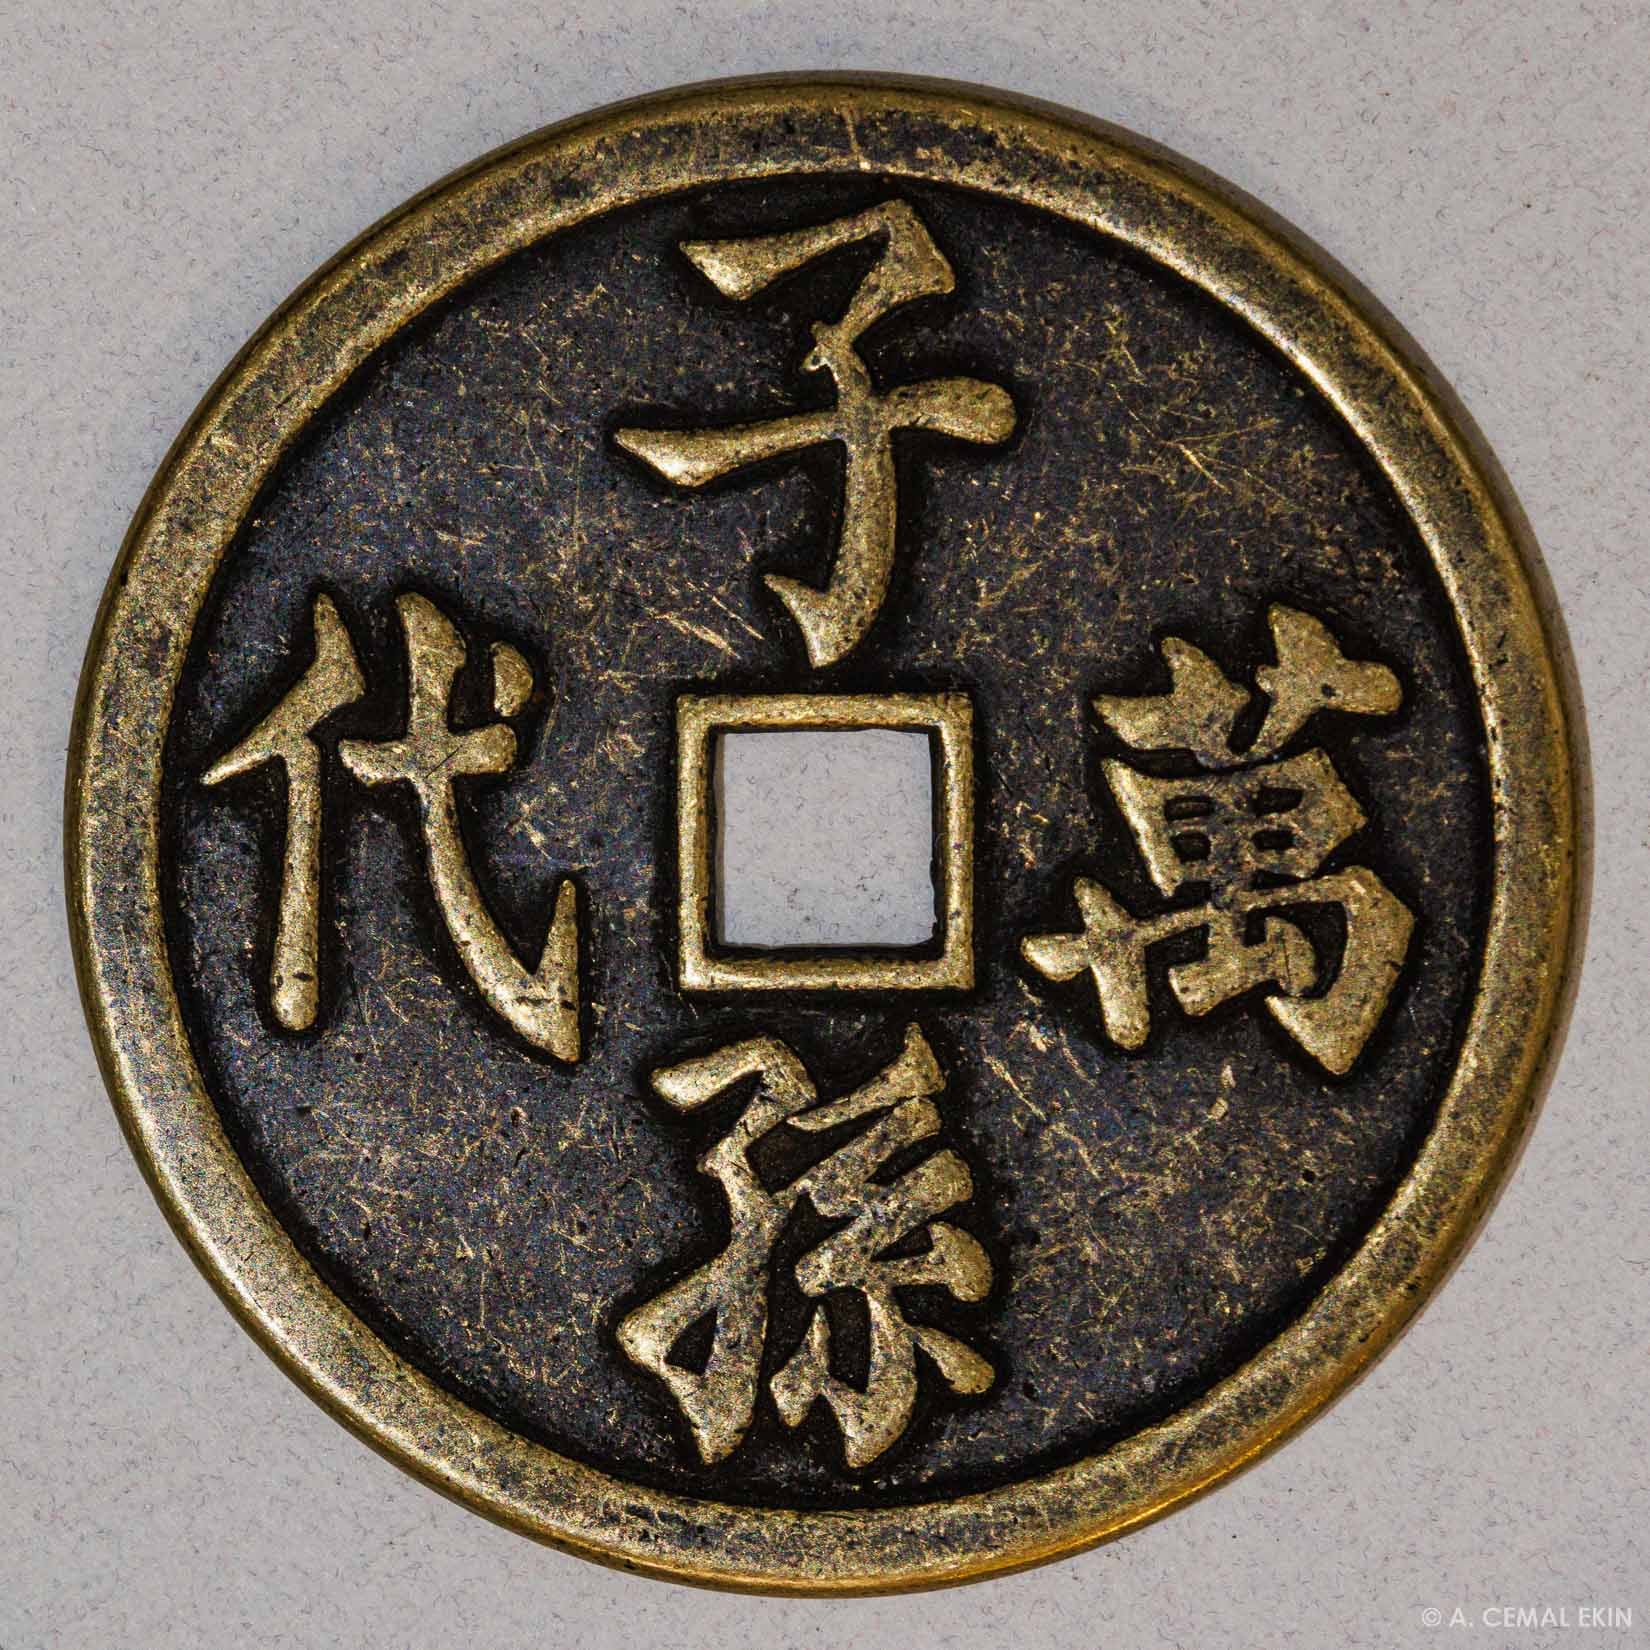
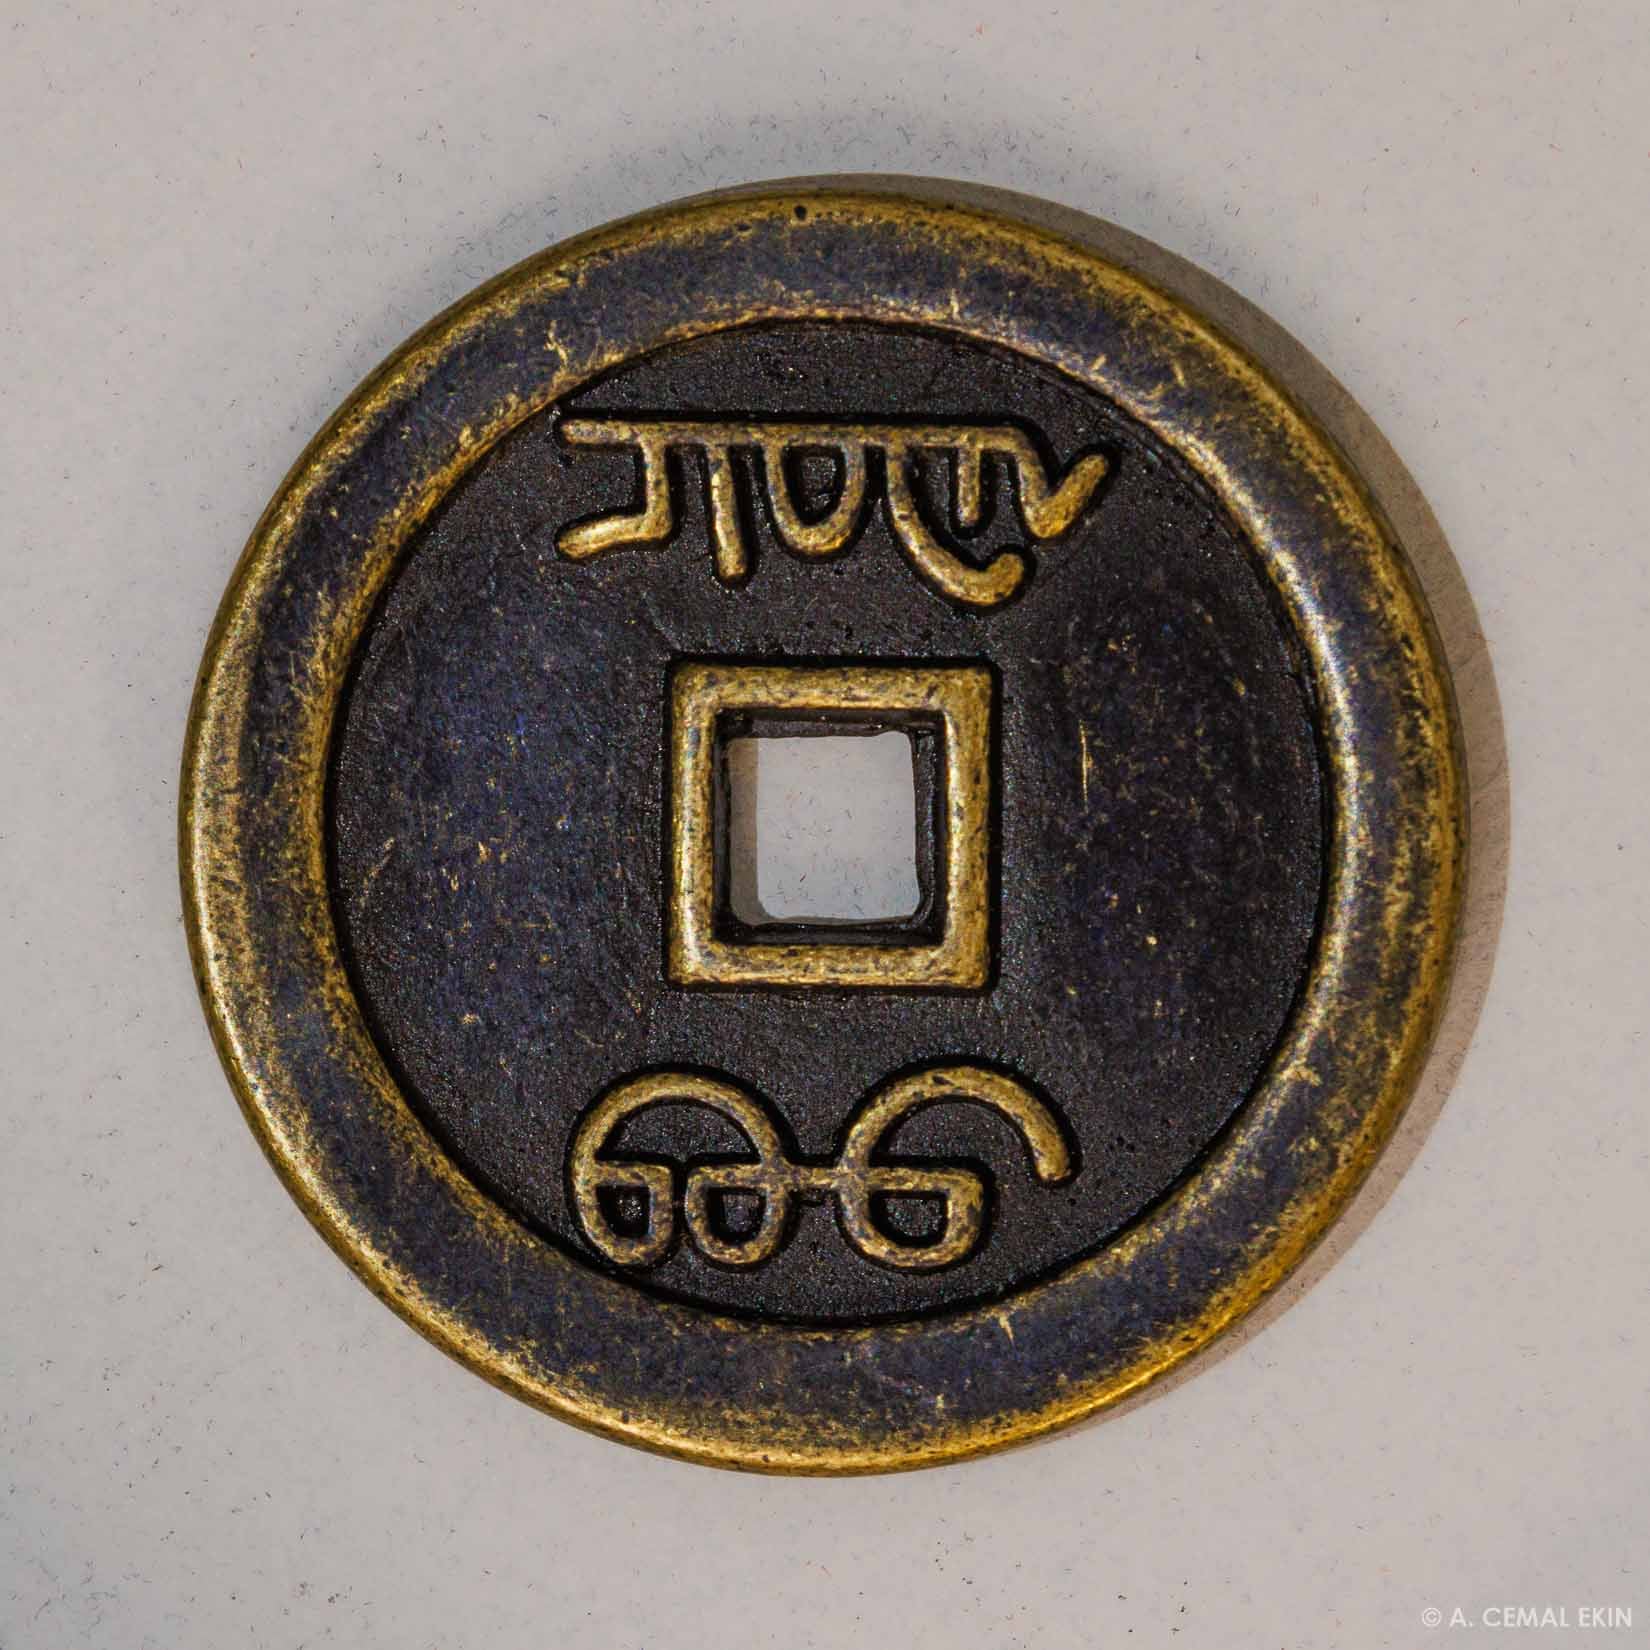
I also photographed a pair of coins my sister gave me years ago. She told me they were antique Chinese coins, and I thought it would be a good fit to photograph them with a lens made in China. I did not know the significance of the writing and figures on them, so I checked with my contact at Pergear if it would be appropriate to share them here. She gave me the green light, and here they are. The large coin is 2.75″ in diameter and the smaller one is 2.25″.


Conclusions and Suggestions
- The build quality is quite good with an all-metal body
- It has an affordable price, currently discounted at $269 on their website
- It is available in Sony, Canon, Nikon, Leica, and Fuji mounts
- The readers of this article can get an extra 8% off with the discount code keptlight which is valid only on their store, not on Amazon
- It can take decent pictures if you don’t mind the weight, manual focus, and no camera connection for data
- it has a comfortable subject distance because of its longer focal length
- Please, make the focus ring rotate more easily, and consider increasing the angle of rotation for slower focusing if possible
- The aperture ring needs to be easier to operate, it is too stiff as it is
- My camera is not a full 35mm frame camera, so I cannot speak to any possible fall of edge sharpness. That’s one advantage of a smaller sensor with lenses made for full-frame cameras.
About Cemal Ekin, coauthored by Dennis Goulet
Cemal Ekin is a photographer and a professor emeritus of marketing at Providence College. Other than doing photography and writing about it, he also gives lessons and organizes workshops. You can learn more about Cemal and find more of his work on his website Kept Light. This article was also published here and shared with permission.
We love it when our readers get in touch with us to share their stories. This article was contributed to DIYP by a member of our community. If you would like to contribute an article, please contact us here.
Related Posts
 Pergear 60mm f/2.8 Mk2 Macro lens offers up to 2x magnification
 Pergear’s APS-C 10mm f/8 Fisheye lens is basically an $80 lens cap you can shoot photos with
 Sony’s New FE 90mm f/2.8 Macro Lens Takes On Canon’s 100mm f/2.8 In Lensrentals’ Resolution TEst
 The impressive Laowa 100mm f/2.8 macro lens is now available for Nikon Z and Canon RF
Join the Discussion
DIYP Comment Policy
Be nice, be on-topic, no personal information or flames.
One response to “A closer look at the new 100mm F2.8 Pergear macro lens”
“Most macro photography is done on a tripod anyway” – that statement might be true for studio work, but most macro wildlife photographers are not using a tripod. Just browse on Instagram for a few minutes and you’ll see we’re using a portable diffuser and flash in the field and no rail or tripod. And that’s even when using a 2x Laowa lens that is similar to this one. It’s too difficult and slow to use a tripod/monopod/rail when photographing macro wildlife in the field. But thanks for the review, always interested in new macro lenses. And I use the R7 for macro as well. Great camera for close-up work.