


How to use microscope lenses on the Blackmagic Pocket Cinema Camera 6K
Mar 7, 2021
Daniel Schweinert

We love it when our readers get in touch with us to share their stories. This article was contributed to DIYP by a member of our community. If you would like to contribute an article, please contact us here.
Share:

I had some fun lately shooting some macro, and I was curious if I could somehow use my father’s old microscope lenses on my photo and video cameras. The idea is not new. A quick google search showed that it was indeed possible, but you need a special adapter for microscope lenses. The adapter is called “M42 to RMS,” and it is available from Aliexpress.
I didn’t want to wait 4 weeks for the metal adapter to arrive, so I thought, let’s design one in Fusion360 – but before I start, let’s check Thingiverse first, and voila! Someone designed it already – LOL.
Here is the link to the STL file: https://www.thingiverse.com/thing:4687298

So I printed the adapter from PLA with a layer height of 0.10mm on my original Prusa MK3. I was surprised that the threads worked perfectly. I screwed the 3d printed adapter into my M42 to CanonEF metal adapter and started to play with different microscope lenses.


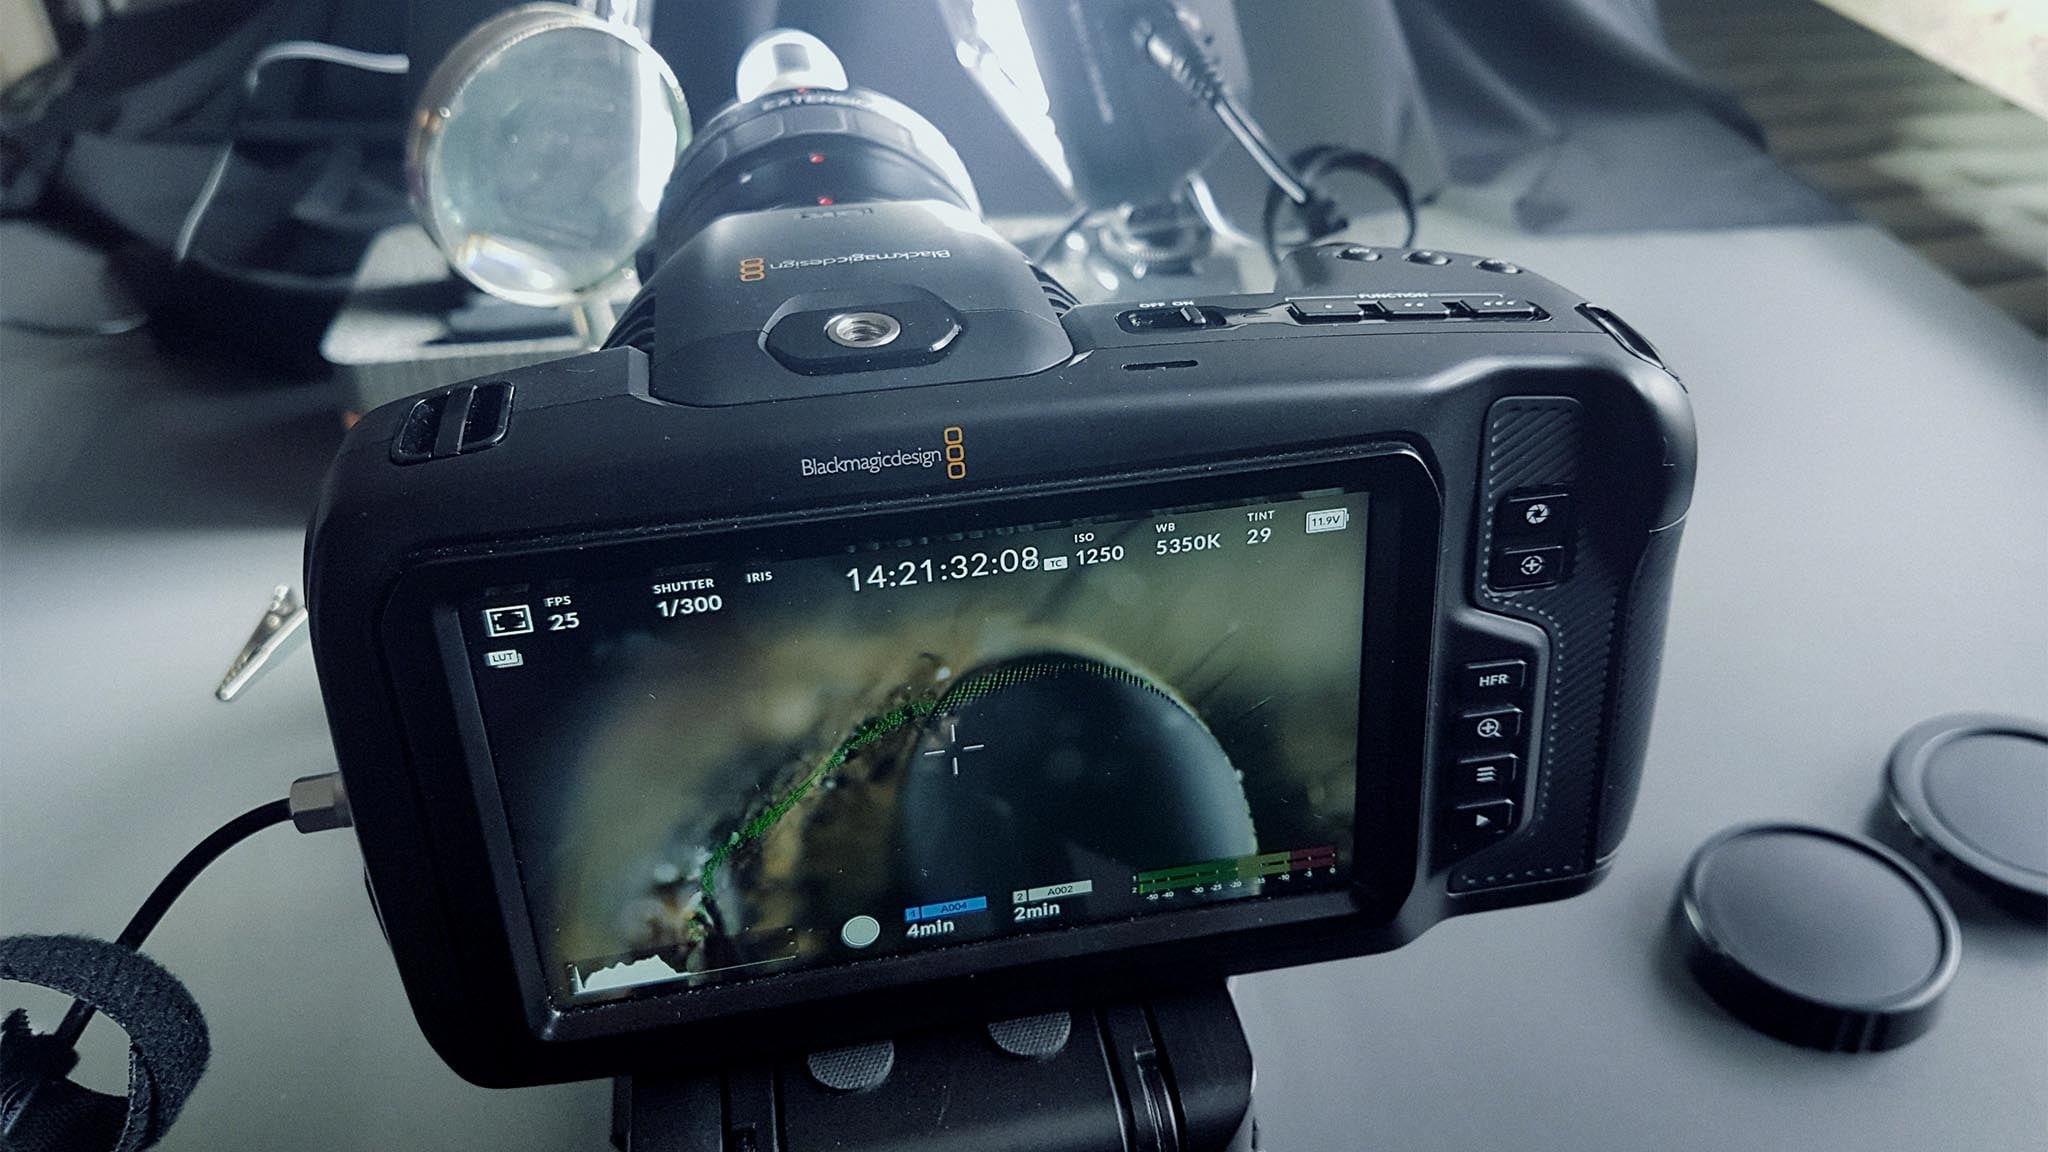
I soon realized that without extension tubes, I got less than 8x magnification and some vignetting. After reading several online documents, I knew that I would have to increase the distance from camera to microscope lens to about 160mm to get that 8x magnification from the Lomo 8x and eliminate the vignetting.
I started with the thin extension tubes from the accessories that came with the microscope and got a good magnification to work with. After that, I added my Kenko/Canon EF extension tubes, and the whole length was about 160mm. You can play with that length depending on the magnification you need. And don’t forget you need a lot of light! This was just a quick test setup on my desk to see if it works, and it did!


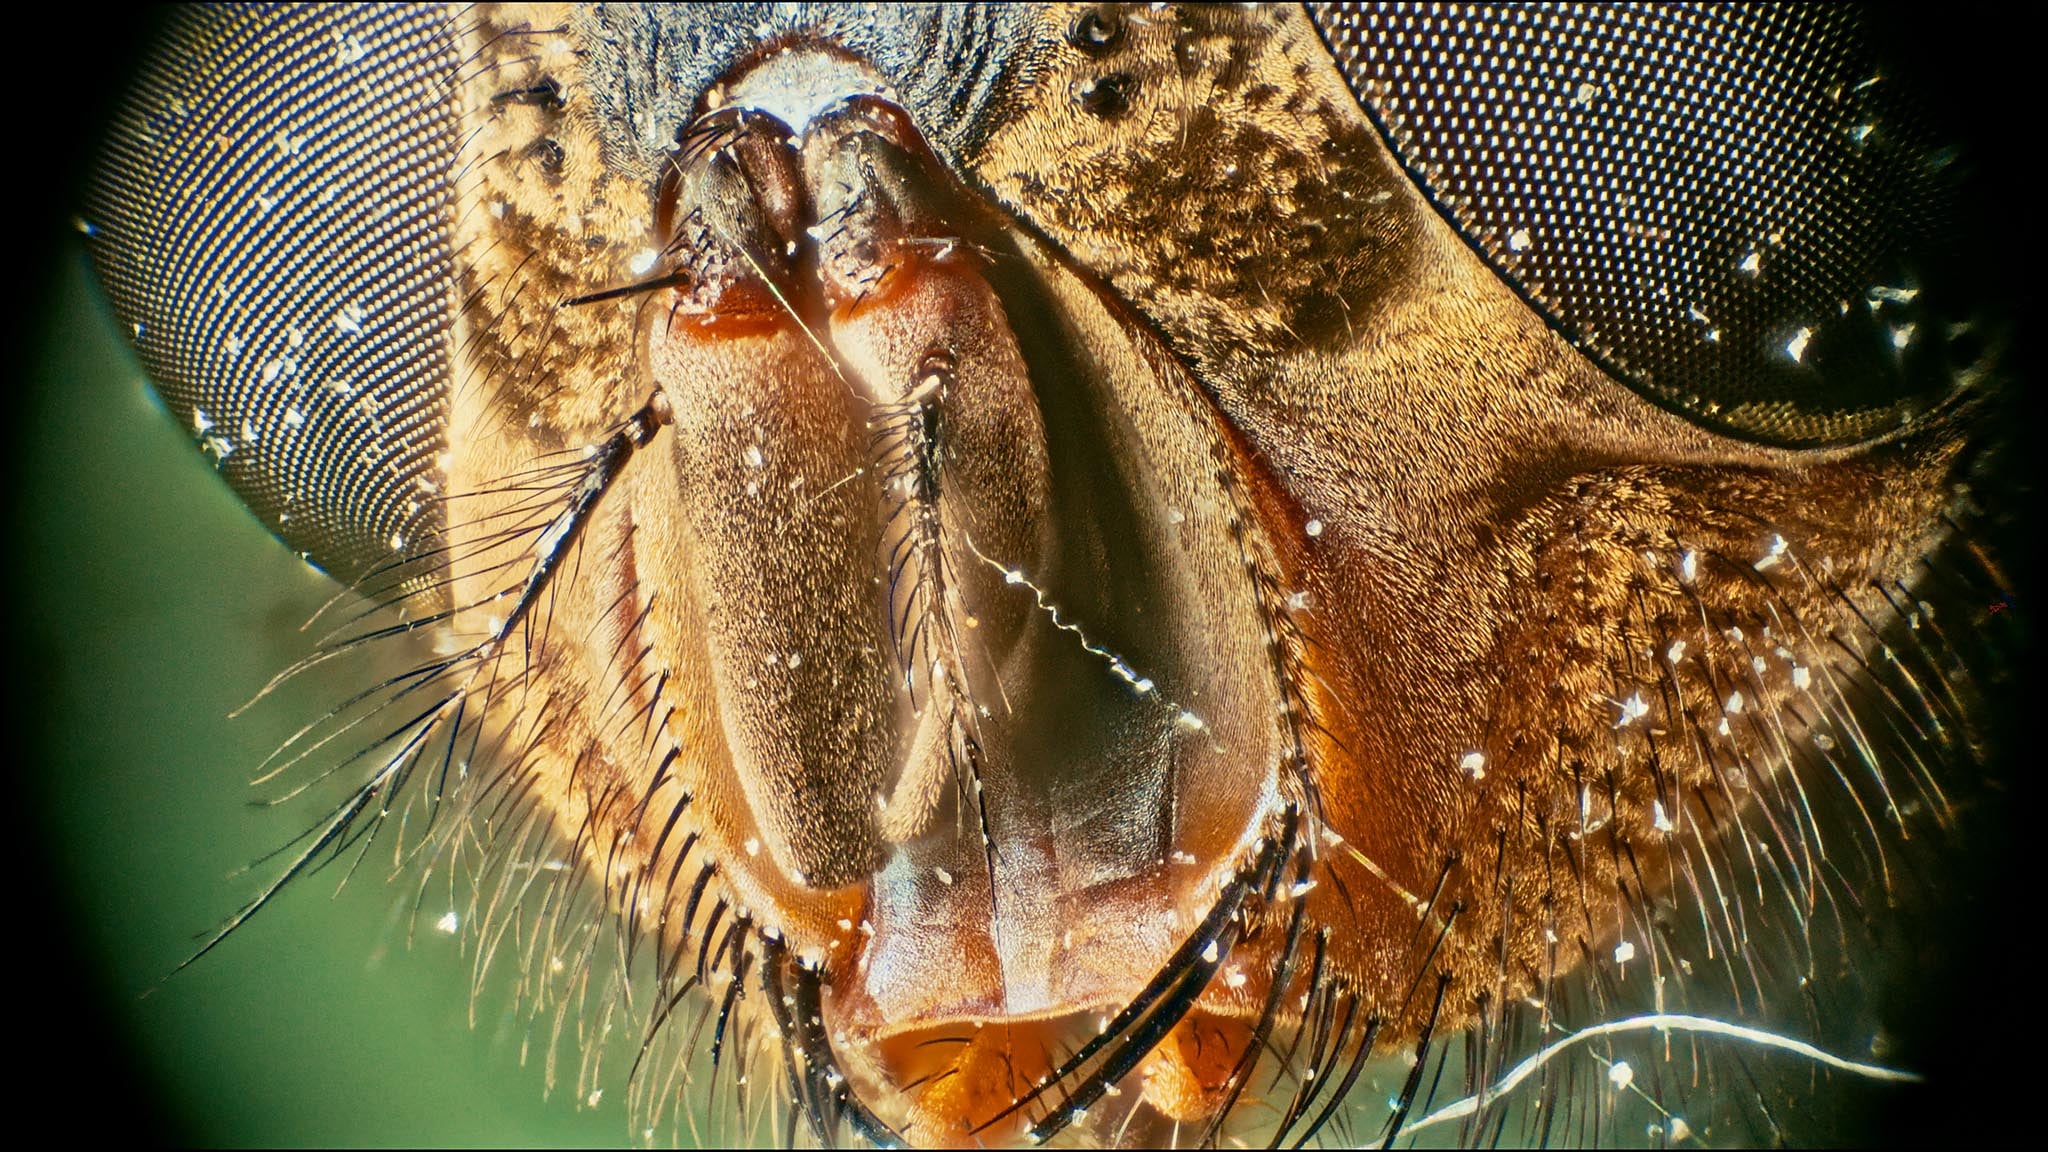
I got to a maximum of X8 magnification from the Lomo microscope lens with all the extension tubes that I had. I also tested the 16x and 40x microscope lenses, and the magnification is mind-blowing, but my setup is way too flimsy for that. I need a dedicated macro rail, like the “Wemacro”, with a threaded rod instead of a belt-driven system.
The camera itself is mounted on an old Edelkrone slider with a motion module. I record short 4K ProRes422HQ clips and use them for focus stacking directly in helicon focus. For this fly, I used an average of 160 frames. The slider was not meant for these extreme macro shots, so I had to increase the shutter speed to 1/300 to avoid the motion blur from the shakiness. This way, I get crystal clear frames that work perfectly in helicon focus.


Sources / interesting material:
- https://www.maxamillion.online/blog/2019/6/20/adapting-microscope-lenses
- https://makrodunyasi.com/en/macro-photography-using-microscope-lenses/
- https://makrofokus.se/blogg/2016/9/22/diy-makro-fisheye.html
- https://makrofokus.se/blogg/2015/9/24/nonac-40mm-f28.html
- https://www.youtube.com/watch?v=PW-44IKD8l0
- https://www.edmundoptics.com/knowledge-center/
- https://www.mjkzz.com/single-post/2016/08/10/Using-Microscope-Objectives-For-Beginners
About the Author
Daniel Schweinert is a Director of Photography, VFX artist & Tech geek based in Germaringen, Germany. You can see more of his work on his website, Instagram, Vimeo, and Youtube. This article was also published here and shared with permission.
We love it when our readers get in touch with us to share their stories. This article was contributed to DIYP by a member of our community. If you would like to contribute an article, please contact us here.
Related Posts
 There is now a pocket-sized controller for the Blackmagic Pocket Cinema Camera 4K
 Blackmagic RAW finally comes to the Blackmagic Pocket Cinema Camera 4K in latest update
 How to use a reverse macro lens with the Blackmagic 6K pocket cinema camera
 The Blackmagic Pocket Cinema Camera 4K is also a stills camera and 10 other things you need to know
Join the Discussion
DIYP Comment Policy
Be nice, be on-topic, no personal information or flames.
One response to “How to use microscope lenses on the Blackmagic Pocket Cinema Camera 6K”
Do you have the video posted anywhere?