


How To Make Your Body Disappear In A Photograph
Nov 19, 2012
Udi Tirosh
Udi Tirosh is an entrepreneur, photography inventor, journalist, educator, and writer based in Israel. With over 25 years of experience in the photo-video industry, Udi has built and sold several photography-related brands. Udi has a double degree in mass media communications and computer science.
Share:
this submission for our How I Took It contest, is a n oldie but a goodie. Photographer AndrewVincent shows us how to create a transparent body. While this post is for a relatively simple end results, there are some great composite tips to be found in the tutorial, and sheds some light on how flying babies and axed head photos are made.

Gear
First you need a camera. My weapon of choice is a Canon 5Dmk2. It does not matter what kind of camera, remember photography is not always about your equipment, it’s about how you can manipulate it.
Secondly a tripod is needed or some sort of stable surface to rest your camera on. The key to this photo is making sure your camera DOES NOT MOVE, any slight change in frame will throw off the final edit.
Shooting
Pick a spot that you feel is visually appealing, I chose the windows with blinds in my house because it was easily accessible and I felt that the lines that the blinds would give a great look.
Lighting really is not a big deal, you can go all out and have wireless flashes and what not or you can use the pop up flash on a point and shoot. The key to lighting this particular photo is to make sure the lighting DOES NOT CHANGE. Once again if it does editing the final image will be difficult and will not look visually pleasing. I decided to not use any flashes, in the photo there is a ceiling light and the standing lamp with all three fixtures turned on.
Next, if you are doing this alone, which what I did, to frame the shot you will want to set your camera on a timer, jump in the shot and make sure you are in the frame. This may take a few shots and adjusting to make sure the subject is aligned perfectly in the frame. This is obviously easier if you have someone jump in for you as your test subject but sometimes this isn’t an option.
Once you are happy with where the subject is going to be in the frame, snap one shot of area WITHOUT anyone in it. You are going to use this as your base image. Then with out changing the lighting or framing, time for you to jump in the frame and strike your pose. Take as many shots of yourself as you like, as long as you don’t change lighting and framing you are golden.
Processing
Time for the final steps. Upload the pictures to you computer make sure to keep the base image and choose one poses of yourself that you enjoy. I chose to have my body “see through” but you can choose any body part you wish depending on the pose.
Next I used Photoshop CS4 and imported my base image and posed image. In Photoshop you want to have the two photos in the same canvas so they layer on top of each other.
Rename the photos respectively, so you know which photo is which. Make sure the photo with the subject in it, is layered on top of your base photo. FInally on the subject photo create a Layer Mask.
Then choose the Brush Tool and make sure the Brush Tool color is set to Black. Make sure in your Layers Pallet that the Mask on the subject photo is selected. Next you can use the Brush Tool to paint away any part of the body. In my case I chose my torso. As you paint away on the subject Layer Mask, the base photo will show through, giving the photo the illusion that you are see through.
There are of course other ways to do this in Photoshop but this is the way I chose to create the illusion.
A tip to painting away your body parts is to work zoomed in on the part you are painting and take your time. Slow and steady will win this race. If you work zoomed into the spot you are painting you can get straighter lines and a better selection. Once you become “see through” flatten the image together and save it as a JPG or any file type you wish.
Lastly you can come up with a witty title, I personally went with “Someone Once Told Me They Were Blinded By My Body” but I could have also said “I Feel Like A Part Of Me Went Right Out The Window”.
Hope you enjoyed the tutorial and I would be more than happy to answer any questions!

Udi Tirosh
Udi Tirosh is an entrepreneur, photography inventor, journalist, educator, and writer based in Israel. With over 25 years of experience in the photo-video industry, Udi has built and sold several photography-related brands. Udi has a double degree in mass media communications and computer science.
Related Posts
 This photographer is documenting the American Midwest’s small towns before they disappear forever
 Land Rover’s concept technology uses cameras to make trailers disappear
 Instagram goes SnapChatty adding “Stories” that disappear after 24 hours
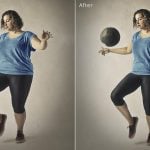 PortraitPro Body now lets you change your subject’s entire body
Join the Discussion
DIYP Comment Policy
Be nice, be on-topic, no personal information or flames.