


Adobe After Effects
Adobe Rolls Out AI-Powered Video Editing Updates for Premiere and After Effects
Jan 21, 2026
Alysa Gavilan
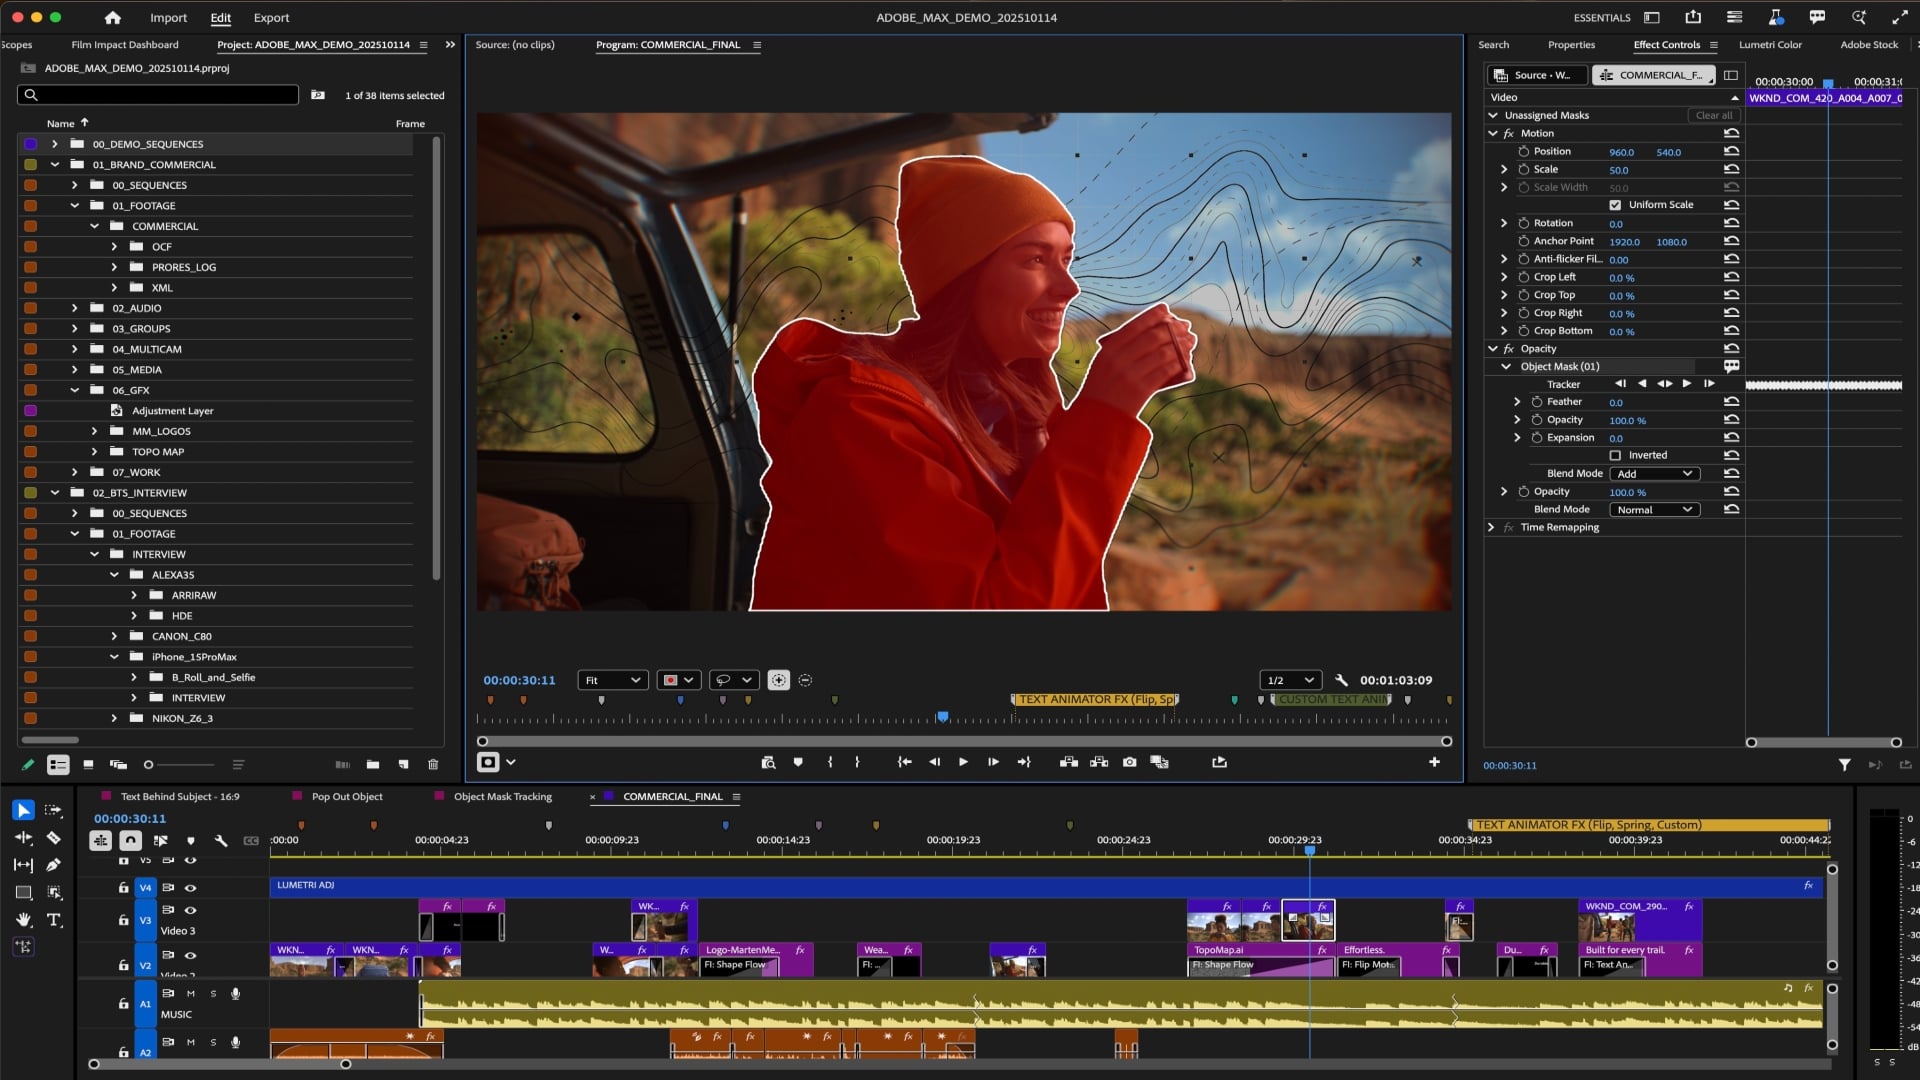
Adobe rolls out new AI-powered updates for Premiere Pro and After Effects, introducing faster masking, smarter tracking, and workflow improvements designed for real-world video editing.

Adobe adds AI-powered updates to Premiere Pro, After Effects, and Frame.io to streamline video editing workflows
Jan 24, 2025
Dunja Đuđić
Adobe has rolled out a series of updates to its video editing tools Premiere Pro, After Effects, and Frame.io, meant to address common filmmaking challenges….

How to do tracking text animations in After Effects
Sep 22, 2024
Sagiv Gilburd
I noticed that text-tracking animations have become increasingly popular in recent years. Social media platforms like YouTube or Instagram often have them, and there is…

Adobe is bringing Generative AI to video with Premiere Pro and After Effects
Oct 11, 2023
John Aldred
We all knew it was only a matter of time before Adobe started implementing its Firefly-powered generative fill-type features in its video products. I have…

Adobe Premiere Pro gets auto-tonemapping for HDR & Log videos
Feb 17, 2023
John Aldred
Adobe has announced new updates to both Premiere Pro and After Effects. Top among them is Premiere Pro’s new ability to automatically tonemap HDR footage,…

Adobe After Effects is now (finally) native to Apple M1 and Photoshop gets Panasonic GH6 support
Apr 12, 2022
John Aldred
If you’re an Apple Silicon user that uses Adobe After Effects, you’ve probably Googled “when the hell will After Effects get M1 support?” at least…

Watch and learn how to use every effect in Adobe After Effects
Mar 2, 2022
John Aldred
After Effects has grown in capability a lot since I last used it regularly. Recently, I’ve found myself needing to use it again for a few…

Adobe After Effects’ new Composition Profiler helps you to speed up your renders
Aug 17, 2021
John Aldred
There’s a small bit significant new feature coming to Adobe After Effects. It’s currently available in the latest After Effects Beta and I expect it’ll…
Adobe Premiere Pro now has AI speech recognition for automatic subtitle creation
Jul 20, 2021
John Aldred
Adobe has released a new July 2021 update to Adobe Premiere Pro with two big headline features. The first is that Premiere Pro can now…

Premiere Pro gets scene detection, HDR workflows and Quick Export feature in new update
Sep 16, 2020
John Aldred
Adobe has announced some nice upgrades for Adobe After Effects and Premiere Pro as part of a major Creative Cloud video tools update. Premiere Pro…