


Here are the 7 top tips that will level-up your time lapse footage
Feb 11, 2019
Dunja Đuđić Kalinin
Dunja Djudjic is a multi-talented artist based in Novi Sad, Serbia. With 15 years of experience as a photographer, she specializes in capturing the beauty of nature, travel, concerts, and fine art. In addition to her photography, Dunja also expresses her creativity through writing, embroidery, and jewelry making.
Share:

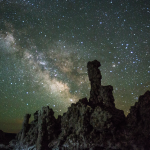
So, you’ve decided to shoot your first timelapse video. If you have never done it before, you will face many challenges and inevitably make some mistakes. But Christian of The Phlog Photography will help you get started with this video. In only three minutes, he will give you seven things to keep in mind and tips to follow before and during the timelapse shooting. They’ll help you make the most of your timelapse video even if it’s your first one.
1. Use manual settings for the consistent look
First of all, use manual settings on your camera to set the white balance, shutter speed, aperture, and ISO. Also, use manual focus. This gives you more control and will ensure to give a consistent look throughout your timelapse.
Extra tip: use histogram to prevent overexposing or underexposing your images. Follow the changes in the histogram and adjust the settings accordingly. Keep in mind: fixing underexposed images in post is easier than fixing overexposed ones.
2. Use aperture priority for day-to-night timelapse
If you’ve got a grasp of the daytime timelapse, you can try shooting day-to-night timelapse. For this, the aperture priority mode is a better choice. This way, the aperture is fixed and the camera will change the shutter speed based on the changing light conditions. This could cause some flickering, but you can fix it in post.
3. Use an ND filter
Speaking of flicker, you can prevent it by using a wide aperture and slower shutter speeds. It’s not easy to use these settings in the bright daylight, so an ND filter will be your friend and ally in these conditions.
4. Use slow shutter speeds for more motion blur
The shutter speed determines the look of your timelapse. Slower shutter speeds will give smoother movement of the clouds, water and people in your video. It can also be a useful tool for removing unwanted elements from the shots, such as the birds flying.
5. Use different shooting intervals for different looks
Shooting interval is another factor that determines the look of your timelapse. For example, shooting a frame every 10 seconds will make things move faster in the final video. Shooting a frame every 2-3 seconds will make them move slower. This all depends on the type of scene you’re shooting and the effect you want to achieve. Christian suggests taking a photo every 2-4 seconds and if things are moving too slow in the final video – you can speed it up in post.
6. Reduce sensor spots by using a wider aperture
The smaller the aperture, the more sensor spots will be visible (especially if you’re not very devoted to cleaning your sensor regularly). This can be fixed in post, but it’s a tedious and frustrating job. To prevent this from happening, you can use a wide aperture and even better: keep your sensor clean.
7. Don’t overuse camera movement
Sliding, panning, and tilting can look cool in timelapse videos, but use them wisely. Nothing looks good when it’s overdone, so use these effects only when the scene is suitable for them.
I’m sure that the newbie timelapse shooters will find these tips helpful to get them started. And if you already have some experience, feel free to share your own tips in the comment section below.
[7 Tricks for better Time-Lapse footage | The Phlog Photography]

Dunja Đuđić Kalinin
Dunja Djudjic is a multi-talented artist based in Novi Sad, Serbia. With 15 years of experience as a photographer, she specializes in capturing the beauty of nature, travel, concerts, and fine art. In addition to her photography, Dunja also expresses her creativity through writing, embroidery, and jewelry making.


Join the Discussion
DIYP Comment Policy
Be nice, be on-topic, no personal information or flames.
2 responses to “Here are the 7 top tips that will level-up your time lapse footage”
Nice to see someone acknowledge you need to use Aperture Priority to get day/night transitions. Too many tutorials just extol manual settings. Which are fine if the light is consistent but there’s no way to capture a sunset on Manual. You can use a plugin like Flicker Free to remove the flicker in post. The other hot tip is to shoot RAW if you can. Most RAW software (Adobe Camera Raw for example) will automatically remove dead pixels. Getting rid of those blue/red spots is really critical for night time lapses.
Some good creative tips here. I’ve had mixed results with shooting Aperture priority however but it’s certainly worth experimenting with.