


Even Better Softbox Part Two – The Test Results
May 29, 2008
Udi Tirosh
Udi Tirosh is an entrepreneur, photography inventor, journalist, educator, and writer based in Israel. With over 25 years of experience in the photo-video industry, Udi has built and sold several photography-related brands. Udi has a double degree in mass media communications and computer science.
Share:
 Nick rocks again with a follow up on the Better Softbox – a comparison of softbox lining materials.
One of the questions asked in the comments when I built my first large softbox was “would a matte white finish on the interior give a more efficient output?” I had to admit, it had never crossed my mind to use anything other than aluminium foil as the lining material as I had just assumed this would be very efficient. After doing a bit of research on the internet I found a table with the following values listed for the reflective efficiency of various materials and finishes:
Mylar: 90% to 95%
Flat White Paint: 85% to 93%
Semi Gloss White Paint: 75% to 80%
Flat Yellow Paint: 70% to 80%
Aluminium Foil: 70% to 75%
Flat Black Paint: less than 10%
This was quite an eye opener. Not just for how inefficient aluminium foil was but how efficient both matte white and particularly Mylar were.
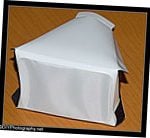
This naturally required further investigation and to test the various lining materials available to the DIY softbox builder I decided to go all Mythbusters and build a softbox prototype testbed. This let me test a couple of new ideas for building a better flash holder and by making the lining removable, let me easily test the light output efficiency of aluminium foil, matte white paint and Mylar. For good measure I also tested matte black paint to give a useful baseline for the overall efficiency of the various linings.
The four linings tested were:
Matte Black Paint

Aluminium Foil

Matte White Paint

Mylar

The setup for the test was to place the softbox pointing directly at a black seamless paper background. The centre of the flash head was 130cm from the background and 134cm from the floor. The flash was a Nikon SB-28 on full power and 24mm zoom fired by a Pocket Wizard. The camera was directly behind and at exactly the same height as the flash. It was a Canon 400D with a 24-70mm zoom lens. The lens was zoomed to 27mm, the shutter speed was 1/125th and the aperture was set to f6.3 at ISO 100. I also set the lens to manual focus.
On the left of the softbox (against the seamless paper) I placed a bright red and yellow soft toy and on the right of the softbox (again against the seamless paper) I placed a light meter on a stand.
To ensure the room lights were not affecting results, I ran a test with them both on and off. The results were exactly the same.
As a base line, I took a picture with the diffuser of the softbox removed and a flat white interior.

Next I took a shot with the matte black lining.

This is the result with the aluminium foil lining.

This is with the matte white lining.

Finally, this is the result with the Mylar lining.

Other than an identical crop applied to each picture and a conversion from RAW to JPG in Lightroom, these are exactly as they came out of the camera.
The results from the light meter are as follows:
Bare Flash (no diffuser): f11.0 (6)
Matte Black: f5.6 (3)
Aluminium Foil: f8.0 (4)
Matte White: f8.0 (4)
Mylar: f8.0 (5)
The results broadly follow the expectations, although matte white tied with aluminium foil. This could have been a result of the construction of the softbox. Looking at the pictures, it is obvious that the white construction card was not totally opaque. Where all the other results involved an extra sheet of lining, the matte white card leaked some light. Maybe with an extra layer of lining it would have been more efficient.
Without a reflective surface, efficiency drops off noticeably. Matte black caused a loss of around 3 stops. Aluminium foil, matte white and Mylar all performed reasonably similarly in this test with Mylar just edging ahead.
Of course, I am no expert on this subject and I am fully open to suggestions for improvements in the experiment and how to obtain the results, but from this test, I think I will give Mylar a go in my next DIY softbox project.
More Nick:
– The Best Softbox Ever
– The Square Ring Flash
– The DIY Strip Light
– A Floor Lit Table Top Studio Project

Udi Tirosh
Udi Tirosh is an entrepreneur, photography inventor, journalist, educator, and writer based in Israel. With over 25 years of experience in the photo-video industry, Udi has built and sold several photography-related brands. Udi has a double degree in mass media communications and computer science.


Join the Discussion
DIYP Comment Policy
Be nice, be on-topic, no personal information or flames.