


Make Digital Film Box Reminder Tabs – No Batteries Required – Using E-Paper Displays
Oct 22, 2025
David Prochnow
Our resident “how-to” project editor, David Prochnow, lives on the Gulf Coast of the United States in Ocean Springs, Mississippi. He brings his expertise at making our photography projects accessible to everyone, from a lengthy stint acting as the Contributing How-To Editor with Popular Science magazine. While you don’t have to actually build each of his projects, reading about these adventures will contribute to your continued overall appreciation of do-it-yourself photography. A collection of David’s best Popular Science projects can be found in the book, “The Big Book of Hacks,” Edited by Doug Cantor.
Share:

Chances are that you’ve experienced electronic paper or e-paper (also known as, e-ink) displays before you encountered this article. In fact, you might be reading this article on an e-paper display. For example, these high-resolution low-power, monochrome displays are utilized in e-reader devices like the Amazon Kindle. Similarly, you might have unexpectedly seen an e-paper display in a retail store where they are frequently used for displaying product information on store shelves (commercially called, Electronic Shelf Labels). This usage is particularly helpful for quickly updating product pricing without having to print and install new placards.
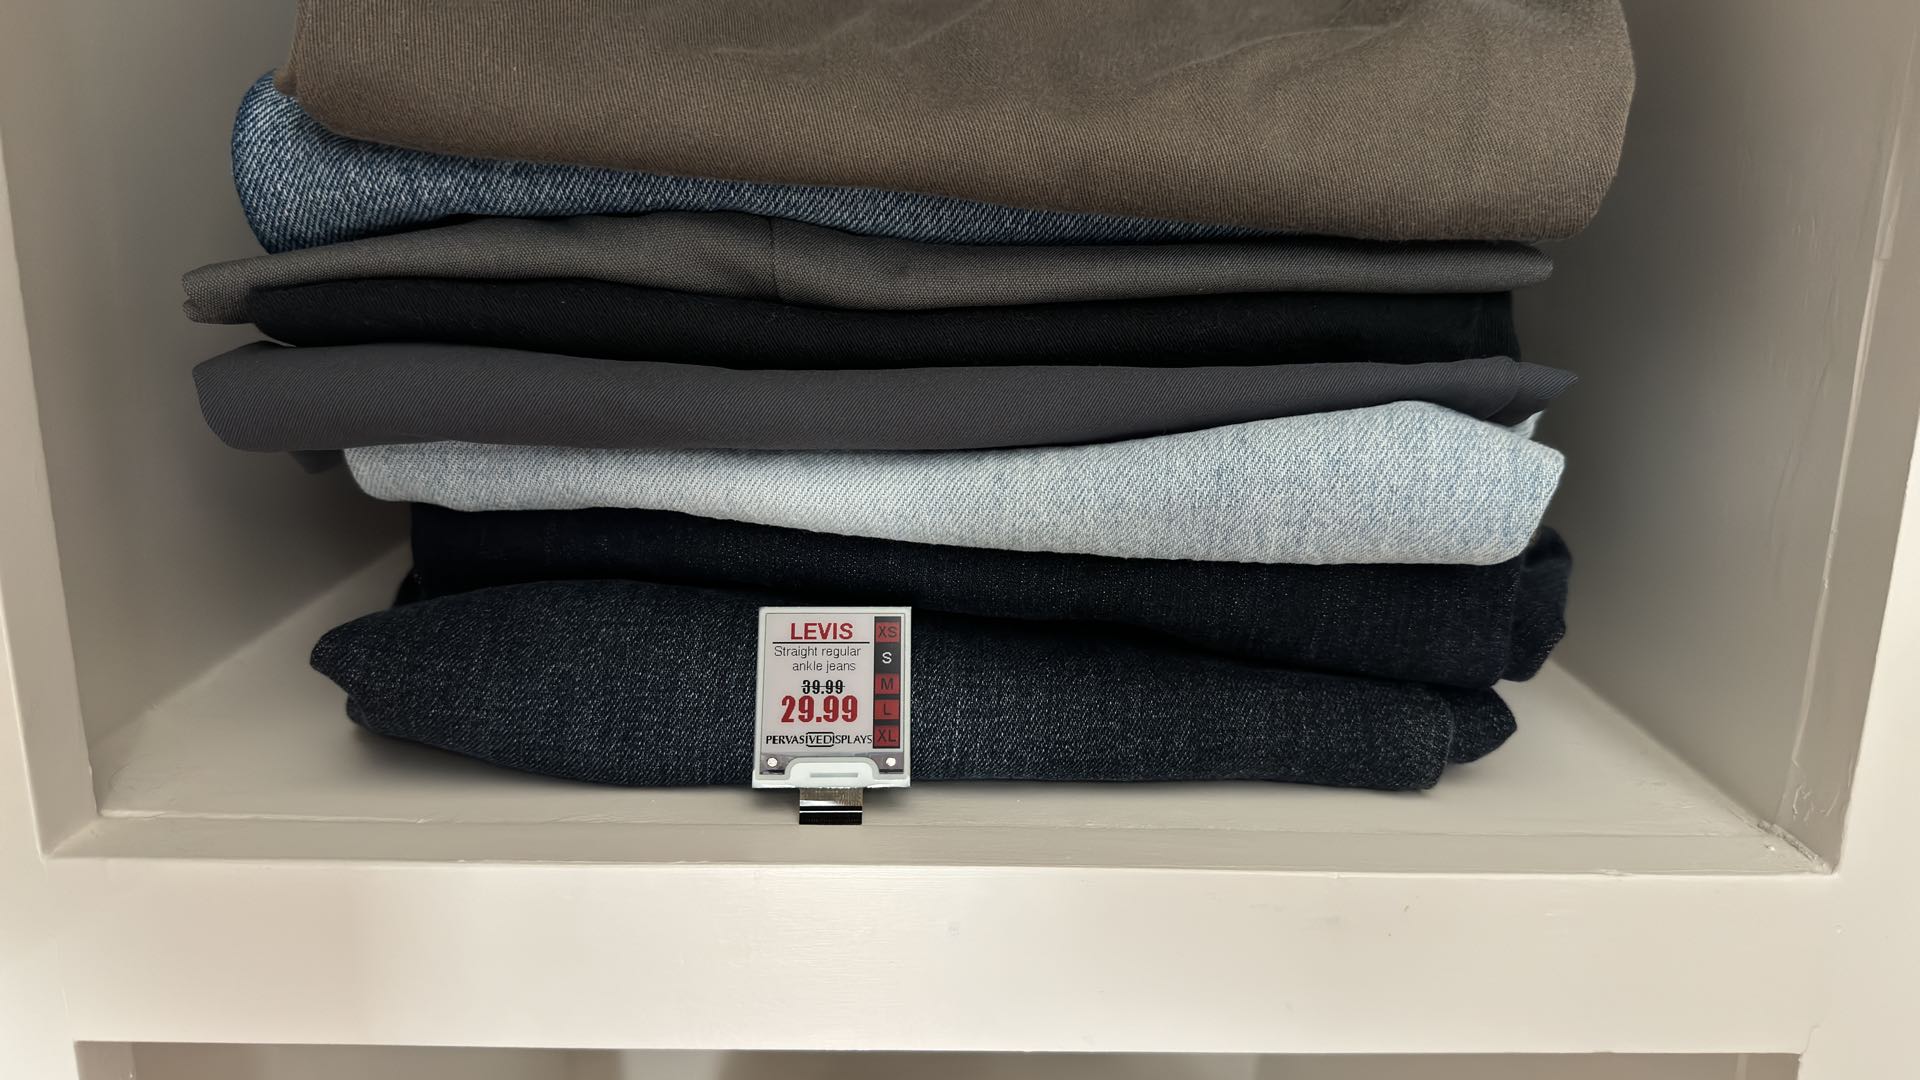
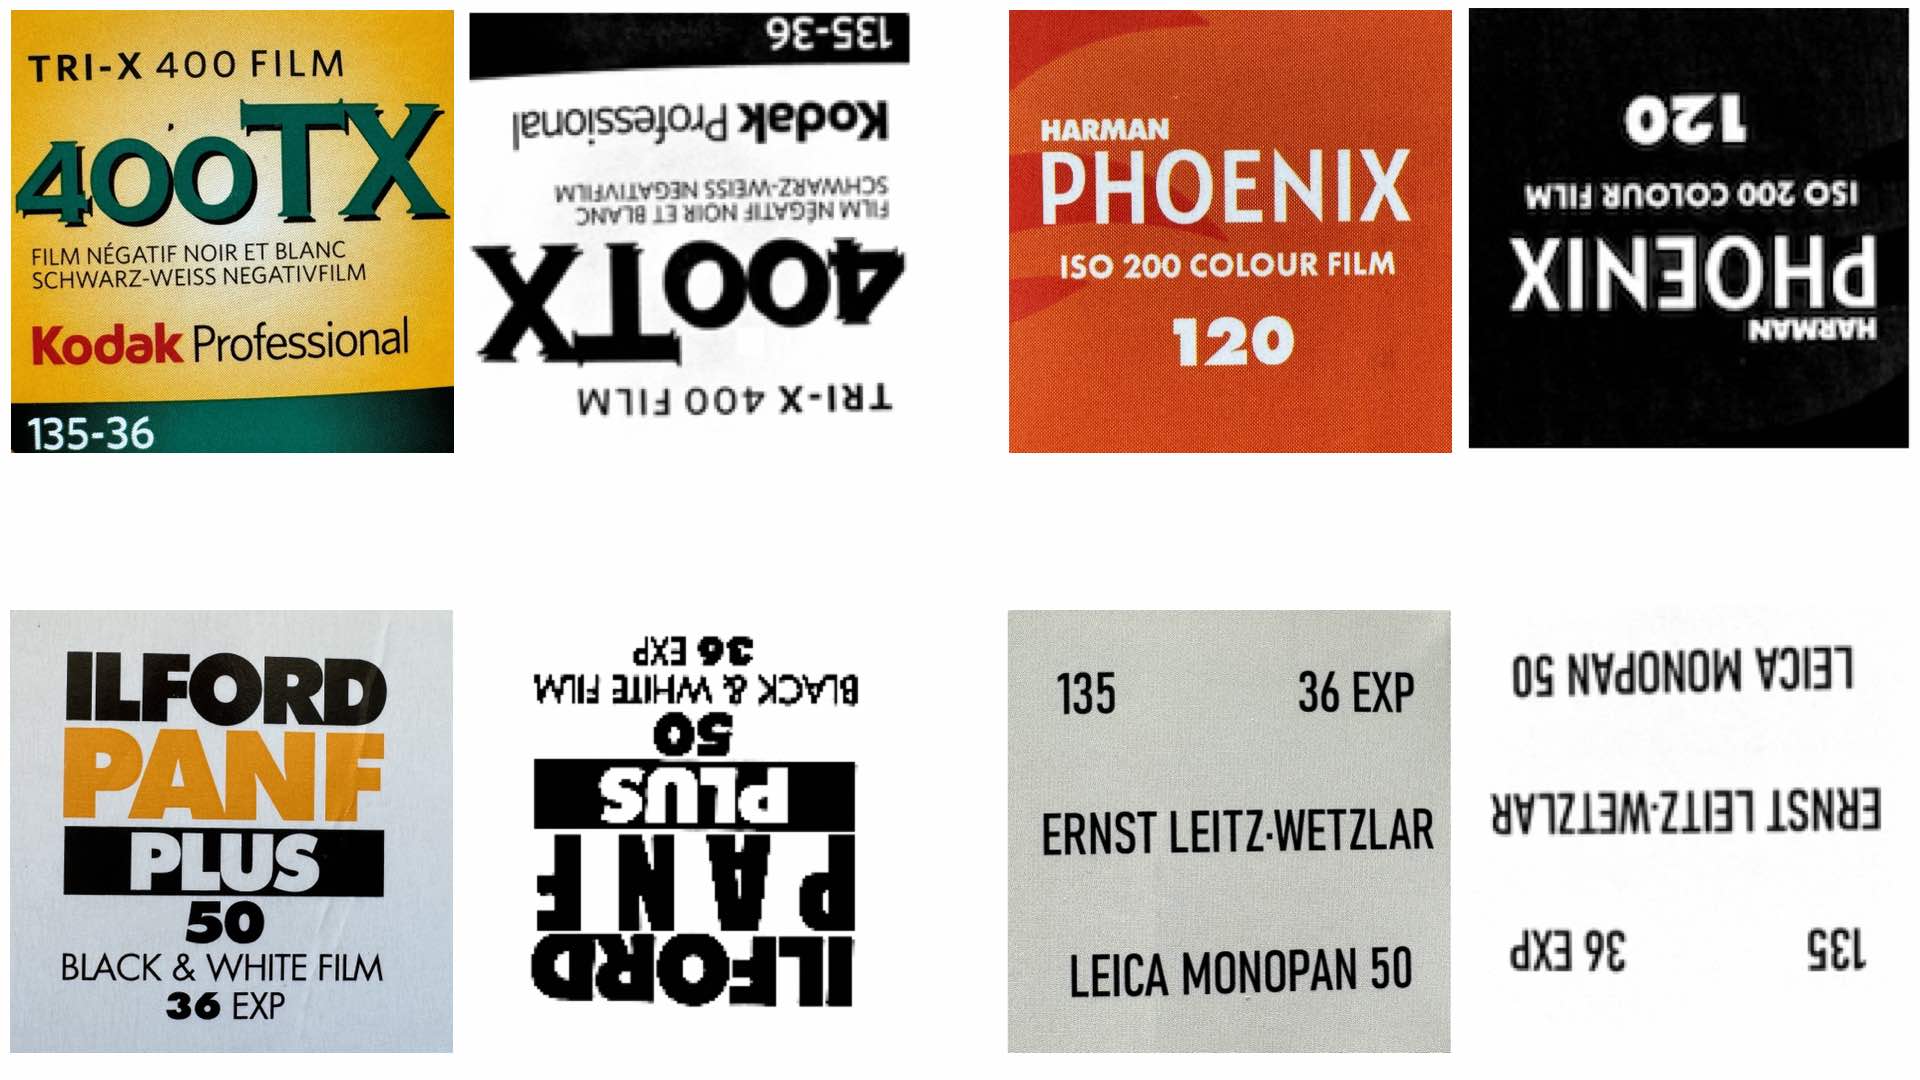
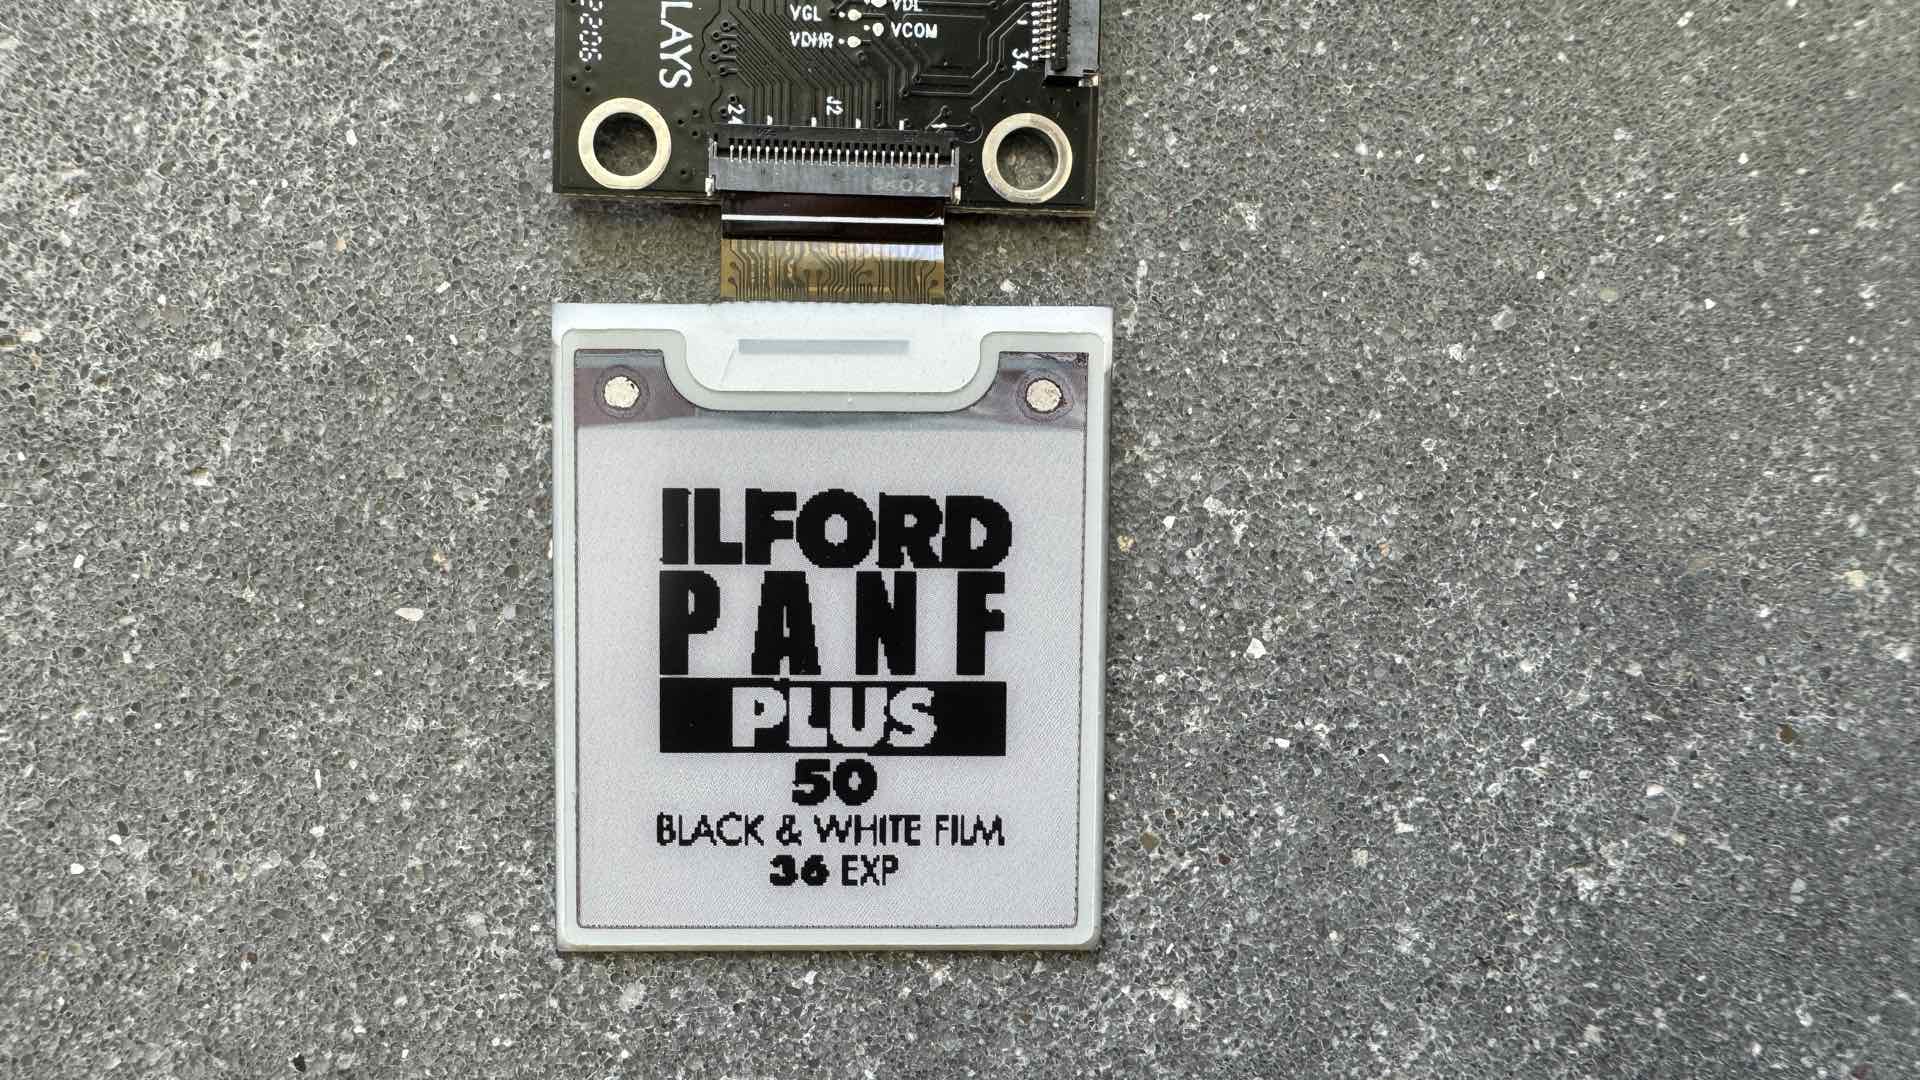
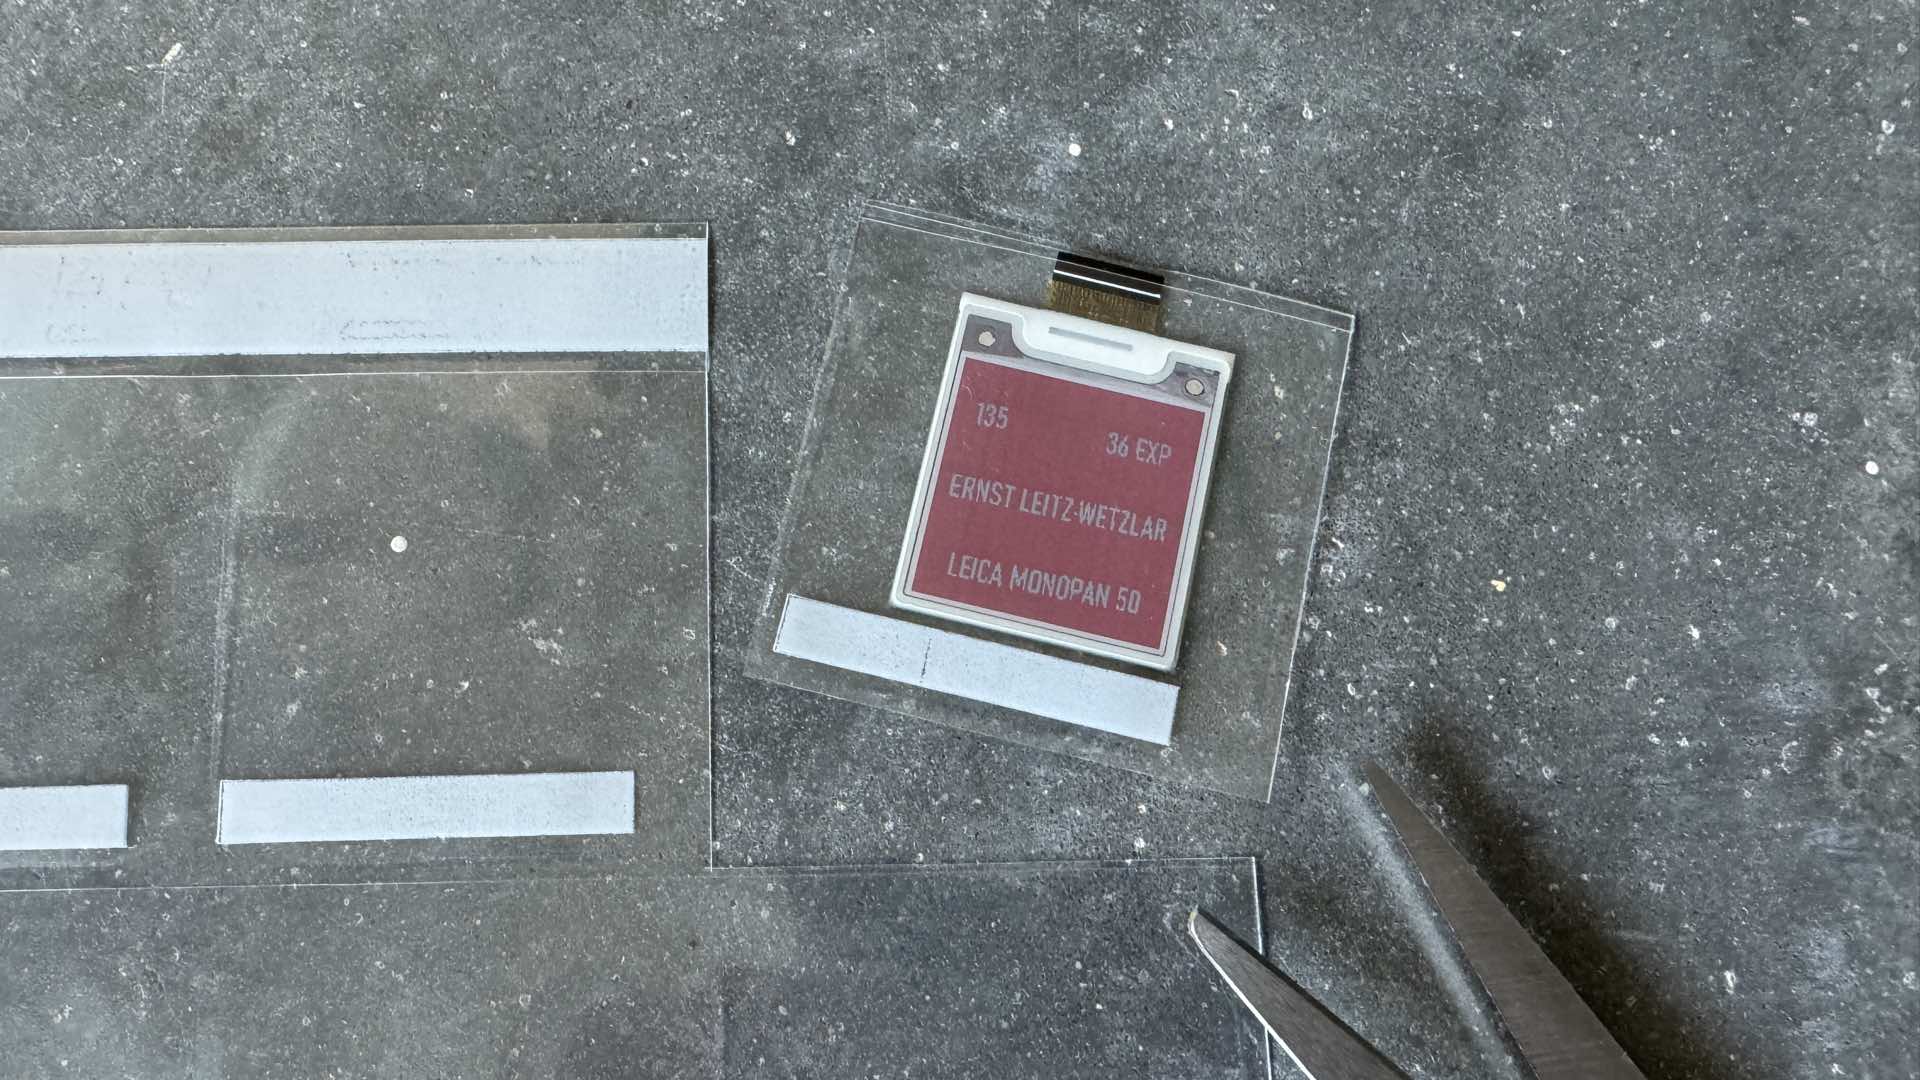
You’d be forgiven for not noticing these retail product pricing “cards,” however, due to the screen’s incredible thinness and the absence of any power source. Remarkably, it is the presence of these two attributes that make e-ink displays prime candidates for creating digital film box reminder tabs. You know these tabs, they’re the end flaps that are removed from a film box to remind you which type of film is currently loaded inside your camera.
The e-ink product used for digital film box reminder tabs is manufactured by Pervasive Displays. A supplier of monochrome e-paper displays, 3-color e-paper displays, touch e-paper displays, and e-paper development kits. Pervasive Displays is a major player in the growth of low-cost, low-power (or, zero-power) lightweight displays. Ranging in size from 1.54-inch up to a whopping 12-inch e-paper display, their products come in two primary flavors: 2-color; black and white (which feature a third color called “grey;” derived from mixing black and white pixels) and 3-color; black, white, red (which, again, includes three additional colors, grey, light red, and dark red; formed by combining black, white, and red pixels).
Looking at the 1.54-inch display you’ll notice a 27.51×27.51mm active area that is housed on a 37.32×31.8mm substrate yet it is a scant 1.1mm thick and features a 152×152 pixel workspace. Best of all, this e-paper display tips the scale at a svelte 1.3-2.3g and requires absolutely NO power for maintaining an image. Single displays can be purchased from Mouser for as low as $3.04.
Furthermore, in the 3-color variety of this display, black, white, and red pigments are housed inside each pixel. Therefore, you can easily program each of these pigments and create elaborate 3-color digital film box flap simulations. The sky’s the limit on what you can illustrate with a digital e-paper display.
Getting Ready to Make Digital Film Box Reminder Tabs
While e-paper, used as a film box reminder tab, will not require any supporting hardware or power supply, you will need a personal computer (PC) for designing your creative artwork. Unbelievably, once you’ve created your digital film box tab you can remove the entire development kit and PC and install your wafer-thin glass display anywhere and the image will remain intact. Trust me, the first time you encounter this “persistent display” you will be amazed.
In addition to a PC, there are two products that you’ll have to purchase:
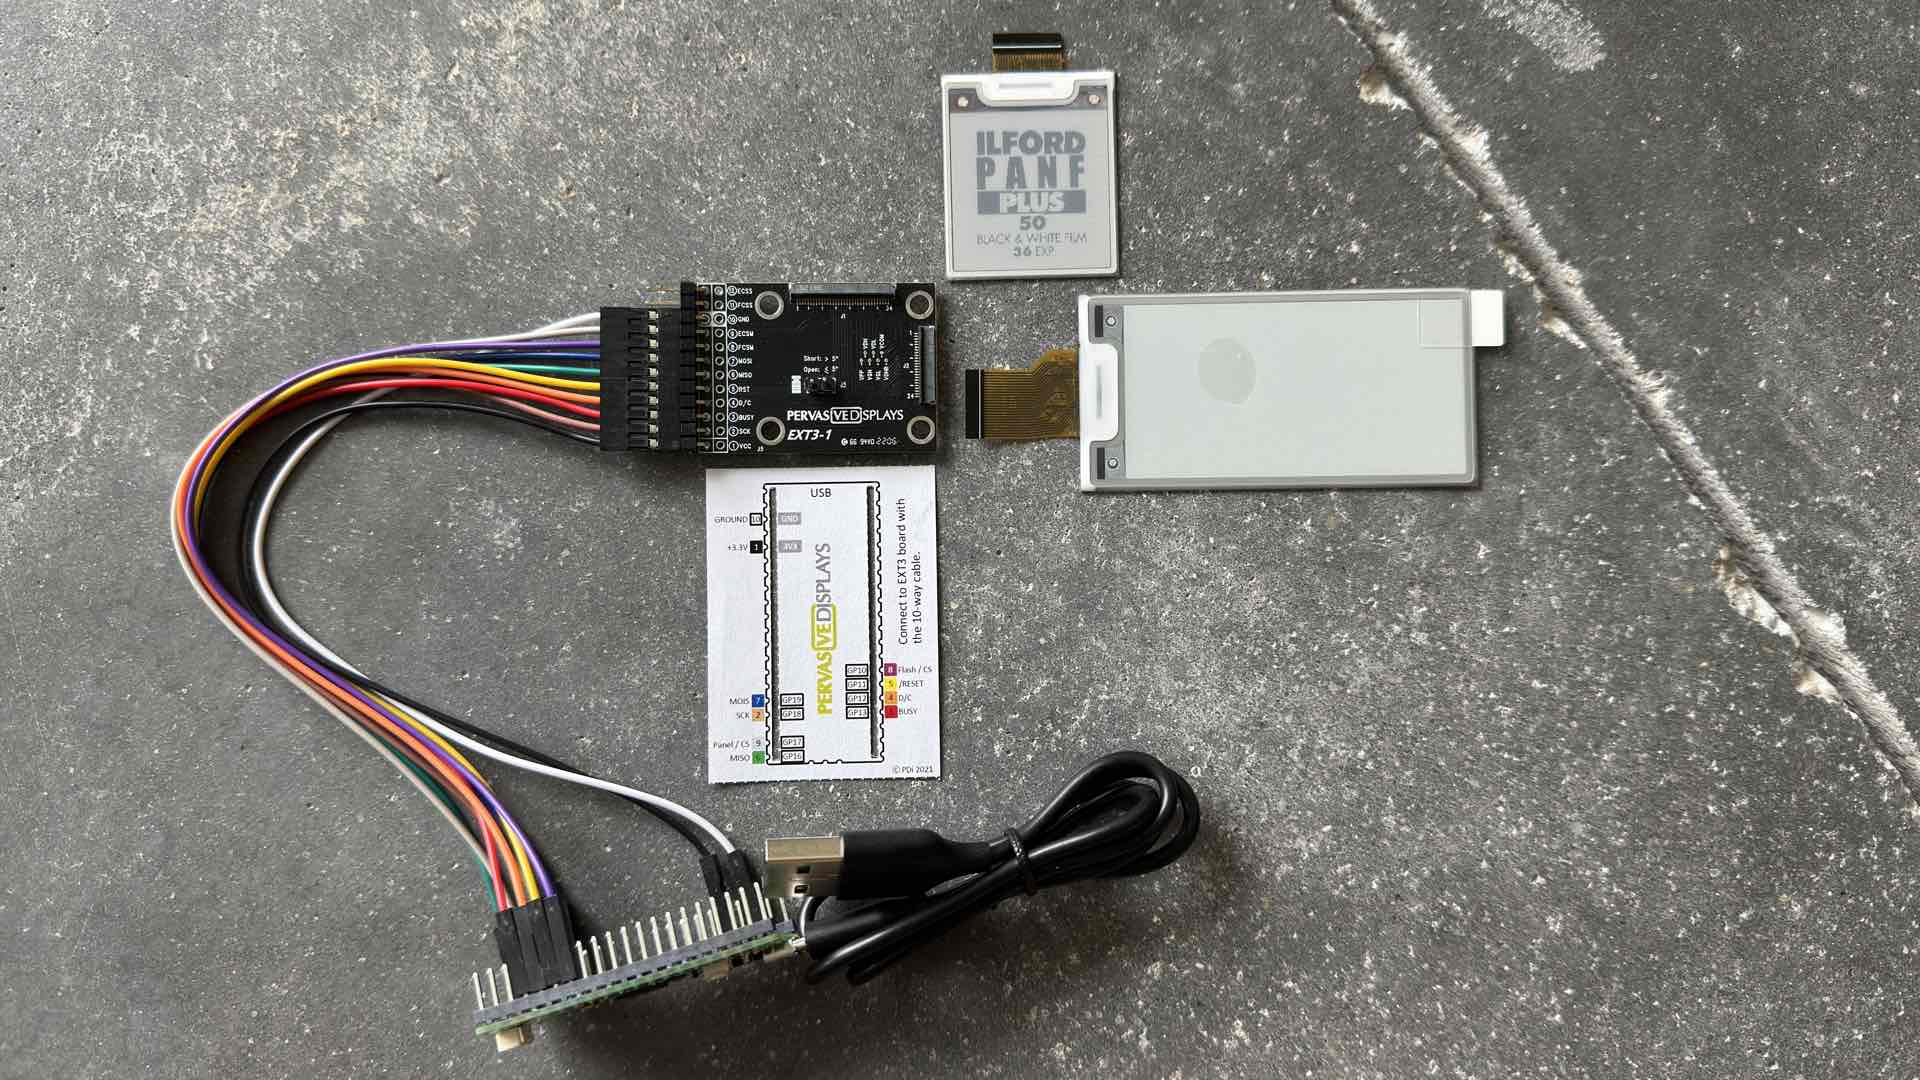
1. Development Kit – Pervasive Displays 2.66-inch EPD Color: B/W/R (Eink epaper Display) with EXT3-1 Kit can be purchased from Mouser for $25.61. Thankfully, you only have to purchase this development kit once. Additional digital film box tabs can be created by purchasing separate displays from Mouser and reusing this development kit for creating more artwork.
2. E-Paper Display – While the Development Kit comes with a display, it is too large for making a digital film box reminder tab. A second, much smaller display must be purchased, separately. As previously mentioned, the 1.54-inch B/W/R Eink Paper Display from Mouser costs $3.04. This is the display that you will be programming with your film box artwork.
All of the remaining things that you’ll need for making a digital film box reminder tab are free. And getting them is as easy as 1-2-3:
1. Download the Arduino Integrated Development Environment (IDE) for your PC operating system (OS). Follow the instructions from Arduino for installing this software.
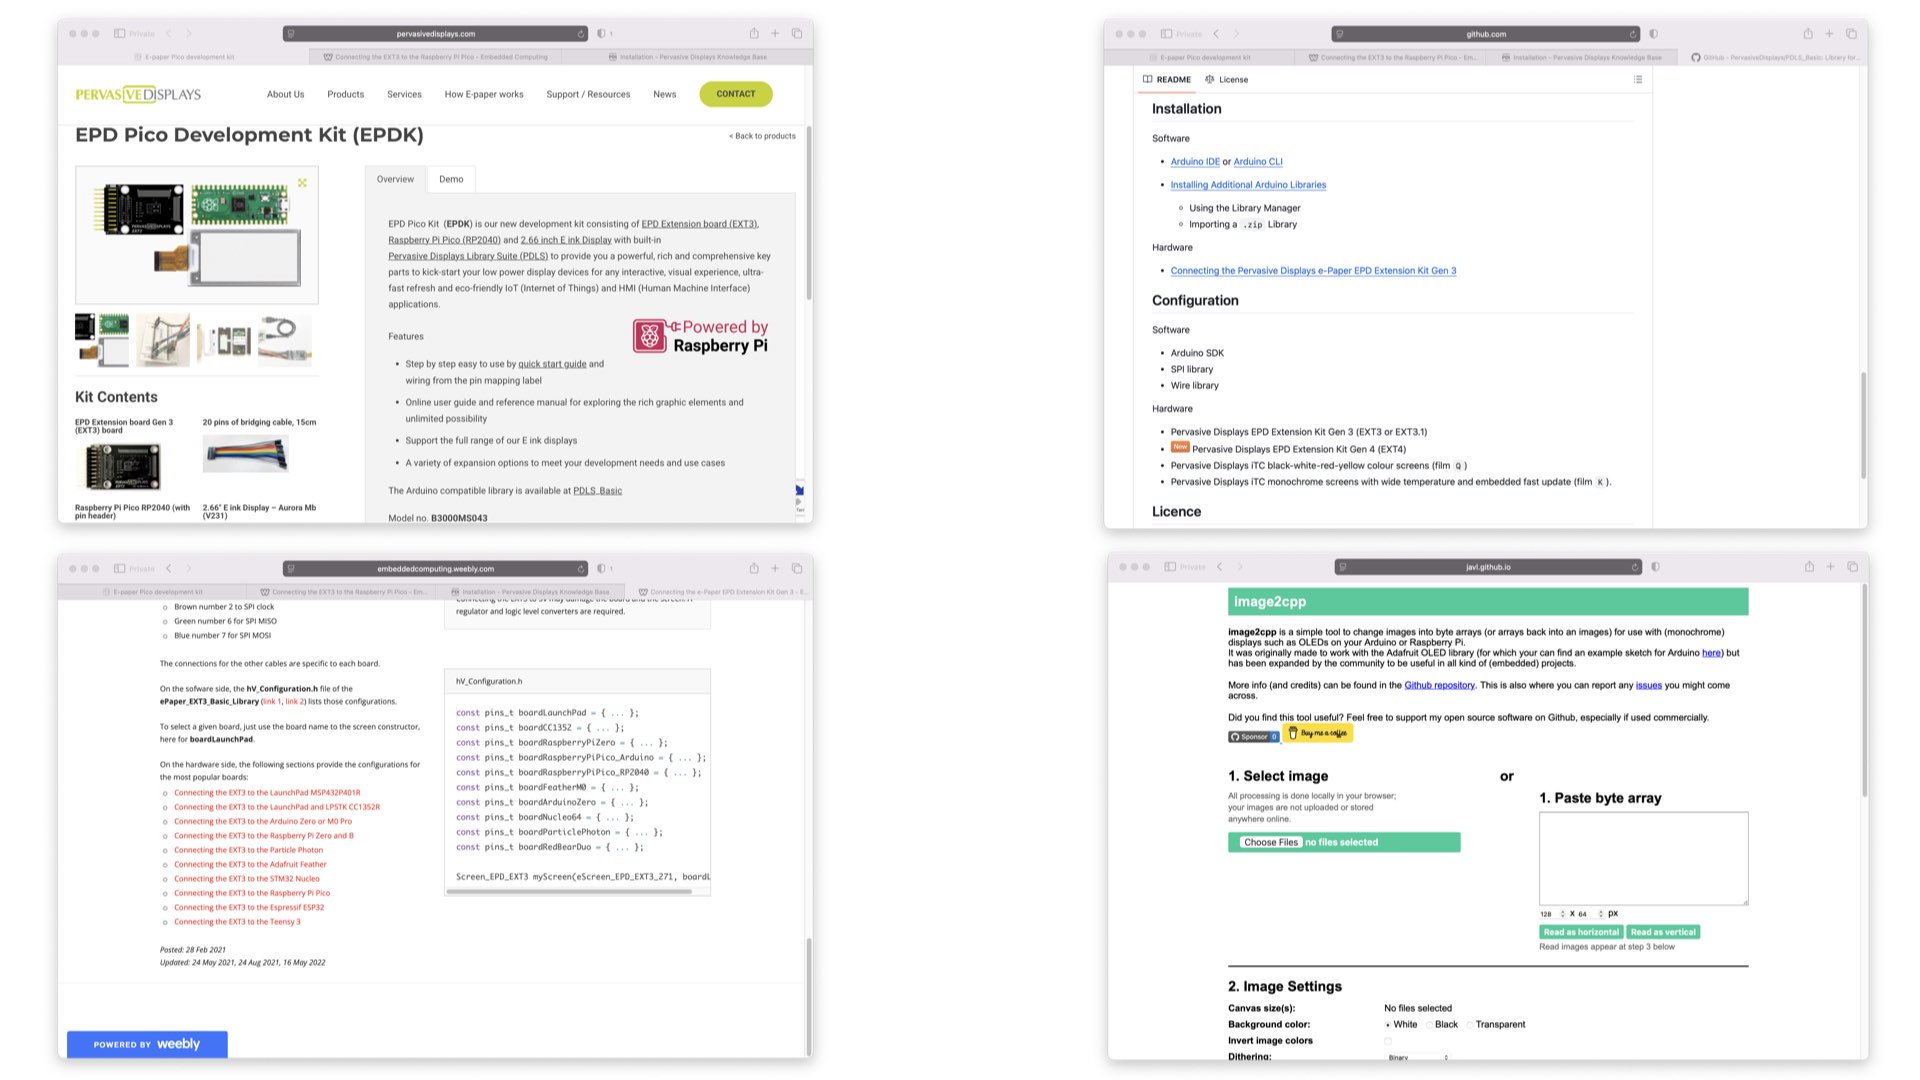
2. Download the PDLS_EXT3_Basic Arduino library from the Pervasive Displays GitHub repository. Follow the instructions in the README.md file for installing this library into the Arduino IDE. Furthermore, this file also has instructions for connecting the e-paper display to the Raspberry Pi Pico H (see – Connecting the Pervasive Displays e-Paper EPD Extension Kit Gen 3). You’ll be taken to an Embedded Computing Weebly page where the specific hardware instructions for the Pico are located at the bottom of the page. Oh, and one last thing, be sure to install the legacy library for using the 1.54-inch display, “Pervasive Wide Small.”
3. Finally, download the arduino-pico board definitions from Earle F. Philhower on GitHub. A link to this site is also provided on the hardware setup page mentioned in Step 2. Installation of these arduino-pico board definitions is performed via the Arduino Board Manager. Follow the instructions for your specific OS provided by Earle Philhower.
Making a Digital Film Box Reminder Tab
Ensure that your digital film box reminder tab development environment is properly configured by verifying that you’ve successfully installed the Arduino IDE, the e-paper display library, and the Pico board definitions. The easiest way to verify that your system is ready to go is to make your first film box reminder tab.
Ironically, in order to create an e-paper film box reminder tab, you must begin by making a photograph of a film box end flap. Duh. Load this image into your fave photo-editing program and convert it into a pure black and white image–no color, no greyscale. Next, size the image to exactly 152- x 152-pixels and rotate the image 180-degrees. Finally, save this edited film box artwork as a bitmap (BMP) file.
Now, jump over to the PC and verify that you have a properly configured and working e-paper development system:
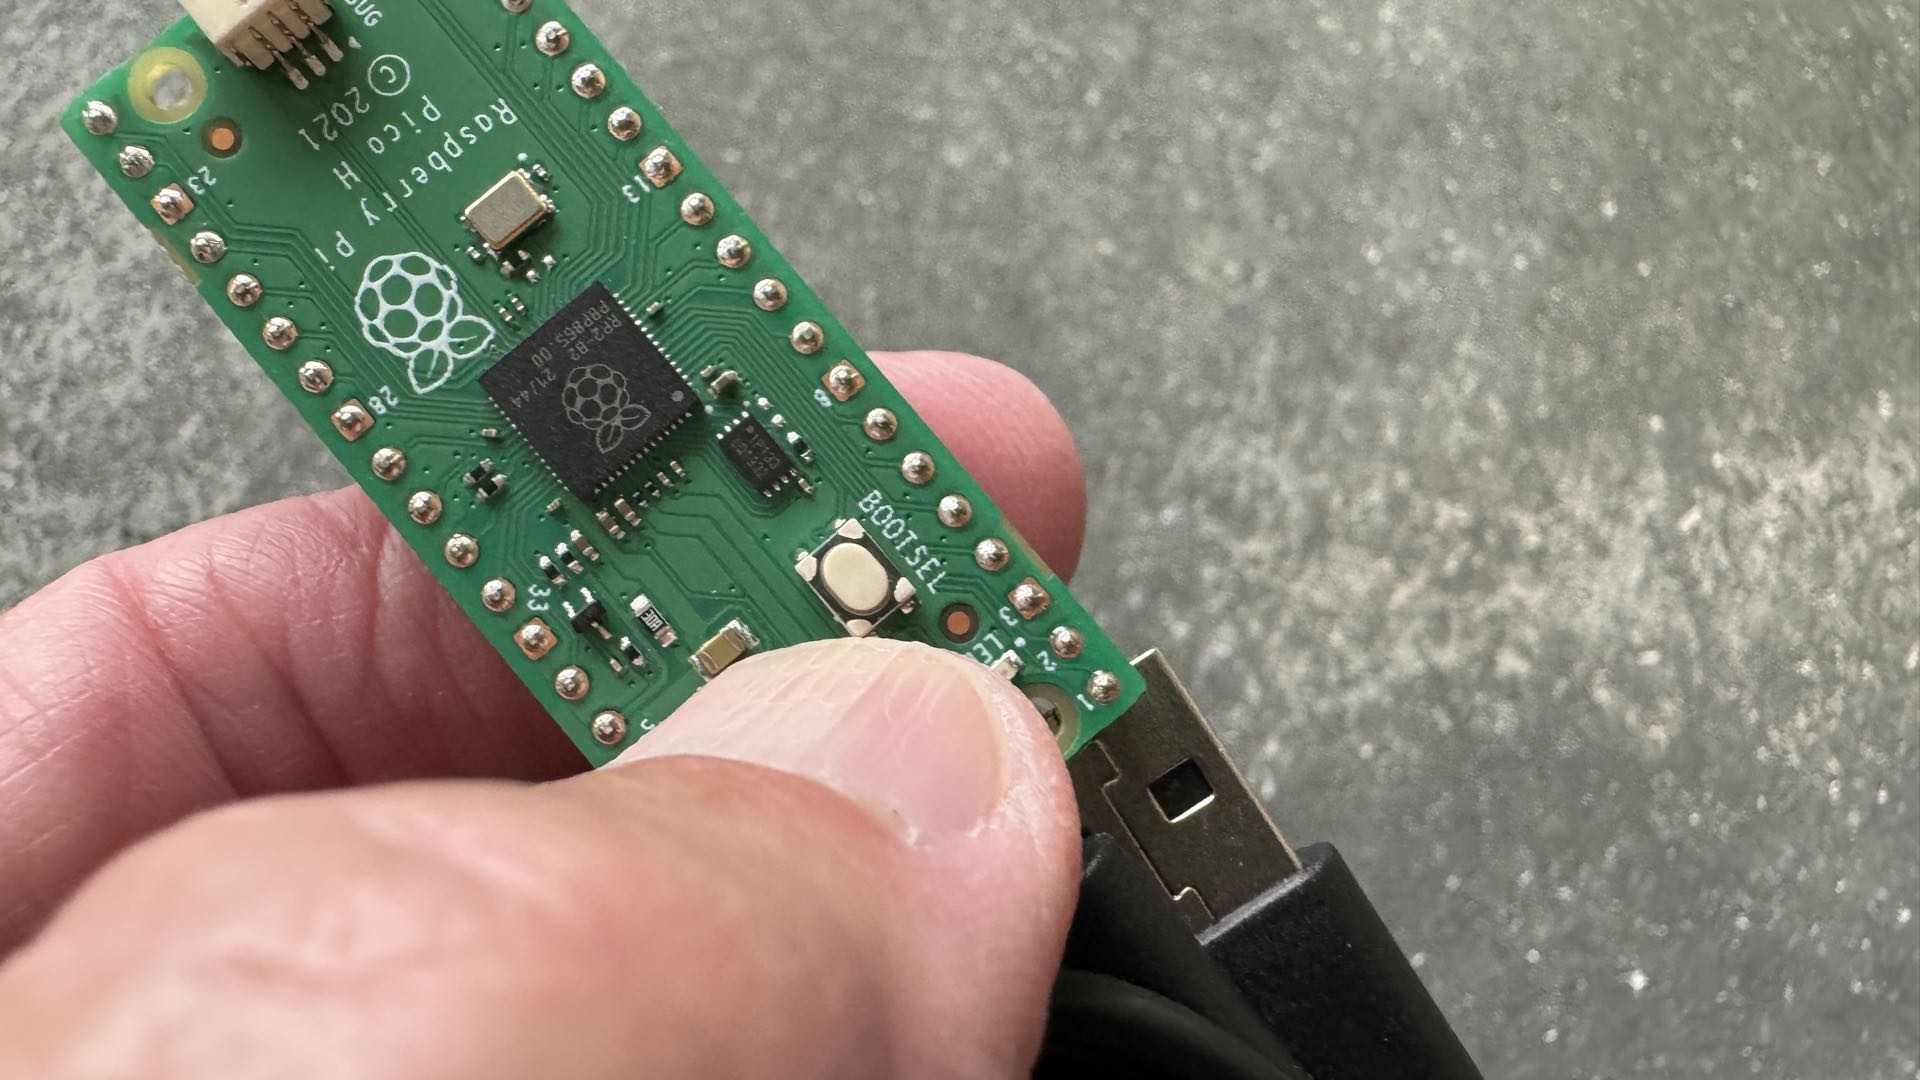
1. Plug the Raspberry Pi Pico H into your PC with the Pico wired to the EXT3-1 development kit while holding the BOOTSEL button DOWN, then release the button. The Pico should appear as a USB drive on your PC.
2. Start the Arduino IDE.
3. Select the Raspberry Pi Pico board and the proper UF2 connection port.
4. Load the example sketch, Demo_271 and make these two changes:
a. Line 17: #define SCREEN 154
b. Line 25: // EPD_Driver epdtest(eScreen_EPD_271, boardLaunchPad_EXT3);
Line 26: EPD_Driver epdtest(eScreen_EPD_154, boardRaspberryPiPico_RP2040_EXT3);
5. Upload the sketch to your Raspberry Pi Pico H development kit and watch the display. If you see an image, then continue with making your first film box reminder tab.
Oops!
If your attempted test fails, here is a short troubleshooting course of action that you can use. First, and foremost, ensure that all of your connections are tight and proper. The most common failing point for your e-paper development system is the incorrect insertion of the display’s flat ribbon cable into the EXT3-1 24-contact connector socket (J2). Oh, you didn’t try to use J1, did you? Please observe, the correct orientation is the white surface of the display facing upwards with the black friction-fit clamping bar upright while the ribbon cable is inserted into J2. Then clamp down on the black bar and lock the ribbon cable into place.
The second area to test is the wiring connections between the Raspberry Pi Pico H and the EXT3-1. These are color-coded connections that are clearly mapped out in the GitHub references mentioned in the software installations steps. Double check each connection.
If you still can’t get the example sketch to function properly, you’d better contact the Pervasive Displays Customer Service support staff.
After completing a successful test display, you are now ready to finish your digital film box reminder tab. The hard work for this process will be performed by the image2cpp online app. This web site will let you load the BMP image file, Select Image, and convert it into program code for insertion into the Arduino/Pico sketch. There are two configuration points to remember. First, select the “Invert Image Colors” option on 2. Image Settings. This will change the loaded BMP into an inverted image for proper coloring on the e-paper display. You can verify this action by examining the display in 3. Preview.
Second, change the “Code Output Format” dropdown menu to “Plain Bytes” under 4. Output. Press the “Generate Code” button and the adjacent window will display the code representation of the film box BMP file. Press the “Copy Output” button, return to your PC, and search for these two files: image_154_152x152_BW.c and image_154_152x152_BWR.c.
[Please note: these two files are located inside the Arduino examples folder -> Demo_271 -> globalupdate_src -> image_data -> 1.54.]
Using a simple text editing app, inside each of these files you will highlight the array code between the two curly braces ({}) and replace this programming with the copied code. Look here inside image_154_152x152_BW.c for the first array:
unsigned char const image_154_152x152_BW_mono[]=
{
};
But do NOT touch this array inside this file:
unsigned char const image_154_152x152_BW_0x00[]=
{
};
Inside the file image_154_152x152_BWR.c, replace each array:
unsigned char const image_154_152x152_BWR_blackBuffer[]=
{
};
And,
unsigned char const image_154_152x152_BWR_redBuffer[]=
{
};
Restart your e-paper development Arduino/Pico system and upload the same example sketch (Demo_271). Two variations of the film box artwork should flash on the 1.54-inch e-paper display. When the preferred box art is displayed on the screen, just unplug the Pico from your PC. The image will remain intact and vibrant for months without any power connection. Fixing the digital film box reminder tab onto your camera can be handled with double-sided tape. Or, you can create a reusable sleeve for holding your e-paper tab by snipping a single pocket from a sheet of protective 35mm slide storage pages.
The real power of the digital film box reminder tab should now become obvious to you. A single e-paper display can be reused 100s of times through just a reconnection to the development system and writing a new sketch. Although a more futuristic scenario could entail modifying an e-paper display for holding more operation/exposure information than just mimicking the film box end flap. But the sky’s the limit, albeit on a very small 1.54-inch stage.
Enjoy.

David Prochnow
Our resident “how-to” project editor, David Prochnow, lives on the Gulf Coast of the United States in Ocean Springs, Mississippi. He brings his expertise at making our photography projects accessible to everyone, from a lengthy stint acting as the Contributing How-To Editor with Popular Science magazine. While you don’t have to actually build each of his projects, reading about these adventures will contribute to your continued overall appreciation of do-it-yourself photography. A collection of David’s best Popular Science projects can be found in the book, “The Big Book of Hacks,” Edited by Doug Cantor.
Related Posts
 Use these 3D printed hotshoe covers as a reminder for film speed
 The Film Carrier Mk1 is yet another film holder for “scanning” your film with a digital camera
 The Matte Box IQ is Irix’s take on a lightweight matte box that uses their magnetic filters
 Photographer shows a simple way to use any film paper with vintage Hasselblad
Join the Discussion
DIYP Comment Policy
Be nice, be on-topic, no personal information or flames.