


Athletic Portrait Lighting Breakdown + Getting Models
Share:
Last week I shot an athletic portrait session for emerging fitness model Kristin Cavarzan.
In this article, I want to touch on the studio lighting setup that I like to use for athletic portraits, the benefit of using modeling lights, post production photo editing, the importance of unique photographs and where to find and hire models.

Studio Lighting for Athletic Portraits
One skill you should practice on a regular basis is the ability to deconstruct another photographer’s lighting. So before reading further, take a look at the photo below, and see if you can figure out what lighting was used.

If you’re new to the game, here are a few things to look for:
- How many lights were used? Look for highlights that indicate individual light sources. Catch lights in the eyes are especially helpful because you can often see a reflection of the actual lights used.
- Where were the lights positioned? Look for the direction that the light is hitting the subject from and the direction of the shadows that are cast.
- What light modifiers were used? Look at the definition around the edges of the shadows. Are the edges of the shadows soft and fuzzy or hard and defined? Is the light directional?
- What other lights might be involved in the lighting setup? Look at the dynamic range of the deep shadow areas. Is a fill light or reflector being used to add some light to those areas? Look at the background. Are dedicated background lights being used? Or conversely, are flags being used to keep light off of the background?
Before I give you the recipe, I’ll give you a hint. It is a pretty straight forward four light setup.
Got it figured out?
OK – here are the answers.
I used four studio strobes. There is a large softbox to the right side of the model, a strip light to the left that is slightly behind the model, an overhead hair light in a small softbox just behind the model, and a fill light in a small softbox in front of the model, in line with, but slightly above the camera.

With the exception of the fill light, the power of all the lights are set to be relatively equal by using a light meter.
Chimping the back of the camera is not the equivalent of using a light meter for studio portraits – you really do need a light meter to do it properly.
The fill light is set about two stops under the key lights to add a little bit of detail to what would otherwise be a deep shadow area on her face.
(For example, if the key lights are set to f8, the fill light would be set to f4 for two stops under the key. Check out this great article if you are not quite comfortable with the concept of f stops.)
Modeling Lights
The lighting concept that I used for this athletic portrait was to wrap the model in dramatic light to the sides and slightly behind, with the light skimming across the model’s muscles in order to show the maximum amount of muscle definition possible.
To do this effectively, it is very important to get the angle of light just right. You also need to use a light modifier that produces a directional light source, such as a soft box (as opposed to an umbrella which is not very directional).
To illustrate the difference, here is a photo with the light to camera left slightly in front of the model, and with the model’s back hip just a touch too far forward.

And here is a similar photo with the light to camera left moved back just a few inches to better skim across the model’s muscles, and with her back hip turned a teeny bit further away from the camera.

As you can see, it is the shadows from the directional light that define the model’s muscle structure, which is what I wanted to emphasize for an athletic portrait.
(In the second photo the model is also spritzed down with water so her skin is a bit more shiny.)
You can also see that the model’s pose has a big impact on the angle of light hitting the subject.
Slight movements by the model can completely change the look of the photos, and it can be difficult to position your subject, your lights and your camera to get dramatic athletic portrait lighting.
That’s what the modeling lights on studio strobes are for.
Many photographers start out with hot shoe style off-camera flash and then progress to studio strobes.
If you are mainly a Strobist style photographer, you may not be used to looking at modeling lights, so it is easy to miss the information that they provide when you switch to studio strobes with modeling lights.
When I work with studio strobes, I find that the process is much slower and controlled than with hot shoe off-camera flash. It takes time to assess the information from the modeling lights and to fine tune the light positions and model’s pose before I even think of picking up the camera to take the shot.
Post Production
The photos from this session are for my stock portfolio on Stocksy United, so my post production photograph editing workflow is fairly minimal.
In order of operation, I use Adobe Lightroom to correct the lens distortion, nail down the exposure, tweak the white balance, pop the blacks, adjust the highlights, add a little bit of contrast, clarity and vibrance, and even out the exposure at any hot spots or shadow areas that are either too bright or too dark.
Then I jump over to Adobe Photoshop.
In Photoshop I remove any blemishes or skin imperfections, liquefy a few key areas (such as the waist line), get rid of all logos and recognizable branding (shoes are a particular pain in the a$$), and finally burn the shadows and dodge the highlights just a little.
Back in Lightroom, I make sure that the exposure is still OK – it usually needs to be brightened just a little, and that’s it.
Here is an example of an image right out of camera.

And here is the same photo, fully edited for submission to Stocksy.

As you can see, even a simple post production photo editing work flow is critical to the look of the finished images.
Create Unique Photographs
All of the images discussed so far are fairly ubiquitous online – ie. a pretty, young, female, Caucasian model posing in a skimpy outfit.
Typical fitness model style photos were what Kristen wanted for her portfolio, so that is what we primarily shot.
In order to pique the interest of more discerning viewers, whenever possible I like to try to create images that are a just a bit different – even when the subject is as rote and cliché as a pretty young woman.
I am selling stock, but I am also pitching my work to art directors and other potential clients, and those types of buyers are not going to notice another photo of a sunset, cat, flower or pretty young woman.
To change things up a bit, I used the exact same setup, except I used a funky damask pattern backdrop and a black and white conversion.
The resulting photos look completely different, and are hopefully a little more captivating than just another photo of a pretty girl.

Finding and Hiring Models
Speaking of pretty girls, finding and hiring models can be a big challenge, especially on a small budget.
(For this session, Kristen approached me to photograph her for her fitness modeling portfolio, and we agreed to work together on a time for prints basis, which is something that I don’t normally do if I am the one hiring the model.)
For larger commercial jobs, you can of course go through a modeling agency.
But for personal projects or stock shoots, it can be much more cost effective to find an independent freelance model.
There are many online freelance modeling communities such as Model Mayhem and One Model Place, which allow you to search for models by location (along with age, gender, ethnicity etc.).
The problem is that these and similar freelance model sites are saturated with models and photographers featuring overtly sexual photographs of attractive young women posing in their underwear.
That’s just not the type of model that I am looking for – especially for stock photography (yes I realize the hypocrisy…).
I need advertising models not lingerie models.
That means young, old, male, female, ethnic variation – in some cases I even want models that have a certain look who might not be what we would traditionally consider attractive.
When I approach a model for a job, I also hate working on a time-for-prints basis.
I find that working on a time-for-prints basis turns what should be a well-defined business relationship into some kind of weird barter arrangement where neither party really gets what they want.
Unfortunately, time-for-prints seems to be the default norm on sites such as Model Mayhem and One Model Place.
If I hire a model for a job, I think the model deserves to be paid in cash for their time, even if it is just a token minimum wage payment for a couple hours work.
I have found that just a nominal cash payment weeds out the flakes and helps to bring in models that have a bit more experience and are willing to really work for the shot. As a photographer that just makes my job so much easier.
If you’re a photographer or model with the same frustrations with the current online freelance modeling resources, I have started a Facebook page called JustAdModels (ad, as in advertising) – check it out, maybe we can grow a community just for independent, freelance advertising and lifestyle models that drops the usual model T&A and includes more photographers who are a bit more diverse…and respectful to women.
Did You Pass The Quiz?
Were you able to deconstruct my athletic portrait lighting setup? How important is post production photo editing to your workflow? Where do you find independent, freelance advertising models or lifestyle models?
About the Author
JP Danko is a commercial photographer based in Toronto, Canada. JP can change a lens mid-rappel, swap a memory card while treading water, or use a camel as a light stand.
To see more of his work please visit his studio website blurMEDIAphotography, or follow him on Twitter, 500px, Google Plus or YouTube.
JP’s photography is available for licensing at Stocksy United.

JP Danko
JP Danko is a commercial photographer based in Toronto, Canada. JP can change a lens mid-rappel, swap a memory card while treading water, or use a camel as a light stand.
Related Posts
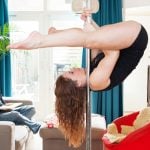 Dutch Photographer Shows The Athletic Side Of Pole Dancing In Original Photo Series “Pole Fitness”
 Analyzing Light – How to Breakdown The Lighting Of A Photo
 How I shot a photo of an octopus hogging an action figure – A lighting breakdown
 Learn to shoot wine bottles with this brilliant lighting breakdown
Join the Discussion
DIYP Comment Policy
Be nice, be on-topic, no personal information or flames.
5 responses to “Athletic Portrait Lighting Breakdown + Getting Models”
Is she single?
Nice article JP. I would agree on your assessment of Model Mayhem..the last “model” i tried to hire may have actually been a former escort…the whole thing seemed very awkward and weird. I agree with deconstructing other photographers lighting this is a skill I still need to practice more (missed the front fill).. look forward to your Facebook community growing.
Model Mayhem is a good resource if you’re new and you need people to practice taking pictures of. The site itself is run by monkeys. But it’s free.
Thanks for the article. You have well written. Apart from lighting, you added very interesting information in getting the models under your camera….
Great article! I liked the light quiz in the beginning and examples of poor and good light for shadows. Great job