


Picture this: a wack world with green sky…oh, and the yellow snow is safe to eat
Sep 21, 2024
David Prochnow
Our resident “how-to” project editor, David Prochnow, lives on the Gulf Coast of the United States in Ocean Springs, Mississippi. He brings his expertise at making our photography projects accessible to everyone, from a lengthy stint acting as the Contributing How-To Editor with Popular Science magazine. While you don’t have to actually build each of his projects, reading about these adventures will contribute to your continued overall appreciation of do-it-yourself photography. A collection of David’s best Popular Science projects can be found in the book, “The Big Book of Hacks,” Edited by Doug Cantor.
Share:
Pursuing infrared (IR) photography is always a wild ride. From focusing quirks to shifted colors, only “boots on the ground” experience can equip your mind’s eye vision with an approximate “look” of your final IR photograph. Add in the unique filter combinations that are needed for achieving this level of experienced imagery and you could be looking at a lifetime of work immersed in another world.
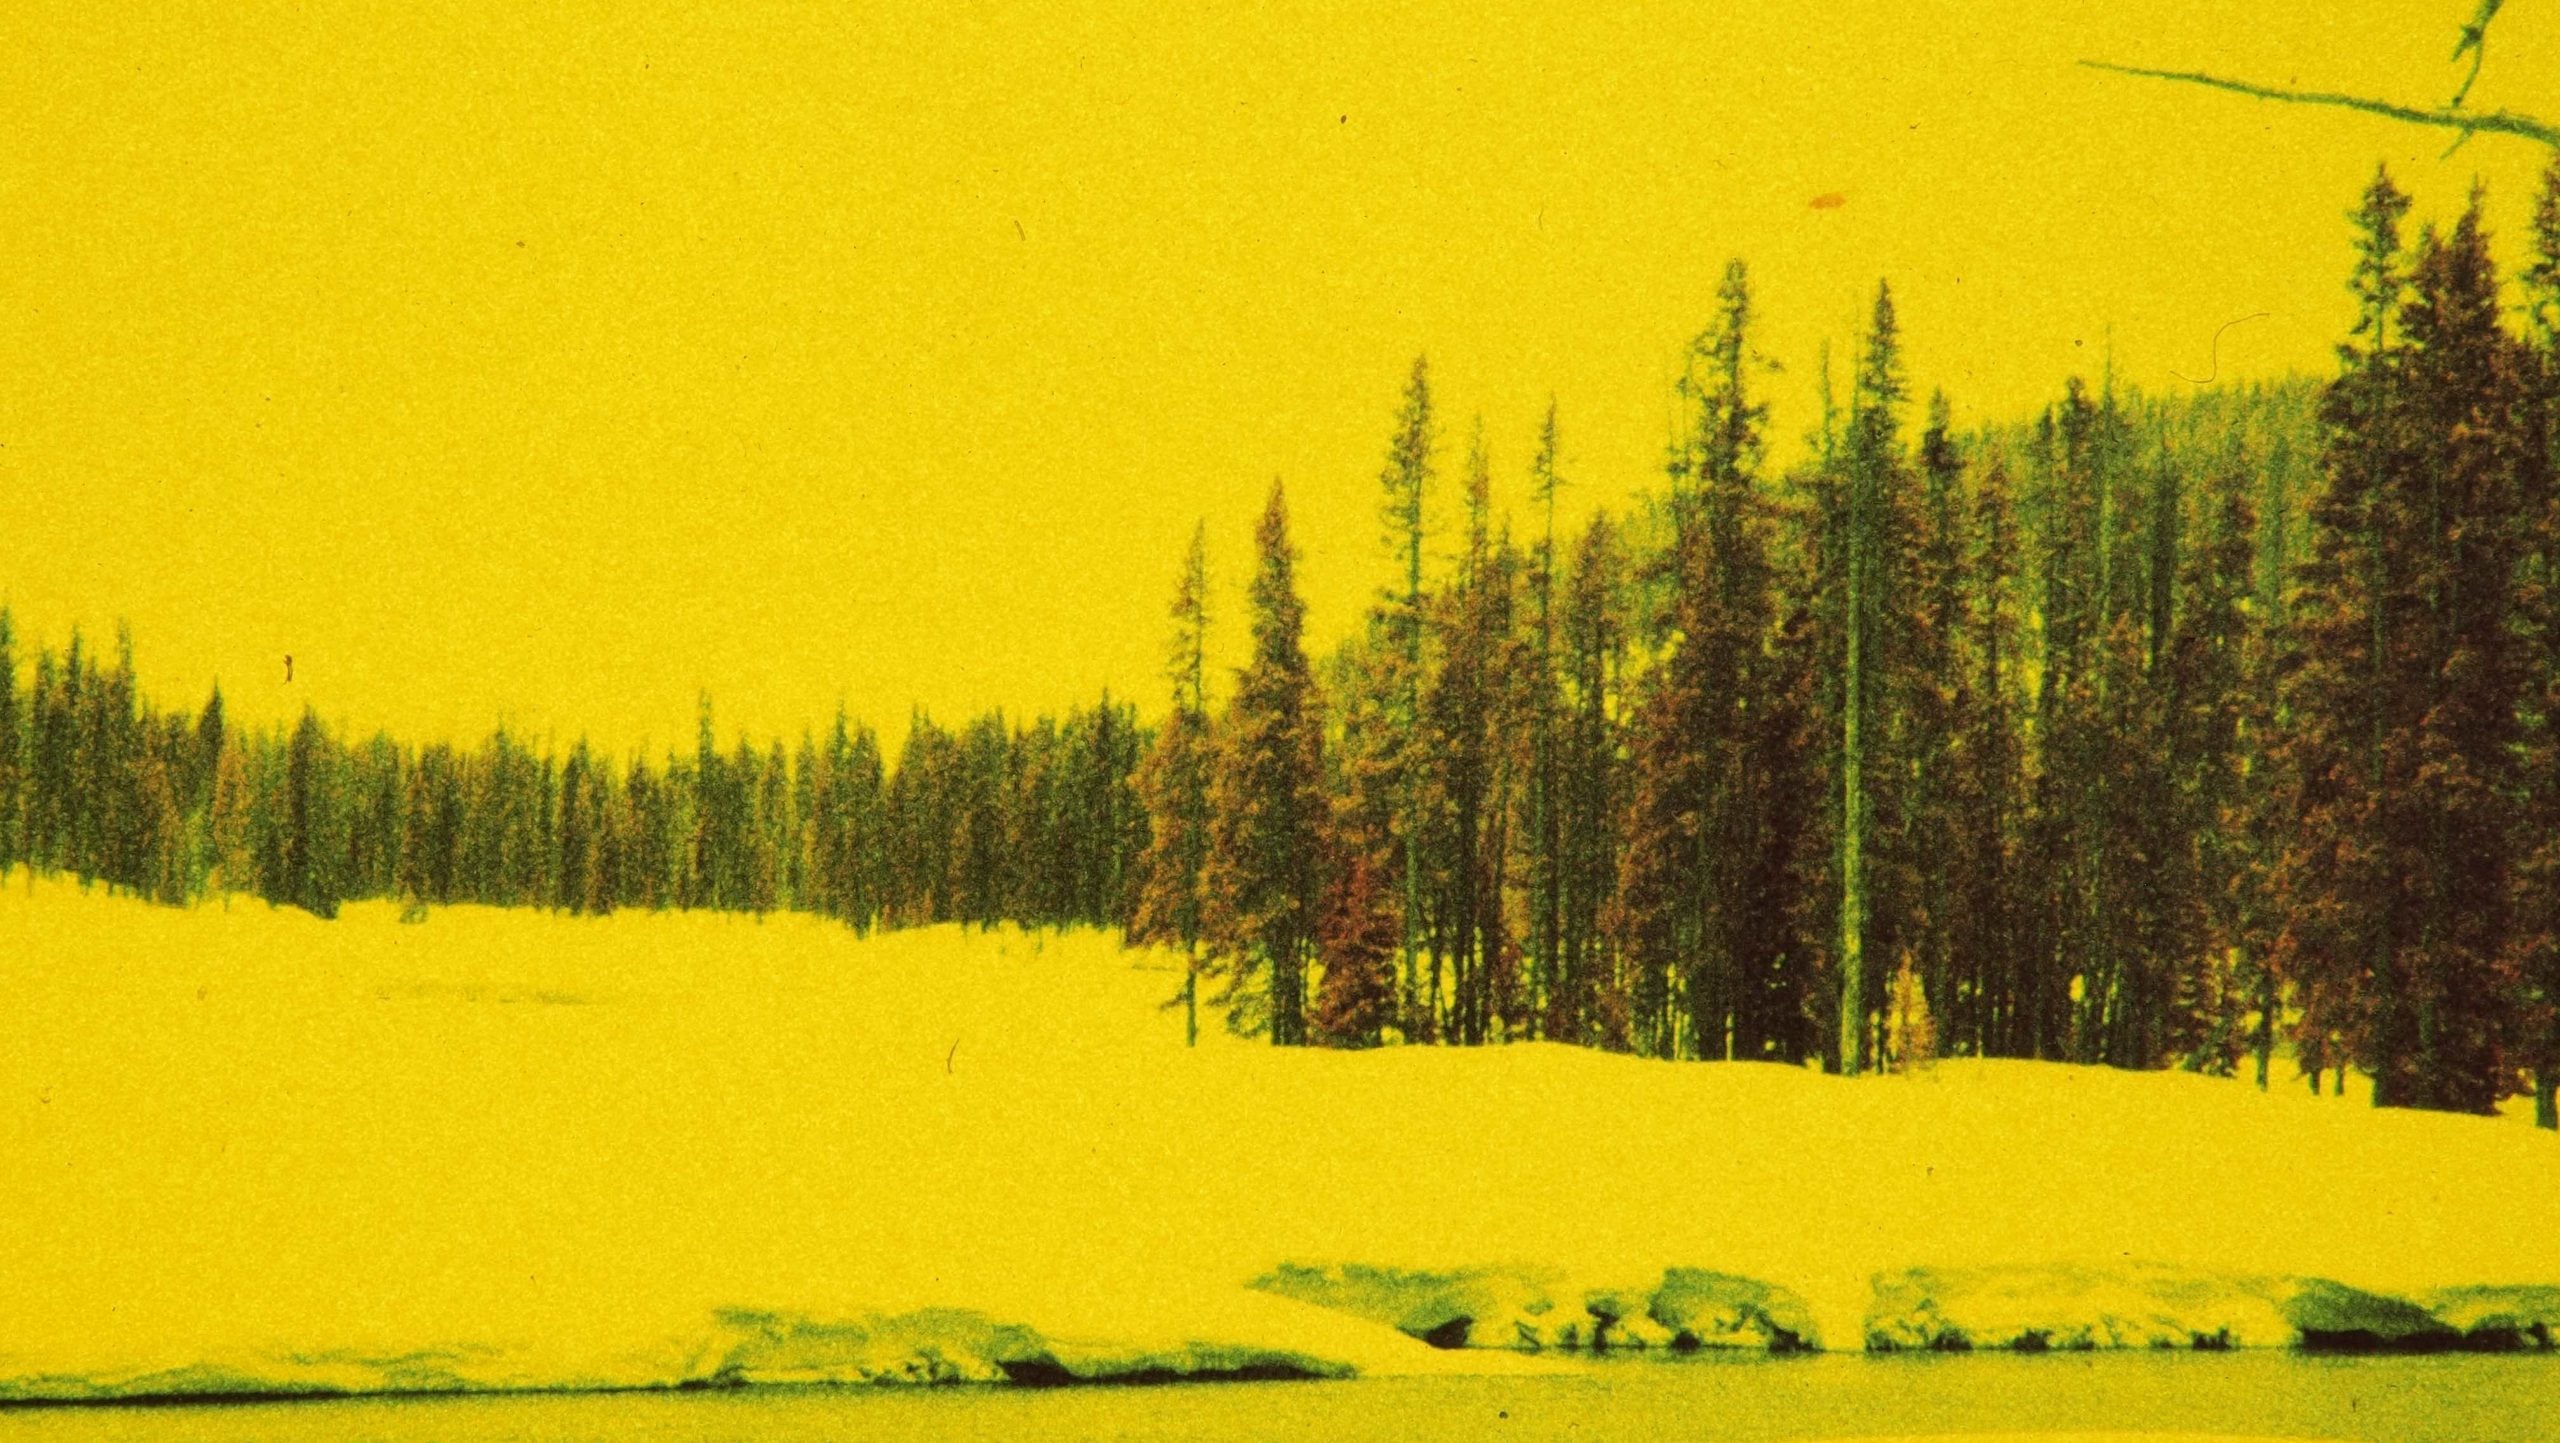
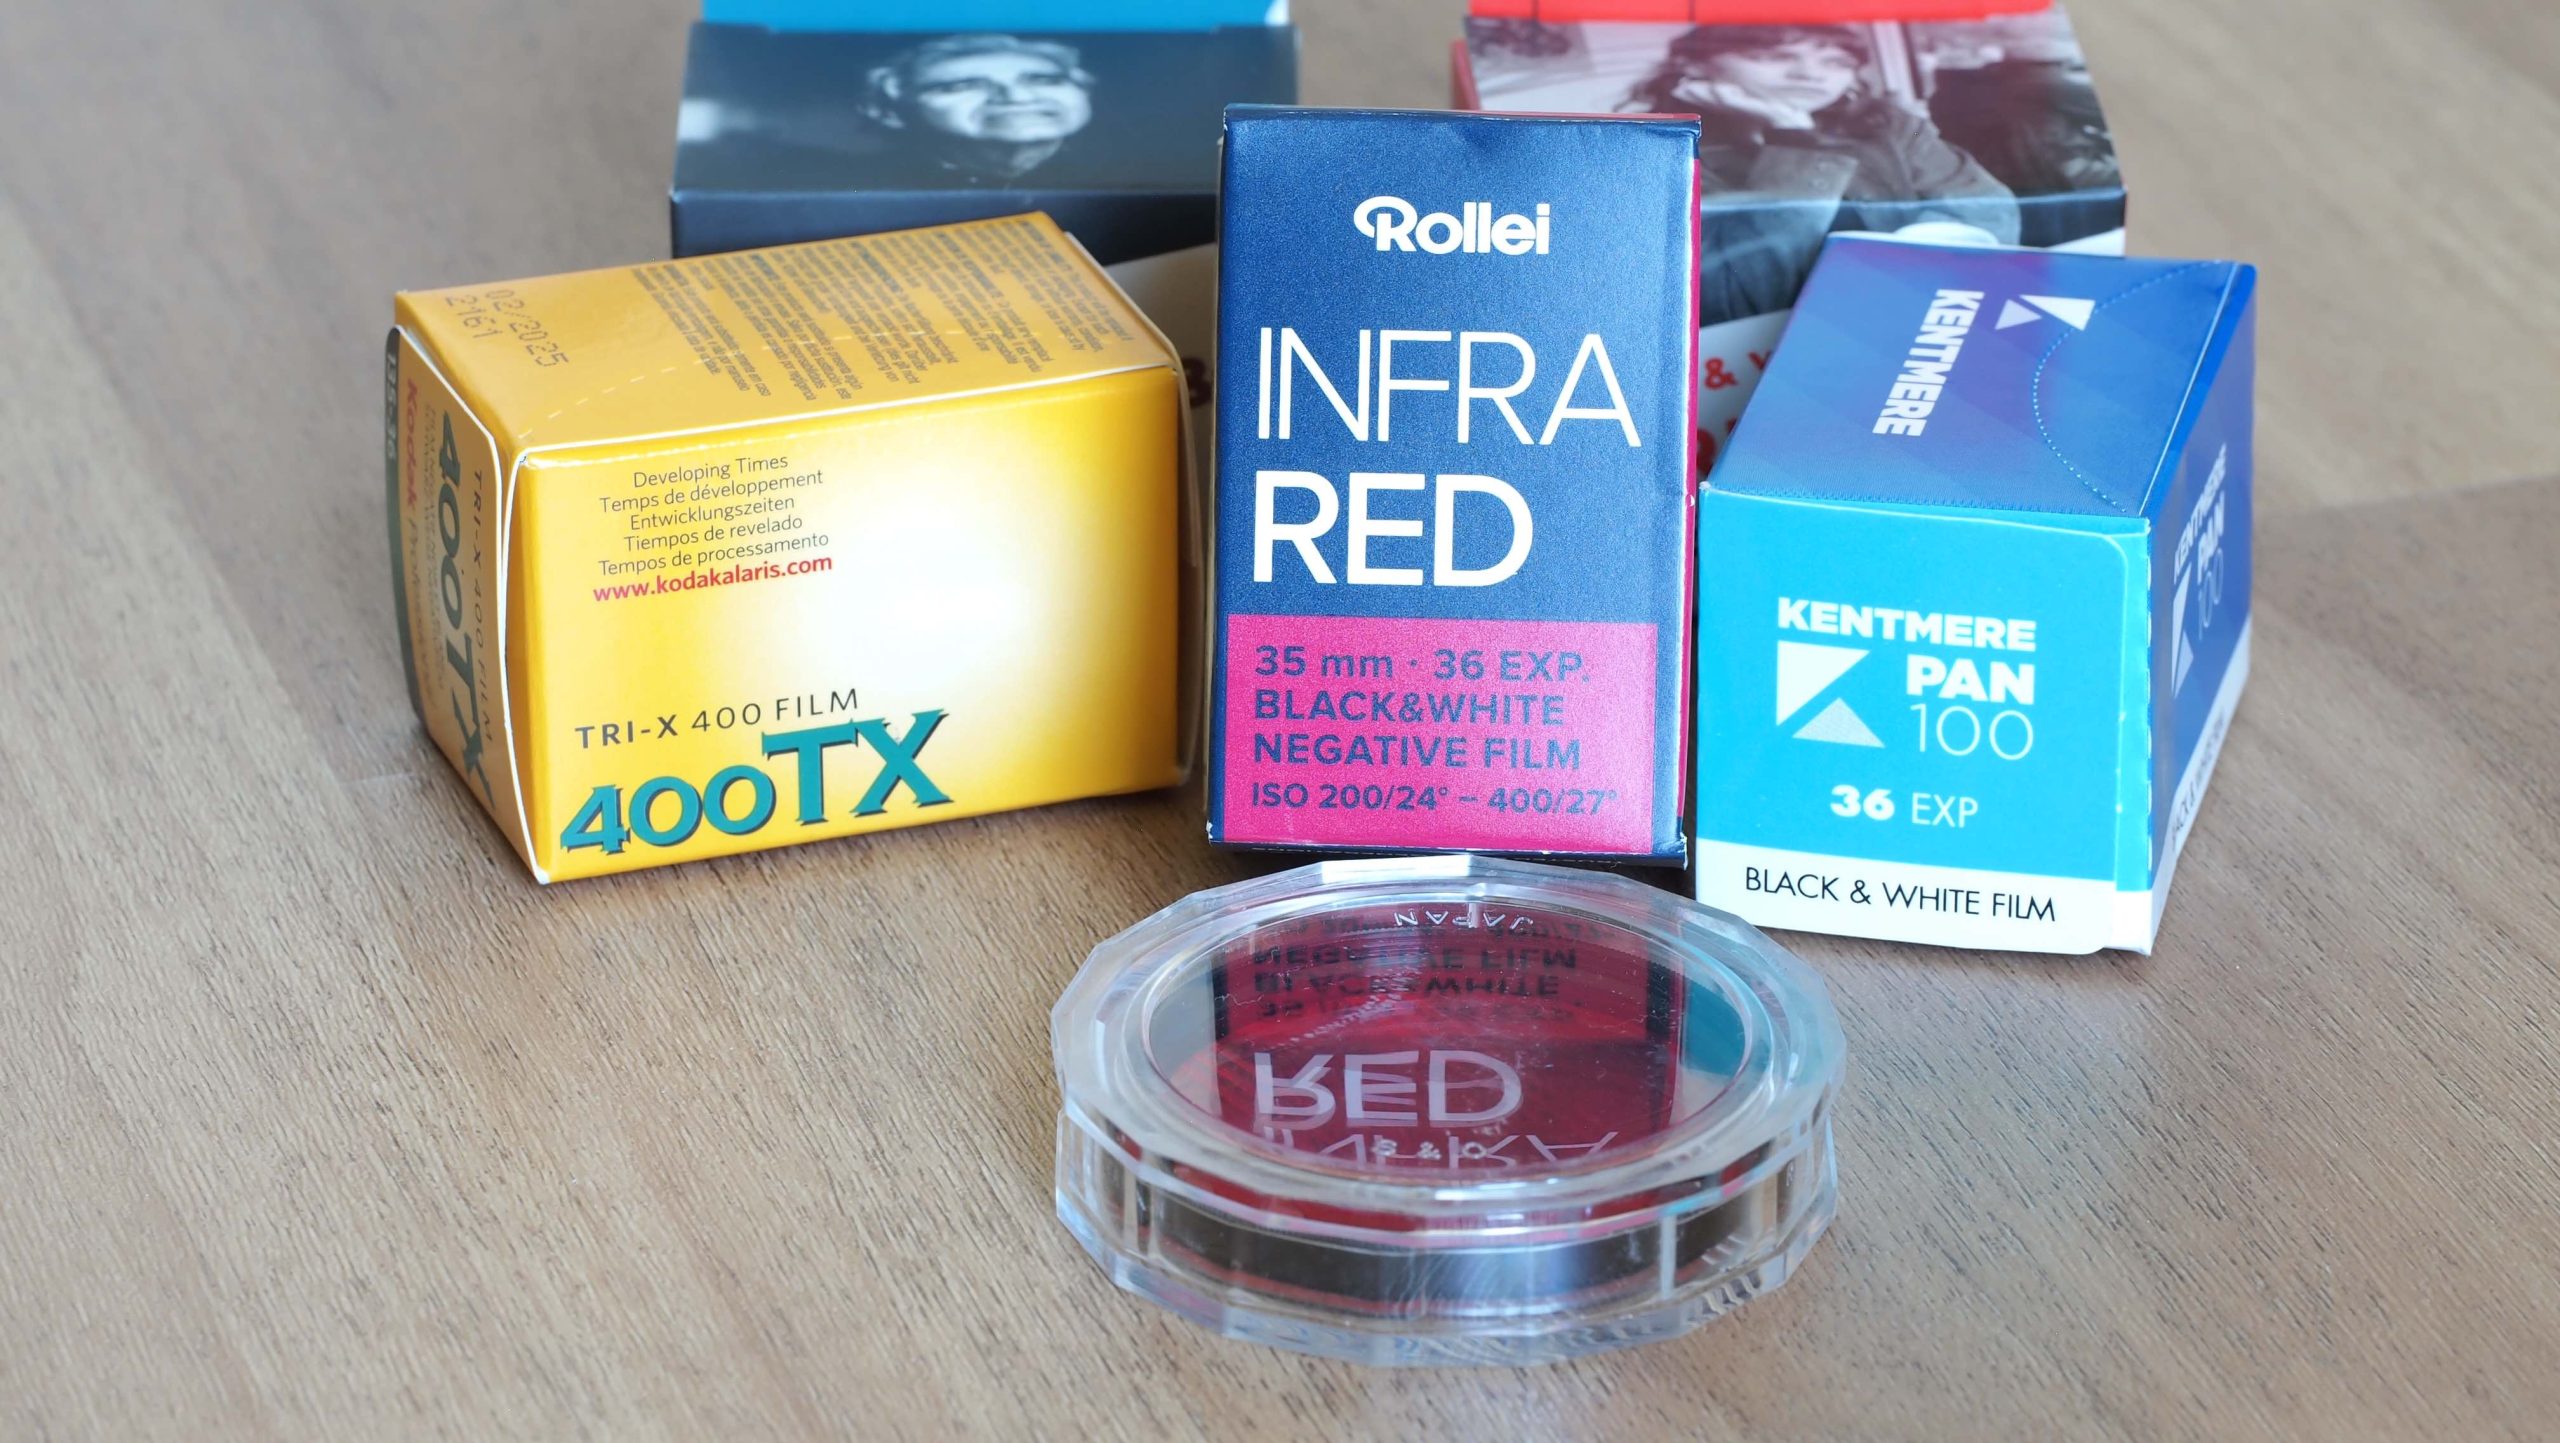
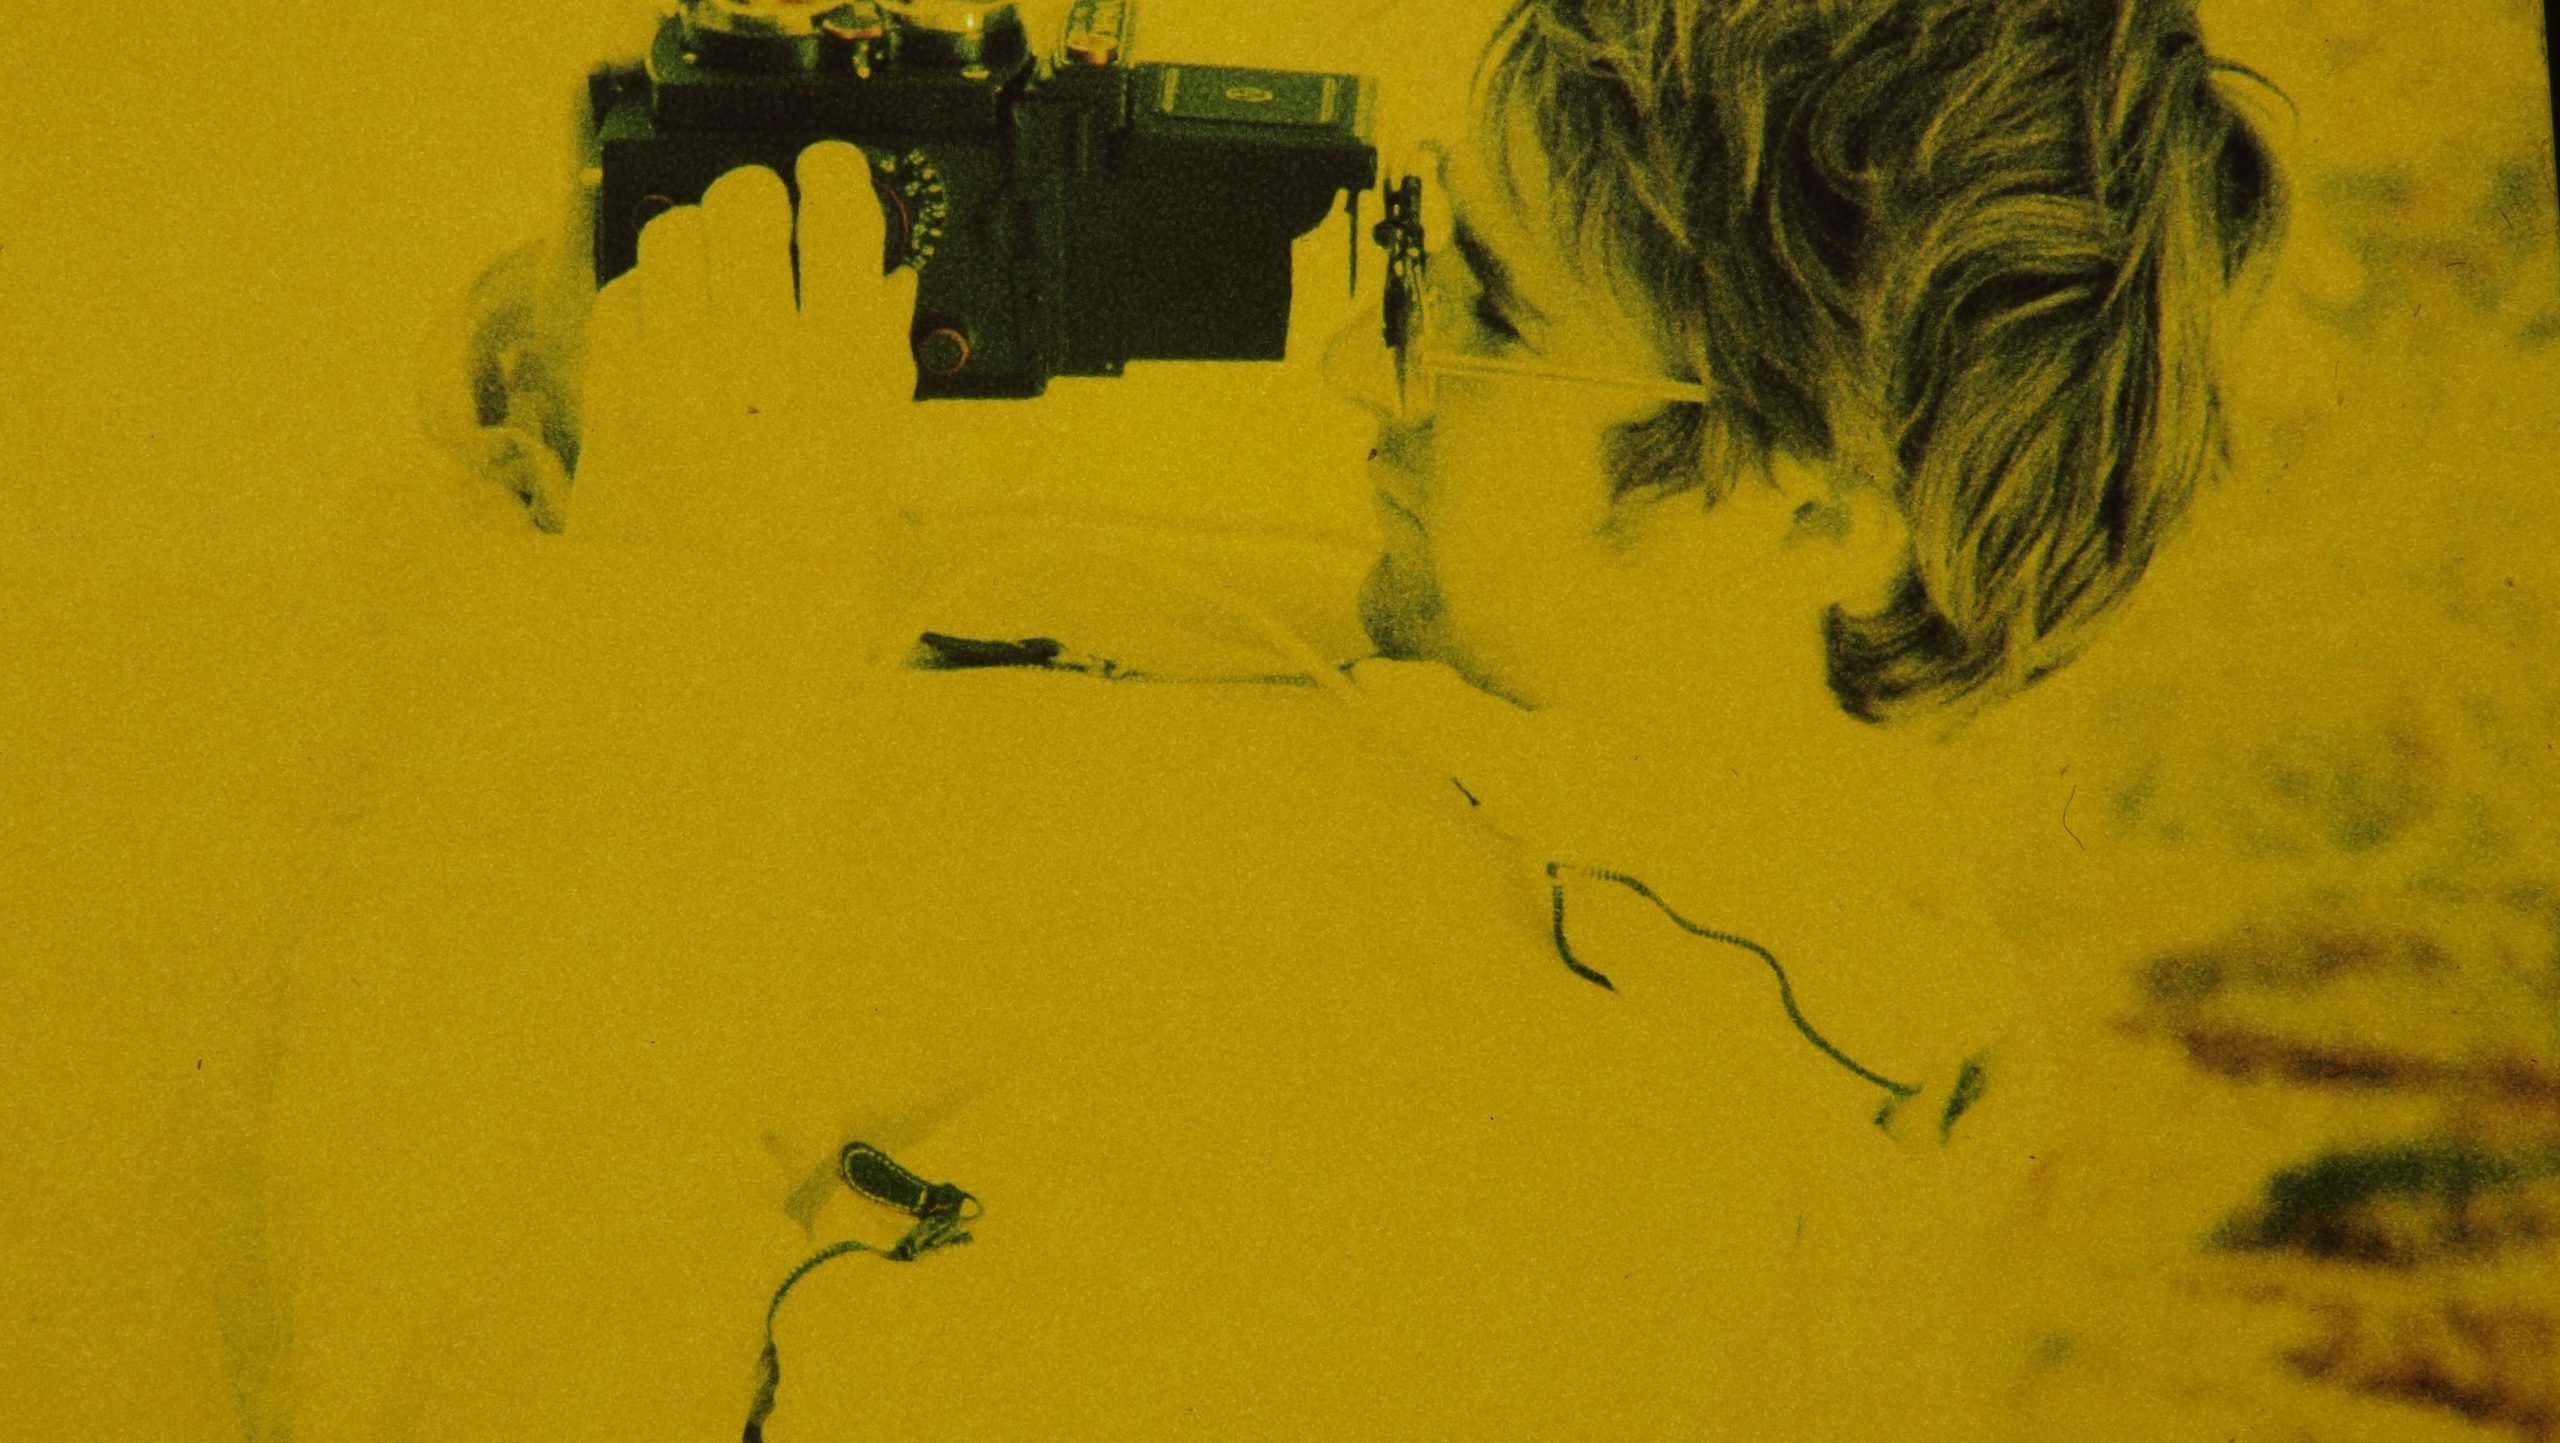
While most photographers are aware of the black and white infrared film manufactured by Rollei that has an IR sensitivity (650 – 750nm) at ISO 200 – 400, Kodak surprised the world in the late 1970s with an E4 process Ektachrome emulsion (Kodak IE) that enabled color infrared images. Whoa! Better yet, this color IR film could be easily home processed.
Lacking proper IR-specific filters, however, when exposed in a 35mm film camera with an uncorrected lens, this home-brew Ektachrome produced oddly colored yellow snow. In these same IR images, coniferous trees would turn a red color—probably blushing from that yellow snow.
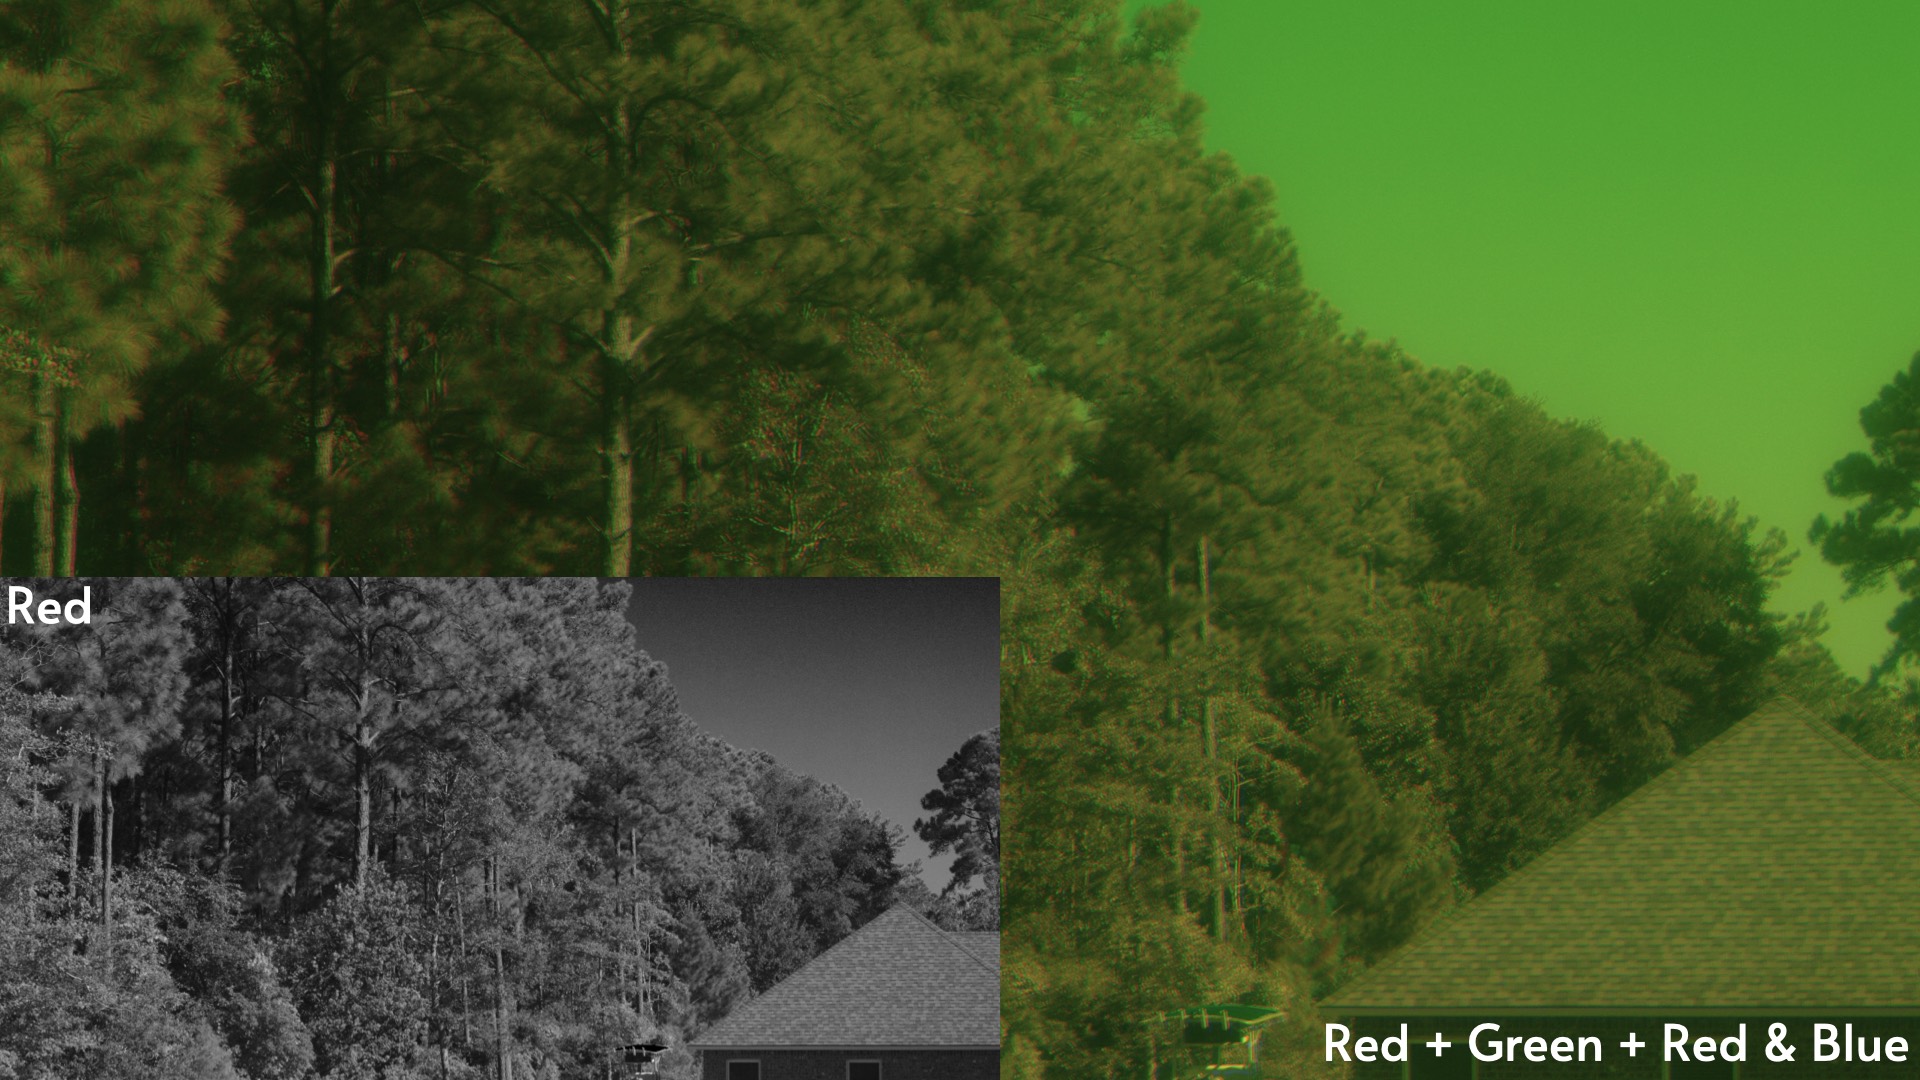
Today it’s possible to kinda relive those colorful Kodak E4 Ektachrome infrared days, by using a technique that was described in another DIY Photography article. By using just three colored gel filters (e.g., red, green, and blue), the black and white Rollei infrared film can be transformed into wild outta-this-world color photographs.
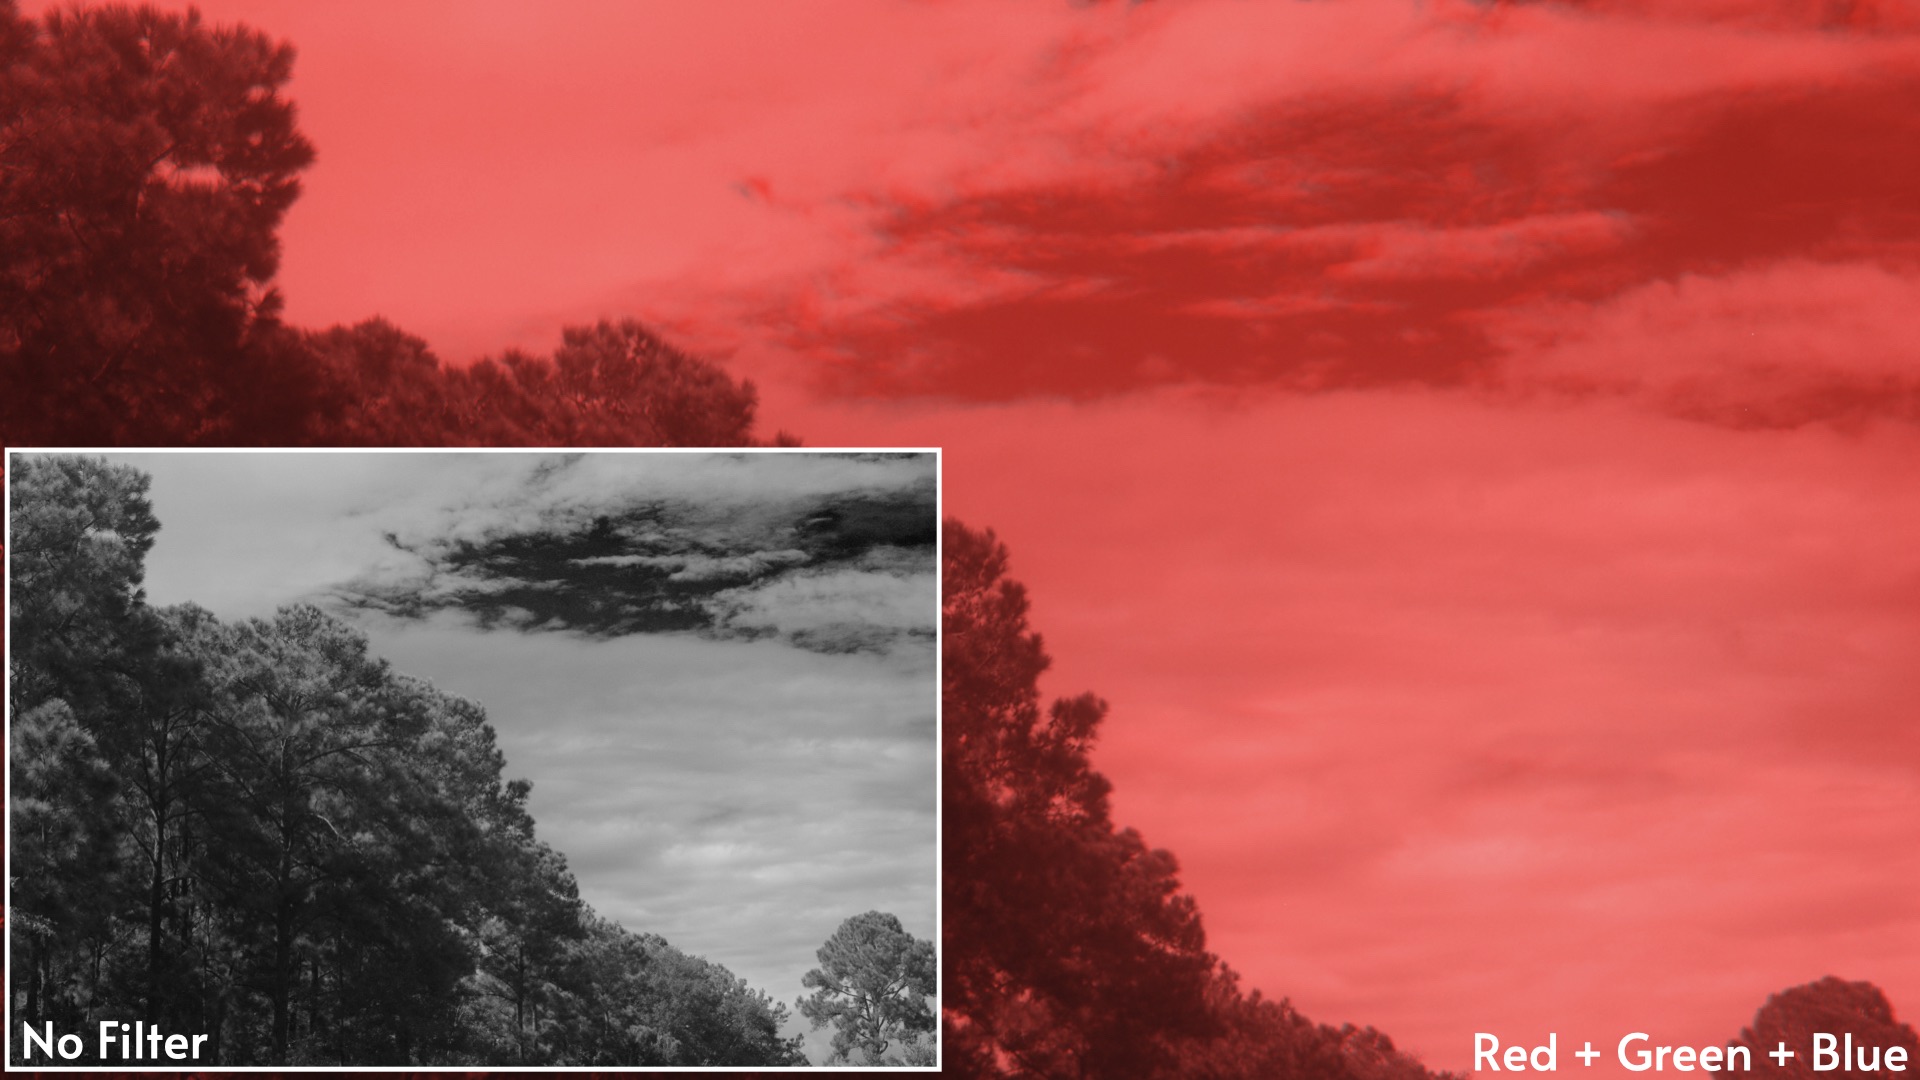
Unlike the exact technique used in that DIY Photography article, however, you don’t need to expose the three frames with the singular red, green, and blue filters. You can experiment with your filters, frames, and combinations. In other words, try using only the green filter for a single, stand-alone black and white photograph.
Additionally, skip the blue channel in your photo editing software and create a red and green combination photograph. Finally, try making three frames with the red filter used by itself for one frame, another frame with the red gel used in conjunction with the green filter (i.e., red + green filter), and, finally, make a third frame by combining the red and blue filters together. Bundle these three frames together into your photo editing software’s RGB channels and kickstart your journey into a world like no other.
Enjoy.

David Prochnow
Our resident “how-to” project editor, David Prochnow, lives on the Gulf Coast of the United States in Ocean Springs, Mississippi. He brings his expertise at making our photography projects accessible to everyone, from a lengthy stint acting as the Contributing How-To Editor with Popular Science magazine. While you don’t have to actually build each of his projects, reading about these adventures will contribute to your continued overall appreciation of do-it-yourself photography. A collection of David’s best Popular Science projects can be found in the book, “The Big Book of Hacks,” Edited by Doug Cantor.


Join the Discussion
DIYP Comment Policy
Be nice, be on-topic, no personal information or flames.