


The Versatile Beauty Dish – My Favourite Lighting Patterns
Aug 10, 2015
Glenn Norwood
Glenn Primarily works as a social and fashion photographer specializing in editorial, advertising and portrait photography, based in Belfast, Northern Ireland.
Share:

Most folks will be fairly familiar with the Beauty Dish and its usefulness in both fashion and general portraiture. In this tutorial I would like to share with you just how versatile I think the humble Beauty Dish can be and show you just how many lighting patterns you can create with my personal favourite light modifier.
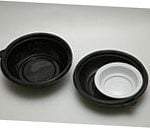
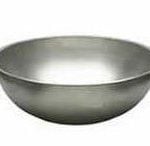
First of all, I should describe exactly what a Beauty Dish is for those perhaps unfamiliar with the modifier. Beauty dishes are essentially large metal bowls, which typically are available in a variety of sizes such as 16″, 22″ or 27″ in diameter. They can be used with both studio strobe and speedlights with the correct speedring fittings.
Inside the dish is an internal reflector. This is a disc of metal, spaced a few inches in from the strobe. This deflects the light from the strobe and pushes the light towards the outside of the dish, ensuring that the only light hitting the subject has been reflected. This creates a very smooth, even and flattering light though this can also depend on the interior of the reflector. Beauty Dishes typically have silver or white interiors. Silver interiors are very specular and produce harder more contrasty light, whereas white interiors are softer and more even as the light inside gets more scattered before leaving the dish, reducing the specular reflections.
The best thing about Beauty Dishes is just how many lighting effects you can achieve with just one modifier – both hard and soft light. Typically, you can add either a grid, to produce more contrast and direction or add a diffusion sock to soften the light more.
WHAT I USED
The Beauty Dish I used for this test was a 22″ [or 55cm] silver Beauty Dish from Seamless Photo – I like this particular brand as it fits Bowens mounts and comes with a Honeycomb Grid and diffusion sock. The Dish was mounted onto a Bowens Gemini 500R strobe head placed onto a 40″ Double Riser Stand.
1. BEAUTY DISH WITH GRID
Ok, to start with I kept things really simple. One light, Beauty Dish with Grid attachment, placed high and 45˚to the subject.


The first thing to notice is that we have created a classic Rembrandt lighting pattern and also the grid on the Beauty Dish has concentrated the light source so the light is only falling on the subject. Even though we have white seamless paper in the background, the dramatic fall off from light makes it look dark grey – very effective.
2. BEAUTY DISH
With the exact same setup the next step was to simply removed the Grid so we were just shooting with the Dish. Notice how the light pattern on the face is almost identical but the extra spill from the light illuminates the white background to give us a much lighter grey.

If we feel the shadow is a little dark we can always place a white poly-board reflector to fill in a little of the shadow and make it less dramatic.


3. BEAUTY DISH WITH DIFFUSION
We can, of course, soften the light down further – fortunately we had a beautiful model Melissa with a great makeup application, so it wasn’t that necessary on this occasion. I typically shoot a lot of fashion and beauty images and prefer images with slightly more contrast, but with regular portraiture the diffusion is a must.

We can now start to get creative! The first thing I did was to add a hair light – just to give a little separation to the subject from the background.
4. ADDING EXTRAS – BEAUTY DISH WITH DIFFUSION & HAIR LIGHT
We added another Bowens 500 strobe head mount onto a Calumet Doubler Riser Stand and placed it high and behind the subject. For this look we also placed the Beauty Dish high and directly above the subject.


To emphasis the hair and shape the face more we can then add an extra accent light slightly behind and to the side of the model. We added a set of Barn doors to this light to help control the amount of flare that might effect the image.


Off course we can use this exact same lighting setup but add the Grid again to the Beauty Dish for a more dramatic feel.

5. CLASSIC BEAUTY LIGHT – CLAMSHELL
Beauty Dishes are of course most widely used for beauty portraits and the calmshell style of lighting is the most popular. Many simply use a reflector under the chin of the model to help fill and lift the shadows but I feel its always best to use another light so we can control and get a more accurate exposure. On this occasion we used a Bowens 500 head with a Strip soft box attached. Any small softbox will do and in fact we could also use another Beauty Dish if preferred. The bottom light was approx one stop less than the beauty dish.


EXTRAS – GETTING CREATIVE!
I always love experimenting and trying something different in the studio. This lighting pattern is super dramatic and very simple! Simply place the Beauty Dish with a Grid directly above the subject pointing down. This is a cool uber fashion look which can produce amazing results – why not try it out along with these other lighting setups ….happy snapping!!

There you have it, if you are considering your next modifier, consider a beauty dish
Filed Under:
Tagged With:

Glenn Norwood
Glenn Primarily works as a social and fashion photographer specializing in editorial, advertising and portrait photography, based in Belfast, Northern Ireland.


Join the Discussion
DIYP Comment Policy
Be nice, be on-topic, no personal information or flames.
7 responses to “The Versatile Beauty Dish – My Favourite Lighting Patterns”
Great article. Practical, easy to read and understand. More like this please! :)
easy to read & good tehnic to pratice.
well done article
Very nice article, I think I need one now.
Can you share the camera settings for the dramatic shot?
hi, i was wondering what beauty dish you are using? I’m trying to buy one !
How far was the model from the backdrop and how far was the beauty dish from the model? The most important things you forgot to mention.