


Super Cheap DIY Camera Wrist Strap
Aug 25, 2006
Guest Author
We love it when our readers get in touch with us to share their stories. This article was contributed to DIYP by a member of our community. If you would like to contribute an article, please contact us here.
Share:
 Alrighty so I just got my new camera (Kodak p850) and it is wicked rad and I’m having lots of fun figuring out all the buttons and whatnot but now that I have a real camera I need a real camera strap, the one that came with it is fairly comfortable but I never wear straps around my neck so I’ve been checking ebay and google for possible alternatives. Fortunately a product already exists that is exactly what I’m looking for, actually many many different variations of what I’m looking for exist and they all have one thing in common, they’re all ridiculously overpriced for the amount of material that your getting. I’m cheap crafty I think I can make my own for less and have just as good of a product. And so it begins.
Materials Used
Strap -$1.99 (enough for 2)
Ball bearing snap swivels -$1.89 (enough for 3, or you can use the other 2 for your neck strap so you have a cheapo “quick” release system)
Eyelet tool and eyelets $1.00
Keyring
Scissors
Finding a Donor Strap
I did a lot of pondering on where to get a nice sized strap from I considered using an old belt but this idea just weirded me out and I don’t have any spare belts kicking around so that didn’t work so I set about ravaging anything with a strap in my house what I eventually found was that my samsonite carry on luggage bag was the perfect size and strength. But I need that bag…and it’s red which doesn’t match my camera and I read in the manual that this particular camera doesn’t like being unfashionable. So it was time for a trip to Value Village. I found a samsonite knockoff for the fair price of $1.99 (all prices are in Canadian or Canadian Tire Money funds).
Here we have the initial tools to make the strap

What the hell is that red thing and those gold thingers you ask? It’s a “eyelet tool” I got it at the Dollarama store for well, a dollar…when I got it I had no idea what I would do with it but I knew if I didn’t get it I would curse my past self later, trust your gut folks random obscure tool purchases should NOT be put off.
Now it’s time to cut up your new purchase, this is self explanatory but I’ll include a picture anyways.

And now the other side…

So now your brain can begin thinking of things to do with the strapless bag you just created. (add your camera strap to it?)
And you have the raw material, everything on the left hand side is junk, I considered using the shoulder guard thing but for me the thickness of the strap is just right and the guard makes it too bulky and doesn’t add anything except making it look like some kind of bowling aid.

Now you have to choose the size of your wrist strap, make sure it’s a size where you can wiggle your hand out without much hassle but won’t slide off. I didn’t want to use any kind of strap tightening device after I was done so I spent a little extra time and made sure I had a good length at this step. Be sure to factor in that you’ll be adding the eyelets about a inch in from where you cut the strap. Here’s my cut with scissors as a reference. Notice that there is enough excess strap to build another wrist strap if you mess up or have multiple camera’s…or someone reads your DIY article and commissions you to do another for them for mad cash :-)

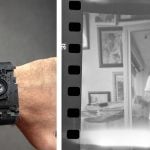
Did I mention it’s a new camera? Crystal clear focus on the wall receptacle though *thumbs up*. Anyways this is just what I have found helps to do before you punch the eyelet hole, I’m not sure what the actual process is for doing this as there was no instructions but if you squish the bottom eyelet a bit before your punch the top one through the material it helps the top eyelet to fit through the center. It’s hard to explain, just play around with punching the eyelets on a scrap piece of material before doing the real deal.

Now punch it through, don’t fret if it looks like it’s going in wonky just put all your muscle into it and then shift the position of the toll and do it again until you have a nice flat eyelet. What a useful tool hey. It’s a pretty neat tool I must say.

The end result of all that, just use a pen to push the punched through fabric out. Now do the same thing to the other end of the strap.

Now you need a keyring…you probably have too many on your keys anyways. Thread it through the two eyelets. It’s starting to look the part now.

As if I need to explain to you what this is. They are “ball bearing snap swivels” they can be found in the fishing section of your hardware store, I went to Canadian Tire and used some spare Canadian Tire money they were about $1.89 for three, why they come in a pack of three I have no idea, must be some kind of crazy fishing industry standard. Pretty packaging though, kudos to them.

Then you put the non-snappy end on the keyring and you’re done. I know some people will be all “oooo I would never trust my camera to that little snap” I can vouch for these snaps, we’re friends from way back. It takes a concentrated effort to get the snap open and I can see no way that it would spring open under even extreme photographic conditions. Will they break under the weight of your camera? Have you ever gone fishing, no this is the ball bearing snap swivels version of winning the lottery they have it easy in this application.

But does it meet the fashion requirements? Works for me.

This great article was contributed by Matt

Guest Author
We love it when our readers get in touch with us to share their stories. This article was contributed to DIYP by a member of our community. If you would like to contribute an article, please contact us here.


Join the Discussion
DIYP Comment Policy
Be nice, be on-topic, no personal information or flames.