


One simple secret to making your landscape photos more dramatic
Jan 28, 2020
Dunja Đuđić
Dunja Djudjic is a multi-talented artist based in Novi Sad, Serbia. With 15 years of experience as a photographer, she specializes in capturing the beauty of nature, travel, concerts, and fine art. In addition to her photography, Dunja also expresses her creativity through writing, embroidery, and jewelry making.
Share:
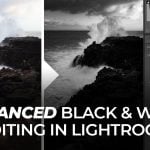
Proper editing adds a lot to the final look of your image, and it can make it or break it. The number of editing styles and methods is unlimited, but there’s one simple addition that can make your landscape photos more dramatic: vignettes. In this video, Mark Denney explains how a simple vignette can contribute to your landscape photos. He also suggests four different ways of adding vignettes so you can find the best solution for any kind of landscape photo.
Before you start editing the image, try to determine where the viewer’s eye will travel throughout the scene. At the same time, find any distractions in the scene, and ideally try to keep the viewer’s eye away from corners/edges of your frame and from those distractions.
A vignette can be a great solution to both emphasize the subject and direct the viewer’s eye away from distractions. When used correctly and effectively, it can be a great tool for creating a focused and dramatic landscape.
Of course, there’s no ”one size fits all” solution, so you will need to use vignettes in different ways depending on the image you’re editing. Mark discusses four ways to add vignette and improve your landscape photos:
1.Vignette slider inside Lightroom’s Effects panel – this is the most obvious option for adding a vignette and it’s ideal when the main subject is in the center of your frame. Within this tool, there are five sliders you can adjust:
- Amount slider (changes the vignette’s brightness)
- Midpoint slider (changes the size of the vignette’s midpoint)
- Roundness (lets you choose between a more round or square shape for your vignette)
- Feather slider (changes between smoother and harder transition zone)
- Highlights slider (recovering highlights in the corners)
2. Radial filter – Mark uses this one most often, and it works best when your main subject isn’t in the center of the shot. If you want to use this method, put the center of your radial filter on the subject and then click the Invert mask. This way everything on the outside of the radial filter will be dark, and the inside will be bright. Then adjust the feather and size of your vignette.
3. Graduated filter – this method works great when the brightest part of your image stretches throughout the scene vertically, horizontally or diagonally. To illustrate my point, here’s one of Mark’s examples:

4. Adjustment brush – like the Radial filter, this is also one of Mark’s favorites. It’s great for custom vignettes regardless of where your main subject is in the scene. Select the Adjustment Brush tool, use lower brush flow, and paint in the vignette precisely in the areas where you want it to be.
I personally never use the Vignette tool in Lightroom and I’ve never considered adding vignettes to my landscape images. Still, when I look back, I realize that I often use the Graduated filter to emphasize the most important areas in the scene. So I guess I do use this “custom vignette” from time to time. What about you? Do you add vignette to your landscape images? What’s your preferred method?
[The Simple SECRET of Creating DRAMATIC Landscape Photos via FStoppers]

Dunja Đuđić
Dunja Djudjic is a multi-talented artist based in Novi Sad, Serbia. With 15 years of experience as a photographer, she specializes in capturing the beauty of nature, travel, concerts, and fine art. In addition to her photography, Dunja also expresses her creativity through writing, embroidery, and jewelry making.


Join the Discussion
DIYP Comment Policy
Be nice, be on-topic, no personal information or flames.
7 responses to “One simple secret to making your landscape photos more dramatic”
Not only on landscapes…
I NEVER use vignetting on any of my photos landscapes or portraits…personally I find vignetting takes away from a photo and doesn’t add to it at all. I find it more of a distraction.
Michael Bray if used skilfully it has it’s place in photography
True….I just choose not to use it for my photos
I do sometimes use them
One simple secret to make all your stories look like clickbait!
This is a bit the same as saying that using tape to stretch facial skin is as good as plastic surgery.?