


How to make amazing double exposure effects in Photoshop
Feb 8, 2017
John Aldred
John Aldred is a photographer with over 25 years of experience in the portrait and commercial worlds. He is based in Scotland and has been an early adopter – and occasional beta tester – of almost every digital imaging technology in that time. As well as his creative visual work, John uses 3D printing, electronics and programming to create his own photography and filmmaking tools and consults for a number of brands across the industry.
Share:

Double exposures have been around for years, but they seemed to disappear when digital came along. But Nikon DSLRs have had the capability for over a decade now, and Canon have recently started implementing it, too. It’s a fantastic technique to experiment with, although it takes a lot of practise, skill and a little luck to really get the results you’re after.
To help make things a little more reliable, though, you can also make them in Photoshop. This video from Chris at Spoon Graphics walks us through the whole process. The tutorial actually came out a couple of years ago, but seems to have recently become popular again. And it’s a great way of achieving the technique.
With film, double exposures are often quite hit and miss. Many large format shooters who do double exposures will actually draw outlines of their subjects onto the ground glass itself. This way, when they line up for the second shot, they have a better idea of where everything fits. I’ve seen DSLR shooters do the same with white board pens on their camera’s LCD. At least with digital, though, you can see your results quickly and usually try again.
While this technique doesn’t offer quite the same result you’d get shooting a real double exposure, it is very effective. It also gives you a lot more control over how you blend the two scenes together.
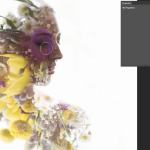
In the video, Chris says that double exposures are often made from photographs of a person and a natural scene. Mostly trees, but occasionally mountains, rivers and other landscapes. So, that’s the combination Chris went with. For the photograph of the person, Chris says it’s best to have one with a solid plain background. This makes it easier to cut them out and make masks.

In this case, Chris uses the colour channels to make his selection around the subject and lift her from the background. Chris selects the channel with the most contrast, duplicates it, and then uses levels on this new layer to crush everything that isn’t pure white to black. Then, the highlights were painted black to match. CTRL+Click to turn the layer into a selection, invert the selection. Finally, duplicating the background layer puts her on her own layer.
Next, the landscape is brought in on its own layer at the top. With the landscape layer selected, CTRL+Click on the layer of the person with the transparent background, then hit the new mask icon. This shows your landscape in a silhouette of the person.

Clicking the little chain link on the landscape layer between the image thumbnail and the mask thumbnail allows you to move the image without moving the mask. This gives you complete control over the placement of the landscape in the silhouette cutout.

Once you have it in a place you’re happy with, duplicate the layer of the person, and drag it on top of the landscape. Be careful not to move it. Chris desaturates this layer, so that it doesn’t have any effect on the colour of underlying landscape. Changing the blending mode to multiple then merges the two layers together, showing both the subject and the landscape below.

Then add a mask to this layer, and create a large soft brush with a black fill. This will allow you to mask out and sections of the top image, preventing your landscape from becoming too dark. Chris paints out everything except the facial features of his subject. When you’re done, drop the opacity of the top layer so that you can see more of the natural landscape behind it, and allow some of that colour to come through.
Finally, Chris duplicates the original landscape and puts it on another new layer at the top. A 250 pixel gaussian blur turns this into a big mushy mess. Use a large soft brush to mask this layer off, letting your subject show through below. Dropping the opacity of this layer creates a subtle vignette, with some colour and tone differences to help match the subject.
Finally, a levels adjustment to tweak contrast finishes it off.

As mentioned, it’s not going to be quite the same as capturing a true double exposure in-camera. But it’s a great technique, and lets you get a lot of control.
What do you think? Is it “cheating”? Or do you prefer to do it in-camera?
[via Reddit]

John Aldred
John Aldred is a photographer with over 25 years of experience in the portrait and commercial worlds. He is based in Scotland and has been an early adopter – and occasional beta tester – of almost every digital imaging technology in that time. As well as his creative visual work, John uses 3D printing, electronics and programming to create his own photography and filmmaking tools and consults for a number of brands across the industry.


Join the Discussion
DIYP Comment Policy
Be nice, be on-topic, no personal information or flames.
One response to “How to make amazing double exposure effects in Photoshop”
Unfortunately, my camera doesn’t offer double exposure so I use photoshop instead.