


Make Contact–a Revolutionary New Way to Print Contact Sheets
Oct 21, 2025
David Prochnow
Our resident “how-to” project editor, David Prochnow, lives on the Gulf Coast of the United States in Ocean Springs, Mississippi. He brings his expertise at making our photography projects accessible to everyone, from a lengthy stint acting as the Contributing How-To Editor with Popular Science magazine. While you don’t have to actually build each of his projects, reading about these adventures will contribute to your continued overall appreciation of do-it-yourself photography. A collection of David’s best Popular Science projects can be found in the book, “The Big Book of Hacks,” Edited by Doug Cantor.
Share:

As a follow-up to our article about using the Ars-Imago Lab-Box for developing your film, we now present a revolutionary new way to print your contact sheets from these developed negatives. Traditionally, a contact sheet is made by arranging a set of negatives from a single roll of film on a piece of photographic paper. This arrangement is then fixed in place with a piece of clear glass that is laid on top of the negatives. Finally, this photographic sandwich is exposed to a brief burst of light and the paper is carefully removed and developed into a life-size photographic print of the negatives.
Both the effort involved in performing this contact sheet printing task, as well as the cost for the paper, typically an 8×10-inch sheet of photographic paper, and the processing chemicals can all become a headache to the film photographer. There’s gotta be a better way. And there is, when you adopt this method, both your darkroom work will disappear and the cost per contact sheet will shrink to pennies. Plus, no 8×10-inch photographic paper will be harmed in this process.

Do you need any fancy equipment for this new contact print making process? Nope; you can perform all of the required actions on your smartphone! Granted, a smartphone is a pretty fancy piece of equipment, but the luxury with this technique is that no additional fancy gadgets are needed.
A Print Processing Lab in Your Pocket
When you have your developed and dried negatives in hand, cut them into strips of your preferred length (generally, 5 or 6 frames per strip) and load each strip into a clear, plastic negative-holding page. Carefully tape your film-loaded plastic page to a window. Ideally, a north-facing window that is devoid of direct sunlight is the perfect candidate for this step, but any window will work.
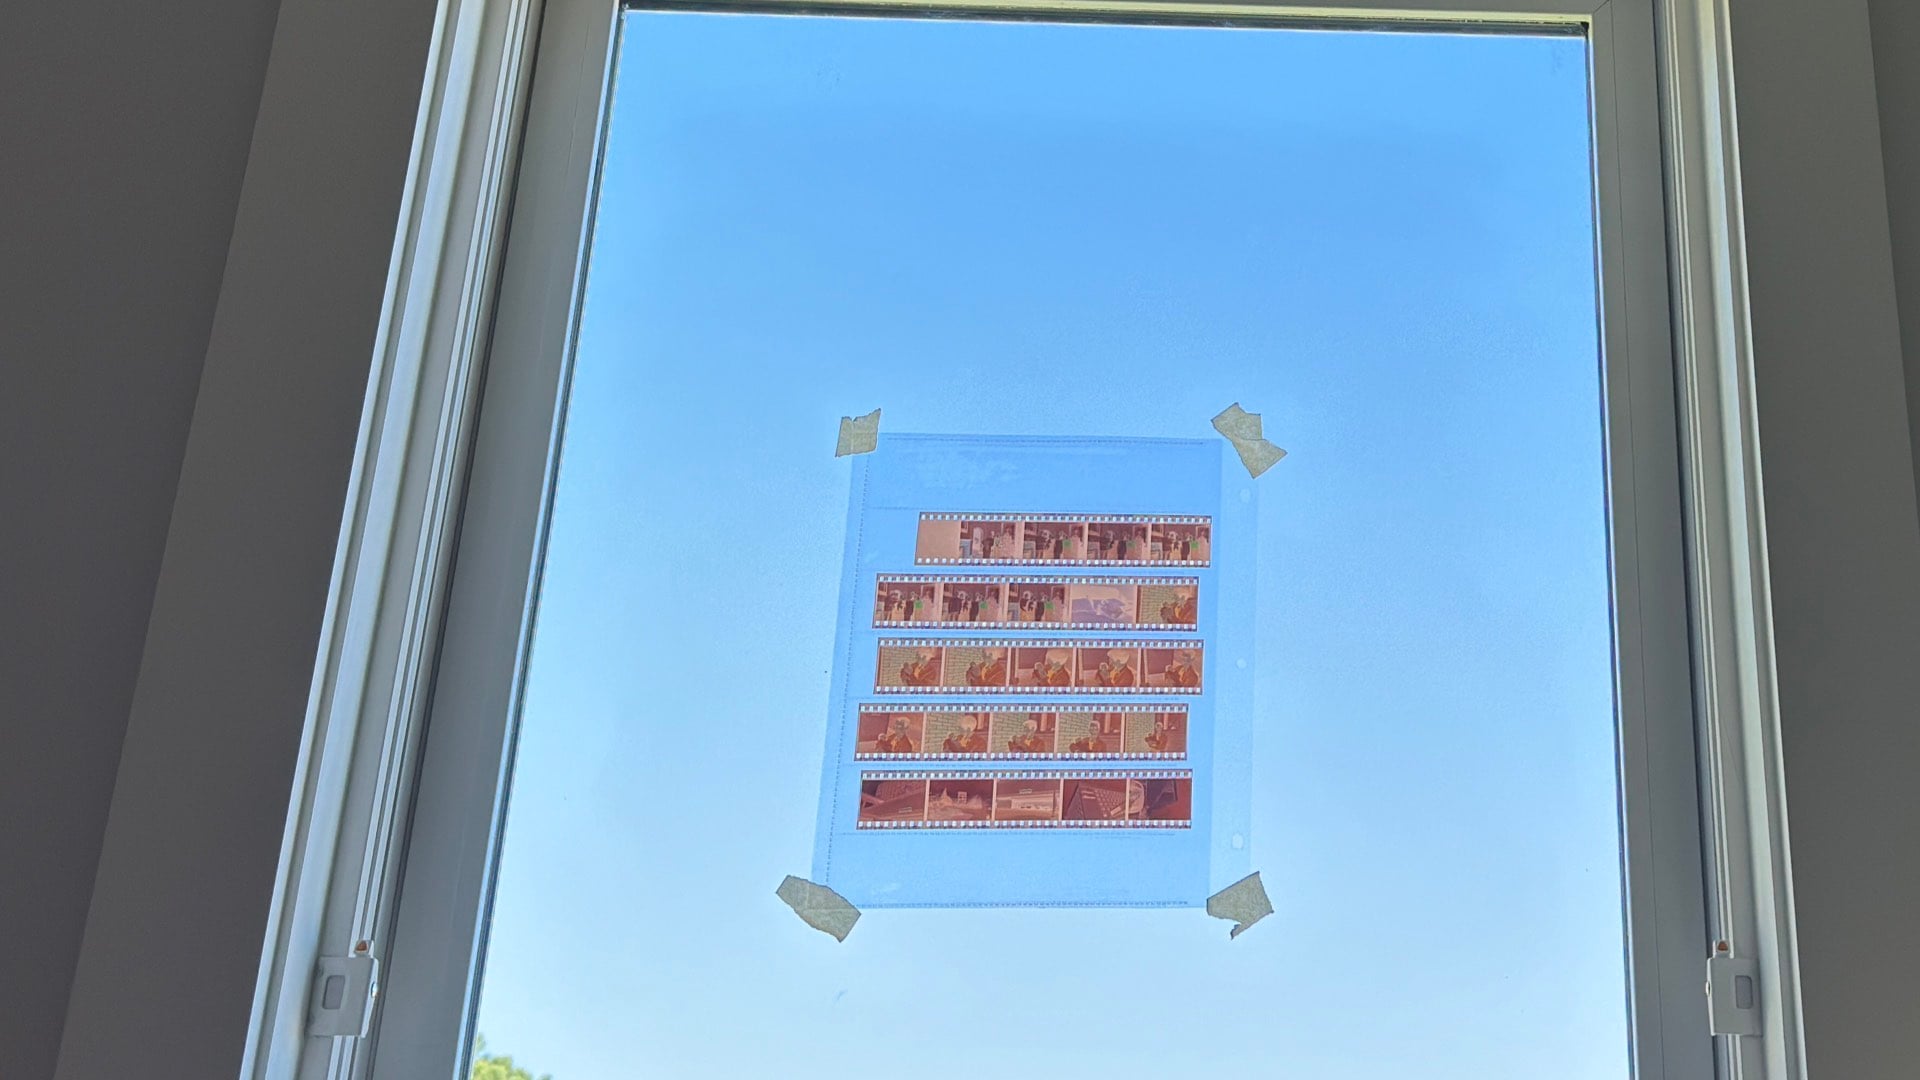
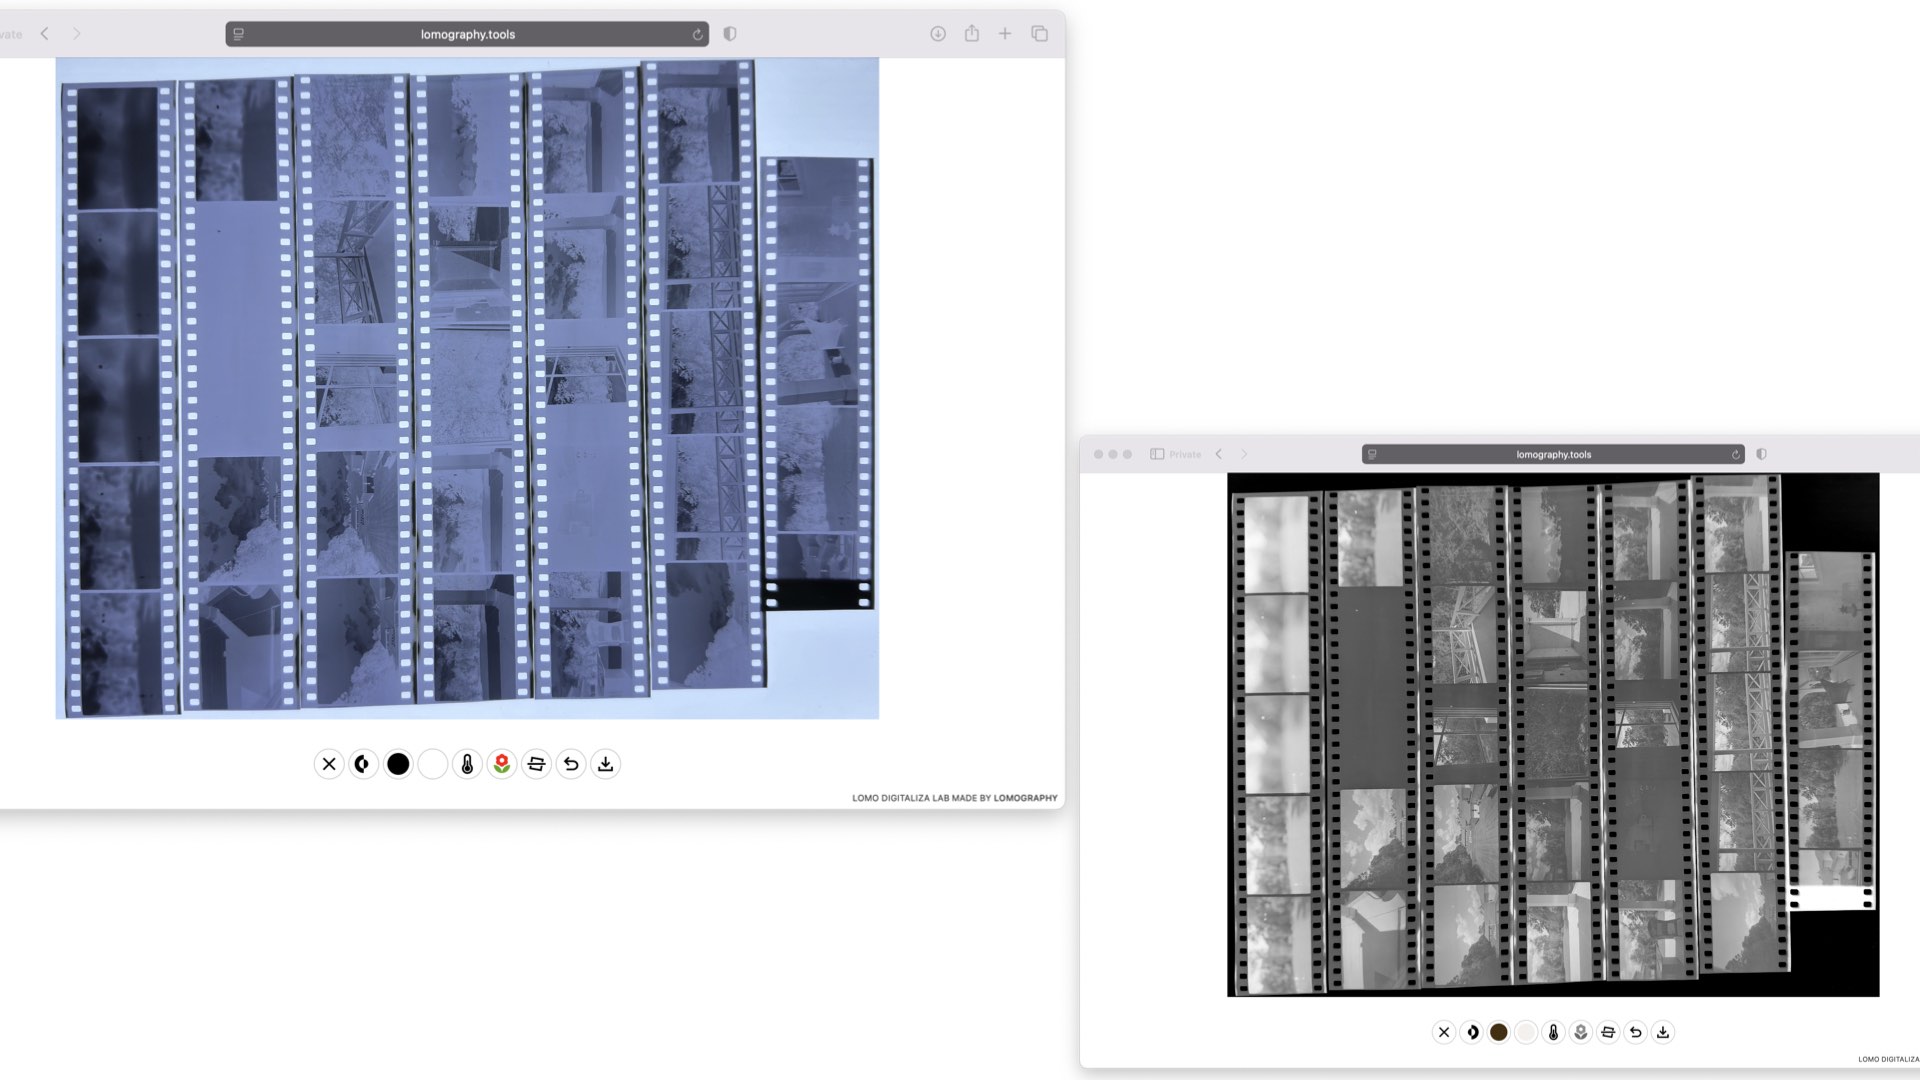
Take your smartphone and make a closely-cropped macrophotograph of the entire plastic page. Ensure that your image is evenly exposed and that the phone’s camera is exactly parallel to the windowpane. Please note that this photograph is a negative. The next chore is converting this negative into a positive image.
The simplest method for converting a negative into a positive image contact sheet is to visit the Lomography DigitaLIZA Lab. Inside this wonderful, FREE negative conversion studio, you will be able to upload your negative, convert it into a positive image, adjust your exposure slightly, compensate for minor amounts of rotation, change from color to monochrome, and download the resulting photograph back to your smartphone. Thank you, Lomography.
Turning this downloaded photograph into a full-fledged contact sheet can be further enhanced by inserting the JPEG into your word processing app on your smartphone and making notes about the camera, film, lens, and exposure in the final document. Save the completed contact sheet document and convert it into a PDF file for subsequent transfer to other devices for document archiving and retrieval.

Naturally, you always have the option of being able to make a print of this contact sheet document. In fact, making a laser print of the contact sheet and storing it alongside the negatives is a great modern interpretation of the tradition photographic contact sheet process. When the printout is complete, Ars-Imago makes a binder/box negative/print storage system that is ideal for accommodating this goal. Priced at $30, this binder is an apt conclusion to the modernization of your film/print processing effort.
Enjoy.
Filed Under:
Tagged With:

David Prochnow
Our resident “how-to” project editor, David Prochnow, lives on the Gulf Coast of the United States in Ocean Springs, Mississippi. He brings his expertise at making our photography projects accessible to everyone, from a lengthy stint acting as the Contributing How-To Editor with Popular Science magazine. While you don’t have to actually build each of his projects, reading about these adventures will contribute to your continued overall appreciation of do-it-yourself photography. A collection of David’s best Popular Science projects can be found in the book, “The Big Book of Hacks,” Edited by Doug Cantor.


Join the Discussion
DIYP Comment Policy
Be nice, be on-topic, no personal information or flames.