


Don’t Do it in the Dark! Develop 35mm & 120 Film in Broad Daylight with this System
Oct 15, 2025
David Prochnow
Our resident “how-to” project editor, David Prochnow, lives on the Gulf Coast of the United States in Ocean Springs, Mississippi. He brings his expertise at making our photography projects accessible to everyone, from a lengthy stint acting as the Contributing How-To Editor with Popular Science magazine. While you don’t have to actually build each of his projects, reading about these adventures will contribute to your continued overall appreciation of do-it-yourself photography. A collection of David’s best Popular Science projects can be found in the book, “The Big Book of Hacks,” Edited by Doug Cantor.
Share:
Using a professional laboratory for the development of your 35mm and 120 film can levy two unexpected and costly burdens on you. The first, and most obvious, burden is the cost for development. Regardless of the lab that you select, you can expect to pay between $10-$15 per roll of film for development–which should include the postage costs for returning the negatives to you.
The second burden is the elusive (and hidden) time factor. This can vary a lot depending upon your local postal delivery network, but ranges between 10-15 days from you dropping the roll in the mailbox to the receipt of the processed negatives. Naturally, these cost and time variables are exclusive of including digital scans and/or prints into your original development purchase.
There’s gotta be a better way, right? And there is, if you consider this: once you’ve purchased the following system (yes, this does entail a significant upfront cost), your total cost per roll of developing both 35mm and 120 film will be less than $2 per roll. Furthermore, the total amount of time involved for developing each roll is less than one hour. Sounds incredible, doesn’t it? Say “thank you,” to Ars-Imago.
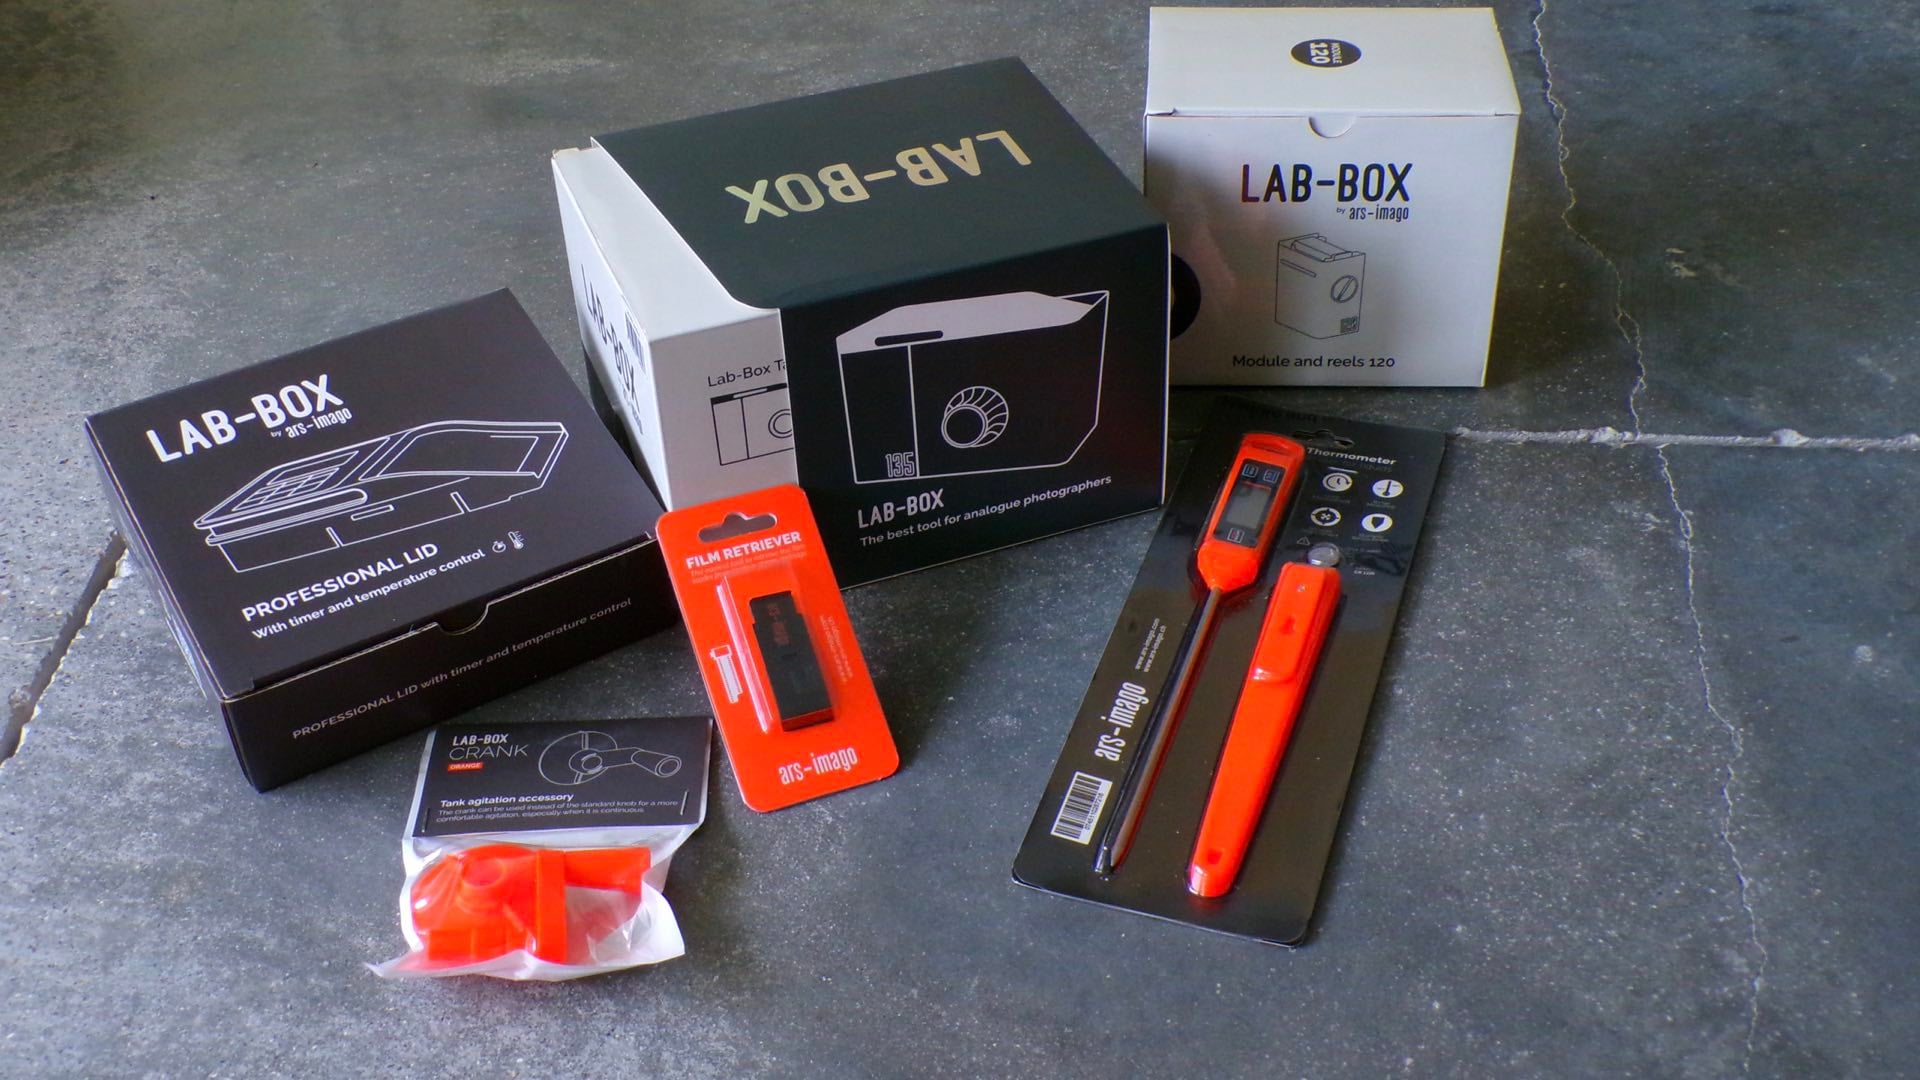
Yes, you will have to “buy” into the Ars-Imago system, but this necessary equipment purchase will last your lifetime. Think of it as an investment in your photographic future. In its barest sense, though, all you will ever need, is the Ars-Imago Lab-Box for 35mm development and/or the Lab-Box 120 Module for processing 120 film.
Priced at $189, the Lab-Box is the only essential piece of equipment required for developing 35mm film. The $69 120 Module for developing 120 film attaches to the Lab-Box and comes with its own 120 film reel.

Naturally, there are a couple of other optional products in the lineup of Ars-Imago photographic development tools that can make your life easier.
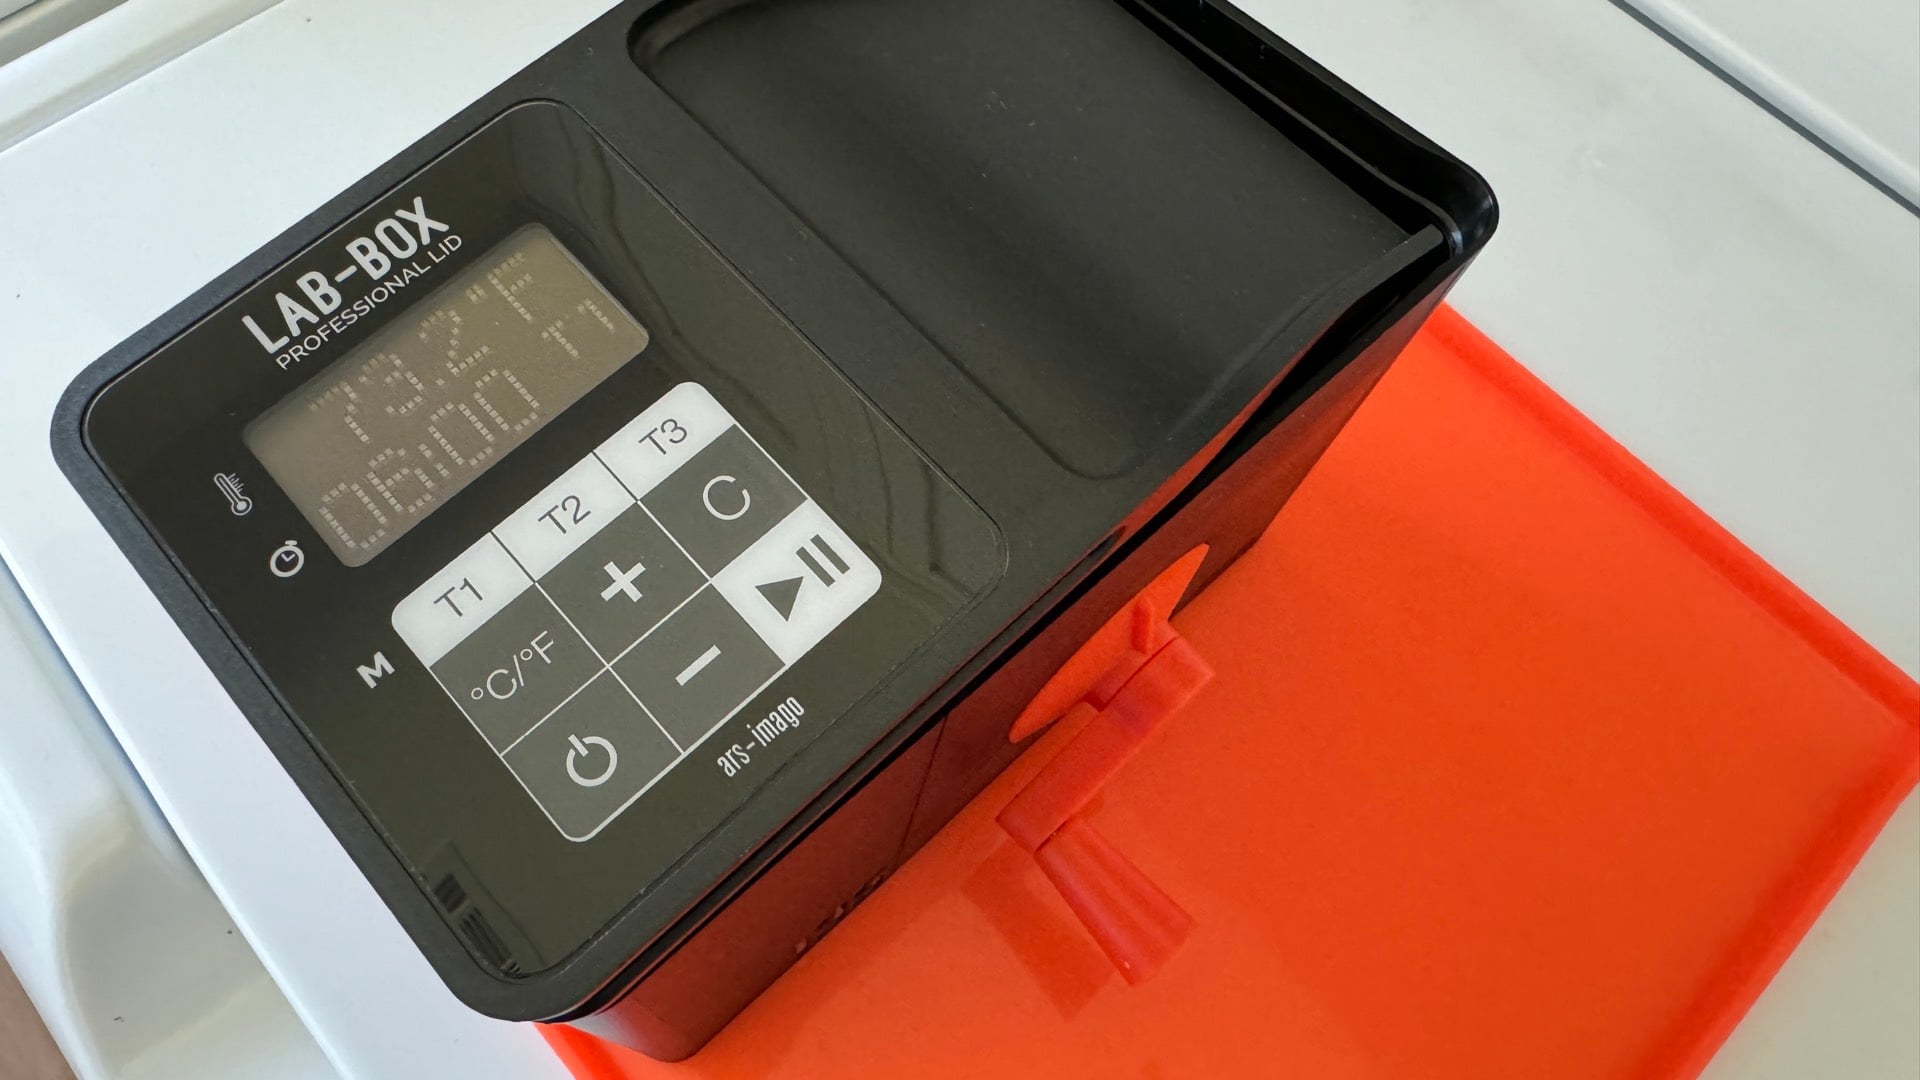
- Professional Lid $59 – adds temperature and timing to the Lab-Box.
- Film Retriever $12 – if you inadvertently rewind the 35mm film’s leader into the cartridge.
- Hand Crank $24 – replaces the Lab-Box knob with a more convenient crank.
- Digital Darkroom Thermometer $29 – ensures that all of your chemistry and water is at the same temperature.
- Lab Mat $12 – contains spills and reduces countertop scratches during Lab-Box processing.
Avoid the Stygian Darkroom with the Lab-Box
Once you’ve gathered together your development equipment, there are only two chemicals that you will need for processing film. No beakers, no mixing, no stop bath, no fixer, just a monobath and a wetting agent are all the chemistry that you will need. That is, provided you use CineStill Df96 Monobath for $19.99 and (optional) Ilford Wetting Agent costing $5.29. Both of these products are self-contained and require no mixing.
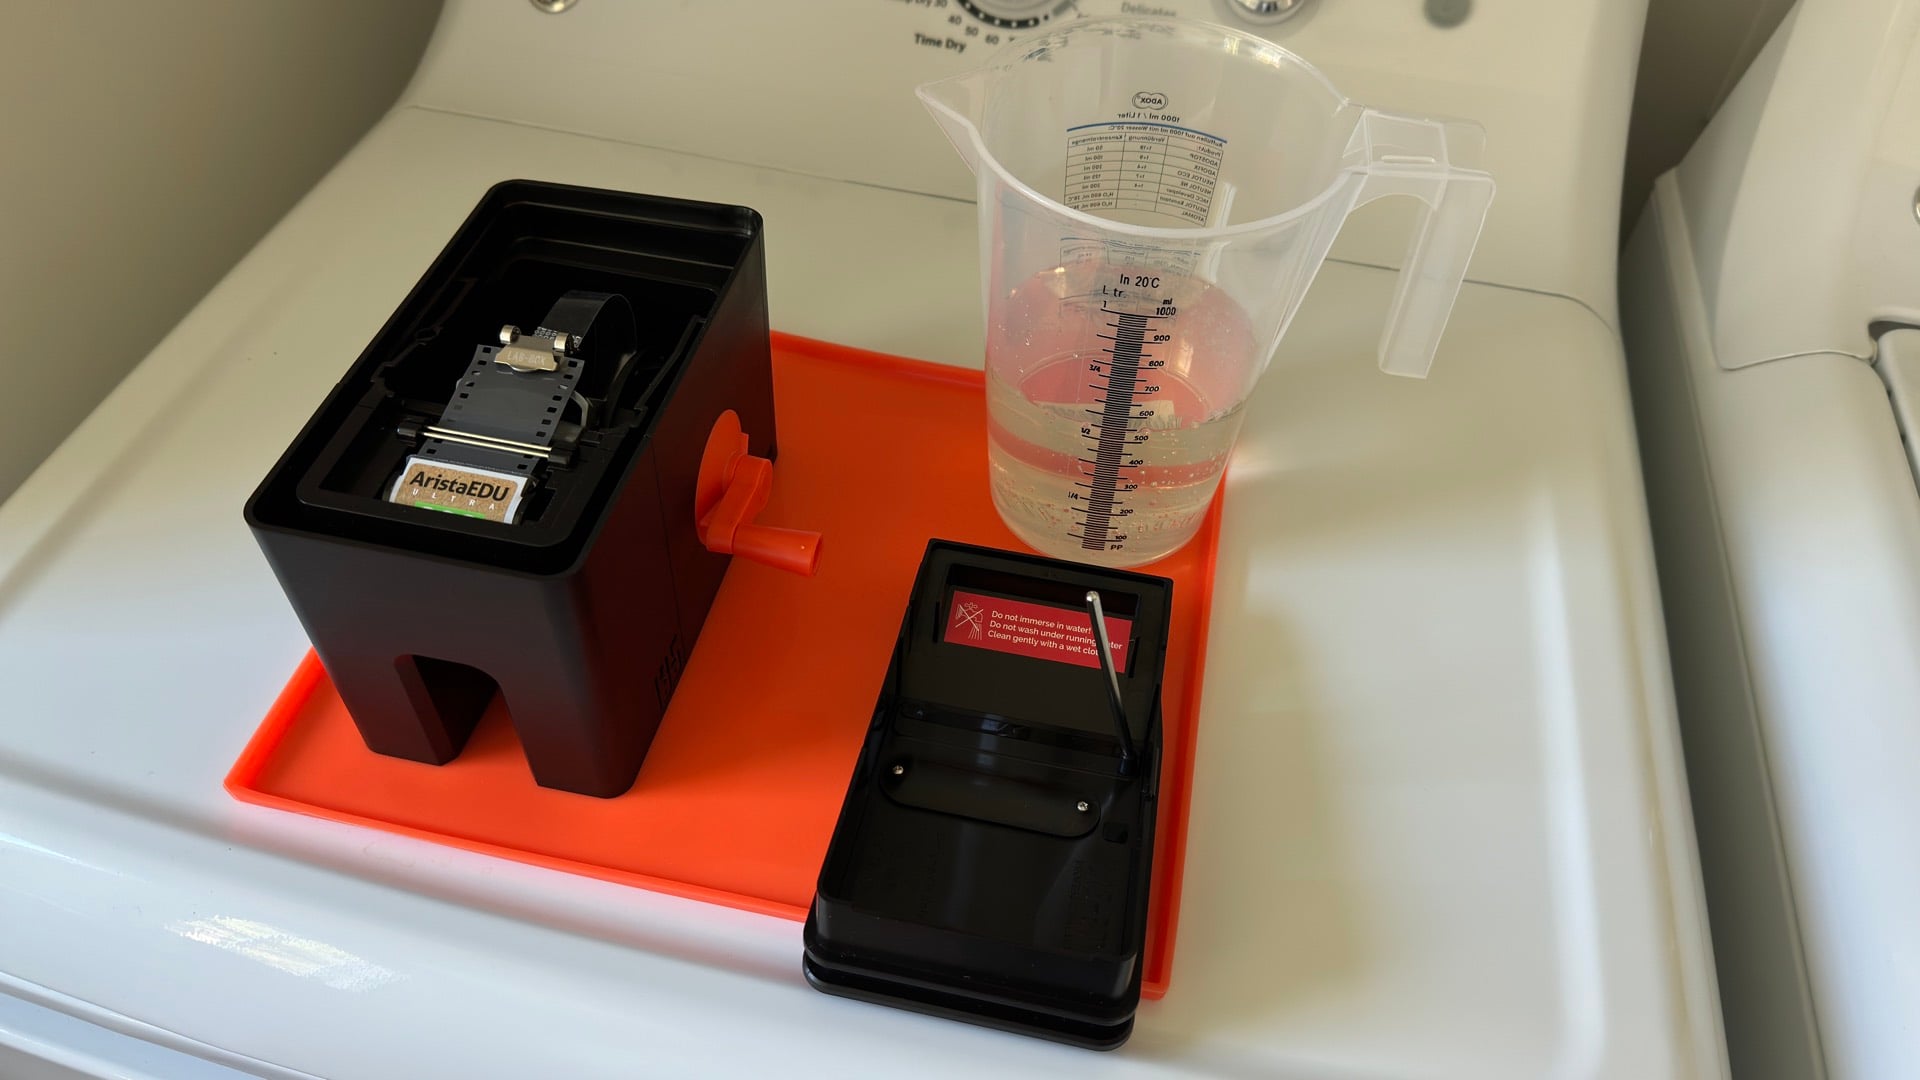
Your basic workflow for using the Ars-Imago system, CineStill Df96, and Ilford Wetting Agent follows these simplified steps:
- Ensure that all chemistry and water is at the same temperature.
- Load the film into the Lab-Box.
- Pre-wet the film with 410ml of water.
- Turn the crank for 15 seconds and discard the water.
- Pour 485ml of CineStill Monobath into the Lab-Box and start your timer (this is usually 6 minutes).
- Lift the Lab-Box slightly above the countertop and drop it 3 times (this will loosen any air bubbles that might be clinging to the film).
- Begin your chosen agitation cycle (usually 30 seconds initially + 10 seconds every minute).
- Time’s Up; drain the monobath back into the CineStill Df96 container.
- Pour 410ml of water into the Lab-Box and begin continuous agitation and start the timer (this is usually 10 minutes). The Lab-Box lid can be removed at this time.
- Discard the water after one minute and pour another 410ml of water into the Lab-Box. Repeat this process, pour-agitate-discard, throughout the 10 minute washing cycle.
- [Optional] After the 10 minute washing cycle is complete, pour 410ml of water into the Lab-Box and add one capful of Ilford Wetting Agent (yes, the instructions say two capfuls, but one is ideal to prevent foaming).
- Agitate the film reel for 30 seconds.
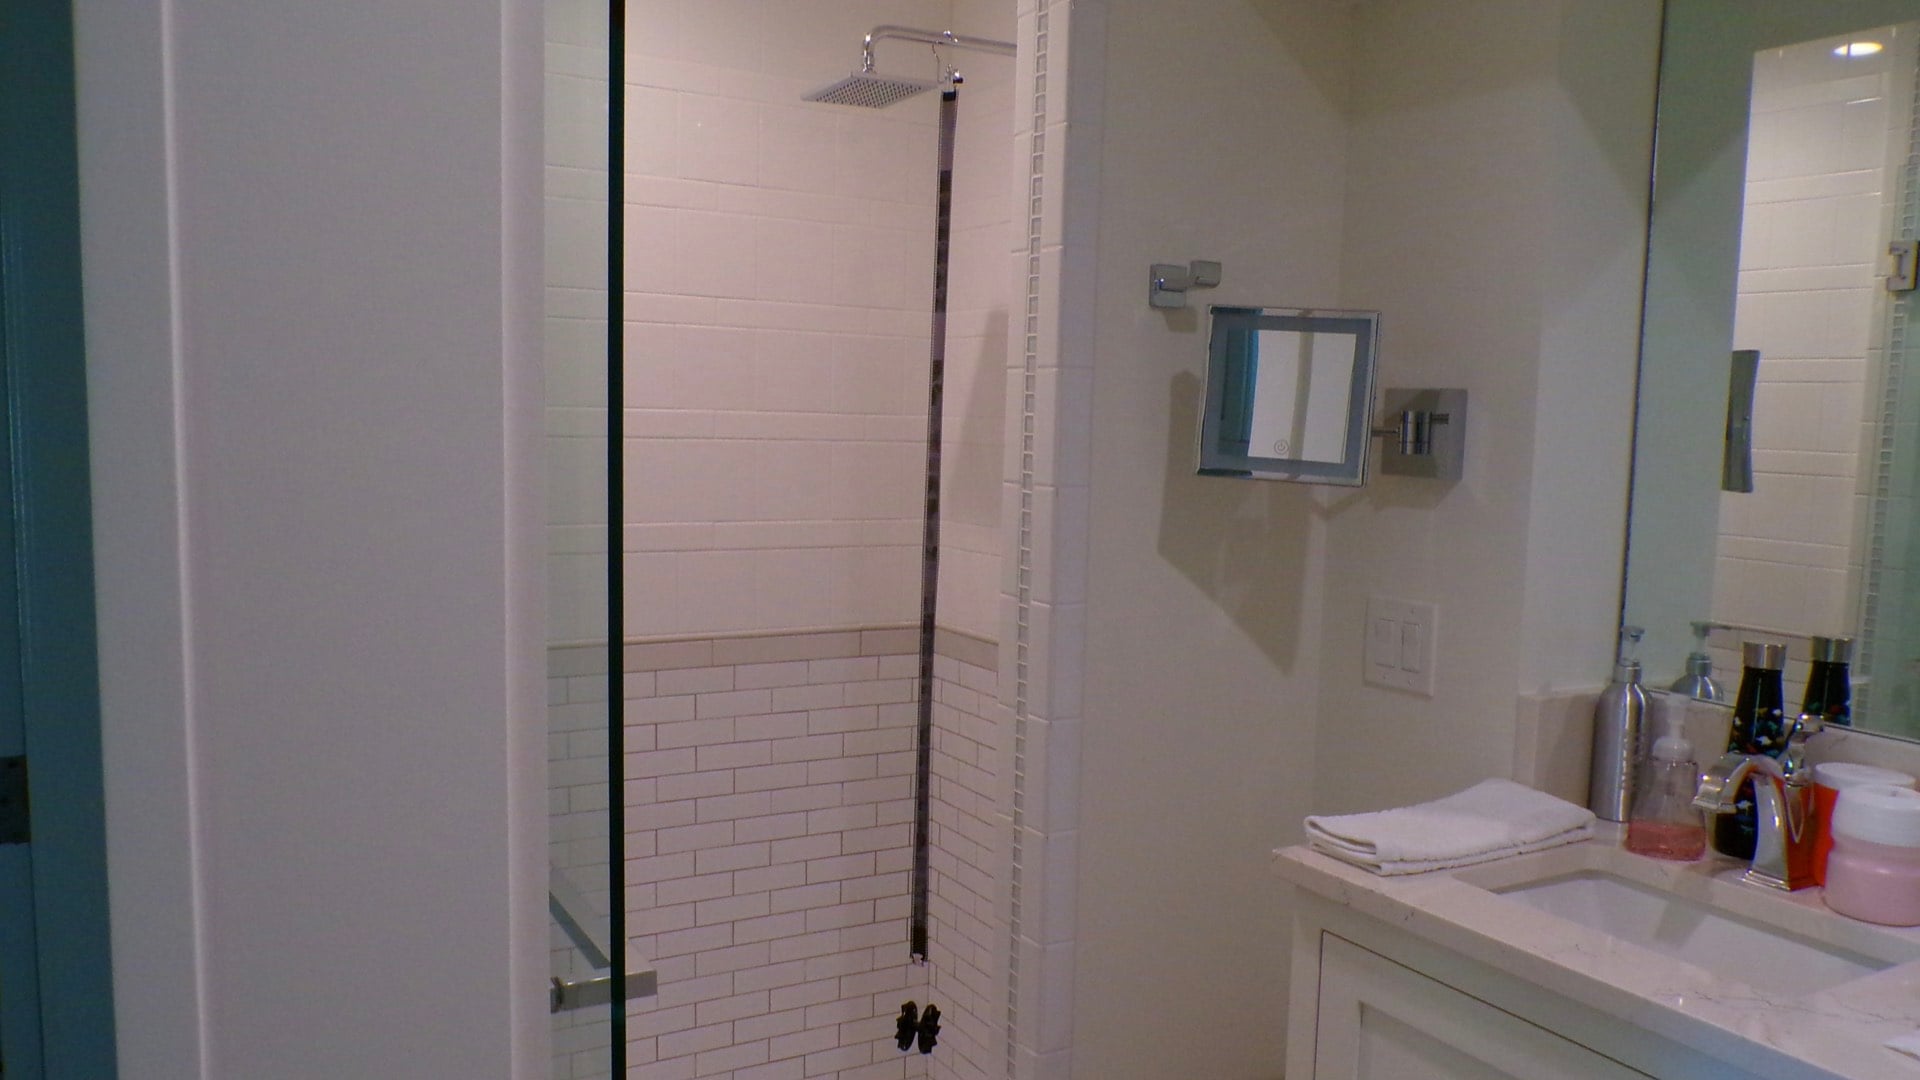
- Remove the film reel and attach the free end of the film to a clothes hanger clip and hang it from your bathroom’s shower head. Leave the reel’s film clip attached to the other end of the film to act as a weight.
- Dip two fingers into the remaining wetting agent + water in the Lab-Box tank and squeegee the entire length of the film between your fingers. Even if you elect to not use a wetting agent, still dip your fingers in water and squeegee the film for reducing the formation of water marks.
- Let the film dry while you meticulously wash and clean all of your equipment.
And that’s it, in less than one hour you will have processed one roll of film. Even better than the simplicity afforded by the Ars-Imago system, the CineStill Monobath is a reusable mixture. You can easily expect to develop 10 rolls of 35mm film with one container of this monobath. In fact, by faithfully following the CineStill Df96 instructions you can gradually extend the development time and process an additional 6+ rolls of film. By using this technique, you will be able to develop a theoretical 16+ rolls of film from one liter of CineStill Monobath. Awesome!
Thank goodness the Lab-Box isn’t limited to only developing black and white films, it can also be used for color C-41 processing, too. While slightly more cumbersome in the required chemicals along with an extended timing sequence, having this flexibility in using the Lab-Box with a wide variety of film emulsions helps to ensure this product’s lifetime value for every film photographer.
[Update: During the “development” of this article, Ars-Imago announced a new motor drive for the Lab-Box, called M-Box. This portable, rechargeable accessory replaces the crank on the Lab-Box. There are three pre-programmed agitation speeds built-in M-Box: continuous-slow, intermittent, and continuous-fast. M-Box is priced at 139 EUR or roughly $161 USD.]
Enjoy.

David Prochnow
Our resident “how-to” project editor, David Prochnow, lives on the Gulf Coast of the United States in Ocean Springs, Mississippi. He brings his expertise at making our photography projects accessible to everyone, from a lengthy stint acting as the Contributing How-To Editor with Popular Science magazine. While you don’t have to actually build each of his projects, reading about these adventures will contribute to your continued overall appreciation of do-it-yourself photography. A collection of David’s best Popular Science projects can be found in the book, “The Big Book of Hacks,” Edited by Doug Cantor.


Join the Discussion
DIYP Comment Policy
Be nice, be on-topic, no personal information or flames.