How to change the colour of anything in Photoshop using Gradient Maps
Feb 23, 2020
Share:
Most of us have used Gradient Maps in Photoshop at some point. Most commonly to aid in black and white conversions. They offer a lot of control and power for black and white conversions and lets us get some nice contrast and done that there regular Black & White adjustment layer doesn’t.
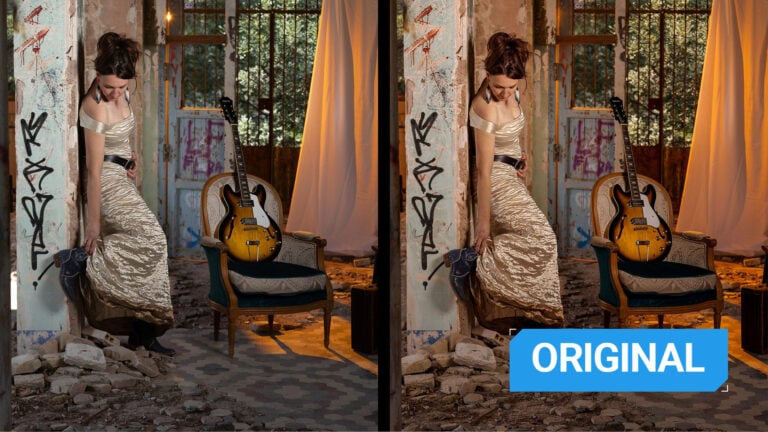
But did you know that you can use it to change the colour of just about anything you want in Photoshop? Taking a break from the more philosophical videos he’s been posting lately, Sean Tucker has released a tutorial on how he uses Gradient Maps to recolour elements of photographs – and it’s let me see the tool in a whole new light.
If it’s not something you’ve faced before, you might wonder why you want to recolour things in Photoshop.
Well, for products it’s often quite common. You might have a client come to you with a product that’s available in 20 different colours. And if it’s a big expensive product, like a piece of furniture, that can get prohibitively expensive for your client and makes the logistics difficult to transport things in and out of your studio, not to mention the time it would take to shoot them all. Being able to swap out the colours in Photoshop and match them to material swatches is faster for you and cheaper for the client.
Perhaps you don’t do product photography, but you do shoot portraits or boudoir. Perhaps one piece of clothing doesn’t quite match the colour of another where it’s supposed to and you need to give it a little nudge. Or maybe their makeup’s a little overpowering and attention-grabbing. The method Sean describes allows you to change them quite easily, but with a lot of control and a very natural-looking final appearance.
Essentially, with this technique, you’re making a selection around the area you wish to change the colour of – Sean uses the Pen Tool, although there are many ways you could do this- and then you just add the Gradient Map adjustment layer using that selection as a mask. From here, you just make a three-point gradient going from black, through your desired colour and then to white, allowing for the full range of brightness.
There are other ways to change the colour of items in Photoshop, of course, but this method offers a lot of control that you wouldn’t have with other techniques. It even allows you to increase or reduce the glossy appearance of surfaces, or add in a little fake fill light to remove contrast in the shadows.
Not every method is going to work for every situation, and there are going to be times where it’s quicker and easier to use another technique, but this one is definitely worth experimenting with.
What’s your favourite method for changing an object’s colour in Photoshop?
John Aldred
John Aldred is a photographer with over 25 years of experience in the portrait and commercial worlds. He is based in Scotland and has been an early adopter – and occasional beta tester – of almost every digital imaging technology in that time. As well as his creative visual work, John uses 3D printing, electronics and programming to create his own photography and filmmaking tools and consults for a number of brands across the industry.








Join the Discussion
DIYP Comment Policy
Be nice, be on-topic, no personal information or flames.
4 responses to “How to change the colour of anything in Photoshop using Gradient Maps”
Easy: Curves.
Great content! Super high-quality! Keep it up! :)
Informative on the gradient maps portion, but if you’re using the pen tool, why are you making all these unnecessary layers instead of just saving the individual paths?
these tips are perfect I didn’t really care when it comes to paying attention to details when retouching. Lots of learnings in this Video Tutorial. Thanks, good job and keep it up.