


How To Build A Beauty Dish
Jul 16, 2012
Udi Tirosh
Udi Tirosh is an entrepreneur, photography inventor, journalist, educator, and writer based in Israel. With over 25 years of experience in the photo-video industry, Udi has built and sold several photography-related brands. Udi has a double degree in mass media communications and computer science.
Share:

A beauty dish provides a light pattern that is kinda between what you get from a bare flash and a softbox. Beauty dishes are an awesome modifier tool, but they have one caveat – price. While branded beauty dishes are kinda on the higher range of modifiers when it comes to costs, they are pretty easy to build for a few dollars if you have a pair of good hands and the time to drive to a close by home depot.
What You’ll Need
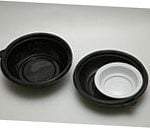
- Metal Salad Bowl (I used a 50cm one)
- Electric box for plaster walls
- A Round wall guard – 12 cm across.
- 3 machine screws (8 cm long) and 6 bolts
- 3 small springs – 8 cm long
- Epoxy glue
- Velcro
- White and black spay paint
Tools
- Drill
- Dremel
- Sand paper
- precision knife
Do Not Panic!
Step 1 – Preparing The Bowl
Sand the bowl on both side so the paint will stick and apply a thin layer of the white paint on both sides. Let it dry for 15 minutes.
Apply a second coat of white paint on the inside. If it is not “white” enough, apply a second third layer of paint. Generally speaking it is better to apply more layers than to apply one thick layer.
In a similar manner paint the external side black. This will have no impact on the lighting quality, but it will make the mod look slicker.

Step 2 – The Reflector
I am using a transparent wall guard here, so I’ll describe the process of sealing and coating it, but if you find anything similar that is white to start with – you can skip this step.
Sand the wall guard on both sides and apply a two coats of white. Let it dry and apply two coats of black. And then. two coats of white again. WE are doing all this painting to make sure the reflector is light tight. As I said, get something white and save the trouble.
Now paint the flash box (the plaster wall box) black on the outside. Again, this is to add to the slickness factor.
Step 3 – Preparing The Flash Mount
After the paint is completely dry mark the hole that will accept the box and the flash on the bowl. It is always better to go just a bit small, because you can always make it bigger.
After marking the flash box, cut it out with the dremel. Use safety goggles when cutting the aluminum, it can get pretty nasty if it hits your eyes.

Step 4 – Preparing The Reflector
Drill three hols in the reflector. Use appropriate drills so the holes will match the diameter of your screws. Place the reflector on the bowl and copy-mark the three holes from the reflector. Use the mark you just made to drill the bowl.
Step 5 – Attaching The Box For The Flash
Using the precision knife, cut the bottom of the electrical box.
Generously apply epoxy on the edges of the hole on the bowl and attach the box. Slide the box in and let the epoxy dry

Step 6 – Strap
Use some of the epoxy to glue the rubber strap with the hook side to the back end of the box and glue some of the loop strap to the other side of the box.


Step 7 – Attaching The Reflector
For each of the holes slide the reflector on the screw and tighten it with a nut. Now slide the spring and thread the entire thing through the holes in the bowl. Lock it down with an extra nut.

I used bolts and springs for this, but after finishing the job, I think a similar solution using more nuts to set the location of the reflector will work just as well, and may be easier to implement.
Step 8 – Behold and Shoot!


There you have it, a super home made beauty dish. Here is the light pattern, see how fast the light falls off.


And here is a picture taken with the dish.

About The Author
Eden Gabay is a fashion photographer based in Israel. Check out his work on his website or follow his page on Facebook.

Udi Tirosh
Udi Tirosh is an entrepreneur, photography inventor, journalist, educator, and writer based in Israel. With over 25 years of experience in the photo-video industry, Udi has built and sold several photography-related brands. Udi has a double degree in mass media communications and computer science.


Join the Discussion
DIYP Comment Policy
Be nice, be on-topic, no personal information or flames.
One response to “How To Build A Beauty Dish”
When I built mine, the flat white was the best thing to distribute light evenly. Check out my dish. I got the idea from Todd. http://www.blog.jadefotographix.com/diy-beauty-dish/