How I shot Sigma’s promotional photos for the Sigma fp
Feb 27, 2020
Share:
One of the things I enjoy about photography is creating product images, my good friends at Sigma Imaging UK recently asked me to create some images for a new promotion. I wanted to take some time to go over how I created these images in the hope to inspire others.
The first step was to visualize a way to display the promotion creatively since it was two different options of free accessories you could claim when buying the camera I decided to create two images of each option with the Sigma fp in the frame. This way people can see exactly what was on offer.
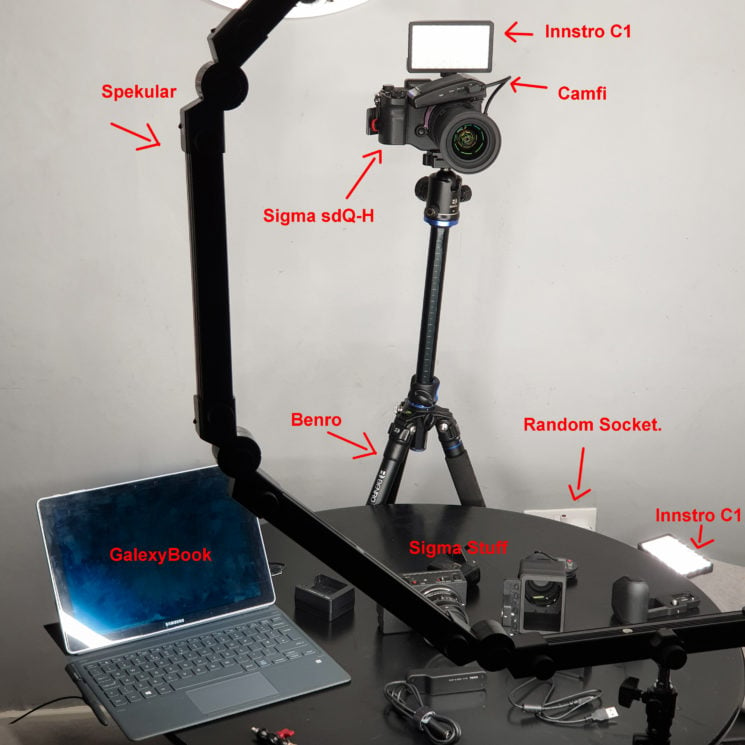
To create this image I used two sets of Spiffy Gear Spekular LED lights, I love these lights not just because of the very nice light quality but because they are modular. I set them up as an octagon to emulate a massive ringlight for this shot, something I did at a recent Sigma event in London to create portraits like these that were used on Sigma UK’s Instagram.
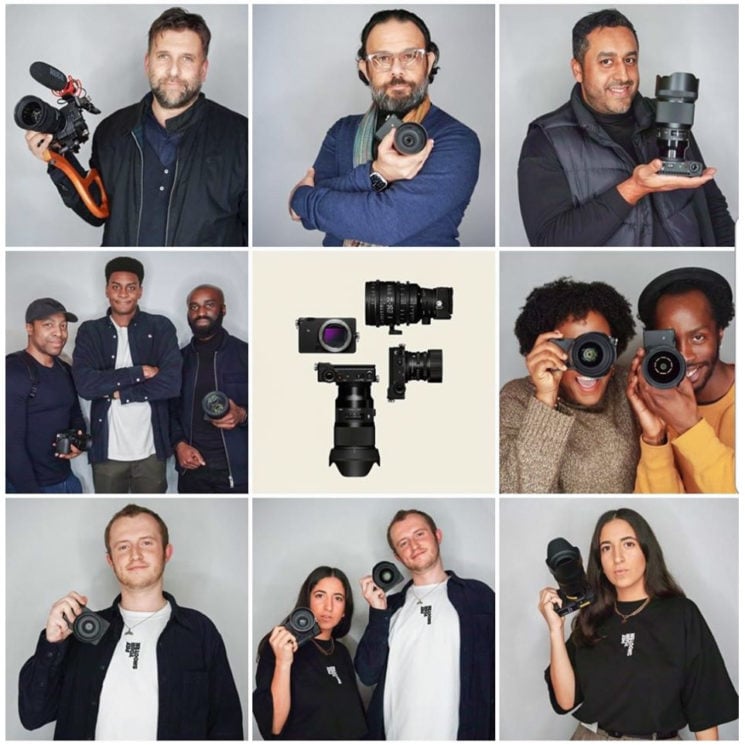
But instead of using it to light the subject from the front as I did on the images above, I will be using it to add a nice edge light around the back of the subject. The Spekular lights will also be bouncing off the wall for fill but I felt a little extra was needed so I also used two Innstro C1 lights. One on the camera and one sitting on the chair to bounce off the wall as you can see here.
The camera I’m using for this is the Sigma sdQ-H with the 18-35mm f1.8 Art lens tethered via CamFi to my laptop so I can actually see where things will be in the frame as the back of the camera is facing the wall, but any camera will work and one with built-in wifi or even a flip-out screen would be easier.
Check out the lovely highlights the spekular is making on the lens!
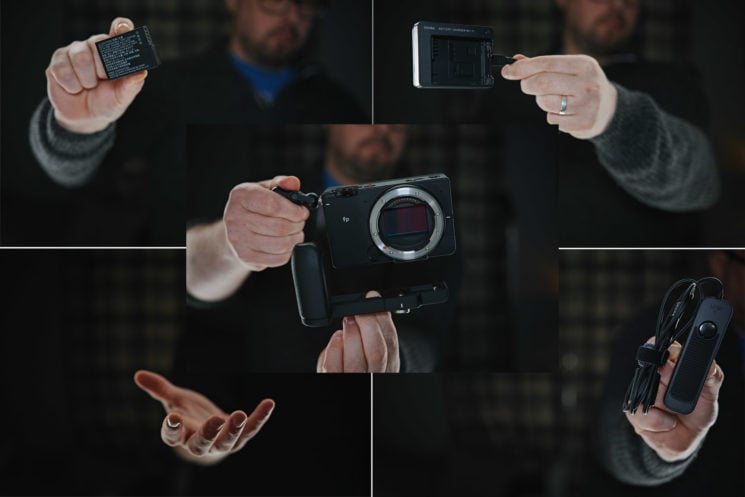
Anyway back to the shoot, there are two way’s to shoot something like this, the best way with less post work would be to rig all the parts in place using string or other things, this takes quite a bit of space, time and more rigging than I had on hand though so I went with the other option to physically hold each part and fix it in post. Here you can see all the frames I used.
Now that I had the images I was going to use, it was time to load them into Photoshop by using “File/Scripts/Load Files into Stack”.

This will create a new file for you with all the images placed in there own layer ready to be edited, its best to rename each layer so you know what it contains. Here you can see the layers I used.

Now that you have all your images loaded you will want to start creating masks, for people new to Photoshop a mask is a grayscale selection that simply shows anything in white, hides anything in black with anything in between becoming transparent.
To create the mask I selected the layer I wanted to work on and using the quick selection tool (W key) I made a selection around the component I wanted then pressed “add a mask” which is the little rectangle icon with a circle inside to the right of the FX icon in the layer panel.

Here is what the mask looked like.
 As you can see only the camera is in white while the rest is black, merely selecting the mask layer and painting white/black onto it will reveal or hide what you need. This can be handy to make and adjustments where the quick select didn’t quite work correctly.
After all the mask’s where made I used the Free Transform tool (Ctrl + T) to move and rotate the objects to suit.
Since I had masked all the background elements out of my image and had no base image to use in the background, I needed to create a background layer for them to sit on. To do this I selected the “Gradient Tool”, then selected “Radial Gradient” and pressed the middle of the image and stretched it out to the edge.
This uses the foreground and background colors selected to then fill the area, I used black and a dark grey. Which gave me the results on the left. I then added some noise to smooth out some of the banding and got the image on the right.

Showing the background and all the layers should give you the final image that after a few tweaks to contrast and fixing a few of the highlight edges that my skin color contaminated looks like this.

As you can see I also cleaned up my finger inside the grip, I did this using the healing brush, after finishing this version I also created another for the second option people could pick, this was much simpler as it only had three parts.

I hope this has been helpful and if you really are interested in the Sigma fp deal I also wrote about my thoughts on both of these options over at the Sigma Imaging UK Lounge.
Paul Monaghan
Paul Monaghan is a creative photographer based in Scotland. Paul is on of the leading landscape photographers in the UK and is an authority on ND filters in the industry. Among others, Paul is a Sigma UK Ambassador.










Join the Discussion
DIYP Comment Policy
Be nice, be on-topic, no personal information or flames.