


How to give your subjects a total hair makeover in Photoshop
Sep 8, 2017
John Aldred
John Aldred is a photographer with over 25 years of experience in the portrait and commercial worlds. He is based in Scotland and has been an early adopter – and occasional beta tester – of almost every digital imaging technology in that time. As well as his creative visual work, John uses 3D printing, electronics and programming to create his own photography and filmmaking tools and consults for a number of brands across the industry.
Share:

Hair is one of those parts of retouching that I least look forward to. It just takes so long to get things looking perfect. Especially if the image is from a shoot that didn’t have a hair stylist on set. If only I could shoot bald models, and composite hair in post, that would make life so much easier.
Well, thanks to Jesús Ramirez at the Photoshop Training Channel, we can! In this video, Jesús walks us through the process of giving a model a completely new hair style in Photoshop, even if they didn’t have much hair to begin with.
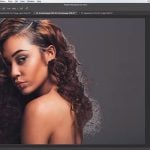
There are a few caveats with this technique. It helps to have the angles of the head to be quite similar, as well as the lighting. Ideally, the hair and skin tone should also match fairly closely. It isn’t vitally essential, but it does make the compositing go a whole lot easier. You’ll also want to use images of a similar size, so that the resolution and detail matches in the final shot. These are the two images that Jesús chose to combine.

You can see that the lighting matches quite closely, with the bright specular highlight on the camera-left side of both images. The first job is to create a very rough selection encompassing the hair, and mask it off. Then convert it into a smart object so that you can resize at will without losing the original detail. Drop the layer’s opacity down, and then scale & position the hair so it approximately fits the subject onto which we wish to place it.

One the hair is positioned, it’s time to start matching the skin tones a little better. Jesús does this with a Selective Color adjustment layer. He targets the reds, where the skin usually sits, and adjust the sliders to match the two in both tone and contrast.


Now that the two are more closely matched, Jesús double clicks on his smart object hair layer to further refine the mask. There’s various ways this can be done, but here we see channels being utilised for this process. With the masking complete it’s time to help the hair better fit the model. After all, not everybody has the same shaped head. So it’s time to go to the liquify tool.


Finally, another mask on the smart object itself helps to blend the areas between the hair and the underlying model smoother. With a final result that is very convincing.

John Aldred
John Aldred is a photographer with over 25 years of experience in the portrait and commercial worlds. He is based in Scotland and has been an early adopter – and occasional beta tester – of almost every digital imaging technology in that time. As well as his creative visual work, John uses 3D printing, electronics and programming to create his own photography and filmmaking tools and consults for a number of brands across the industry.


Join the Discussion
DIYP Comment Policy
Be nice, be on-topic, no personal information or flames.
2 responses to “How to give your subjects a total hair makeover in Photoshop”
thanks for tips
Or like DONT DALD IS BEAUTIFUL plus made him look like a yuppy lol