


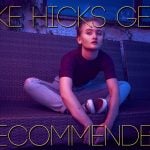
DIYP reviews RGG EDU’s Jake Hicks gel class
Dec 14, 2016
Joseph Parry
Joseph Parry is a Commercial and Editorial photographer based in the UK that provides cinematic photography and ounces of humour. Follow him on Instagram for stories and kick ass imagery.
Share:

I knew the second I had the email come through offering me the chance to review Jake’s latest tutorial that I was going to be in for a marathon of content. RGG EDU are renowned for 20+ hour slabs of content and this is the first time I’ve delved in with a professional capacity for writing about it.
Don’t get me wrong here, I literally own over 500GB of tutorials I’ve collected from CreativeLive sales . The like over the last 2 years so I’m no stranger to sitting in front of a screen for 8 hours+ a day studying.

There’s definitely something commanding of seeing 22+ hours of content slapped onto a product though. It’s a LOT of time to commit to. So I’m here to break it down for you and help you work out; is it worth your money? And more importantly, your time.
I’ve had the pleasure of reviewing Jake’s Gels personally after receiving them from Amersham Studios for such a purpose. And I’ve had nothing by success and reliability with them, so honestly I was expecting a decent tutorial ahead! (see the full gel review here)
In the tutorial Jake manages to cover (with gels):
- Flare shots
- Beauty shots
- Edge lighting
- Key and fill balance
- 2 Locations and 4 shoots
In each section Jake very clearly lets you know the gear he’s using, the issues he’s facing when on set and how he intends to fix it. There’s a lot to be learned here, I actually picked up a 22″ silver beauty dish because of this tutorial.

Jake takes you through:
- separating lights correctly,
- Distances from the background,
- Distance from subjects,
- How to change Saturation, Contrast and Evenness of light.
It really is a pleasure to watch the guy on set working through the problems.
As a huge fan of composition and analysing shots it’s clear that Jake isn’t just a “shooter” but someone who understands composition. He knows the typical traits that are required in order to make a great pictures. Such as Edge Flicker to GAC (Greatest Area of Contrast), Isometric posing and more.

Jake takes you through his shot process from start to finish, including the way he processes an image. It’s always genuinely interesting to see how everyone else out there approaches the final image. And man, Jake has some SERIOUS time saving shortcuts.
The results are awesome and for the time it takes him to achieve? Godsmacking actually. He has a great eye for working with the “over the top” way and then reducing the opacity to bring it back to reality. I also work a similar way, pushing things to the extreme and then dialling it back.

On the first location Jake takes us through a house / hotel suite style set and takes us through some valuable tips (such as wearing bags on your feet to keep the carpets clean!). Lots of little tips and tricks thrown in there that extend not only to the shooting side but also the behavioural side too.

I loved the way Jake managed to take this natural light window and used some basic camera adjustments combined with the gels to make a colourful palette. It was a genuine pleasure watching him struggle here.
To clarify that last statement, you learn very little when everything runs smoothly, and in this section Jake had a really tight shooting space. With such a limited composition space, I was literally sat here wondering how the hell he’d get usable shot.
Watching him run through the issues of the lamp, the picture, the models position and pose etc was just a fantastic learning experience. It really is moments like this that you learn a lot about keeping cool and being able to adapt and change things on the fly.
Jake is a true professional and a very relaxed teacher, a pleasure to listen to!

This was another setup where Jake had to make adjustments to the scene in order to make it come together. Like last time it was a genuinely welcome addition to the experience. Being able to watch somebody analyse a scene, fix the issues / distractions and then come out with a final image is just so satisfying.
Most of Jake’s setups seem to be 3/4 lights (a background, fill, edge / hair light and the key).
It does make you think it’s out of reach for the average shooter at first. When you think that you can pick up 3-4 YongNuo flashes for literally £150 or so that’s a serious reality check that you can do this on a serious budget.

This shot and the first Beauty one are my two favourites from the workshop (there are a few more finals not shown here). I love this one because it reminds me of Bear's Den – Red Earth and The Pouring Rain album cover. Which in turn reminds me of the movie Drive.
I love that style and combination of colours.
To summarise and answer a few final points;
- Did I learn anything? Yes!
- Did I learn $300 worth? Yes!
- Is Jake easy to learn from? Yes!
- Is an entire workflow covered? Yes!
- Do I feel comfortable using gels in the future? Yes!
- Did Jake inspire me to buy a beauty dish? Yes!
- Should you buy this? Y… If you have an interest in learning how to light with gels, from a great teacher who doesn’t become tiresome, too much or boring. Then absolutely YES!
Believe me, if the tutorial wasn’t worth your time, I would tell you such. I do not make a single penny or get any benefits from this tutorial selling well because of the glowing review.
If you’ve followed me over the last 6+ months with DIYP then you’ll know that every Sunday I post something out there to you guys to look over and get excited by or to improve your craft.
I’m a teacher at heart and I love sharing.
If you want to learn specifically about gelled lighting in a really killer style this is definitely worth your time.
*Top tip: Watch it at double speed to make it 11 hours worth of content if you are short on time!
Breakdown:
- Audio: 8/10
- Pacing: 8/10
- Presentation: 10/10
- Teacher: 10/10
- Value: 9/10
Overall: 9/10
[Colored Gel Portraits & Retouching with Jake Hicks | $299 @ RGGEDU]

Joseph Parry
Joseph Parry is a Commercial and Editorial photographer based in the UK that provides cinematic photography and ounces of humour. Follow him on Instagram for stories and kick ass imagery.


Join the Discussion
DIYP Comment Policy
Be nice, be on-topic, no personal information or flames.