


How I Composited An Elemental Sorceress Photo – A Walkthrough
Oct 26, 2015
Share:
I’m excited to be showing this video tutorial to you guys. One of my shoots have been cancelled and we already had everything in place and so we set out to create this photo. Aside the actual photo (which you can see below), I’ve been given the opportunity to work with some awesome textures from the DIYP texture store.
Of course there’s a lot of resources to get your textures and backgrounds from, and for lots of reasons it would be wise to create your own textures and backgrounds. But every now and then you’re inspired with an idea that just needs to be made, and you don’t have the time to shoot skeletons, lens flares, or go to Venice to make it happen. And maybe your a digital artist who doesn’t have the means to shoot all the elements you need.
Then it’s nice to know there’s a place where you can find practically everything you need to work with. I’m always on the lookout for good quality textures to use, and these sets are amazing. (I’ve even helped develop some myself ;-) Check check out all the textures I used here! But first, here is the breakdown:
So this video is actually born out of randomness and some bad weather. I had planned a photoshoot with a model and a good friend, outside, in the forest, with a light dress…All was well planned, and we were all excited to go out and shoot….but then the weather turned, rain was due and the temperature was dropping fast. And our model was just recovering from a cold, so we did the sensible thing and called it off, that’s how we roll ;-)
But since the timeslot was planned and we didn’t have anything else to do, we put out a casting call for some indoor shooting with actually no idea what we were going to shoot conceptually.
I love randomness like this, since it frees up your mind to just go with the flow, and see what happens naturally. And it leaves room to experiment, without having anyone rush you.
So both me and my friend had some global ideas and experiments we wanted to work out, and just have some great fun.
I didn’t know the model that well, but to my surprise she had an amazing face and character to work with, and new ideas soon came up.
I’ve been dying to work with my new awesome light tool (which you can see in the original image), which is just a pingpong ball attached to a makeshift snoot on my LumoPro flash. This way I can add very controlled “magic” light on my subject, and since it’s a blue ball, it gives off an even more magical blue glow on my model.
The setup isn’t perfect, it could use a higher light output, but that’s where experimentation comes from right.
We set up in the main factory hall near my studio, and worked out some amazing images. And I’d like to walk you through the compositing process of this image.


The initial idea is quite clear, I have this sorceress, with a blue glow above her hand, so she must be conjuring something.
Now all I need is to add the thing she’s magically conjuring up.
Here’s the video breakdown:
- 0:06 First I’ll start with a first color grade, to tone down the background and make the model pop to the foreground. For this I’m using a Gradient Map Adjustment Layer set to overlay, and lowering it’s opacity to blend it better in. The gradient goes from black to a cold dark blue to white.
- 00:09 I then paint out the foreground elements in the layer mask of the gradient map layer. This way the red tones come back in, and the different color wash helps to separate the model from the background even more.
- 00:20 Naturally I need to loose the ping pong ball, so I’m clone stamping it out.
- 00:27 Now its time to add some magic. Instead of just adding random light effects, I wanted her to conjure up a creature from the other side, so I used the Skeleton Pack to select a nice looking animal skeleton. I paint out the stand and use a color range selection to roughly select out the skeleton.
- 00:44 The skeleton model is just standing there, which isn’t very magical, so I need to bend it to my will, the warp tool isn’t the best option for this so I’m using the Puppet Warp (image>puppet warp), which gives me better control over the deformation, by adding “pins” to the parts I need to change. By adding more “pins” you can pull and stretch a layer, and control the deformation.
- 00:55 To add more magic, I want some particles and dust to fly around. For this I’m using the Dust Pack, which was perfect for adding smoky looking particles swirling around.
- 01:12 To add more magicall elements, smoke is always a good way to go, so here the Smoke Pack came in handy to add to the magic. Setting the smoke layer to “screen” will blend it right onto the image. Using a layer mask to blend it together.
- 01:31 Now for some fire, I didn’t want flames, but sparks to contrast the overal blue tone of the image. The Fire Pack has exactly the sparks and dots I needed. Once again I set the layer to “screen” to remove the dark parts of the layer, and I’m left with only the glowy sparks. Using a layer mask again I can paint out any unwanted parts. I also found an image of some light-painted fire swirls, and I thought they’d make a good conjuring ring to add to the image. Here I didn’t know where to put it at first, so I experiment with placement on the image and finally settled on the right hand.
- 02:20 I noticed there was also a Slime Pack and I wondered what that would do to the image, perhaps add it to the skeleton, as a sort of ectoplasma materializing from the spell. Again “screen” is your friend. The slime was a bit too sharp, so I blurred it down to fit the overal photo.
- 02:40 At this point I’m thinking stars and particles to build on the magic. For this I thought one of the lens flares from the Sci-Fi Lens Flare Pack would be great. I selected one, made a new layer from it, inverted and desaturated and selected it, and made a Brush Preset from it (Edit>Define Brush Preset). This will give you a stamp that you can stamp on the image. Using the brush setting and tinkering with Shape Dynamic and Scattering, I’m able to manipulate the distribution of the stamps over the image. Another trick I use to have the star/sparkles pop a bit more is to put some FX on the layer I’m painting the sparks on. Playing with inner and outer glows, will give it just a little bit more randomness.
- 03:30 There are some yellow lines in the background floor, that I found distracting. So I wanted to get rid of them. And add some gritt to the floor as well. Just as a little detail. Using a Grungy image from the Decay Archive Texture Pack. Placing it over the floor and removing/clone stamping all the unwanted parts.
- 04:33 Now to finish the magic, I’m in need of some extra glow. The Light Rays pack is perfect for this, there are some very cool looking rays in there to add more ambiance to an image. Again, using “Screen” and using Layer Masks, I blend it into the image. The ray-image I’m using didn’t have the color I wanted, so I made a solid-color layer above it, then set it to a Clipping Mask and its blending to “Screen” as well. Which gives you control over the color of the rays.
- 04:14 Now its time for some dodging and burning. The image is coming to completion. I just want to highlight some parts, and darken other parts. And perhaps add some veins to her face as well. This is some powerful magic she’s casting.
- 04:45 And finally to finish it all off, I love to play in Nik Tools Analog Efex and see what happens when playing with the different toning options. I usually just play till I find a pleasing toning aesthetic.
I do hope you find this article insightful and may it help you get started using the amazing textures and images in the DIYP texture store.

Roderique Arisiaman
Roderique “Dracorubio” Arisiaman is a professional photographer, photoshop wizard, and artist, using photography as his canvas to create beyond reality imagery and stories. you can follow Dracorubio on his site, facebook and G+ account.
Related Posts
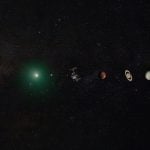 This solar system photo was composited from photos shot from a photographer’s backyard
 A complete walkthrough on registering your new Christmas drone with the FAA
 This simple product photography walkthrough offers everything you need to know to get started in product photography
 Revisiting Shinichi Maruyama’s “Nude”; 10,000 Photos Of Nude Dancers Composited Into One
Join the Discussion
DIYP Comment Policy
Be nice, be on-topic, no personal information or flames.
3 responses to “How I Composited An Elemental Sorceress Photo – A Walkthrough”
Absolutely beautiful, inspiring work. thank you for posting! :-)
Here my Halloween pic speed-art! :)
https://www.youtube.com/watch?v=hk1hrMfgIA4
Stefano, this is awesome. I would love to see you enter your contest. it involves our awesome textures and $250 to be won: http://bit.ly/1Wf1mkK