


Building An Ultra Violet Flash For Black Light Photography
Aug 31, 2015
Gvido Mūrnieks

We love it when our readers get in touch with us to share their stories. This article was contributed to DIYP by a member of our community. If you would like to contribute an article, please contact us here.
Share:

Back in May I got collaboration offer, from a body painter, to make photo session with airbrushed models. This offer gave me the incentive, to finally try out blacklight photography, what I wanted to try out for years now.
After searching through web, I found, that blacklight photography is technically rather complicated process. The main obstacle of blacklight photography is the light source. Generally, there are two main options, for UV lighting. Ultra violet constant lighting and ultra violet strobe lighting:
- The problem with ultra violet constant lighting is low light output. For example: even when using a pair of 400W UV lights, it would require to use relatively high ISO and low shutter speeds, that wouldn’t work with my old D5100.
- The other option, black light strobes, solves the problem with low shutter speeds and high ISO, but the problem is in cost. For example, a single Broncolor UV Attachment costs more than all of my camera gear combined.
At this point I was rather disencouraged, with these options. But with a lucky coincidence I got my hands on old soviet UV flood light, that used ultra violet filters, not UV bulbs.

After searching some info about these filters, I found, that it is possible to purchase filters like these on AliExpress(It is possible to find industrial vendors, by googling: “Ultraviolet Transmitting, Visible Absorbing Filter”).
How do these filters work: Most of lights emit light in visible spectrum(390-700 nm) and some light in ultraviolet spectrum(300-400 nm). These filters simply block out visible light spectrum and allows only ultra violet light to pass through. This is what previously mentioned Broncolor UV Attachment does.
After this long preface, let’s get straight to the point – how I made ultra violet strobes, for blacklight photography.
Here are the necessary supplies:
- A flash(I used a pair of old FIL-105)
- Ultraviolet transmitting, visible absorbing filter.
- Gaffer tape
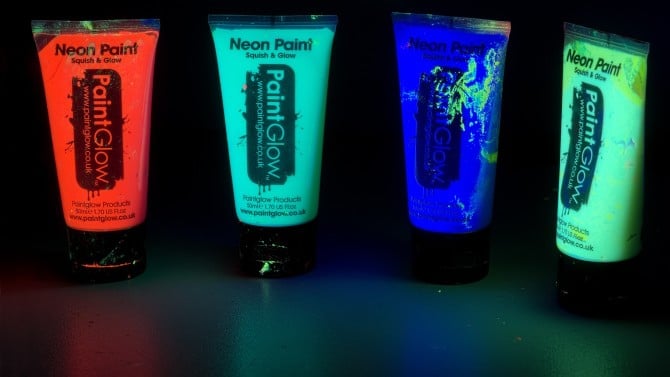
- UV body paint

The hardest part about this project is to get the supplies, but after that it doesn’t take genius, to attach UV filters to strobes. :p

Now, when it comes to hot-shoe flashes, it can get a bit more complicated. Some flashes, especially high-end like CaNikon ones, have UV blocking filters. These flashes require removal of this filter, to work with blacklight photography.
In case of my YN560-III I didn’t need to do this, because it does not have uv blocking filter.

Here below is a test shot with UV paint, illuminated with YN560-III.
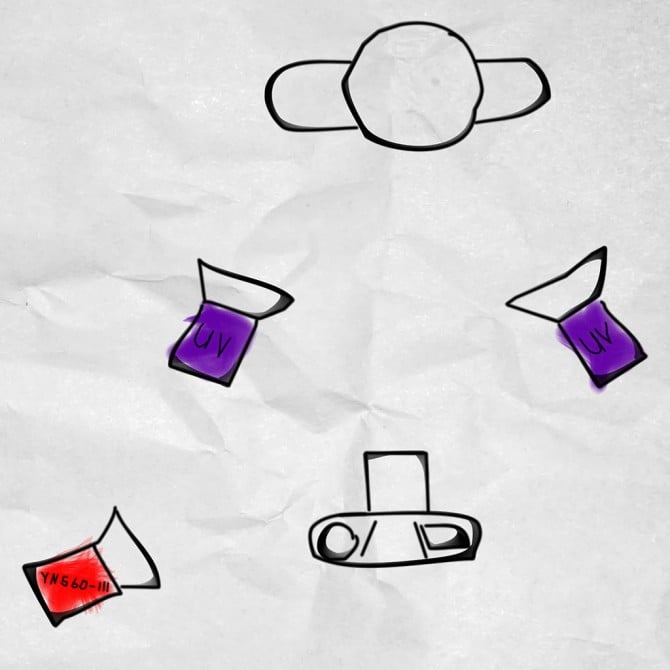
My light setup was really simple. I used both FIL-105 flashes for UV. Because these FIL-105 flashes synchronizes optically, I use YN 560-III on lowest power, to trigger them.

 And here is a lighting diagram in case you want something more ‘formal’
Here are some photos, made with this setup:


A few extra tips, I learned, from this project:
- Be careful with blue UV paint, because it’s fluorescence is the brightest, comparing to other colors. This makes really easy to blow out blue tones.
- Theoretically, it should be possible to salvage filters by cutting UV bulbs in half.
- Most of text highlighter pens are fluorescent.
- Avoid incandescent UV bulbs and UV LED lights.
That is pretty much it!
If you have any questions and/or suggestions – comment section below is there for a reason.
About The Author
Gvido Mūrnieks is a photographer and tinkerer from Valmiera, Latvia. You can see more of his photos on his Flickr stream and follow his site here. This post is based upon this article and shared with permission.
We love it when our readers get in touch with us to share their stories. This article was contributed to DIYP by a member of our community. If you would like to contribute an article, please contact us here.
Related Posts
 Building an ultra-large-format 16×20 camera with a massive aerial lens and cardboard
 Here are two budget DIY ways to get the black light look without using actual black lights
 LIT Flash is designed to simplify smartphone flash photography
 Fill flash explained – take stunning outdoor portrait photography with a flash
Join the Discussion
DIYP Comment Policy
Be nice, be on-topic, no personal information or flames.
21 responses to “Building An Ultra Violet Flash For Black Light Photography”
Thanks for this, you guys and gals, you oh so smexy team if DIY’ers. ;)
Nice job !
In the lighting diagram, the red yn-560 at the back is without the UV absorbing filter?
Thanks!
Yes. I used it without filter. It was used just for triggering both FIL-105.
I had to do this, because FIL-105, like most vintage strobes, have high voltage PC sync, that would fry my radio triggers(learned it thr hard way).
So, I use radio trigger, to sync YN560-III, that optically triggers FIL-105.
Emitted UV light was powerful enough, to overpower YN560-III, so I didn’t had any light pollution from it.
I’d be willing to pay nice for a good quality “pure uv” LED
Thanks !
Why do you recommend avoiding LED UV lights? You don’t mention in your article.
Same as UV tungsten bulbs, UV led lights produce more violet visible light, than ultra violet light. This means, that they are virtually useless as UV sources.
The latest cutting edge UV LEDs, can efficiently produce genuine UV light, but they are really expensive.
Christian Obermeier How about IR flashs? :D
Hmmm….Challenge accepted!
WHy not just use a few normal UV bulbs from your local halloween store? Why bother with flashes?
400w mercury vapur lights, I mentioned as option, are many times more powerfull than florescent tubes availible in local haloween stores. But even with thease powerfull constant lights I would have to use something like iso3200, f/2.8 and 1/50s.
Now, looking at exif data, with strobes, you can see the advantage. :)
What exactly did you order from the Aliexpress link? Is one sheet enough?
Personally, I used filters, salvaged from that old soviet flood light. These filters are really hard to find, because they are mostly used in industrial applications.
That AliExpress link was the only place I could find these filters, for average consumer.
Can you please recommend which one to buy ?
Thanks !
365nm
Thanks!
What if you just placed a B&W UV pass filter on the end of your lens and shot everything normally?
its moving on my mind too.
zwb2 is working? if anyone buy from alibaba?
On the link you offer, it goes to a page that lists three different pieces, nm 310, 365, and 254. What NM range did you get for your filter and how much would this matter? This is the first article I’ve read on the subject so have no judgement or other info to work with (yet).
Are you saying i could attach something like these: UV Pass Filter 200*200×3.0mm ZWB1 UG11 U-340 Ultraviolet Bandpass Glass for 302nm 312nm Transilluminator
https://www.aliexpress.com/item/33038131888.html?storeId=4314008&spm=2114.12010608.0.0.190d6be8OrdhX2
To the front of an Alien Bee or Einstein 640 and get a UV Strobe?